The pumpkin sat on my counter for two weeks. I kept walking past it, telling myself I’d get to it on the weekend, but the weekend came and went and that sugar pumpkin just stared at me from its spot next to the fruit bowl. My sister was coming over for dinner in three hours, and I had promised her something special—not the usual weeknight pasta situation. I opened the fridge. Butter, heavy cream, eggs. A bag of brown sugar that was getting a little stiff. No canned pumpkin in sight. That’s when I grabbed the knife and went to war with that stubborn little pumpkin.
Honestly, I was terrified. I’d made plenty of pumpkin pies before, but always from a can. The idea of starting from scratch felt like something my grandma would do, not me—a person who has definitely used a boxed cake mix in the last month. But there I was, scraping stringy pulp into a bowl, seeds flying everywhere, wondering if I’d just ruined dinner. An hour later, the kitchen smelled like a bakery in October (you know that smell—warm cinnamon, nutty butter, something sweet promising comfort). And when I pulled that pie out of the oven, golden and slightly cracked on top, I knew I’d never go back to the can.
That pie changed something in me. Not in a dramatic, life-altering way, but in a quiet, “oh, I can actually do this” kind of way. The filling was silkier than anything I’d ever made before. The crust—a simple butter crust I’d messed up twice before—finally cooperated and came out flaky and tender. My sister took one bite and said, “This is the best pumpkin pie I’ve ever had.” And she wasn’t just being nice. So here I am, sharing that exact recipe with you. Because you deserve to know how good a homemade pumpkin pie can really be.
Why You’ll Love This Recipe
This isn’t just another pumpkin pie recipe you’ll bookmark and forget about. This is the one you’ll actually make—every Thanksgiving, every fall gathering, every time you need to impress someone without losing your mind. I’ve tested this recipe six times over the past two months (my coworkers are very tired of pumpkin pie, but they’re also very well-fed), and I’ve dialed in every detail so you don’t have to guess.
- From-Scratch Flavor Without the Stress : Roasting your own pumpkin gives the filling a deep, caramelized sweetness that canned puree just can’t match. But I’ve also included a shortcut if you’re short on time—no judgment here.
- Silky, Not Soggy : The secret is roasting the pumpkin to concentrate the moisture and then straining it slightly. No watery filling, no soggy bottom crust.
- Perfectly Spiced : I use a blend of cinnamon, ginger, nutmeg, and a tiny pinch of cloves. It’s warm and aromatic without tasting like a candle.
- A Foolproof All-Butter Crust : I’ve included my best tips for a flaky, golden crust that even beginners can pull off. No special equipment needed.
- Make-Ahead Friendly : You can roast the pumpkin and make the crust days in advance. Thanksgiving morning just got a whole lot easier.
This recipe is the kind that makes you close your eyes after the first bite. It’s comfort food reimagined—fresher, more flavorful, but with the same soul-soothing satisfaction you expect from a slice of pie. Whether you’re serving it at a holiday table or just treating yourself on a random Tuesday, this pumpkin pie delivers every single time.
What Ingredients You Will Need
This recipe uses simple, wholesome ingredients that come together to create something greater than the sum of their parts. Most of these are pantry staples, but a few deserve a little extra attention to get the best results.
For the Pie Crust
- 1 ¼ cups all-purpose flour (160g) — I use King Arthur Flour for consistent results, but any brand works. Spoon and level your flour—don’t scoop directly from the bag or you’ll end up with a tough crust.
- ½ teaspoon salt — Fine sea salt is best. It dissolves evenly and doesn’t leave salty pockets.
- ½ cup cold unsalted butter (113g), cut into small cubes — This is non-negotiable. Cold butter creates steam pockets in the oven, which gives you flaky layers. I pop my butter in the freezer for 15 minutes before cutting it.
- 3 to 4 tablespoons ice water — The water needs to be genuinely icy. I keep a cup of water with ice cubes in the fridge while I’m mixing the dough.
For the Pumpkin Puree
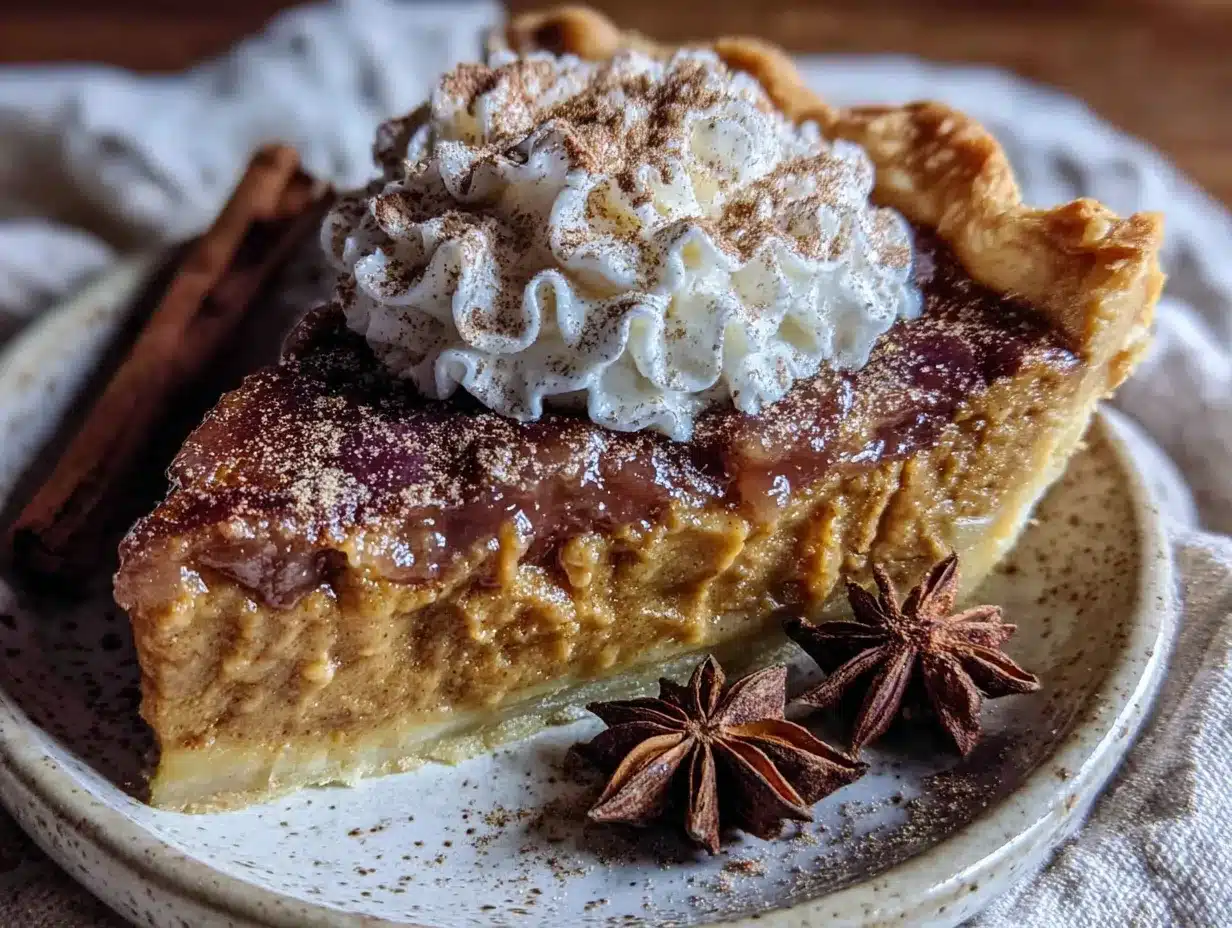
- 1 small sugar pumpkin (about 2-3 pounds) — Look for pumpkins labeled “pie pumpkins” or “sugar pumpkins.” They’re smaller, sweeter, and less watery than carving pumpkins. I’ve made the mistake of using a carving pumpkin once. Never again. It was stringy and bland.
- 1 tablespoon olive oil — Just enough to coat the pumpkin halves for roasting.
For the Filling
- 2 cups pumpkin puree (about 450g) — Homemade or canned, both work. If using canned, I recommend Libby’s. It’s consistently thick and flavorful.
- ¾ cup packed brown sugar (150g) — Light or dark brown sugar works. Dark brown sugar gives a deeper molasses flavor, which I personally love.
- ¼ cup granulated sugar (50g) — Adds sweetness without overpowering the pumpkin.
- 2 large eggs — Room temperature. Cold eggs can seize the filling and create lumps.
- 1 cup heavy cream (240ml) — Full-fat is best for that silky texture. You can substitute half-and-half, but the filling won’t be as rich.
- 1 teaspoon vanilla extract — Pure vanilla, not imitation. It makes a difference.
- 1 ½ teaspoons ground cinnamon
- ½ teaspoon ground ginger
- ½ teaspoon ground nutmeg — Freshly grated if you have it. The flavor is brighter and more aromatic.
- ¼ teaspoon ground cloves — A little goes a long way. Too much and your pie will taste like holiday potpourri.
- ½ teaspoon salt — Balances the sweetness and enhances the spices.
Equipment Needed
You don’t need a fancy kitchen to make this pie. Here’s what you’ll actually use:
- 9-inch pie dish — Glass or ceramic works best for even browning. I use a deep-dish glass pie plate. Avoid metal pans—they can over-brown the crust.
- Rolling pin — I use a simple wooden pin. If you don’t have one, a wine bottle works in a pinch. Just chill the dough extra well.
- Baking sheet — Place the pie dish on a baking sheet while baking to catch any drips and help the bottom crust cook evenly.
- Food processor or pastry cutter — For cutting butter into flour. A food processor is faster, but a pastry cutter gives you more control. I’ve used both and honestly, my best crusts came from the pastry cutter.
- Parchment paper and pie weights — For blind baking the crust. Dried beans or rice work perfectly as cheap pie weights.
- Chef’s knife and cutting board — For halving the pumpkin.
- Vegetable peeler — Optional, but makes peeling the roasted pumpkin easier.
- Fine-mesh strainer and cheesecloth — For straining the pumpkin puree if it’s too watery.
- Large mixing bowls — One for the crust, one for the filling.
- Whisk — For smoothing out the filling.
Preparation Method
Step 1: Make the Pumpkin Puree (Do This First)
Preheat your oven to 400°F (200°C). Carefully cut the sugar pumpkin in half from top to bottom using a sharp chef’s knife. Scoop out the seeds and stringy pulp with a spoon—save the seeds for roasting if you want a snack. Brush the cut sides with olive oil and place them cut-side down on a parchment-lined baking sheet. Roast for 35-45 minutes, until the flesh is fork-tender and starting to caramelize around the edges. Let the pumpkin cool until you can handle it, then scoop the flesh into a food processor. Blend until completely smooth, about 30 seconds. Here’s the trick: line a fine-mesh strainer with cheesecloth or a clean kitchen towel, pour in the puree, and let it drain for 30 minutes. This removes excess water and gives you a thick, concentrated puree. You’ll end up with about 2 cups.
Step 2: Make the Pie Crust
In a large bowl, whisk together the flour and salt. Add the cold butter cubes and toss to coat. Using a pastry cutter or your fingertips, work the butter into the flour until it resembles coarse meal with some pea-sized butter pieces remaining. Sprinkle 3 tablespoons of ice water over the mixture and stir with a fork until the dough starts coming together. Squeeze a small handful—if it holds together, it’s ready. If not, add the remaining tablespoon of water. Turn the dough onto a floured surface, shape into a disc, wrap in plastic, and refrigerate for at least 1 hour (or up to 3 days).
Step 3: Blind Bake the Crust
Preheat your oven to 375°F (190°C). On a floured surface, roll the dough into a 12-inch circle, about ⅛-inch thick. Transfer to your pie dish and gently press it into the corners. Trim the overhang to about ½ inch, fold it under, and crimp the edges however you like. Prick the bottom all over with a fork. Line the crust with parchment paper and fill with pie weights or dried beans. Bake for 15 minutes, then remove the parchment and weights. Bake for another 8-10 minutes until the bottom looks dry and lightly golden. Let it cool completely.
Step 4: Make the Filling
In a large bowl, whisk together the pumpkin puree, brown sugar, granulated sugar, eggs, heavy cream, vanilla, cinnamon, ginger, nutmeg, cloves, and salt. Whisk until everything is completely smooth and well combined. The mixture should be thick but pourable. Taste it—yes, raw egg and all. You want the spice level to feel balanced. If it tastes flat, add another pinch of cinnamon.
Step 5: Bake the Pie
Preheat your oven to 375°F (190°C). Place the blind-baked crust on a baking sheet. Pour the filling into the crust—it should come almost to the top. Carefully transfer the baking sheet to the oven. Bake for 50-60 minutes, until the edges are set and the center jiggles slightly when you gently shake the pan. The internal temperature should reach 175°F (80°C). If the crust edges are browning too quickly, tent them with foil or a pie shield after 30 minutes. Let the pie cool completely on a wire rack—at least 3 hours. The filling will continue to set as it cools.
Cooking Tips & Techniques
I’ve made every mistake you can imagine with pumpkin pie. Here’s what I learned the hard way so you don’t have to:
- Don’t skip the blind bake. I know it’s an extra step, but it’s the difference between a crispy crust and a soggy one. Trust me on this.
- Strain your puree. Even if you use canned pumpkin, give it a quick press through a strainer. Excess moisture is the number one cause of a watery, cracked pie.
- Watch the oven temperature. If your pie is browning too fast on top but still jiggly in the center, lower the oven temperature to 350°F (175°C) and bake longer. Every oven runs differently.
- Let it cool completely. I know it’s tempting to cut into a warm pie, but the filling needs time to set. Cutting too early gives you a runny mess. Patience is a virtue, and pie is the reward.
- Use a pie shield. I bought a silicone pie shield after burning my crust edges three times in a row. Best $8 I ever spent. Foil works too, but it’s fiddly.
Variations & Adaptations
This recipe is wonderfully flexible. Here are a few ways to make it your own:
- Gluten-Free Version : Substitute the all-purpose flour with a 1:1 gluten-free baking blend. I’ve used King Arthur Measure for Measure with great results. The dough will be more delicate, so handle it gently.
- Dairy-Free Version : Use cold coconut oil or vegan butter in the crust (freeze it first) and replace the heavy cream with full-fat coconut cream. The filling will be slightly less rich but still delicious.
- Spice It Up : Add a pinch of black pepper or cayenne to the filling for a subtle warmth that cuts through the sweetness. It sounds weird, but it’s a game-changer.
- Maple Pumpkin Pie : Replace the granulated sugar with ¼ cup maple syrup and reduce the heavy cream by 2 tablespoons. The maple flavor pairs beautifully with the pumpkin.
- Mini Pies : Use a muffin tin and cut the crust into circles. Fill each cup about ¾ full and bake for 20-25 minutes. Perfect for parties or portion control.
Serving & Storage Suggestions
This pie is best served at room temperature or slightly warm. I know some people like it cold, but the flavors really open up when it’s not straight from the fridge. Top each slice with a generous dollop of lightly sweetened whipped cream—the tanginess balances the sweet, spiced filling. A sprinkle of cinnamon or freshly grated nutmeg on top makes it look extra special.
For drinks, a cup of hot coffee or a glass of cold milk is classic. If you’re feeling festive, try it with a mug of mulled cider or a Caramel Apple Cider Sangria for a truly seasonal pairing. And if you want to go full fall dessert mode, serve it alongside a slice of Salted Caramel Apple Crisp for a dessert spread that will steal the show.
To store, cover the pie loosely with plastic wrap or foil and refrigerate for up to 4 days. The crust will soften slightly over time, but the flavor actually improves after a day or two. To freeze, wrap the fully cooled pie tightly in plastic wrap, then foil, and freeze for up to 3 months. Thaw overnight in the refrigerator and bring to room temperature before serving. I do not recommend reheating the whole pie—microwaving ruins the texture. If you want a warm slice, pop it in a 300°F (150°C) oven for 10 minutes.
Nutritional Information & Benefits
Per slice (based on 8 servings): approximately 380 calories, 22g fat, 44g carbohydrates, 6g protein, 2g fiber, 28g sugar. This is a dessert, so it’s not health food, but it does have some redeeming qualities. Pumpkin is packed with vitamin A (over 200% of your daily needs per serving), vitamin C, potassium, and fiber. The antioxidants in pumpkin, like beta-carotene, support eye health and immune function. Eggs provide high-quality protein and choline, which is important for brain health. And the spices—cinnamon, ginger, nutmeg—are anti-inflammatory and may help with blood sugar regulation.
If you’re watching your sugar intake, you can reduce the brown sugar to ½ cup and the granulated sugar to 2 tablespoons. The pie will be less sweet but still flavorful. For a lower-fat option, replace the heavy cream with evaporated milk. The texture will be slightly less luxurious, but it’s a common and delicious substitute.
Conclusion
This perfect homemade pumpkin pie from scratch is more than just a recipe—it’s a tradition waiting to happen. It’s the pie you’ll bring to Friendsgiving and watch disappear in minutes. It’s the pie your family will request year after year. And honestly? It’s the pie that will make you proud of what you can create with your own two hands. The first time I made it, I stood over the counter staring at that golden, fragrant pie like it was a work of art. And in a way, it was. Because food made from scratch carries something special—a little bit of your time, your effort, your love.
I’d love to hear how yours turns out. Did you try a variation? Did your family fight over the last slice? Drop a comment below and let me know. And if you’re looking for more fall baking inspiration, don’t miss my Brown Butter Pumpkin Snickerdoodle Cookies or these Small Batch Pumpkin Cream Cheese Muffins. Happy baking, friend—you’ve got this.
Frequently Asked Questions
Can I use canned pumpkin instead of roasting a fresh pumpkin?
Absolutely. If you’re short on time, use 2 cups of canned pumpkin puree. I recommend Libby’s—it’s consistently thick and flavorful. Just strain it through a fine-mesh strainer for 15 minutes to remove excess water before using it in the filling.
Why did my pumpkin pie crack on top?
Cracks usually happen when the pie is overbaked or the oven temperature is too high. The filling expands as it bakes, and if it sets too quickly, the surface cracks. To prevent this, bake at 375°F and pull the pie out when the center still has a slight jiggle. It will continue to set as it cools.
Can I make this pie ahead of time?
Yes! You can make the entire pie 1-2 days in advance. Store it covered in the refrigerator. The flavors actually meld together and improve overnight. You can also make the crust and pumpkin puree up to 3 days ahead and assemble the pie on the day you plan to serve it.
How do I know when the pie is done baking?
The edges should be set and slightly puffed, while the center should jiggle like Jell-O when you gently shake the pan. An instant-read thermometer inserted into the center should read 175°F (80°C). Don’t wait until the center is completely firm—it will continue to set as it cools.
Can I freeze this pumpkin pie?
Yes, and it freezes beautifully. Let the pie cool completely, then wrap it tightly in plastic wrap, followed by a layer of foil. Freeze for up to 3 months. To thaw, move it to the refrigerator overnight. Bring to room temperature before serving for the best texture and flavor.
Pin This Recipe!

Perfect Homemade Pumpkin Pie: Easy From-Scratch Recipe
This from-scratch pumpkin pie features a silky, caramelized filling made from roasted sugar pumpkin and a foolproof all-butter crust. It’s the ultimate fall dessert that will impress at any gathering.
- Prep Time: 30 minutes
- Cook Time: 1 hour 30 minutes
- Total Time: 2 hours 30 minutes
- Yield: 8 servings 1x
- Category: Dessert
- Cuisine: American
Ingredients
- 1 ¼ cups all-purpose flour (160g)
- ½ teaspoon fine sea salt
- ½ cup cold unsalted butter (113g), cut into small cubes
- 3 to 4 tablespoons ice water
- 1 small sugar pumpkin (about 2–3 pounds)
- 1 tablespoon olive oil
- 2 cups pumpkin puree (about 450g)
- ¾ cup packed brown sugar (150g)
- ¼ cup granulated sugar (50g)
- 2 large eggs, room temperature
- 1 cup heavy cream (240ml)
- 1 teaspoon vanilla extract
- 1 ½ teaspoons ground cinnamon
- ½ teaspoon ground ginger
- ½ teaspoon ground nutmeg
- ¼ teaspoon ground cloves
- ½ teaspoon salt
Instructions
- Preheat oven to 400°F (200°C). Cut sugar pumpkin in half, scoop out seeds and pulp, brush cut sides with olive oil, and place cut-side down on a parchment-lined baking sheet. Roast 35-45 minutes until fork-tender. Let cool, then scoop flesh into a food processor and blend until smooth. Strain through a fine-mesh strainer lined with cheesecloth for 30 minutes to remove excess water. You should have about 2 cups of puree.
- In a large bowl, whisk together flour and salt. Add cold butter cubes and toss to coat. Using a pastry cutter or fingertips, work butter into flour until mixture resembles coarse meal with some pea-sized butter pieces. Sprinkle 3 tablespoons ice water over mixture and stir with a fork until dough starts coming together. Squeeze a handful—if it holds, it’s ready. If not, add remaining tablespoon water. Turn dough onto floured surface, shape into a disc, wrap in plastic, and refrigerate at least 1…
- Preheat oven to 375°F (190°C). On a floured surface, roll dough into a 12-inch circle, about ⅛-inch thick. Transfer to a 9-inch pie dish, press into corners, trim overhang to ½ inch, fold under, and crimp edges. Prick bottom with a fork. Line with parchment paper and fill with pie weights or dried beans. Bake 15 minutes, remove parchment and weights, then bake another 8-10 minutes until bottom is dry and lightly golden. Let cool completely.
- In a large bowl, whisk together pumpkin puree, brown sugar, granulated sugar, eggs, heavy cream, vanilla, cinnamon, ginger, nutmeg, cloves, and salt until completely smooth and well combined. The mixture should be thick but pourable.
- Preheat oven to 375°F (190°C). Place blind-baked crust on a baking sheet. Pour filling into crust almost to the top. Carefully transfer to oven and bake 50-60 minutes, until edges are set and center jiggles slightly when shaken. Internal temperature should reach 175°F (80°C). If crust edges brown too quickly, tent with foil after 30 minutes. Let cool completely on a wire rack—at least 3 hours. Filling will continue to set as it cools.
Notes
Don’t skip blind baking the crust—it prevents sogginess. Strain the pumpkin puree even if using canned to remove excess moisture. Let the pie cool completely before slicing to allow the filling to set. For best flavor, serve at room temperature or slightly warm. Store covered in the refrigerator for up to 4 days or freeze for up to 3 months.
Nutrition
- Serving Size: 1 slice
- Calories: 380
- Sugar: 28
- Sodium: 320
- Fat: 22
- Saturated Fat: 13
- Carbohydrates: 44
- Fiber: 2
- Protein: 6
Keywords: pumpkin pie, homemade pumpkin pie, from scratch pumpkin pie, fall dessert, Thanksgiving pie, easy pumpkin pie recipe