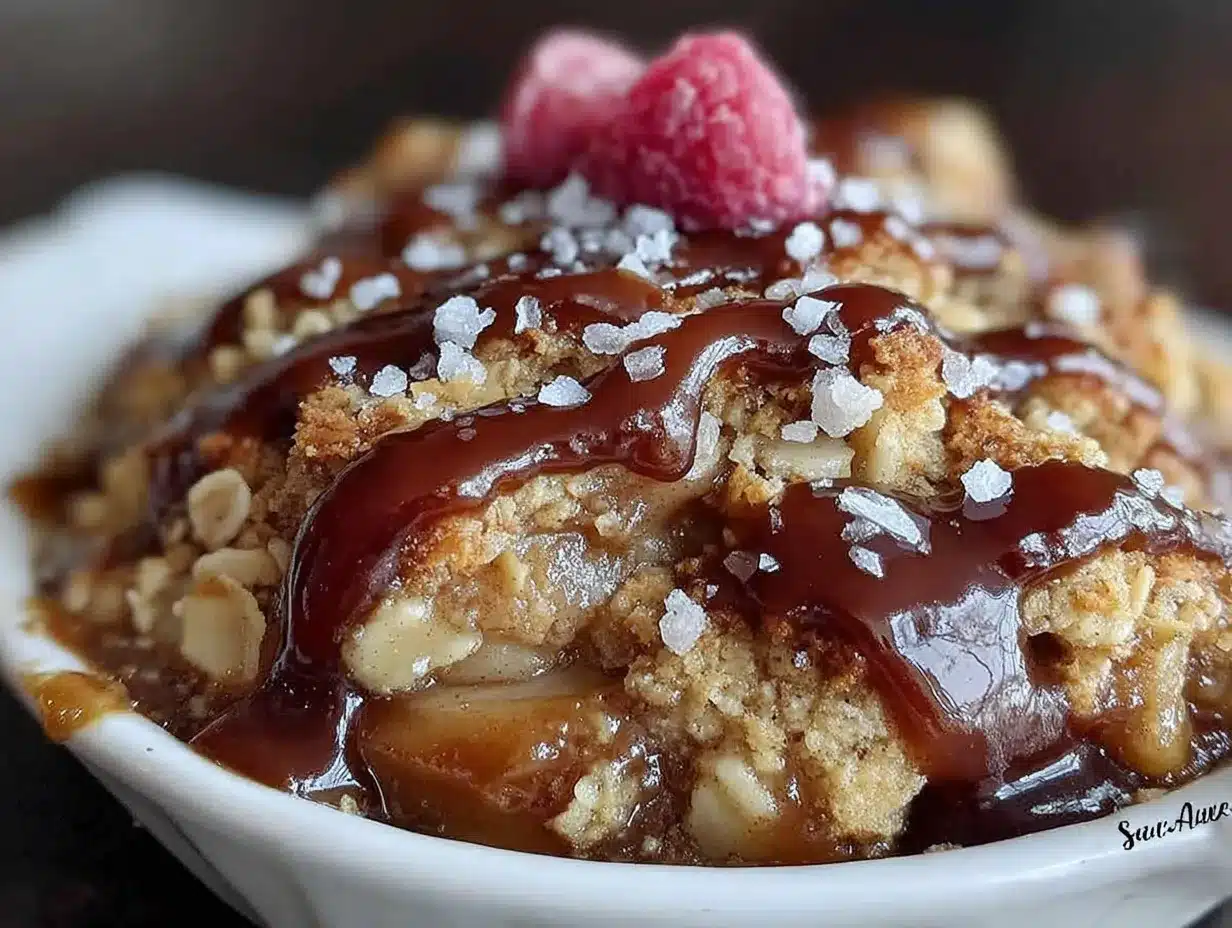
The baking dish came out of the oven looking like a golden, bubbling landscape of autumn. I set it on the trivet, and my husband walked into the kitchen mid-sentence, stopped talking entirely, and just stared at it for a second. He didn’t say a word—he just grabbed a spoon. That was the moment I knew this salted caramel apple crisp was different.
It wasn’t planned, honestly. I had a bag of Honeycrisp apples that were starting to look a little sad on the counter, a half-empty jar of homemade salted caramel sauce from a weekend project, and a serious craving for something warm. I wanted that contrast—tender, jammy apples underneath something shatteringly crisp on top. Not a mushy, sad crumble. A real, buttery oat topping that actually stays crunchy.
So I started pulling things out of the pantry. Old-fashioned oats, brown sugar, a stick of butter that was perfectly softened. I tossed the apples in a little lemon juice and cinnamon, layered them in the dish, and drizzled that salted caramel right through the middle. Then I piled on the oat mixture, maybe a little heavier than I should have, and crossed my fingers.
Forty-five minutes later, the kitchen smelled like a bakery in a small town in October. The apples had softened into this almost-butterscotch-like sweetness, and the topping was deeply golden and crisp. I spooned some into bowls, added a scoop of vanilla ice cream, and watched it melt into the crevices. My husband finally spoke: “Don’t change anything.” I didn’t plan to.
This is one of those recipes that feels like a warm blanket on a chilly evening. It’s simple enough for a Tuesday night but impressive enough for a holiday gathering. And honestly, it’s the salted caramel that makes it unforgettable.
Why You’ll Love This Recipe
After testing this recipe four times (yes, four—my family didn’t complain), I can confidently say this is the best version of apple crisp you’ll ever make. It hits every single note you want in a fall dessert.
- Quick & Easy: From start to oven in about 20 minutes. No complicated techniques or fancy equipment needed.
- Simple Ingredients: You probably have most of these in your pantry right now. Apples, oats, flour, butter, brown sugar—the usual suspects.
- Perfect for Fall Gatherings: Whether it’s Thanksgiving, a cozy dinner party, or just a random Tuesday, this dessert fits every occasion.
- Crowd-Pleaser: I’ve served it to kids, grandparents, and picky eaters. The dish comes back empty every single time.
- Unbelievably Delicious: The combination of tender caramelized apples, crunchy oat topping, and that ribbon of salted caramel throughout is pure comfort food magic.
What makes this different from every other apple crisp recipe? It’s the salted caramel, obviously. But it’s also the technique—tossing the apples with a little cornstarch so the juices thicken into a luscious syrup instead of turning watery. And the oat crumble? I use cold butter cut into the dry ingredients, just like a pie crust, so it bakes up shatteringly crisp instead of dense and doughy.
This isn’t just good apple crisp. This is the kind of dessert that makes people close their eyes after the first bite. The kind that prompts texts the next day asking for the recipe. It’s comfort food at its absolute finest—warm, sweet, salty, and completely soul-satisfying.
What Ingredients You Will Need
This recipe uses simple, wholesome ingredients that come together to create something truly special. Most of these are pantry staples, which makes this dessert perfect for spontaneous baking sessions.
For the Apple Filling:
- 6 cups apples, peeled, cored, and sliced (about 5-6 medium apples; I recommend Honeycrisp, Granny Smith, or a mix of both)
- 2 tablespoons lemon juice (freshly squeezed is best; it prevents browning and adds brightness)
- 1/4 cup granulated sugar
- 1/4 cup packed light brown sugar
- 1 teaspoon ground cinnamon
- 1/4 teaspoon ground nutmeg (freshly grated if you have it)
- 1/4 teaspoon salt (enhances all the flavors)
- 2 tablespoons cornstarch (this is the secret to a perfectly thickened filling)
- 1 teaspoon vanilla extract
- 1/3 cup salted caramel sauce (store-bought or homemade—I love using a high-quality jarred version when I’m short on time)
For the Oat Crumble Topping:
- 1 cup old-fashioned rolled oats (not quick oats; they get mushy)
- 3/4 cup all-purpose flour
- 1/2 cup packed light brown sugar
- 1/4 cup granulated sugar
- 1/2 teaspoon ground cinnamon
- 1/4 teaspoon salt
- 1/2 cup unsalted butter, cold and cut into small cubes (I use Kerrygold for its rich flavor)
For the Garnish (Optional but Highly Recommended):
- Flaky sea salt (like Maldon—this is non-negotiable for that salted caramel vibe)
- Vanilla ice cream or whipped cream (for serving)
- Extra salted caramel sauce (for drizzling)
Ingredient Tips: For the apples, I prefer a mix of tart and sweet varieties. Granny Smith holds its shape beautifully, while Honeycrisp breaks down slightly into a jammy texture. If you’re using store-bought salted caramel sauce, look for one that’s thick and rich, not watery. I’ve tested this with salted caramel apple crumble bars before, and the same caramel works perfectly here.
Equipment Needed
You don’t need a lot of fancy equipment for this recipe, which is part of its charm. Here’s what you’ll need:
- 9×13-inch baking dish (or a 2.5-quart casserole dish; glass or ceramic works best for even baking)
- Large mixing bowl (for the apple filling)
- Medium mixing bowl (for the oat crumble)
- Sharp knife and cutting board (for prepping the apples)
- Vegetable peeler (a good Y-peeler makes quick work of apple peeling)
- Measuring cups and spoons
- Pastry cutter or fork (for cutting butter into the dry ingredients; your hands work great too)
- Rubber spatula
- Aluminum foil (for tenting the crisp if the topping browns too quickly)
I used my grandmother’s old Pyrex baking dish for this, and it worked beautifully. If you don’t have a pastry cutter, just use two forks or your fingertips—the warmth of your hands actually helps the butter incorporate nicely.
Preparation Method
Let’s get baking! This recipe comes together quickly, so preheat your oven first and get everything ready.
- Preheat your oven to 350°F (175°C). Position a rack in the center of the oven. Lightly grease your 9×13-inch baking dish with butter or nonstick spray.
- Prepare the apples. Peel, core, and slice your apples into 1/4-inch thick slices. You want them uniform so they cook evenly. Toss the sliced apples with lemon juice in a large bowl to prevent browning.
- Make the apple filling. To the bowl with the apples, add granulated sugar, brown sugar, cinnamon, nutmeg, salt, cornstarch, and vanilla extract. Toss everything together until the apples are evenly coated. Let this sit for about 5 minutes—the cornstarch needs a moment to start working its magic.
- Layer the apples. Spread half of the apple mixture into the prepared baking dish in an even layer. Drizzle half of the salted caramel sauce over the apples. Add the remaining apple mixture on top, then drizzle the rest of the caramel sauce. Use a spatula to gently spread everything into an even layer.
- Make the oat crumble. In a medium bowl, whisk together the rolled oats, flour, brown sugar, granulated sugar, cinnamon, and salt. Add the cold butter cubes. Using a pastry cutter, fork, or your fingertips, work the butter into the dry ingredients until the mixture resembles coarse sand with some pea-sized butter pieces remaining. You want some bigger clumps—those create the best crunchy bits.
- Top the crisp. Sprinkle the oat crumble evenly over the apple filling. Don’t press it down—you want it loose so it bakes up crispy and textured.
- Bake. Place the dish on a baking sheet (to catch any drips—trust me on this) and bake for 40-45 minutes, or until the filling is bubbling around the edges and the topping is deep golden brown. If the topping is browning too quickly around the 30-minute mark, tent loosely with foil.
- Cool slightly. Let the crisp rest on a wire rack for at least 15 minutes before serving. This allows the filling to set up—if you dig in too soon, it will be runny. I learned this the hard way on my first test!
- Garnish and serve. Sprinkle flaky sea salt over the warm crisp, then scoop into bowls. Top with vanilla ice cream and an extra drizzle of salted caramel sauce if you’re feeling indulgent.
Pro Tip: The apples will release a lot of liquid as they bake. Don’t panic—the cornstarch thickens it into a gorgeous syrup. If your crisp seems too juicy after baking, let it rest longer. It thickens significantly as it cools.
Cooking Tips & Techniques
After testing this recipe multiple times (and making some mistakes along the way), here are my best tips for perfect salted caramel apple crisp every time.
Don’t skip the cornstarch. I made one batch without it, and the filling was watery and sad. Cornstarch is essential for that luscious, jammy texture. If you’re gluten-free, arrowroot powder works as a substitute.
Use cold butter for the topping. This is the biggest secret to a crunchy crumble. If your butter is too soft, the topping will spread into the apples instead of staying crisp on top. I cube my butter and pop it in the freezer for 10 minutes before using it.
Watch your oven closely. Every oven runs differently. My first test batch came out with burnt edges because I didn’t check until the timer went off. Start checking at the 35-minute mark. The topping should be golden brown, and you should see bubbling around the edges of the dish.
Let it rest. I know it’s hard to wait, but those 15 minutes of resting time are crucial. The filling continues to thicken as it cools, and the topping sets up into perfect crunchy clusters. If you serve it immediately, it will be more like apple soup with croutons.
Make extra topping. Honestly, you can never have too much crumble. I always make a little extra and sprinkle it on top of the apples even if it seems like a lot. It bakes down and creates the perfect ratio of topping to filling.
Multitask like a pro. While the apples are sitting in the sugar mixture (step 3), use that time to make the crumble topping. It saves about 5 minutes and keeps your workflow smooth.
Variations & Adaptations
This recipe is wonderfully adaptable. Here are some of my favorite variations:
Gluten-Free Version: Substitute the all-purpose flour with a 1:1 gluten-free baking flour blend. The oat crumble works beautifully with gluten-free flour—I’ve tested it with Bob’s Red Mill and King Arthur brands, and both turned out great.
Dairy-Free Version: Use a high-quality vegan butter stick (not margarine) in the crumble topping. Miyoko’s and Country Crock Plant Butter work best. The texture is slightly less crispy but still delicious.
Seasonal Fruit Swap: In the summer, swap the apples for sliced peaches or nectarines. Reduce the sugar slightly since stone fruits are sweeter. In the winter, try pears with a little ginger added to the filling.
Nutty Crumble: Add 1/2 cup chopped pecans or walnuts to the oat crumble mixture. Toast them lightly first for extra flavor. This adds a wonderful crunch and pairs beautifully with the salted caramel.
Spice It Up: Add 1/4 teaspoon cardamom or allspice to the apple filling for a more complex flavor profile. I love a cardamom-apple combination—it feels extra special for holiday gatherings.
Individual Servings: Divide the filling and topping among 6-8 ramekins. Bake for 20-25 minutes instead of 40-45. These are perfect for dinner parties—everyone gets their own little dish of heaven.
Serving & Storage Suggestions
Serving: This apple crisp is best served warm, about 15-20 minutes after it comes out of the oven. The filling should be bubbling and the topping golden and crisp. A scoop of high-quality vanilla ice cream is the classic pairing—the cold creaminess against the warm, spiced apples is pure magic. For a less indulgent option, try a dollop of lightly sweetened whipped cream or a drizzle of heavy cream.
What to Serve With It: This crisp pairs beautifully with a cup of hot coffee or a warm mug of spiced cider. For a full fall spread, consider serving it alongside pumpkin cream cheese swirl muffins for brunch, or as a grand finale after a bowl of cozy slow cooker Tuscan white bean and sausage soup.
Storage: Cover the baking dish tightly with foil or plastic wrap and store in the refrigerator for up to 4 days. The topping will lose some of its crispness over time, but the flavors actually deepen and get even better on day two.
Reheating: To restore some of that crunchy topping, reheat individual portions in the microwave for 30-45 seconds, then pop them under the broiler for 1-2 minutes. For larger portions, reheat in a 350°F oven for 10-15 minutes, uncovered.
Freezing: You can freeze the unbaked crisp for up to 3 months. Assemble the dish completely, but don’t bake it. Wrap tightly in plastic wrap, then foil. To bake, thaw overnight in the refrigerator, then bake as directed, adding 10-15 minutes to the baking time. The topping might be slightly less crispy, but it’s still delicious.
Flavor Development: Honestly, this crisp tastes even better the next day. The apples continue to absorb the caramel and spices, and the flavors meld together beautifully. If you can resist eating it all on day one, you’re in for a treat.
Nutritional Information & Benefits
Here’s the estimated nutritional breakdown for one serving (about 1/8 of the recipe, without ice cream):
| Nutrient | Amount per Serving |
|---|---|
| Calories | 385 |
| Total Fat | 16g |
| Saturated Fat | 10g |
| Cholesterol | 40mg |
| Sodium | 210mg |
| Total Carbohydrates | 60g |
| Dietary Fiber | 4g |
| Sugars | 42g |
| Protein | 3g |
Health Benefits: Apples are packed with fiber and antioxidants, particularly quercetin, which supports heart health. Oats provide soluble fiber that helps maintain steady blood sugar levels. The cinnamon in this recipe has anti-inflammatory properties. Yes, this is a dessert, but it’s made with whole-food ingredients that offer more nutritional value than a processed treat.
Dietary Considerations: This recipe is vegetarian and can be made gluten-free and dairy-free with the substitutions mentioned above. It contains wheat (flour) and dairy (butter). The salted caramel sauce may contain dairy as well, depending on the brand.
My Take: I believe in balance. This dessert is meant to be enjoyed as an occasional treat, not an everyday snack. But knowing that it’s made with real ingredients—apples, oats, butter—makes me feel a lot better about that second helping.
Frequently Asked Questions
Can I use quick oats instead of old-fashioned rolled oats?
I don’t recommend it. Quick oats are more finely processed and will absorb too much moisture from the apples, resulting in a mushy, dense topping. Old-fashioned rolled oats give you that wonderful crispy, crunchy texture that makes apple crisp so satisfying.
How do I prevent the oat topping from burning?
If you notice the topping browning too quickly (usually around the 30-minute mark), loosely tent the baking dish with aluminum foil. This allows the filling to continue cooking while protecting the topping. Remove the foil for the last 5-10 minutes if you want extra color.
Can I make this recipe ahead of time?
Absolutely! You can assemble the entire crisp (without baking) up to 24 hours in advance. Cover and refrigerate. When you’re ready to bake, add about 10-15 minutes to the baking time since you’re starting from cold. The topping might be slightly less crispy, but it’s still delicious.
What are the best apples for apple crisp?
I love using a mix of Honeycrisp and Granny Smith apples. Honeycrisp adds natural sweetness and breaks down into a jammy texture, while Granny Smith holds its shape and provides a nice tartness to balance the sweet caramel. Fuji, Braeburn, and Pink Lady are also excellent choices.
Why is my apple crisp watery?
This usually happens for one of two reasons: either you skipped the cornstarch, or you didn’t let the crisp rest long enough after baking. Cornstarch is essential for thickening the apple juices into a syrup. And that 15-minute resting period isn’t optional—it allows the filling to set up properly. If you’re still having issues, try adding an extra tablespoon of cornstarch next time.
Conclusion
This salted caramel apple crisp with oat crumble has become my go-to fall dessert, and I have a feeling it will become yours too. It’s everything you want in a cozy dessert—warm, sweet, salty, crunchy, and completely comforting. The apples soften into a luscious, caramel-infused filling while the oat topping bakes up golden and shatteringly crisp. A sprinkle of flaky sea salt on top, a scoop of melting vanilla ice cream, and honestly, life doesn’t get much better than this.
What I love most about this recipe is that it’s forgiving. You don’t need to be a pastry chef to nail it. The ingredients are simple, the steps are straightforward, and the result is always impressive. Whether you’re making it for a holiday gathering, a dinner party, or just a quiet night in, this crisp delivers every single time.
I’d love to hear how yours turns out! Did you try any variations? Did you add extra caramel? Did anyone in your family ask for the recipe? Drop a comment below and share your experience—your feedback helps other readers and makes this community so special. And if you loved this recipe, don’t forget to pin it on Pinterest or share it with a friend who needs a little fall comfort in their life.
Happy baking, friends. May your kitchen smell like apples and cinnamon, and may your crisp always be perfectly crunchy on top.
Pin This Recipe!

Best Salted Caramel Apple Crisp – Easy Fall Dessert

This salted caramel apple crisp features tender, jammy apples under a shatteringly crisp oat topping, with ribbons of salted caramel throughout. It’s a simple yet impressive fall dessert that’s perfect for any occasion.
- Prep Time: 20 minutes
- Cook Time: 45 minutes
- Total Time: 1 hour 5 minutes
- Yield: 8 servings 1x
- Category: Dessert
- Cuisine: American
Ingredients
- 6 cups apples, peeled, cored, and sliced (about 5–6 medium apples; Honeycrisp, Granny Smith, or a mix)
- 2 tablespoons lemon juice
- 1/4 cup granulated sugar
- 1/4 cup packed light brown sugar
- 1 teaspoon ground cinnamon
- 1/4 teaspoon ground nutmeg
- 1/4 teaspoon salt
- 2 tablespoons cornstarch
- 1 teaspoon vanilla extract
- 1/3 cup salted caramel sauce
- 1 cup old-fashioned rolled oats
- 3/4 cup all-purpose flour
- 1/2 cup packed light brown sugar
- 1/4 cup granulated sugar
- 1/2 teaspoon ground cinnamon
- 1/4 teaspoon salt
- 1/2 cup unsalted butter, cold and cut into small cubes
- Flaky sea salt (for garnish, optional)
- Vanilla ice cream or whipped cream (for serving, optional)
- Extra salted caramel sauce (for drizzling, optional)
Instructions
- Preheat your oven to 350°F (175°C). Lightly grease a 9×13-inch baking dish with butter or nonstick spray.
- Peel, core, and slice apples into 1/4-inch thick slices. Toss with lemon juice in a large bowl.
- Add granulated sugar, brown sugar, cinnamon, nutmeg, salt, cornstarch, and vanilla extract to the apples. Toss until evenly coated. Let sit for 5 minutes.
- Spread half of the apple mixture into the prepared baking dish. Drizzle half of the salted caramel sauce over the apples. Add remaining apple mixture, then drizzle remaining caramel sauce. Spread into an even layer.
- In a medium bowl, whisk together oats, flour, brown sugar, granulated sugar, cinnamon, and salt. Add cold butter cubes. Use a pastry cutter, fork, or fingertips to work butter into dry ingredients until mixture resembles coarse sand with some pea-sized butter pieces.
- Sprinkle oat crumble evenly over the apple filling. Do not press down.
- Place dish on a baking sheet and bake for 40-45 minutes, until filling is bubbling around edges and topping is deep golden brown. If topping browns too quickly, tent loosely with foil around 30 minutes.
- Let crisp rest on a wire rack for at least 15 minutes before serving.
- Sprinkle flaky sea salt over warm crisp. Serve with vanilla ice cream and extra salted caramel sauce if desired.
Notes
Don’t skip the cornstarch—it thickens the apple juices into a luscious syrup. Use cold butter for the topping to ensure a crunchy crumble. Let the crisp rest for at least 15 minutes after baking to allow the filling to set. For gluten-free, use a 1:1 gluten-free flour blend and arrowroot powder instead of cornstarch. For dairy-free, use vegan butter. The crisp can be assembled up to 24 hours in advance and refrigerated before baking.
Nutrition
- Serving Size: 1/8 of recipe
- Calories: 385
- Sugar: 42
- Sodium: 210
- Fat: 16
- Saturated Fat: 10
- Carbohydrates: 60
- Fiber: 4
- Protein: 3
Keywords: salted caramel apple crisp, apple crisp, fall dessert, oat crumble, easy apple dessert, caramel apple crisp


