I had three sticks of butter on the counter and no idea what I was doing. That’s not how I usually start a recipe — actually, it’s never how I start a recipe. But it was mid-October, the air smelled like wet leaves and woodsmoke, and I had a pumpkin-shaped hole in my baking rotation. I wanted something that tasted like fall but didn’t scream “I’m a pumpkin dessert” from the rooftops. Something with depth. Something that made people stop mid-chew and look at the cookie in their hand like they’d just discovered a new color.
So I browned the butter. Because, honestly, browning butter fixes almost everything. And then I thought about snickerdoodles — those soft, tangy clouds of cinnamon sugar that somehow feel nostalgic even if you didn’t grow up eating them. I wondered what would happen if I combined the nutty warmth of brown butter with the cozy spice of pumpkin and the classic chew of a snickerdoodle. So I just went for it.
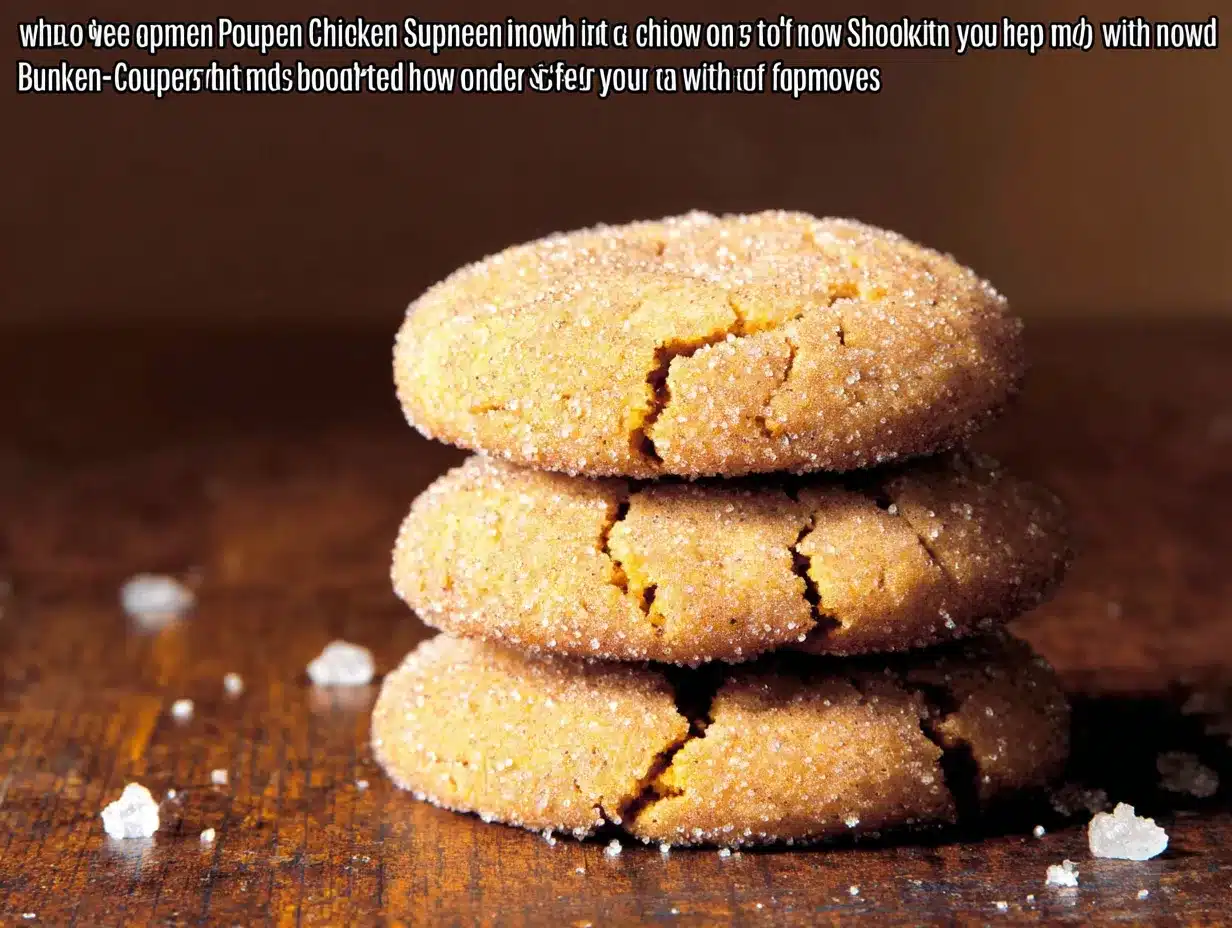
The first batch came out of the oven at 10 p.m. My kitchen smelled like a bakery that only plays acoustic covers of folk songs. I ate one warm, and I actually laughed out loud. Not because it was funny — because it was that good. The edges were slightly crisp, the centers were pillow-soft, and the brown butter gave everything this rich, almost caramel-like undertone that made the pumpkin taste deeper, not sweeter. I texted my neighbor a photo at 10:15. She was at my door by 10:20. That’s how you know.
These Brown Butter Pumpkin Snickerdoodle Cookies aren’t trying to be the most complicated thing you’ll bake this season. They’re just trying to be the one you keep coming back to. And honestly? They succeed.
Why You’ll Love This Recipe
Let me tell you why these cookies are about to become your new fall obsession. I’ve tested this recipe six times — yes, six — to get the texture exactly right. Not too cakey, not too flat, with that signature snickerdoodle tang and a warmth that lingers.
- Perfectly Soft & Chewy : These cookies stay soft for days, thanks to the pumpkin puree and brown butter working together to create an incredibly tender crumb. No dry, crumbly cookies here.
- Real Pumpkin Flavor : Not that artificial pumpkin spice nonsense. The pumpkin puree adds moisture and a subtle earthiness that lets the brown butter and cinnamon shine.
- No Stand Mixer Required : You can mix everything by hand with a whisk and a spatula. Less cleanup, more cookies. That’s a win in my book.
- That Brown Butter Magic : If you’ve never browned butter for cookies, you’re in for a treat. It adds a nutty, toasty depth that makes these taste like you spent hours in the kitchen — when really, it’s just one extra step.
- Perfect for Fall Baking : These are the cookies you bring to a cozy gathering, pack in lunchboxes, or eat standing over the counter with a cup of coffee. No judgment here.
I’ve made a lot of pumpkin desserts over the years — from pumpkin cream cheese swirl muffins to maple pumpkin spice overnight oats — but these cookies are the ones my family requests most. They’re not trying to be fancy. They’re just trying to be delicious. And they nail it.
What Ingredients You Will Need
This recipe uses simple, everyday ingredients — most of which you probably already have in your pantry. The star of the show is the brown butter, which transforms the whole flavor profile with minimal effort.
- Unsalted butter (1 cup / 2 sticks) — You’ll brown this on the stovetop, so skip the salted butter here. You want full control over the salt level.
- Granulated sugar (¾ cup / 150g) — Adds sweetness and helps create those slightly crispy edges.
- Light brown sugar (½ cup / 100g), packed — Brings moisture and a hint of molasses flavor that pairs beautifully with the brown butter.
- Pumpkin puree (⅓ cup / 80g) — Make sure it’s 100% pumpkin puree, not pumpkin pie filling. I prefer Libby’s for consistent texture, but any brand works.
- Large egg (1) — Room temperature helps it incorporate smoothly into the brown butter mixture.
- Vanilla extract (1 teaspoon) — Pure vanilla, not imitation. It makes a difference here.
- All-purpose flour (2 cups / 240g) — Spoon and level your flour for the most accurate measurement. Scooping directly can lead to dense cookies.
- Cream of tartar (1 teaspoon) — This is the secret to the classic snickerdoodle tang. Don’t skip it.
- Baking soda (½ teaspoon) — Helps the cookies spread just enough without turning into pancakes.
- Salt (½ teaspoon) — Balances the sweetness and enhances the brown butter flavor.
- Ground cinnamon (1 teaspoon) — Warm, cozy, essential.
- Pumpkin pie spice (½ teaspoon) — Adds that extra layer of fall flavor. You can substitute with ¼ teaspoon nutmeg + ¼ teaspoon ginger if needed.
For the cinnamon sugar coating:
- Granulated sugar (¼ cup / 50g)
- Ground cinnamon (1½ tablespoons)
- Pinch of nutmeg (optional, but recommended)
Equipment Needed
You don’t need a fancy bakery setup for these cookies. Here’s what you’ll actually use:
- Medium saucepan — For browning the butter. A light-colored pan helps you see the color change more easily.
- Large mixing bowl — For the wet ingredients.
- Medium mixing bowl — For the dry ingredients.
- Whisk and rubber spatula — A whisk for the wet ingredients, a spatula for folding everything together.
- Cookie scoop (about 1.5 tablespoons) — For evenly sized cookies. I use a #40 scoop and it works perfectly.
- Baking sheets (2) — Light-colored baking sheets give you the most even browning. Dark sheets can cause the bottoms to burn.
- Parchment paper or silicone baking mat — Non-stick and easy cleanup.
- Cooling rack — Lets the cookies cool evenly without getting soggy bottoms.
If you don’t have a cookie scoop, just use two spoons. It’s less pretty but equally delicious.
Preparation Method
Alright, let’s make some cookies. I’ll walk you through every step so you feel confident, even if this is your first time browning butter.
- Brown the butter. Place the butter in a medium saucepan over medium heat. Let it melt completely, then stir occasionally. After about 5-7 minutes, you’ll notice the butter foaming and then settling. Tiny brown specks will appear at the bottom — that’s the milk solids toasting. The smell will shift from buttery to nutty and almost caramel-like. Once it’s a golden amber color (think the color of a hazelnut), remove it from the heat immediately. Pour it into a heatproof bowl and let it cool for 10-15 minutes. Don’t skip the cooling — hot butter will cook your egg.
- Mix the wet ingredients. In a large bowl, whisk together the cooled brown butter, granulated sugar, and brown sugar until smooth and combined. It should look like wet sand. Add the pumpkin puree, egg, and vanilla extract. Whisk vigorously until everything is fully incorporated and the mixture looks glossy and smooth. This takes about 30 seconds of consistent whisking.
- Combine the dry ingredients. In a separate medium bowl, whisk together the flour, cream of tartar, baking soda, salt, cinnamon, and pumpkin pie spice. Make sure there are no clumps — especially with the cream of tartar, which can be stubborn.
- Fold it all together. Pour the dry ingredients into the wet ingredients. Use a rubber spatula to fold gently, scraping the bottom and sides of the bowl. Stop as soon as no streaks of flour remain. Overmixing will make your cookies tough, so be gentle. The dough will be soft and slightly sticky — that’s exactly what you want.
- Chill the dough. Cover the bowl with plastic wrap and refrigerate for at least 30 minutes. I know, I know — you want cookies now. But trust me, this step is non-negotiable. Chilling solidifies the brown butter, which prevents the cookies from spreading too thin in the oven. If you skip it, you’ll get flat, greasy cookies. And nobody wants that.
- Preheat and prep. While the dough chills, preheat your oven to 350°F (175°C). Line two baking sheets with parchment paper or silicone mats.
- Make the cinnamon sugar coating. In a small shallow bowl, mix together the granulated sugar, cinnamon, and a pinch of nutmeg if using. Stir until combined.
- Scoop and roll. Using a cookie scoop, portion out rounded tablespoons of dough (about 1.5 tablespoons each). Roll each portion into a ball between your palms, then roll it in the cinnamon sugar mixture until fully coated. Place the coated dough balls on the prepared baking sheets, spacing them about 2 inches apart. They’ll spread a little, but not too much.
- Bake. Bake one sheet at a time for 10-12 minutes. The edges should look set and slightly golden, but the centers will still look soft and puffy. Don’t overbake — they continue cooking on the hot baking sheet after you pull them out. For softer cookies, aim for 10 minutes. For slightly crisper edges, go to 12.
- Cool. Let the cookies rest on the baking sheet for 5 minutes. This allows them to set up without breaking. Then transfer them to a wire rack to cool completely — or eat one warm. I won’t tell anyone.
Cooking Tips & Techniques
I’ve made enough mistakes in the kitchen to fill a small cookbook. Here are the lessons I learned so you don’t have to repeat them.
Don’t rush the brown butter. I once tried to speed things up by using high heat. Big mistake. The butter burned in spots while other parts stayed pale. Low and slow is the way to go. Medium heat, constant attention, and patience. The moment you smell that nutty aroma, watch closely — it goes from perfect to burnt in about 30 seconds.
Measure your pumpkin puree carefully. Too much pumpkin will make the cookies gummy and dense. Use a measuring cup and level it off with a knife. If your pumpkin puree looks watery, blot it with a paper towel before adding it to the dough. This is especially important if you’re using a store-brand puree that tends to be more liquid.
Chill the dough — seriously. I tested this recipe with and without chilling. The unchilled version spread into flat, greasy discs with no height. The chilled version produced thick, soft cookies with those beautiful crackly tops. If you’re in a hurry, pop the dough in the freezer for 15 minutes instead of the fridge for 30. It works in a pinch.
Use a cookie scoop for even baking. Uneven dough sizes mean some cookies will be overbaked while others are underdone. A simple scoop ensures every cookie bakes at the same rate. Plus, it’s faster than rolling by hand.
Rotate your baking sheet halfway through. Ovens have hot spots. Halfway through baking, give the sheet a quick 180-degree turn. This ensures even browning and prevents one side from getting too dark.
Let them cool on the sheet. I know it’s tempting to move them immediately, but those 5 minutes on the hot baking sheet are crucial for the cookies to set their structure. Move them too soon and they’ll fall apart.
Variations & Adaptations
One of the best things about this recipe is how adaptable it is. Here are some variations I’ve tried and loved.
Gluten-Free Version
Swap the all-purpose flour with a 1:1 gluten-free baking flour blend (I like King Arthur’s or Bob’s Red Mill). Add ¼ teaspoon of xanthan gum if your blend doesn’t already include it. The texture will be slightly more tender, but still delicious.
Dairy-Free Version
Use vegan butter sticks (like Miyoko’s or Earth Balance) for browning. The browning process works the same way, though the flavor will be slightly different. Coconut oil also works in a pinch, but the cookies will be a bit more delicate.
Extra Spiced Version
Add ¼ teaspoon of ground cloves and ¼ teaspoon of ground ginger to the dry ingredients. This gives the cookies a deeper, warmer spice profile — perfect for cold winter evenings.
Brown Butter Snickerdoodle Blondies Variation
If you love this brown butter and cinnamon combo but want something even easier, you should try my cozy brown butter snickerdoodle blondies. Same flavor, less rolling, and they come together in a single pan. Total lifesaver for busy weeks.
Pumpkin Cream Cheese Swirl Version
Before baking, press a small indent into each dough ball and add a tiny dollop of cream cheese mixture (4 oz cream cheese + 2 tablespoons sugar + ½ teaspoon vanilla). Pinch the dough around it to seal, then bake as directed. It’s like a surprise inside every cookie.
Serving & Storage Suggestions
These cookies are best served slightly warm, when the centers are still soft and the cinnamon sugar coating is perfectly set. A glass of cold milk is the classic pairing, but I also love them with a hot cup of coffee or a creamy pumpkin cold foam iced latte for the ultimate fall treat.
For a dessert spread, arrange them on a wooden board with other fall favorites like salted caramel apple crumble bars and fresh apple slices. They also make excellent lunchbox surprises — just wrap them individually in parchment paper.
Storage: Keep the cookies in an airtight container at room temperature for up to 5 days. Layer them with parchment paper between stacks to prevent sticking. They’ll stay soft and chewy the whole time — if they last that long.
Freezing: You can freeze the baked cookies for up to 3 months. Wrap each cookie individually in plastic wrap, then place them in a freezer-safe bag. Thaw at room temperature for about 30 minutes, then warm in a 300°F oven for 5 minutes to revive that fresh-baked texture.
Freezing the dough: Scoop the dough into balls, roll in cinnamon sugar, and place them on a baking sheet in the freezer for 1 hour. Transfer the frozen dough balls to a freezer bag. Bake directly from frozen, adding 2-3 minutes to the bake time. Fresh cookies anytime you want them.
Nutritional Information & Benefits
Here’s the estimated nutrition for one cookie (based on 24 cookies):
- Calories: 165
- Fat: 8g
- Carbohydrates: 22g
- Protein: 2g
- Fiber: 1g
- Sugar: 14g
These numbers are estimates and will vary based on exact ingredients and portion sizes.
While these are definitely a treat (hello, butter and sugar), the pumpkin puree does add a small boost of vitamin A and fiber. Plus, there’s something to be said for the mental health benefits of a warm cookie on a chilly afternoon. Baking is self-care, and these cookies deliver.
If you’re watching your sugar intake, you can reduce the cinnamon sugar coating by rolling the dough balls more lightly. The cookies will still be plenty sweet on their own.
Conclusion
These Brown Butter Pumpkin Snickerdoodle Cookies are the kind of recipe that makes you look forward to fall all year long. They’re soft, chewy, and packed with warm, nutty flavor that feels both familiar and special. The brown butter adds a depth you won’t find in regular snickerdoodles, and the pumpkin keeps everything perfectly moist without overwhelming the taste.
I love that this recipe doesn’t require any fancy techniques or hard-to-find ingredients. It’s approachable enough for a beginner baker but impressive enough to bring to any gathering. And honestly? The way your kitchen will smell while these bake is worth the effort alone.
I’d love to hear how yours turn out. Did you try any variations? Did you eat one straight off the baking sheet? (No judgment — I definitely did.) Leave a comment below and let me know. Share a photo on Pinterest or tag me in your baking adventures. And if you’re looking for more cozy fall recipes, check out my pumpkin chocolate chip sourdough bread or pumpkin cream cheese swirl muffins for even more seasonal goodness.
Happy baking, friends. Your kitchen is about to smell incredible.
Frequently Asked Questions
Can I use pumpkin pie filling instead of pumpkin puree?
No, please don’t. Pumpkin pie filling is pre-sweetened and spiced, which will throw off the sugar and spice balance of this recipe. Stick with 100% pure pumpkin puree for the best results.
Why did my cookies turn out flat?
Flat cookies usually mean the dough wasn’t chilled long enough, or the butter was too warm when you mixed it. Make sure to chill the dough for at least 30 minutes, and let the brown butter cool to room temperature before adding the egg and pumpkin.
Can I make these cookies ahead of time?
Absolutely. You can prepare the dough up to 3 days in advance and keep it covered in the refrigerator. You can also freeze the dough balls for up to 3 months. Bake directly from frozen, adding 2-3 minutes to the bake time.
Can I skip the cream of tartar?
Cream of tartar is what gives snickerdoodles their signature tangy flavor and soft texture. If you don’t have it, you can substitute with 1 teaspoon of lemon juice or white vinegar, but the flavor will be slightly different. For the most authentic snickerdoodle experience, I recommend using cream of tartar.
How do I know when the brown butter is done?
Watch for the butter to turn a golden amber color with tiny brown specks at the bottom of the pan. The smell will shift from buttery to nutty and toasty. As soon as you see the color change and smell that nutty aroma, remove it from the heat immediately. It goes from perfect to burnt very quickly.
Pin This Recipe!
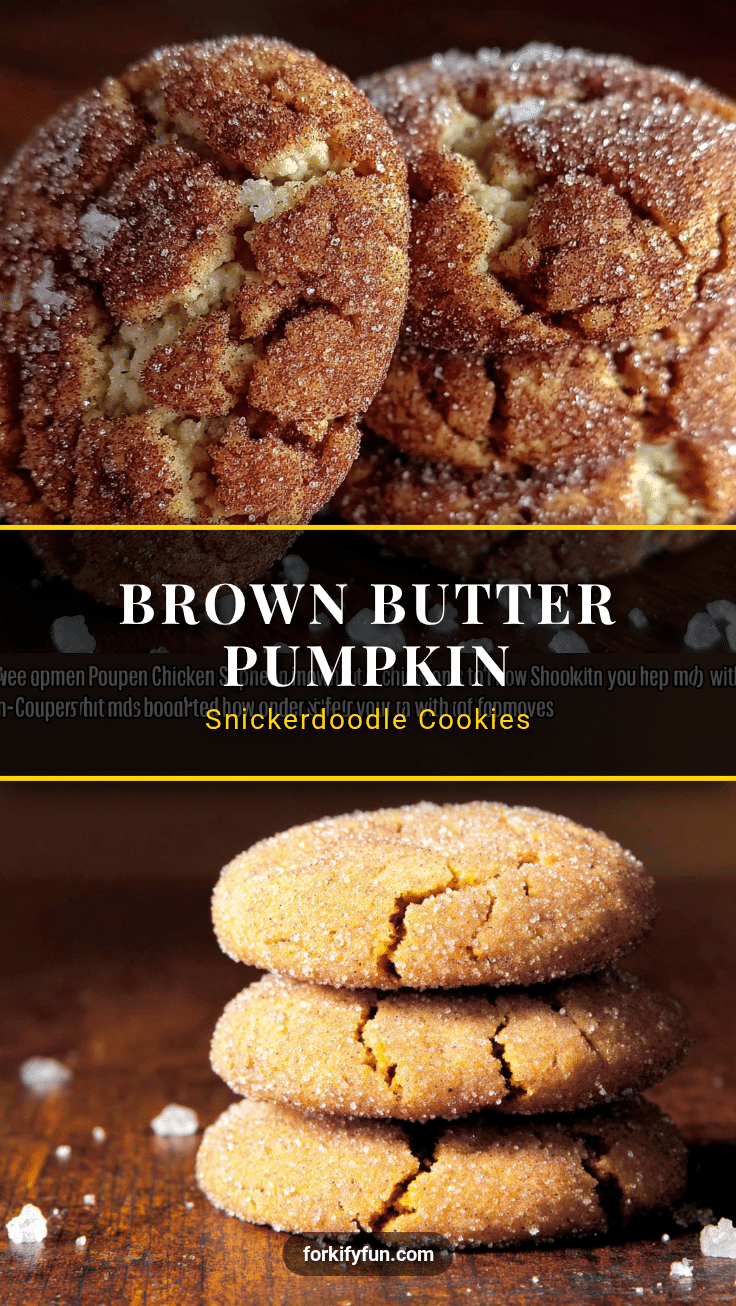
Best Brown Butter Pumpkin Snickerdoodle Cookies
These Brown Butter Pumpkin Snickerdoodle Cookies are soft, chewy, and packed with warm, nutty flavor. The brown butter adds depth, while pumpkin keeps them moist without overwhelming the taste.
- Prep Time: 15 minutes
- Cook Time: 12 minutes
- Total Time: 1 hour 2 minutes (including chilling)
- Yield: 24 cookies 1x
- Category: Dessert
- Cuisine: American
Ingredients
- 1 cup (2 sticks) unsalted butter
- ¾ cup (150g) granulated sugar
- ½ cup (100g) light brown sugar, packed
- ⅓ cup (80g) pumpkin puree
- 1 large egg, room temperature
- 1 teaspoon vanilla extract
- 2 cups (240g) all-purpose flour
- 1 teaspoon cream of tartar
- ½ teaspoon baking soda
- ½ teaspoon salt
- 1 teaspoon ground cinnamon
- ½ teaspoon pumpkin pie spice
- For the cinnamon sugar coating:
- ¼ cup (50g) granulated sugar
- 1½ tablespoons ground cinnamon
- Pinch of nutmeg (optional)
Instructions
- Brown the butter: Place butter in a medium saucepan over medium heat. Melt completely, stirring occasionally. After 5-7 minutes, butter will foam and then settle. Tiny brown specks will appear at the bottom. When it turns golden amber and smells nutty, remove from heat immediately. Pour into a heatproof bowl and cool for 10-15 minutes.
- Mix wet ingredients: In a large bowl, whisk together cooled brown butter, granulated sugar, and brown sugar until smooth. Add pumpkin puree, egg, and vanilla extract. Whisk vigorously until glossy and smooth, about 30 seconds.
- Combine dry ingredients: In a separate medium bowl, whisk together flour, cream of tartar, baking soda, salt, cinnamon, and pumpkin pie spice until no clumps remain.
- Fold together: Pour dry ingredients into wet ingredients. Use a rubber spatula to fold gently until no streaks of flour remain. Dough will be soft and slightly sticky.
- Chill dough: Cover bowl with plastic wrap and refrigerate for at least 30 minutes.
- Preheat and prep: Preheat oven to 350°F (175°C). Line two baking sheets with parchment paper or silicone mats.
- Make cinnamon sugar coating: In a small shallow bowl, mix together granulated sugar, cinnamon, and nutmeg (if using).
- Scoop and roll: Using a cookie scoop (about 1.5 tablespoons), portion dough into balls. Roll each ball in cinnamon sugar mixture until fully coated. Place on prepared baking sheets, spacing 2 inches apart.
- Bake: Bake one sheet at a time for 10-12 minutes. Edges should be set and slightly golden; centers will look soft and puffy.
- Cool: Let cookies rest on baking sheet for 5 minutes, then transfer to a wire rack to cool completely.
Notes
Chill the dough for at least 30 minutes to prevent spreading. Brown butter can burn quickly; watch closely. For gluten-free, use a 1:1 gluten-free flour blend with xanthan gum. For dairy-free, use vegan butter sticks.
Nutrition
- Serving Size: 1 cookie
- Calories: 165
- Sugar: 14
- Sodium: 95
- Fat: 8
- Saturated Fat: 5
- Carbohydrates: 22
- Fiber: 1
- Protein: 2
Keywords: brown butter, pumpkin, snickerdoodle, cookies, fall baking, cinnamon sugar


