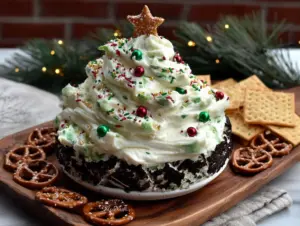
Let’s be honest—the holidays are a beautiful, chaotic blur of wrapping paper, tinsel, and way too many things on your to-do list. The last thing you need is a complicated dessert that takes over your kitchen and your afternoon. This Quick No-Bake Christmas Cookie Dough Dip is the answer to that exact problem. It’s the kind of recipe that feels like a little victory, you know?
- Ready in 5 Minutes, Seriously: No oven, no mixer, no waiting. Just a bowl, a spoon, and five minutes of your time. Perfect for those evenings when you need a treat, fast.
- Simple Pantry Ingredients: You probably already have everything you need. Brown sugar, butter, vanilla, and some holiday mix-ins. No frantic trips to the store for obscure ingredients.
- Perfect for Holiday Chaos: This is your go-to for cookie exchanges, last-minute guests, or a quiet night when the kids are asleep and you just want something sweet. It’s a crowd-pleaser without the crowd of dirty dishes.
- So Much Better Than Store-Bought: It tastes like the best part of making cookies—the raw dough—but without the worry of raw eggs. It’s creamy, sweet, and has that perfect texture that makes you close your eyes after the first bite.
- Completely Customizable: You can dress it up or keep it simple. It’s a base for your holiday creativity, not a rigid rulebook.
This isn’t just another dip recipe. It’s the one that saves your sanity when you need a dessert, and you need it now. It’s comfort food reimagined—faster, easier, but with the same soul-soothing satisfaction. Honestly, it might become your new holiday tradition.
What Ingredients You Will Need
This recipe uses simple, wholesome ingredients to deliver that classic cookie dough flavor without any fuss. Most of these are probably sitting in your pantry or fridge right now, which is the whole point.
- For the Base:
- 1/2 cup (1 stick) unsalted butter, softened – This is crucial for that creamy texture. Make sure it’s truly soft, not melted. (I use Kerrygold for the richest flavor, but any good butter works.)
- 1/2 cup packed light brown sugar – This gives the dip that deep, caramel-like sweetness that mimics real cookie dough. Dark brown sugar works too, for a more molasses-y flavor.
- 1/4 cup granulated sugar – Adds a bit of pure sweetness and helps with the texture.
- 1 teaspoon vanilla extract – Pure vanilla extract makes a difference here. Skip the imitation stuff if you can.
- 1/4 teaspoon salt – Don’t skip this! It balances the sweetness and makes the flavors pop.
- For the Creamy Texture:
- 4 ounces cream cheese, softened – This is the secret to the dip’s luscious, spreadable consistency. It also adds a slight tang that keeps it from being too cloying. (Neufchâtel cheese works great for a slightly lighter option.)
- 1/2 cup heavy cream – This lightens the dip and makes it fluffy. You can substitute with whole milk, but the dip will be a bit denser.
- For the “Cookie Dough” Feel:
- 1 cup all-purpose flour – We need to heat-treat this! More on that below. (For a gluten-free version, use a 1:1 gluten-free baking flour blend.)
- For the Holiday Magic:
- 1/2 cup mini chocolate chips – These are non-negotiable for that classic cookie dough experience. I love the mini ones because they distribute evenly.
- 1/4 cup festive sprinkles or crushed candy canes – For that Christmas touch! Red and green sprinkles are classic, but crushed candy canes add a lovely peppermint crunch.
- Optional: 1/4 cup chopped pecans or walnuts – Adds a nice textural contrast if you’re into that.
Ingredient Note: Heat-treating the flour is a must. Raw flour can carry bacteria. Simply spread the flour on a baking sheet and bake at 350°F (175°C) for 5 minutes, or microwave it in a bowl for 30-45 seconds until it reaches 160°F (71°C). Let it cool completely before using. I’ve forgotten to do this before, and let me tell you, it’s not worth the risk.
Equipment Needed
You don’t need a fancy kitchen for this one. Honestly, the simplicity is part of the charm.
- Large Mixing Bowl – Any bowl will do, but a wider one makes mixing easier.
- Hand Mixer or Stand Mixer – You can do this by hand with a strong whisk, but a mixer makes it incredibly fast and ensures a super creamy texture. I’ve used a $20 hand mixer for years, and it works perfectly.
- Rubber Spatula – For scraping down the sides of the bowl. You don’t want to waste any of this goodness.
- Measuring Cups and Spoons – Standard set. Nothing fancy.
- Serving Bowl and Dippers – Graham crackers, pretzels, apple slices, or just a spoon. No judgment here.
That’s it. If you have a microwave, you can even heat-treat the flour in there. No oven required for the main event.
Preparation Method
This is where the magic happens. Follow these steps, and you’ll have a bowl of holiday happiness in less time than it takes to decide what to watch on Netflix.
- Heat-Treat Your Flour (Crucial Step): Spread the 1 cup of all-purpose flour on a microwave-safe plate. Microwave on high for 30 seconds. Stir it, then microwave for another 15-20 seconds. The flour should reach 160°F (71°C) on an instant-read thermometer. Let it cool completely on the counter. I usually do this first so it’s cooling while I mix everything else.
- Cream the Butter and Sugars: In your large mixing bowl, combine the softened butter (1/2 cup), packed brown sugar (1/2 cup), and granulated sugar (1/4 cup). Beat with your hand mixer on medium speed for about 2-3 minutes, until it’s light, fluffy, and looks like a sandy, delicious paste. Scrape down the sides of the bowl with your spatula.
- Add the Cream Cheese and Vanilla: Add the softened cream cheese (4 ounces), vanilla extract (1 teaspoon), and salt (1/4 teaspoon). Beat on medium speed for another 1-2 minutes until everything is smooth and well combined. There should be no lumps of cream cheese. It should look like a thick, glossy frosting.
- Add the Heavy Cream: With the mixer on low, slowly pour in the heavy cream (1/2 cup). Once it’s all in, increase the speed to medium and beat for about 1 minute. The mixture will become noticeably lighter and fluffier. It should be soft and billowy.
- Fold in the Cooled Flour: Add the cooled, heat-treated flour to the bowl. Mix on low speed just until the flour is incorporated. Do not overmix! Overmixing can make the dip tough. A few streaks of flour are okay; they’ll disappear when you fold in the mix-ins.
- Fold in the Mix-Ins: Using your rubber spatula, gently fold in the mini chocolate chips (1/2 cup) and your festive sprinkles or crushed candy canes (1/4 cup). Fold just until they are evenly distributed. If you’re adding nuts, fold them in now, too.
- Chill (Optional but Recommended): The dip is ready to eat immediately, but for the best texture, cover the bowl and pop it in the refrigerator for 20-30 minutes. This allows the flavors to meld and the dip to firm up slightly, making it easier to scoop. I know, waiting is hard. I’ve definitely eaten it straight from the bowl with a spoon before it even hit the fridge. No regrets.
- Serve and Enjoy: Transfer the dip to a serving bowl. Garnish with a few extra sprinkles or a dusting of powdered sugar if you’re feeling fancy. Serve with your favorite dippers.
Cooking Tips & Techniques
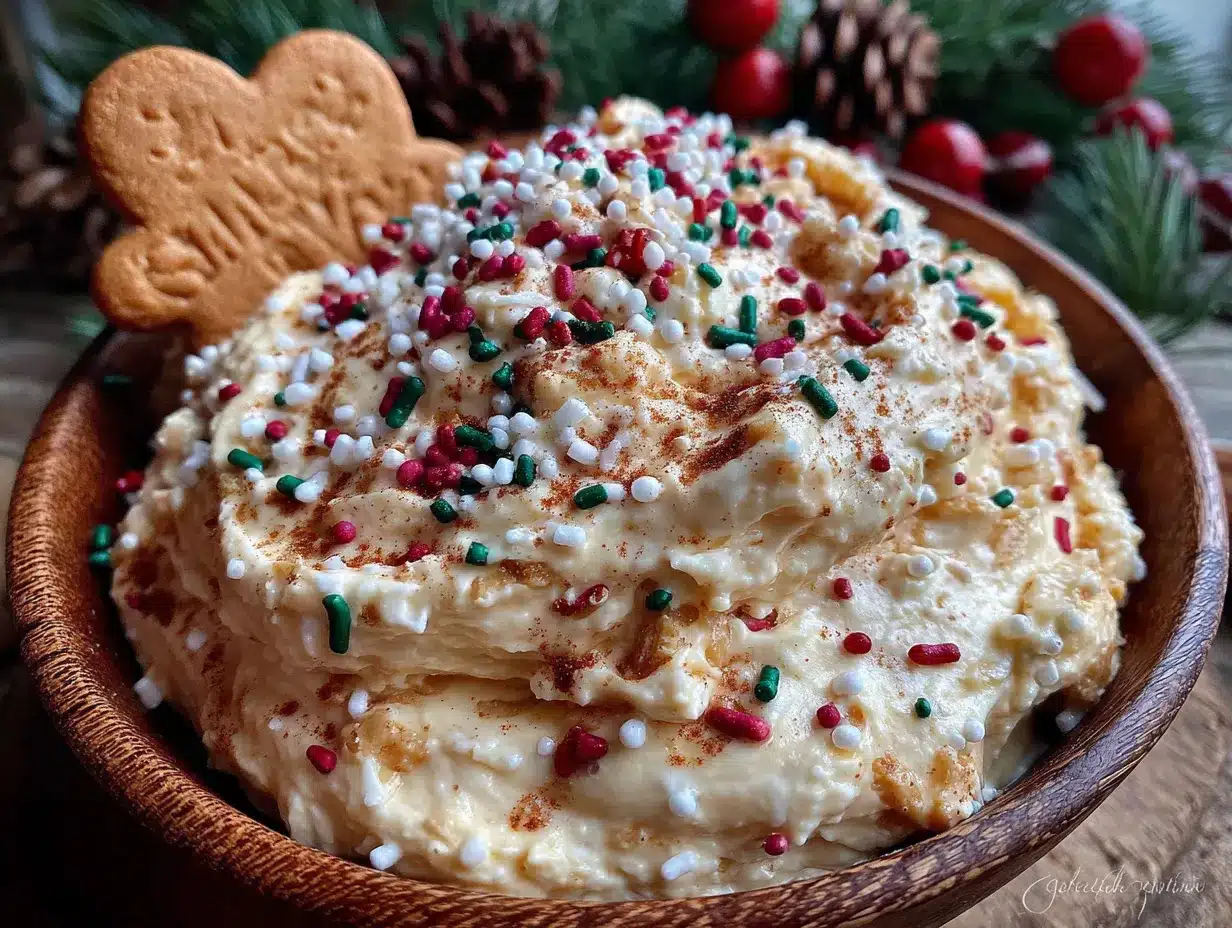
I’ve made this dip at least a dozen times now, and I’ve learned a few things the hard way. Here are my best tips to make sure yours turns out perfect.
- Softened Ingredients are Non-Negotiable: Cold butter or cream cheese will leave you with a lumpy dip. Trust me, I tried to rush it once. Leave them on the counter for 30 minutes before you start. If you’re in a hurry, cut the butter and cream cheese into small cubes—they’ll soften faster.
- Don’t Overmix After Adding Flour: This is the biggest mistake people make. Overmixing develops the gluten in the flour, which can make your dip gummy instead of light and creamy. Mix just until you can’t see any more dry flour.
- Adjust the Sweetness: Taste the base before you add the mix-ins. If you prefer a less sweet dip, you can reduce the brown sugar by a couple of tablespoons. I like mine on the sweeter side, so I keep it as is.
- The Chill is Your Friend: I know I said it’s optional, but honestly, it makes a huge difference. The dip thickens up beautifully, and the flavors—especially the vanilla and brown sugar—become more pronounced. It’s like the dip takes a deep breath and settles into itself.
- Make It Ahead: This dip is fantastic for meal prep! You can make it up to 2 days in advance. Just keep it covered in the fridge. Before serving, let it sit at room temperature for about 15 minutes to soften slightly, then give it a good stir.
Variations & Adaptations
This recipe is a blank canvas. Here are some ways I’ve played with it, and they’ve all been winners.
- Peppermint Bark Dip: Swap the mini chocolate chips for 1/2 cup of crushed peppermint bark and use crushed candy canes instead of sprinkles. It tastes just like the holiday classic.
- Chocolate Lover’s Dip: Add 2 tablespoons of unsweetened cocoa powder to the flour before folding it in. Use dark chocolate chips instead of mini ones. It’s dangerously good.
- Vegan & Dairy-Free Version: Use vegan butter and a vegan cream cheese alternative (like Kite Hill or Violife). Use a full-fat canned coconut cream instead of heavy cream. The texture will be slightly different, but it’s still delicious. I made this for a friend with a dairy allergy, and she couldn’t stop eating it.
- Snickerdoodle Dip: Add 1 teaspoon of ground cinnamon to the flour. Fold in white chocolate chips and a sprinkle of cinnamon sugar on top before serving. It’s like a hug in a bowl.
- Gluten-Free Option: Simply use a 1:1 gluten-free all-purpose flour blend. Make sure to heat-treat it the same way. The texture will be a tad grainier, but the flavor is spot on.
Serving & Storage Suggestions
This dip is versatile, but here are my favorite ways to serve and store it.
- Serving Temperature: Serve it slightly chilled or at room temperature. I prefer it after a short chill—it holds its shape better for dipping.
- Best Dippers: Graham crackers, vanilla wafers, pretzels, apple slices, pear slices, strawberries, or even just a spoon. For a holiday party, I love setting out a platter of assorted dippers.
- Presentation: Transfer the dip to a festive bowl. Sprinkle a few extra chocolate chips and sprinkles on top. A sprig of fresh mint or a cinnamon stick stuck in the dip looks beautiful for photos.
- Storage: Store any leftovers in an airtight container in the refrigerator for up to 5 days. The dip will firm up quite a bit as it chills.
- Reheating: To soften the dip, let it sit at room temperature for 15-20 minutes. You can also microwave it for 10-15 seconds, but be careful not to melt the chocolate chips. Stir well before serving.
- Flavor Development: Honestly, this dip tastes even better the next day. The flavors meld together beautifully. It’s a great make-ahead dessert for holiday parties.
Nutritional Information & Benefits
Let’s be real—this is a treat. But knowing what’s in it helps you enjoy it mindfully.
- Estimated Per Serving (about 1/4 cup): Calories: 280, Fat: 18g, Saturated Fat: 11g, Cholesterol: 45mg, Sodium: 120mg, Carbohydrates: 30g, Fiber: 1g, Sugar: 22g, Protein: 3g.
- Health Benefits: The cream cheese and butter provide a small amount of vitamin A and calcium. Dark chocolate chips offer antioxidants. It’s a source of quick energy from the carbohydrates.
- Dietary Considerations: This recipe can easily be made gluten-free, vegan, or dairy-free with the substitutions listed above. It is not low-fat or low-sugar by nature.
- Potential Allergens: Contains dairy (butter, cream cheese, heavy cream) and gluten (flour). May contain traces of nuts depending on your mix-ins.
- Personal Note: I see this as a special occasion treat. It’s not an everyday snack, but for a holiday party or a cozy night in, it’s absolutely worth the indulgence. A little bit goes a long way!
Conclusion
This Quick No-Bake Christmas Cookie Dough Dip is more than just a recipe—it’s a little moment of joy in the middle of a busy season. It’s the dessert that saves you when you’re short on time but still want to give your family or guests something special. It’s creamy, sweet, and packed with all the flavors you love about the holidays.
I truly hope you give this a try. Don’t be afraid to make it your own—swap in your favorite mix-ins, adjust the sweetness, or try one of the variations. The best recipes are the ones you feel free to play with.
If you make this dip, I’d love to hear about it! Let me know in the comments what dippers you used or how you customized it. And if you share a photo on Pinterest, tag me—I love seeing your creations. Happy holidays, and happy dipping!
Frequently Asked Questions
Can I eat this raw cookie dough dip without baking the flour?
No, you should always heat-treat the flour first to kill any potential bacteria. It’s a quick step that makes the dip safe to eat. Don’t skip it!
How long does this dip last in the fridge?
Stored in an airtight container, this dip will stay fresh for up to 5 days. It will firm up as it chills, so let it sit at room temperature for 15 minutes before serving.
Can I use a different type of sugar?
Yes, but it will change the flavor. You can use all granulated sugar for a lighter taste, or all brown sugar for a deeper, molasses-like flavor. Coconut sugar also works, but it will be less sweet and more grainy.
What can I use instead of heavy cream?
Whole milk or half-and-half will work, but the dip will be less fluffy and rich. For a dairy-free option, use full-fat canned coconut cream. The texture will be slightly different but still delicious.
Can I freeze this cookie dough dip?
Technically yes, but I don’t recommend it. The texture can become grainy or watery after thawing. It’s best enjoyed fresh or within a few days of making it. If you must freeze it, store it in a freezer-safe container for up to 1 month and thaw it in the fridge overnight.
Pin This Recipe!

Quick No-Bake Christmas Cookie Dough Dip: Easy 5-Minute Holiday Dessert

This Quick No-Bake Christmas Cookie Dough Dip is a creamy, sweet, and festive dessert ready in just 5 minutes. Perfect for holiday chaos, it uses simple pantry ingredients and is completely customizable.
- Prep Time: 5 minutes
- Cook Time: 0 minutes
- Total Time: 5 minutes
- Yield: 8 servings 1x
- Category: Dessert
- Cuisine: American
Ingredients
- 1/2 cup (1 stick) unsalted butter, softened
- 1/2 cup packed light brown sugar
- 1/4 cup granulated sugar
- 1 teaspoon vanilla extract
- 1/4 teaspoon salt
- 4 ounces cream cheese, softened
- 1/2 cup heavy cream
- 1 cup all-purpose flour (heat-treated)
- 1/2 cup mini chocolate chips
- 1/4 cup festive sprinkles or crushed candy canes
- Optional: 1/4 cup chopped pecans or walnuts
Instructions
- Heat-treat the flour: Spread 1 cup all-purpose flour on a microwave-safe plate. Microwave on high for 30 seconds, stir, then microwave for another 15-20 seconds until it reaches 160°F (71°C). Let cool completely.
- In a large mixing bowl, combine softened butter, brown sugar, and granulated sugar. Beat with a hand mixer on medium speed for 2-3 minutes until light and fluffy.
- Add softened cream cheese, vanilla extract, and salt. Beat on medium speed for 1-2 minutes until smooth and well combined.
- With the mixer on low, slowly pour in heavy cream. Increase speed to medium and beat for about 1 minute until lighter and fluffier.
- Add the cooled, heat-treated flour to the bowl. Mix on low speed just until incorporated. Do not overmix.
- Using a rubber spatula, gently fold in mini chocolate chips and festive sprinkles or crushed candy canes. If using nuts, fold them in now.
- For best texture, cover and refrigerate for 20-30 minutes before serving. (Optional but recommended.)
- Transfer to a serving bowl, garnish with extra sprinkles if desired, and serve with dippers of choice.
Notes
Heat-treating the flour is crucial to kill bacteria. Soften butter and cream cheese to room temperature for best texture. The dip can be made up to 2 days in advance and stored in the refrigerator. Let sit at room temperature for 15 minutes before serving if chilled.
Nutrition
- Serving Size: 1/4 cup
- Calories: 280
- Sugar: 22
- Sodium: 120
- Fat: 18
- Saturated Fat: 11
- Carbohydrates: 30
- Fiber: 1
- Protein: 3
Keywords: no-bake dessert, Christmas cookie dough dip, 5-minute dessert, holiday dip, cookie dough dip, easy dessert, no-bake