My sister had refused to eat banana pudding for twenty-three years. Twenty-three years. She’d make a face at the mention of it, claiming the texture was “slimy” and the bananas turned into brown mush. Then last summer, I made these quick no-bake banana pudding cups with vanilla wafer crumble just for myself on a random Tuesday. I turned around from the counter and found her standing at the kitchen doorway, spoon already in hand, dipping it into my bowl before I could even say a word. “What is this?” she asked, mouth half-full, and I just laughed.
Honestly, I get it. Traditional banana pudding can be a lot of work. You’re standing over the stove making a custard, folding in whipped cream, layering everything in a giant dish, and then waiting hours for it to set. On a weeknight? Forget it. I wanted something that hit all the same notes—creamy, banana-forward, with that signature vanilla wafer crunch—but didn’t require a culinary degree or a nap afterward. So I started playing around in my kitchen, and these little cups were born.
The first batch came together in about fifteen minutes. I used store-bought pudding mix because, let’s face it, sometimes shortcuts are the smartest move. I layered it with fresh bananas and crushed wafers, and the texture was everything. Creamy, crunchy, sweet, and just a little bit salty from the wafers. That first bite made me close my eyes. Maybe you’ve been there—standing over a bowl, eating something you made in a hurry, and realizing it might be the best thing you’ve eaten all week.
These quick no-bake banana pudding cups with vanilla wafer crumble have become my go-to when I need dessert on the table fast. They’re perfect for busy weeknights, last-minute guests, or those evenings when you just need something sweet without the fuss. And my sister? She asks for them now. That’s the kind of recipe magic you can’t plan for.
Why You’ll Love This Recipe
Let me tell you why these quick no-bake banana pudding cups with vanilla wafer crumble are about to become your new favorite dessert. I’ve tested this recipe at least a dozen times, tweaking the ratios and the layering order until everything was just right. Here’s what makes them special:
- Quick & Easy: These come together in under 20 minutes. No oven, no stovetop custard, no waiting around. You can make them after dinner and still have time to put your feet up.
- Simple Ingredients: You probably have most of this stuff in your kitchen right now. Instant vanilla pudding, milk, bananas, vanilla wafers, and whipped topping. That’s it. No fancy trips to specialty stores.
- Perfect for Weeknights: When you’re tired and hungry and the kids are asking for dessert, these cups are your answer. They feel special without any of the stress.
- Crowd-Pleaser: I’ve served these at family dinners, potlucks, and casual get-togethers. They disappear fast. Kids love them, adults sneak seconds, and nobody believes they were this easy.
- Unbelievably Delicious: The texture combination is next-level. Silky pudding, fresh banana slices, and that crunchy vanilla wafer crumble—it’s comfort food at its finest.
What makes these different from other banana pudding recipes? It’s the crumble technique. Instead of just layering whole wafers, I crush some of them into a coarse crumble and sprinkle it between layers. This keeps the texture interesting throughout—you get creamy, crunchy, and soft all in one spoonful. Plus, making them in individual cups means everyone gets their own perfect portion. No fighting over the corner pieces.
This recipe is the kind that makes you close your eyes after the first bite. It’s comfort food reimagined—faster, simpler, but with the same soul-soothing satisfaction. Perfect for impressing guests without stress, or turning a simple Tuesday into something memorable.
What Ingredients You Will Need
This recipe uses simple, everyday ingredients to deliver that classic banana pudding flavor and satisfying texture without any fuss. Everything is easy to find and probably already in your pantry.
- Instant vanilla pudding mix (3.4 oz box): Use the instant kind, not cook-and-serve. Jell-O brand works great, but store brands are fine too. The instant mix sets up quickly with cold milk, which is the whole point of a no-bake recipe.
- Cold whole milk (2 cups): Whole milk gives the pudding a richer, creamier texture. You can use 2% in a pinch, but avoid skim milk—the pudding won’t be as thick or satisfying. For a dairy-free version, unsweetened oat milk works surprisingly well.
- Ripe but firm bananas (3 medium): This is important. You want bananas that are yellow with maybe a few brown spots—sweet enough to taste good, but firm enough to hold their shape when sliced. Mushy bananas will turn into a mess in your cups. I buy mine a few days ahead and let them ripen on the counter.
- Vanilla wafers (about 2 cups): Nilla Wafers are the classic choice, and honestly, they’re hard to beat. You’ll use some whole for layering and crush the rest for the crumble. If you can find the mini ones, they’re perfect for this.
- Frozen whipped topping (8 oz tub), thawed: Cool Whip is the standard, but any brand works. Thaw it in the fridge overnight or on the counter for about an hour before using. You could also make fresh whipped cream if you’re feeling fancy—just whip 1 cup of heavy cream with 2 tablespoons of powdered sugar until stiff peaks form.
- Optional garnish: Extra crushed wafers, banana slices, and a dollop of whipped topping for the top. Makes them look pretty for serving.
I recommend using Jell-O instant vanilla pudding for the most consistent results. I’ve tried generic brands before, and sometimes the texture ends up a little grainy. For the wafers, Nilla is my go-to—they have that perfect vanilla flavor and just the right amount of crunch. If you’re gluten-free, look for gluten-free vanilla wafers; they work exactly the same way.
Equipment Needed
You don’t need much for this recipe, which is part of the beauty. Here’s what you’ll want on hand:
- Medium mixing bowl (2-quart size): For whisking the pudding mix with milk. Any bowl works, but a wider bowl makes whisking easier.
- Whisk: A good whisk helps incorporate the pudding powder smoothly without lumps. A fork works in a pinch, but you’ll have to work harder.
- Measuring cups: For the milk. A liquid measuring cup is best for accuracy.
- Small knife and cutting board: For slicing the bananas. A serrated knife works best—it cuts through the banana without squishing it.
- 6 small cups or glasses (6-8 oz each): Mason jars, juice glasses, or small dessert cups all work. I use 8-ounce wide-mouth mason jars because they look cute and seal well for leftovers.
- Ziploc bag or small bowl: For crushing the vanilla wafers into crumble. A rolling pin or the bottom of a measuring cup helps with the crushing.
- Spatula or spoon: For layering and spreading the pudding.
If you don’t have individual cups, you can make this in a single 8×8 dish or a small trifle bowl. Just layer everything the same way and scoop it out when serving. The presentation is less fancy, but the taste is identical.
Preparation Method
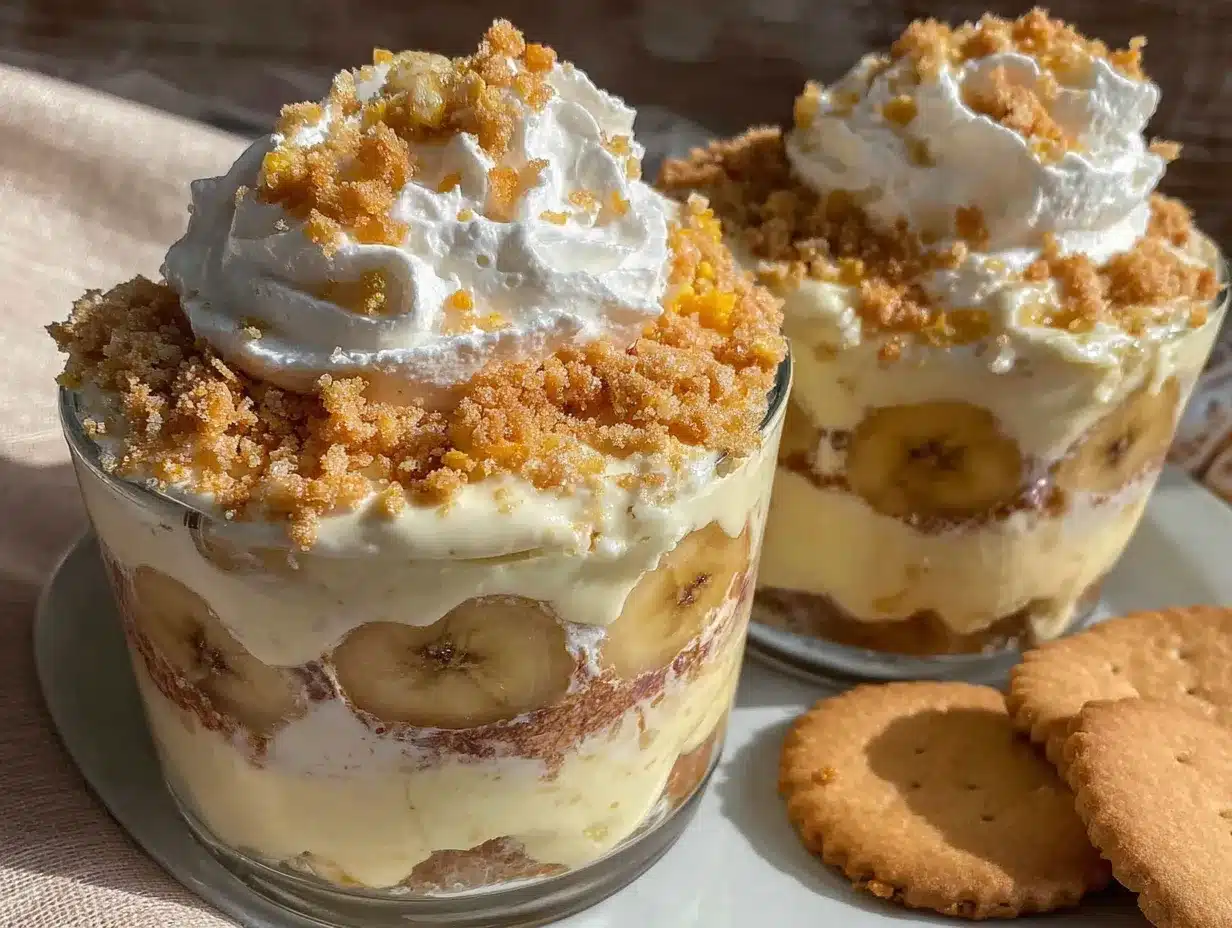
Follow these steps carefully, and you’ll have creamy, crunchy banana pudding cups ready in no time. The whole process takes about 15-20 minutes of active work, plus a short chill time if you want the pudding to set fully.
- Make the pudding base: In your medium mixing bowl, whisk together the instant vanilla pudding mix and 2 cups of cold whole milk. Whisk vigorously for about 2 minutes until the mixture thickens and becomes smooth. It will start out thin, then suddenly get thick—that’s when you know it’s ready. Scrape down the sides of the bowl with your spatula to make sure everything is incorporated.
- Fold in the whipped topping: Add the entire tub of thawed whipped topping to the pudding mixture. Use your spatula to gently fold it together—don’t stir aggressively, or you’ll deflate the airiness. Fold until you don’t see any white streaks anymore. The mixture should look light, fluffy, and pale yellow. Set this aside while you prep the other ingredients.
- Prepare the bananas: Peel your three bananas and slice them into rounds about ¼-inch thick. Not too thin, or they’ll disappear into the pudding. Not too thick, or they’ll be hard to eat. Aim for a nice coin shape. If your bananas are very ripe, work quickly—they’ll start browning as soon as they’re exposed to air.
- Crush the vanilla wafers: Place about 1½ cups of vanilla wafers in a Ziploc bag. Seal it, then use your hands or a rolling pin to crush them into coarse crumbs. You want a mix of fine crumbs and small chunks—that’s what gives you the good texture. Don’t pulverize them into dust. Leave the remaining ½ cup of wafers whole for layering.
- Layer the cups: Grab your 6 cups or glasses. Start with a spoonful of the vanilla wafer crumble at the bottom of each cup—about 1 tablespoon per cup. This creates a crunchy base. Next, add a layer of pudding mixture, filling each cup about one-third full. Use your spoon to spread it evenly.
- Add the banana layer: Place a few banana slices on top of the pudding in each cup. You want about 4-5 slices per cup, arranged in a single layer. Press them down gently so they’re nestled into the pudding.
- Repeat the layers: Add another spoonful of pudding on top of the bananas, filling each cup to about two-thirds full. Sprinkle another tablespoon of wafer crumble over the pudding, then add a few more banana slices. Finish with a final layer of pudding, filling each cup almost to the top. Leave a little room for the topping.
- Top and garnish: Add a dollop of whipped topping to each cup. Sprinkle with the reserved whole wafer crumbs and a fresh banana slice for looks. If you’re serving immediately, dig in. For a firmer set, refrigerate for at least 30 minutes before serving.
- Chill if desired: The pudding will be soft right after assembly, which is delicious in its own way. But if you let the cups chill for 30-60 minutes, the flavors meld together and the wafers soften slightly, creating a more traditional banana pudding texture. I prefer them chilled, but my kids eat them right away.
A word of warning: don’t let the assembled cups sit at room temperature for more than 2 hours, especially if you’re using dairy. The bananas can also start to brown and get mushy. If you’re making these ahead, assemble them without the banana slices, then add fresh bananas just before serving.
Cooking Tips & Techniques
After making these quick no-bake banana pudding cups with vanilla wafer crumble more times than I can count, I’ve picked up a few tricks that make a real difference. Let me share them with you.
Don’t overmix the pudding. I learned this the hard way. If you whisk the instant pudding too long, it can actually start to break down and get runny again. Whisk just until it thickens—about 2 minutes—then stop. The same goes for folding in the whipped topping. Gentle folds, not aggressive stirring.
Keep your bananas from browning. This is the number one question I get. Slice your bananas right before you’re ready to layer them, and don’t let them sit out. If you need to prep ahead, toss the slices in a little lemon juice or pineapple juice—just a teaspoon or two. It won’t change the flavor much, and it keeps them looking fresh. I’ve also used slightly under-ripe bananas for longer-lasting color.
Crush the wafers strategically. I used to crush all my wafers into fine crumbs, and the texture was boring. Now I leave some chunks and some whole wafers for the layers. The variation in crunch makes each bite interesting. Also, don’t crush them too far in advance—they’ll absorb moisture from the air and lose their crunch. Crush them right before you start layering.
Timing is everything. The pudding needs about 2 minutes to thicken after whisking. The whole assembly takes about 10-15 minutes. If you’re making these for a party, I recommend assembling them about an hour before serving and letting them chill. The flavors develop beautifully in the fridge, and the texture gets that perfect pudding consistency.
Use a piping bag for neat layers. If you want those Instagram-worthy layers, spoon the pudding into a Ziploc bag, snip off a corner, and pipe it into the cups. It keeps the sides clean and makes layering much easier. I do this when I’m making them for company. For a Tuesday night? I just spoon it in and don’t worry about perfection.
A common mistake I made: The first few times, I layered the bananas directly on top of the wafer crumble without any pudding in between. The wafers got soggy immediately, and the bananas slid around. Now I always put a thin layer of pudding first, then the bananas. It keeps everything in place and the texture stays right.
Variations & Adaptations
One of the best things about these quick no-bake banana pudding cups with vanilla wafer crumble is how easy they are to customize. Here are some variations I’ve tried and loved.
Chocolate banana version: Swap the instant vanilla pudding for chocolate pudding. The chocolate and banana combination is incredible—like a chocolate banana split in a cup. Use chocolate wafer cookies instead of vanilla for extra chocolate flavor. My nephew requests this version for every birthday party.
Peanut butter twist: Add a tablespoon of creamy peanut butter to the pudding mixture when you whisk it. You’ll need to whisk a little longer to get it smooth, but the peanut butter adds a savory richness that pairs perfectly with the bananas. Top with crushed peanuts for extra crunch. This one’s dangerous—I can’t stop eating it.
Dairy-free adaptation: Use unsweetened oat milk or almond milk for the pudding, and a dairy-free whipped topping like CocoWhip. Check that your vanilla wafers are dairy-free—some brands are, some aren’t. The texture is slightly less creamy, but it’s still delicious. I’ve made this for friends with dairy allergies, and they always ask for the recipe.
Gluten-free option: Look for gluten-free vanilla wafers—Kinnikinnick makes a good one. The rest of the ingredients are naturally gluten-free, so this is an easy swap. Just make sure your pudding mix is certified gluten-free if that’s a concern.
Berry banana version: Add a layer of fresh strawberries or raspberries along with the bananas. The tartness of the berries cuts through the sweetness of the pudding. I made this last summer with strawberries from the farmers market, and it was incredible. Use a mix of berries for a colorful presentation.
Make it a parfait: Layer in some yogurt or Greek yogurt between the pudding layers for a lighter version. Use vanilla or banana-flavored yogurt for extra flavor. This is my go-to when I want something sweet but don’t want to go overboard. It’s still indulgent, just a little more balanced.
Serving & Storage Suggestions
These cups are best served chilled, straight from the fridge. The cold pudding contrasts beautifully with the crunchy wafer crumble and the soft banana slices. If you’re serving them at a party, pull them out about 10 minutes before serving to take the chill off slightly—it lets the banana flavor shine through more.
Presentation ideas: Serve them in clear glass cups or mason jars so everyone can see the beautiful layers. Top each cup with a whole vanilla wafer stuck in at an angle, a fresh banana slice, and maybe a dusting of cinnamon or nutmeg. A sprig of mint adds a pop of color if you’re feeling fancy.
What to serve alongside: These cups are rich enough to stand alone, but they pair beautifully with a cup of coffee or a glass of cold milk. If you’re serving them as part of a dessert spread, they go well with fudgy brownies or a slice of classic pound cake for contrast. For a summer party, serve them alongside fresh fruit skewers.
Storage instructions: Cover each cup tightly with plastic wrap or a lid and store in the refrigerator for up to 3 days. The bananas will start to brown after the first day, and the wafers will soften over time, so these are best eaten within 24 hours of assembly. If you’re making them ahead, I recommend assembling the pudding and crumble layers without the bananas, then adding fresh banana slices just before serving.
Can you freeze these? I don’t recommend it. The pudding gets icy and grainy when frozen, and the bananas turn into mush when thawed. These are strictly a refrigerator dessert. If you need to prep ahead, make the pudding mixture and crush the wafers separately, then assemble fresh when you’re ready to serve.
Reheating: Don’t. These are served cold. If you want a warm banana dessert, try banana bread muffins instead—they’re just as easy and satisfy that warm dessert craving.
Flavor development: The flavors actually get better after a few hours in the fridge. The banana flavor infuses into the pudding, and the wafers soften just enough to create that classic banana pudding texture. If you can wait, these are even better the next day.
Nutritional Information & Benefits
Here’s the approximate nutritional breakdown for one serving (one cup, about 8 ounces). Keep in mind these are estimates and can vary based on specific brands and ingredient choices.
| Nutrient | Amount per Serving |
|---|---|
| Calories | 320 |
| Total Fat | 12g |
| Saturated Fat | 7g |
| Cholesterol | 10mg |
| Sodium | 380mg |
| Total Carbohydrates | 52g |
| Dietary Fiber | 2g |
| Sugars | 35g |
| Protein | 4g |
Health benefits: Bananas are a good source of potassium, vitamin B6, and vitamin C. They also provide dietary fiber, which aids digestion. The vanilla wafers add calcium and iron in small amounts. While this is definitely a treat, it does offer more nutritional value than many other desserts thanks to the fresh fruit.
Dietary considerations: This recipe contains dairy (milk, whipped topping) and gluten (vanilla wafers). It can be made dairy-free and gluten-free with appropriate substitutions. It’s not suitable for vegan diets unless you use plant-based alternatives for everything. The recipe is nut-free as written, but check your vanilla wafer label for cross-contamination warnings if that’s a concern.
My perspective: I believe in balance. These cups are a dessert, and they’re meant to be enjoyed. I don’t stress about the sugar content when I’m making them for a special occasion or a weeknight treat. If you’re watching your intake, you can use sugar-free pudding mix and light whipped topping to cut the calories and sugar by about 30%. The taste is still great, and you get the same satisfying experience.
Conclusion
These quick no-bake banana pudding cups with vanilla wafer crumble have earned a permanent spot in my dessert rotation. They’re fast, they’re foolproof, and they taste like something you spent hours on. The creamy pudding, the fresh banana slices, the crunchy wafer crumble—every spoonful is a little moment of joy.
I love that this recipe meets you where you are. Maybe you’re a busy parent trying to get dessert on the table after a long day. Maybe you’re hosting a last-minute gathering and need something impressive without the stress. Or maybe you just want a little sweetness on a random Tuesday. These cups work for all of it.
Don’t be afraid to make them your own. Swap in different pudding flavors, try different cookies for the crumble, or add your favorite toppings. The base recipe is forgiving and flexible, which is exactly what a good weeknight dessert should be.
I’d love to hear how yours turn out. Drop a comment below and let me know what variations you tried, or tag me in your photos if you share them online. And if you make these for someone who claims they don’t like banana pudding? Well, you might just change their mind.
Happy cooking, friends. Go make something sweet.
Frequently Asked Questions
Can I use homemade pudding instead of instant?
Yes, you can use homemade vanilla pudding if you prefer. Just make sure it’s completely cooled and thickened before layering. Keep in mind that homemade pudding will make the process longer and defeats the “no-bake, quick” aspect, but the flavor is lovely.
How do I keep the bananas from turning brown?
Slice your bananas right before assembling, and toss them with a teaspoon of lemon juice or pineapple juice if you’re worried about browning. You can also use slightly under-ripe bananas—they hold their color better and stay firmer in the layers.
Can I make these the night before?
Absolutely. Assemble the cups without the banana slices, then add fresh bananas just before serving. The pudding and wafer layers will meld beautifully overnight, and you’ll have a nearly instant dessert the next day.
What if I don’t have vanilla wafers?
Graham crackers, shortbread cookies, or even crushed pretzels work as substitutes. Each will change the flavor slightly, but they all add that essential crunch. For a chocolate version, use chocolate wafer cookies or Oreos (cream removed).
Can I use fat-free or sugar-free ingredients?
Yes, you can use fat-free milk, sugar-free instant pudding mix, and light whipped topping. The texture will be slightly less rich, but the recipe still works well. Just follow the package directions for the sugar-free pudding, as it sometimes requires different milk ratios.
Pin This Recipe!
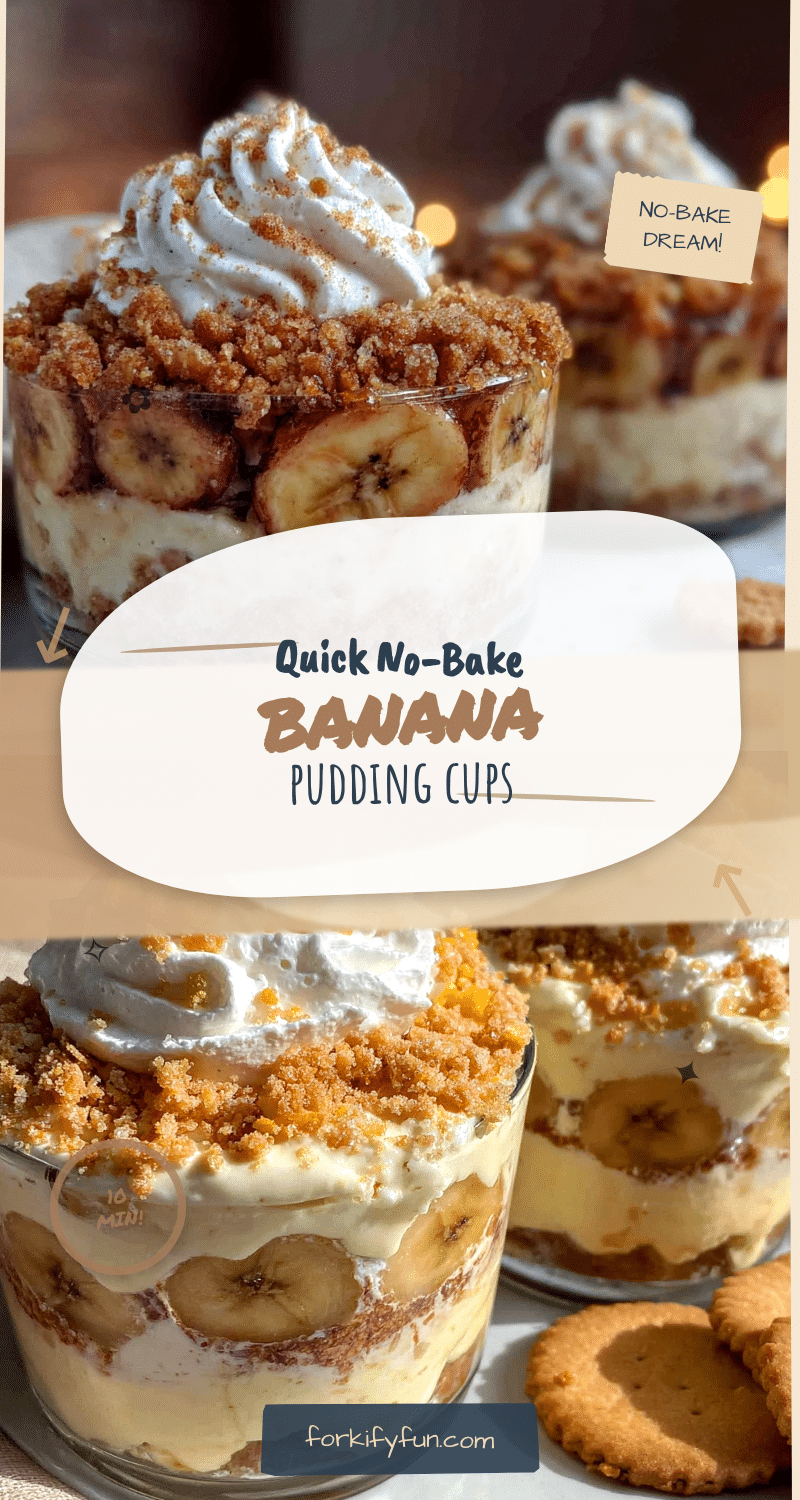
Quick No-Bake Banana Pudding Cups with Vanilla Wafer Crumble
These quick no-bake banana pudding cups with vanilla wafer crumble come together in under 20 minutes with simple ingredients. Creamy pudding, fresh banana slices, and crunchy wafer crumble make for an irresistible dessert that’s perfect for weeknights or last-minute guests.
- Prep Time: 15 minutes
- Cook Time: 0 minutes
- Total Time: 15 minutes
- Yield: 6 servings 1x
- Category: Dessert
- Cuisine: American
Ingredients
- 1 box (3.4 oz) instant vanilla pudding mix
- 2 cups cold whole milk
- 3 medium ripe but firm bananas
- 2 cups vanilla wafers (about 1½ cups crushed, ½ cup whole)
- 1 tub (8 oz) frozen whipped topping, thawed
- Optional garnish: extra crushed wafers, banana slices, whipped topping
Instructions
- In a medium mixing bowl, whisk together the instant vanilla pudding mix and 2 cups of cold whole milk for about 2 minutes until thickened and smooth.
- Fold the entire tub of thawed whipped topping into the pudding mixture until no white streaks remain. Set aside.
- Peel and slice the bananas into ¼-inch thick rounds.
- Place 1½ cups of vanilla wafers in a Ziploc bag and crush into coarse crumbs (mix of fine crumbs and small chunks). Reserve the remaining ½ cup of wafers whole.
- In 6 small cups or glasses (6-8 oz each), layer: 1 tablespoon of wafer crumble at the bottom, then pudding mixture to one-third full.
- Add 4-5 banana slices on top of the pudding in each cup, pressing gently.
- Repeat layers: another spoonful of pudding (to two-thirds full), 1 tablespoon wafer crumble, a few more banana slices, then final layer of pudding almost to the top.
- Top each cup with a dollop of whipped topping, sprinkle with reserved whole wafer crumbs, and add a fresh banana slice.
- Serve immediately or refrigerate for at least 30 minutes for a firmer set. Best served chilled.
Notes
For best results, slice bananas right before assembling to prevent browning. If making ahead, assemble without banana slices and add fresh bananas just before serving. Store covered in the refrigerator for up to 3 days, but best within 24 hours. Do not freeze. For dairy-free, use unsweetened oat milk and dairy-free whipped topping. For gluten-free, use gluten-free vanilla wafers.
Nutrition
- Serving Size: 1 cup (about 8 oz)
- Calories: 320
- Sugar: 35
- Sodium: 380
- Fat: 12
- Saturated Fat: 7
- Carbohydrates: 52
- Fiber: 2
- Protein: 4
Keywords: banana pudding, no-bake dessert, quick dessert, vanilla wafer, banana pudding cups, easy dessert, weeknight dessert


