I want banana bread right now, and I have everything except patience. That’s the thing about overripe bananas — they don’t give you a warning. One day they’re fine, the next they’re staring at you from the counter with those brown spots, practically demanding to be turned into something warm and buttery. And honestly? I’m not mad about it.
This particular batch of bananas had been sitting there for three days, getting uglier by the hour. I kept walking past them, telling myself I’d deal with them tomorrow. But tomorrow came, and they looked even more desperate. You know the ones — so soft you can practically smell the sweetness through the peel. That’s exactly when you want them for baking. Not a day before, not a day after.
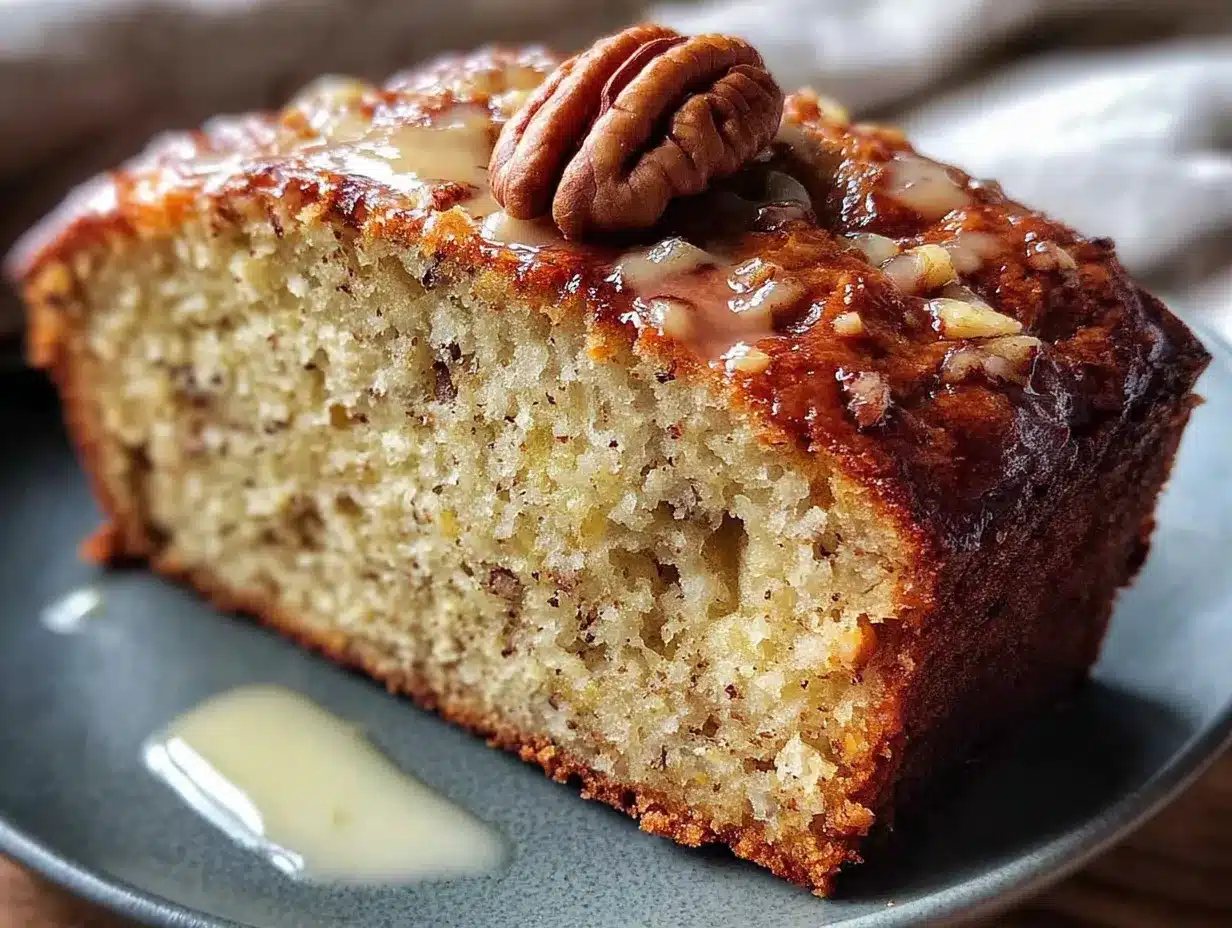
I’ve made a lot of banana bread in my life. Some were dry and crumbly, the kind that falls apart the second you try to slice it. Others were dense and gummy, like a brick disguised as breakfast. But this one? This one hits different. It’s the kind of banana bread that makes you close your eyes after the first bite, not because it’s fancy, but because it’s exactly right. Moist without being wet, tender without being fragile, with those little pockets of toasted walnut that catch you off guard in the best way.
There’s something about the combination of very ripe bananas and walnuts that just works. The nuts add this subtle crunch and earthy flavor that keeps every bite interesting. And the bread itself? It stays moist for days — if it lasts that long, which it usually doesn’t in my house.
This recipe came together after a lot of trial and error. Too much butter, and the bread was greasy. Too little sugar, and it was bland. But I finally found the sweet spot, and I’m pretty proud of it. So if you’ve got a bunch of sad-looking bananas on your counter, you know what to do.
Why You’ll Love This Recipe
Let me tell you why this banana walnut bread is different from every other recipe you’ve tried. I’ve tested this thing more times than I care to admit, and I’ve learned a few things along the way.
- Quick & Easy : From start to finish, this comes together in about an hour. Most of that is baking time, so you’re really only looking at 10-15 minutes of active work. Perfect for those mornings when you realize you need something baked but don’t have all day.
- Simple Ingredients : You probably have everything in your kitchen right now. Butter, sugar, eggs, flour, baking soda, salt, vanilla, bananas, and walnuts. That’s it. No weird specialty ingredients you’ll never use again.
- Perfect for Breakfast or Snack : This bread works for literally any time of day. Slice it for breakfast with your coffee, pack it in lunchboxes, or serve it as an afternoon snack. It’s versatile like that.
- Crowd-Pleaser : I’ve brought this to potlucks, family gatherings, and neighborhood brunches. It always gets devoured. Kids love it, adults love it, even people who claim they don’t like bananas end up going back for seconds.
- Unbelievably Moist : The texture is what sets this apart. It’s not dry, not gummy, not greasy — just perfectly tender and moist. The kind of moist that makes you wonder how it’s possible without adding a ton of extra fat.
The secret? It’s all in how you handle the bananas and the butter. I’ll walk you through every step so you get it right the first time.
What Ingredients You Will Need
This recipe uses simple, everyday ingredients that work together to create something truly special. Here’s what you’ll need and why each one matters.
For the Banana Bread
- 1 ½ cups (188g) all-purpose flour — I use unbleached all-purpose flour for the best texture. It gives the bread structure without making it tough. If you’re in a pinch, you can use bleached flour, but I find unbleached gives a slightly better crumb.
- 1 teaspoon baking soda — This is what makes the bread rise. Make sure your baking soda is fresh — if it’s been sitting in your pantry for a year, it might not work as well. Test it by dropping a little in vinegar; it should fizz immediately.
- ½ teaspoon salt — Don’t skip this! Salt balances the sweetness and enhances all the other flavors. I use fine sea salt for baking.
- ½ cup (113g) unsalted butter, softened — Butter adds richness and flavor. I prefer unsalted so I can control the salt level. Let it sit at room temperature for about 30 minutes before you start.
- ¾ cup (150g) granulated sugar — This gives the bread sweetness and helps keep it moist. You can reduce it to ½ cup if your bananas are very sweet, but I wouldn’t go lower than that.
- 2 large eggs, room temperature — Eggs add structure and moisture. Room temperature eggs incorporate better into the batter, so take them out of the fridge about 20 minutes before you start.
- 1 teaspoon vanilla extract — Pure vanilla extract is worth the splurge here. It adds warmth and depth that you just can’t get from imitation vanilla.
- 3 large ripe bananas, mashed (about 1 ½ cups) — The riper, the better. You want bananas with lots of brown spots — almost black is perfect. They’re sweeter and easier to mash. If your bananas aren’t ripe enough, you can bake them at 300°F for 15-20 minutes to soften and sweeten them.
- ¼ cup (60ml) buttermilk, room temperature — Buttermilk adds tenderness and a subtle tang that balances the sweetness. If you don’t have buttermilk, you can make a quick substitute by adding 1 teaspoon of lemon juice or vinegar to ¼ cup of regular milk and letting it sit for 5 minutes.
- 1 cup (120g) walnuts, chopped — I like to toast the walnuts first for extra flavor. Just spread them on a baking sheet and bake at 350°F for 5-7 minutes, until fragrant. Let them cool before adding to the batter.
For the best results, I recommend using King Arthur Flour for the flour and Land O’Lakes for the butter. They’re consistently good and widely available. But honestly, any brand will work fine — just make sure your ingredients are fresh.
If you’re out of buttermilk, don’t worry. I’ve made this with regular milk mixed with a splash of lemon juice, and it works beautifully. You can also use plain yogurt or sour cream thinned with a little milk. The texture will be slightly different, but still delicious.
Equipment Needed
You don’t need a lot of fancy equipment for this recipe. Here’s what you’ll need:
- 9×5-inch loaf pan — This is the standard size for banana bread. If you use a different size, your baking time will change. An 8×4-inch pan will work, but you’ll need to bake it longer.
- Large mixing bowl — For combining your dry ingredients.
- Medium mixing bowl — For mashing the bananas and mixing the wet ingredients.
- Whisk — For mixing the dry ingredients together.
- Wooden spoon or rubber spatula — For folding everything together. Don’t use an electric mixer here — you want to mix by hand to avoid overmixing.
- Fork or potato masher — For mashing the bananas. A fork works fine, but a potato masher makes it quicker.
- Measuring cups and spoons — Accurate measurements matter in baking.
- Parchment paper — I like to line my loaf pan with parchment paper for easy removal. You can also just grease the pan well with butter or cooking spray.
- Cooling rack — For cooling the bread after baking. If you don’t have one, you can use a wire rack from your oven.
I’ve made this recipe with both metal and glass loaf pans. Metal pans give a nicer crust, while glass pans tend to make the bread slightly softer on the outside. Either works, just adjust your baking time if using glass (it usually takes a few minutes longer).
Preparation Method
Alright, let’s get to the good part. Here’s how to make this perfectly moist banana walnut bread, step by step.
- Preheat your oven to 350°F (175°C). Position the rack in the center of the oven. This is important — if your rack is too low, the bottom of the bread might burn before the middle is done.
- Prepare your loaf pan. Grease a 9×5-inch loaf pan with butter or cooking spray. For extra insurance, line it with a strip of parchment paper that hangs over the long sides — this makes it super easy to lift the bread out after baking.
- Toast the walnuts (optional but recommended). Spread the chopped walnuts on a baking sheet and toast them in the preheated oven for 5-7 minutes, until they smell nutty and are lightly golden. Watch them closely — they can burn quickly. Let them cool completely before using.
- Mash the bananas. In a medium bowl, mash the ripe bananas with a fork or potato masher until smooth. You want some small lumps remaining — that’s texture. Don’t overmash them into a liquid. Set aside.
- Mix the dry ingredients. In a large bowl, whisk together the flour, baking soda, and salt. Make sure everything is evenly distributed. This only takes about 30 seconds.
- Cream the butter and sugar. In another large bowl, beat the softened butter and granulated sugar together until light and fluffy. You can do this with a hand mixer or by hand with a wooden spoon. It should take about 2-3 minutes with a mixer, or 4-5 minutes by hand. The mixture should look pale and airy.
- Add the eggs and vanilla. Beat in the eggs one at a time, mixing well after each addition. Then add the vanilla extract and mix until combined. The mixture might look slightly curdled at this point — that’s normal, don’t worry.
- Add the bananas and buttermilk. Stir in the mashed bananas and buttermilk until just combined. The mixture will look a little lumpy and that’s exactly what you want.
- Combine wet and dry ingredients. Pour the wet ingredients into the dry ingredients. Fold gently with a rubber spatula or wooden spoon until just combined. A few streaks of flour are okay — you don’t want to overmix. Overmixing develops gluten and makes the bread tough.
- Fold in the walnuts. Gently fold in the toasted walnuts until they’re evenly distributed throughout the batter. Don’t overmix here either.
- Pour into the pan. Scrape the batter into the prepared loaf pan and spread it evenly. Tap the pan on the counter a few times to release any air bubbles.
- Bake. Bake for 50-60 minutes, or until a toothpick inserted into the center comes out clean or with just a few moist crumbs. If the top is browning too quickly (after about 40 minutes), tent it loosely with aluminum foil.
- Cool. Let the bread cool in the pan for 10-15 minutes, then transfer it to a wire rack to cool completely. Don’t try to slice it while it’s still warm — it needs time to set, or it will fall apart.
Your kitchen should smell amazing right about now. That combination of banana, butter, and toasted walnuts is pure comfort.
Cooking Tips & Techniques
I’ve learned a few things the hard way, so you don’t have to. Here are my best tips for perfect banana walnut bread every time.
Don’t overmix the batter. This is the number one mistake people make with quick breads. Mix until the flour just disappears, then stop. Overmixing develops gluten, and gluten makes bread tough and rubbery. You want tender, not tough.
Use a kitchen scale for accuracy. I know measuring cups are convenient, but flour is tricky to measure accurately with cups. One cup of flour can weigh anywhere from 120 to 150 grams depending on how you scoop it. For consistent results, weigh your ingredients. I promise it makes a difference.
Check for doneness early. Every oven runs differently. Start checking your bread at the 50-minute mark. Insert a toothpick into the center — if it comes out clean or with just a few moist crumbs, it’s done. If there’s wet batter on it, give it another 5 minutes and check again.
Let it cool completely. I know it’s tempting to slice into that warm bread right away, but patience pays off here. The bread continues to set as it cools, and slicing too early can make it crumble. Give it at least an hour on the cooling rack.
Toast your walnuts. This step makes a huge difference. Raw walnuts are fine, but toasted walnuts have a deeper, nuttier flavor that elevates the whole bread. Don’t skip it.
Use very ripe bananas. The riper the bananas, the sweeter and more flavorful your bread will be. Bananas that are mostly brown or even black are perfect. If yours aren’t ripe enough, you can speed things up by baking them at 300°F for 15-20 minutes.
Variations & Adaptations
One of the best things about this recipe is how versatile it is. Here are some ways to make it your own.
Chocolate Chip Banana Walnut Bread. Fold in ½ cup of chocolate chips along with the walnuts. Dark chocolate or semi-sweet work best — they balance the sweetness of the bananas. I’ve made this version for birthday parties and it’s always a hit.
Gluten-Free Option. Substitute the all-purpose flour with a good gluten-free flour blend. I’ve had great results with King Arthur Measure for Measure gluten-free flour. Add 1 teaspoon of xanthan gum if your blend doesn’t already include it. The texture will be slightly different, but still delicious.
Vegan Banana Walnut Bread. Replace the butter with coconut oil or vegan butter, use flax eggs (1 tablespoon ground flaxseed mixed with 3 tablespoons water per egg), and substitute the buttermilk with almond milk mixed with a teaspoon of apple cider vinegar. It works surprisingly well.
Spiced Banana Walnut Bread. Add 1 teaspoon of cinnamon, ½ teaspoon of nutmeg, and ¼ teaspoon of cloves to the dry ingredients. This gives the bread a warm, cozy flavor that’s perfect for fall. If you love fall baking, you might also enjoy this perfect maple pumpkin sourdough bread for another seasonal treat.
Lower Sugar Version. Reduce the sugar to ½ cup and use very ripe bananas. You can also substitute half the sugar with coconut sugar or a sugar substitute like monk fruit. The texture will be slightly less tender, but the flavor will still be great.
I’ve tried the chocolate chip version more times than I can count, and it’s become my go-to for potlucks. Something about that combination of banana, walnut, and chocolate just works.
Serving & Storage Suggestions
This banana walnut bread is delicious in so many ways. Here’s how to serve and store it.
Serving. Serve at room temperature or slightly warm. A slice with a pat of butter is classic and perfect. For something extra special, toast a slice and drizzle it with honey or maple syrup. It’s also amazing with a smear of cream cheese or peanut butter.
What to serve with it. This bread pairs beautifully with coffee, tea, or a glass of cold milk. For a complete breakfast, serve it alongside scrambled eggs and fresh fruit. For dessert, add a scoop of vanilla ice cream or a dollop of whipped cream.
Storage. Store the bread in an airtight container at room temperature for up to 4 days. Wrap it tightly in plastic wrap or aluminum foil to keep it from drying out. I like to store it with a paper towel in the container to absorb excess moisture.
Freezing. This bread freezes beautifully. Wrap the cooled loaf tightly in plastic wrap, then in aluminum foil, and freeze for up to 3 months. You can also slice it before freezing for easy individual portions. Thaw at room temperature or pop a frozen slice in the toaster.
Reheating. To reheat, warm slices in the microwave for 10-15 seconds, or toast them in a toaster or oven at 350°F for 5-7 minutes. Toasting brings out the flavor of the walnuts and gives the bread a slightly crispy exterior.
The flavors actually develop over time. Day-old banana bread often tastes better than fresh-baked. Something about the banana flavor deepening and the walnuts settling in. So don’t be afraid to make it a day ahead.
Nutritional Information & Benefits
Here’s the nutritional breakdown for one slice (assuming 12 slices per loaf):
- Calories: Approximately 280
- Total Fat: 14g
- Saturated Fat: 6g
- Cholesterol: 55mg
- Sodium: 220mg
- Total Carbohydrates: 36g
- Dietary Fiber: 2g
- Sugars: 18g
- Protein: 5g
Bananas are a great source of potassium, vitamin B6, and vitamin C. They also contain fiber, which helps with digestion. Walnuts are packed with omega-3 fatty acids, which are good for heart health. They also provide protein and fiber.
This bread is not gluten-free unless you use a gluten-free flour blend. It contains dairy from the butter and buttermilk, but you can make it dairy-free with the substitutions I mentioned earlier. It also contains nuts, so it’s not suitable for those with nut allergies.
I love that this bread feels indulgent but isn’t actually that bad for you. It’s made with real, whole ingredients, and it’s satisfying without being overly sweet. It’s the kind of treat you can feel good about eating for breakfast.
Conclusion
This perfectly moist banana walnut bread is everything I want in a quick bread. It’s tender, flavorful, and stays moist for days. The toasted walnuts add that perfect crunch, and the banana flavor is front and center without being overwhelming.
I’ve made this recipe more times than I can count, and it never lets me down. It’s become my go-to for using up overripe bananas, and it’s always a hit with everyone who tries it. Whether you’re baking for a special occasion or just because you have bananas that need using, this recipe delivers.
Don’t be afraid to make it your own. Add chocolate chips, experiment with spices, or try different nuts. The base recipe is solid, and it’s meant to be adapted. If you’re looking for another way to use up ripe bananas, this one-bowl chocolate zucchini banana bread is another favorite in my kitchen.
I’d love to hear how yours turns out. Leave a comment below and let me know what variations you tried. Did you add chocolate chips? Did you use pecans instead of walnuts? Did you double the recipe because one loaf just isn’t enough? Share your experience — I read every comment and I love hearing from you.
Happy baking, friends. Your kitchen is about to smell amazing.
Frequently Asked Questions
Can I use frozen bananas for this recipe?
Absolutely. Frozen bananas work great for banana bread. Thaw them completely before using, and drain off any excess liquid. They’ll be very soft and may not need much mashing. The flavor is actually more concentrated in frozen bananas, so your bread might be even more banana-y.
Why did my banana bread turn out dry?
Dry banana bread is usually caused by overmixing the batter or overbaking. Mix just until the flour disappears, and start checking for doneness at the 50-minute mark. Also, make sure you’re using very ripe bananas — they add moisture. If your bananas are only slightly ripe, you might need to add a tablespoon or two of yogurt or sour cream for extra moisture.
Can I make this recipe without walnuts?
Yes, absolutely. You can simply omit the walnuts, or substitute them with pecans, almonds, or chocolate chips. If you’re avoiding nuts altogether, try adding dried fruit like raisins or cranberries, or leave the bread plain. It will still be delicious.
How do I know when my banana bread is done?
Insert a toothpick or skewer into the center of the bread. If it comes out clean or with just a few moist crumbs, it’s done. If there’s wet batter on it, bake for another 5 minutes and check again. The bread should also be golden brown on top and pulling away slightly from the sides of the pan.
Can I double this recipe?
Yes, you can easily double this recipe. Use two 9×5-inch loaf pans and bake them at the same time. The baking time might be slightly longer since the oven will be fuller, so start checking at the 55-minute mark. You can also bake the batter in mini loaf pans or muffin tins for individual portions — just reduce the baking time accordingly.
Pin This Recipe!
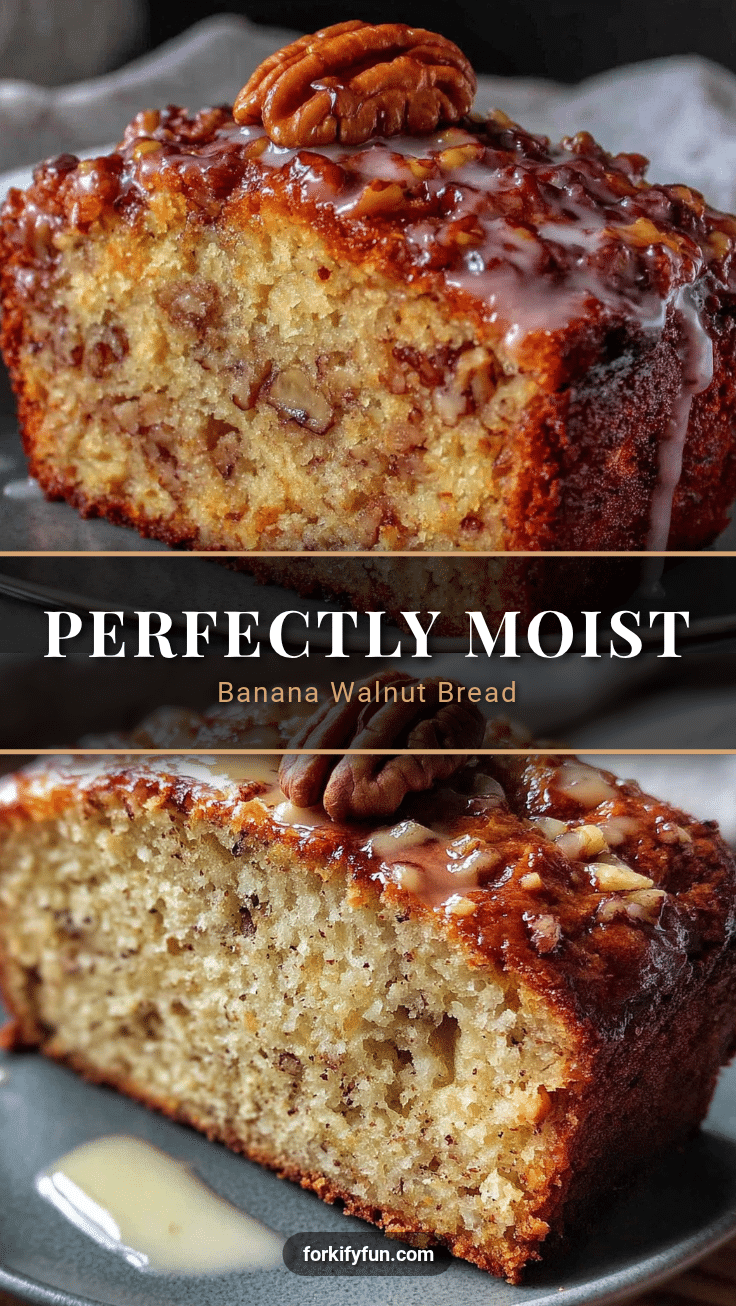
Perfectly Moist Banana Walnut Bread: Easy Homemade Recipe
This perfectly moist banana walnut bread is tender, flavorful, and stays moist for days. Toasted walnuts add crunch, and the banana flavor shines without being overwhelming.
- Prep Time: 15 minutes
- Cook Time: 55 minutes
- Total Time: 1 hour 10 minutes
- Yield: 12 servings 1x
- Category: Dessert
- Cuisine: American
Ingredients
- 1 ½ cups (188g) all-purpose flour
- 1 teaspoon baking soda
- ½ teaspoon salt
- ½ cup (113g) unsalted butter, softened
- ¾ cup (150g) granulated sugar
- 2 large eggs, room temperature
- 1 teaspoon vanilla extract
- 3 large ripe bananas, mashed (about 1 ½ cups)
- ¼ cup (60ml) buttermilk, room temperature
- 1 cup (120g) walnuts, chopped
Instructions
- Preheat your oven to 350°F (175°C). Position the rack in the center of the oven.
- Grease a 9×5-inch loaf pan with butter or cooking spray. Line with parchment paper for easy removal.
- Toast the chopped walnuts on a baking sheet for 5-7 minutes until fragrant and lightly golden. Let cool completely.
- In a medium bowl, mash the ripe bananas with a fork or potato masher until smooth with some small lumps. Set aside.
- In a large bowl, whisk together the flour, baking soda, and salt.
- In another large bowl, beat the softened butter and granulated sugar together until light and fluffy (2-3 minutes with a mixer).
- Beat in the eggs one at a time, then add the vanilla extract and mix until combined.
- Stir in the mashed bananas and buttermilk until just combined. The mixture may look slightly lumpy.
- Pour the wet ingredients into the dry ingredients. Fold gently with a rubber spatula or wooden spoon until just combined. Do not overmix.
- Gently fold in the toasted walnuts until evenly distributed.
- Pour the batter into the prepared loaf pan and spread evenly. Tap the pan on the counter to release air bubbles.
- Bake for 50-60 minutes, or until a toothpick inserted into the center comes out clean or with a few moist crumbs. If the top browns too quickly, tent with foil after 40 minutes.
- Let the bread cool in the pan for 10-15 minutes, then transfer to a wire rack to cool completely before slicing.
Notes
Use very ripe bananas (brown or black spots) for best sweetness and moisture. Toast walnuts for deeper flavor. Do not overmix the batter to avoid tough bread. Let bread cool completely before slicing. Store in an airtight container at room temperature for up to 4 days, or freeze for up to 3 months.
Nutrition
- Serving Size: 1 slice
- Calories: 280
- Sugar: 18
- Sodium: 220
- Fat: 14
- Saturated Fat: 6
- Carbohydrates: 36
- Fiber: 2
- Protein: 5
Keywords: banana bread, walnut bread, moist banana bread, easy banana bread, homemade banana bread, banana walnut bread


