Three hard-boiled eggs cracked in the pot before I even got them peeled. My four-year-old was crying because someone’s costume was “too scary,” and the store-bought veggie tray sat untouched on the counter like a sad, orange monument to my lack of planning. Halloween party was in forty minutes. I had a half-empty jar of mayonnaise, a bottle of paprika I couldn’t remember buying, and a sudden, desperate need for something that looked like I tried without actually trying. That’s when I spotted the black olives in the back of the fridge. And honestly? That’s when these Easy Spooky Spider Deviled Eggs were born.
I wasn’t trying to be clever. I was just out of time. I mashed the yolks, piled them high, and sliced those olives into what I hoped looked like leggy little arachnids. The kids stopped crying. The adults actually reached for them over the chips. By the end of the night, the platter was empty, and someone asked for the recipe—something that never happens when I panic-cook.
That’s the thing about this recipe. It’s not fussy. It’s not fancy. It’s just a classic, creamy deviled egg dressed up in its creepiest costume, and it takes maybe twenty minutes from start to finish. So if you’re staring down a Halloween party with zero time and a growing sense of dread, trust me—these little guys will save the day.
Why You’ll Love This Recipe
Let’s be real for a second. Halloween appetizers can be a total pain. You want something festive, but you also don’t want to spend three hours sculpting cheese into a pumpkin. These spider deviled eggs hit that sweet spot where spooky meets simple.
- Quick & Easy : From boiling eggs to final garnish, you’re looking at about 25 minutes. That includes cooling time. Honestly, if you already have hard-boiled eggs on hand, you can whip these up in under 10.
- Simple Ingredients : Eggs, mayo, mustard, paprika, and olives. That’s it. No weird specialty items, no last-minute grocery store runs for black food coloring or edible eyes.
- Perfect for Halloween Parties : These are the appetizer that disappears first. They’re creepy enough to fit the theme but familiar enough that even picky eaters grab one. Kids love them. Adults love them. Your mother-in-law who “doesn’t do Halloween” will eat three.
- Crowd-Pleaser : I’ve brought these to potlucks, school parties, and game day gatherings (just skip the spider legs for a non-spooky version). They always get the same reaction—surprise, then delight, then someone asking for the recipe. They pair perfectly with other finger foods like Easy Mummy Hot Dog Bites or a bowl of Creamy Buffalo Chicken Dip for a full spread.
- Unbelievably Delicious : Here’s the thing—the spider part is just decoration. Underneath that creepy-crawly exterior is a perfectly creamy, tangy, classic deviled egg. The olive adds a briny pop that actually complements the filling beautifully. It’s not just a gimmick. It’s genuinely good.
What makes this version different from other spooky egg recipes? It’s the olive placement. I figured out that slicing the olive into thin rings for legs and using a whole olive half for the body creates a spider that actually looks like a spider—not a sad blob with toothpicks sticking out. It’s a small detail, but it makes all the difference when you’re trying to impress a crowd of skeptical five-year-olds.
This is the recipe that makes you feel like a Halloween hero without the stress. And honestly, after the first bite, you’ll forget it’s supposed to be scary.
What Ingredients You Will Need
This recipe uses simple, everyday ingredients to deliver big Halloween flair without the fuss. Most of these are probably in your kitchen right now, which is exactly the point.
- 6 large eggs – The foundation of everything. Use large eggs for the best yolk-to-white ratio. Older eggs actually peel easier than fresh ones, so if you have eggs sitting in the fridge for a week, this is their moment to shine.
- 3 tablespoons mayonnaise – Adds creaminess and binds the filling. I prefer Hellmann’s or Duke’s for that classic tangy flavor, but any brand works. If you’re out, Greek yogurt makes a surprisingly good substitute (though the texture will be slightly lighter).
- 1 teaspoon yellow mustard – Gives the filling that signature yellow color and a subtle tang. Dijon mustard works too if you want a sharper flavor profile. Honestly, I’ve used spicy brown mustard in a pinch and it was delicious.
- 1 teaspoon white vinegar – This is my secret ingredient. It brightens the filling and cuts through the richness of the yolks. Don’t skip it—it makes a difference. Apple cider vinegar works as a substitute if that’s what you have.
- Salt and black pepper to taste – Season generously. Deviled eggs can taste flat without enough salt, so don’t be shy. I usually do about ¼ teaspoon salt and ⅛ teaspoon pepper.
- Paprika for garnish – Smoked paprika adds a deeper flavor, but regular sweet paprika gives that classic red speckle that looks so good on photos. I use smoked paprika because I like the extra layer of flavor, but either works beautifully.
- 1 can (6 ounces) black olives, drained – These are your spiders. Look for large, pitted black olives—the bigger the better. You’ll need about 12 whole olives for the bodies, plus extra for practice (because someone always eats a few).
That’s it. Seven ingredients, and you probably already have six of them. The only thing you might need to buy is the olives, and honestly, they’re cheap. This is not a recipe that requires a specialty grocery run or a second mortgage.
One quick note about the eggs: if you can find pasture-raised eggs with deep orange yolks, your filling will be richer and more vibrantly colored. It’s not necessary, but it does make the final dish look more appetizing. I’ve made these with standard grocery store eggs plenty of times, and they turn out great either way.
Equipment Needed
You don’t need fancy gadgets for this recipe. Here’s what you’ll need:
- Medium saucepan – For boiling the eggs. Any pot works, but one with a tight-fitting lid helps the steaming process.
- Mixing bowl – For mashing the yolks and mixing the filling.
- Fork or potato masher – A fork works perfectly fine, but a potato masher makes quick work of those yolks. I’ve used both, and honestly, the fork gives you more control over the texture.
- Cutting board and sharp knife – For slicing olives. A dull knife will squish the olives, so use something sharp.
- Spoon or piping bag – A small spoon works great for filling the eggs. A piping bag with a star tip makes them look fancy, but it’s totally optional. I usually just use a spoon because fewer dishes to wash.
- Serving platter – Something flat that shows off your spooky spiders. A dark-colored platter makes the white eggs pop.
If you don’t have a piping bag, just snip the corner off a zip-top bag. That’s what I do when I’m feeling fancy, and it works like a charm. No need to buy specialized equipment for a recipe this simple.
Preparation Method
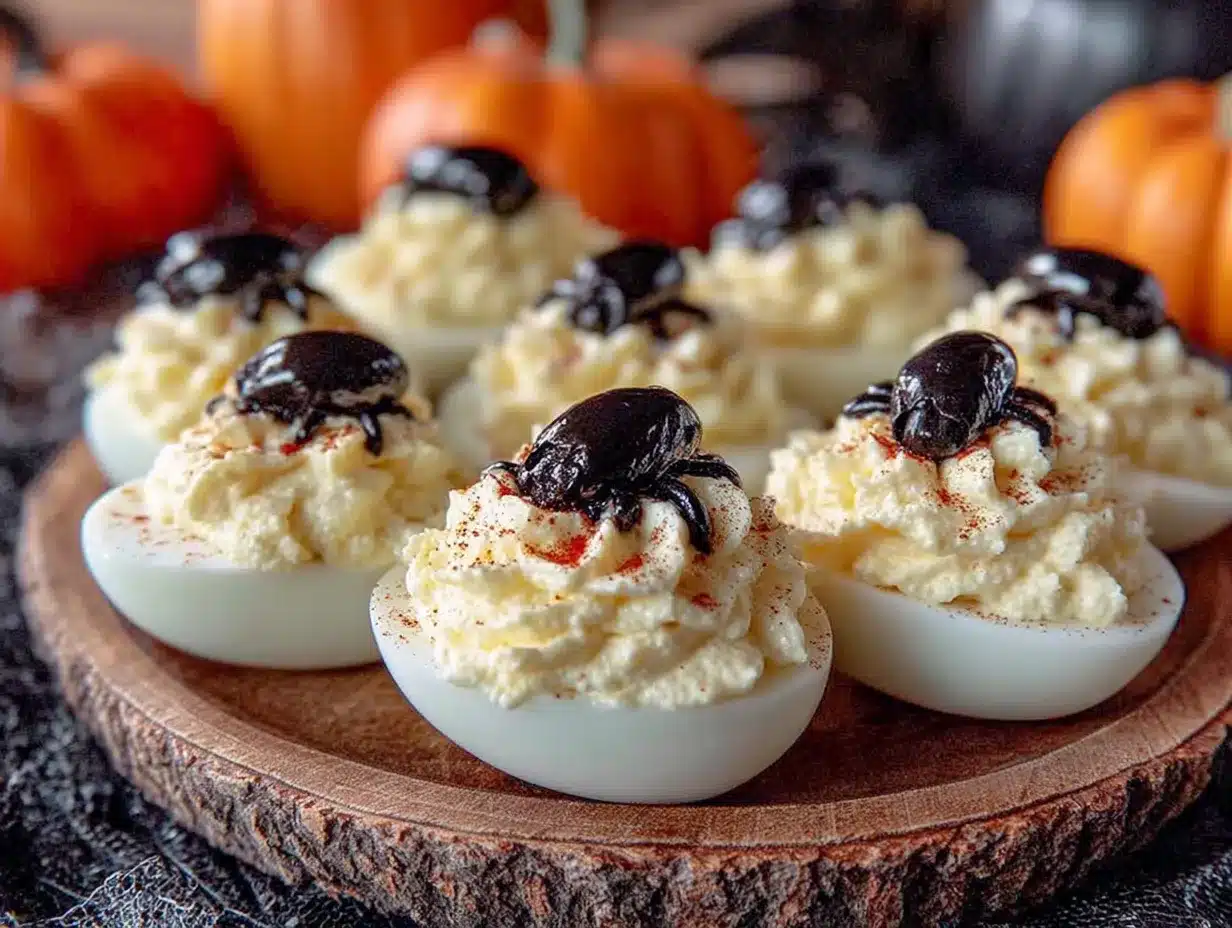
Let’s get these spooky guys made. I’ll walk you through every step, including the little tricks I’ve learned from making these about twenty times.
Step 1: Hard-Boil the Eggs
Place your 6 eggs in a single layer in a medium saucepan. Cover them with cold water by about an inch. Bring the water to a rolling boil over high heat. As soon as it reaches a full boil, turn off the heat, cover the pot, and let it sit for exactly 10 minutes. This method gives you perfectly cooked yolks—no green ring, no rubbery whites.
Step 2: Ice Bath
While the eggs are sitting, fill a bowl with ice and cold water. After the 10 minutes are up, transfer the eggs to the ice bath using a slotted spoon. Let them chill for at least 5 minutes. This stops the cooking process and makes the eggs much easier to peel. I’ve skipped this step when I was in a hurry, and I regretted it every single time.
Step 3: Peel the Eggs
Gently tap each egg on the counter to crack the shell all over, then roll it between your palms to loosen the shell. Start peeling from the wider end (where the air pocket is). Running the eggs under cold water while you peel helps remove stubborn shell bits. If you’re struggling, try peeling them under the water—it really works.
Step 4: Slice the Eggs in Half
Once peeled, slice each egg lengthwise with a sharp knife. Wipe the knife clean between cuts for neat edges. Gently pop out the yolks into a mixing bowl. Arrange the white halves on your serving platter, cut side up.
Step 5: Make the Filling
Add 3 tablespoons mayonnaise, 1 teaspoon yellow mustard, and 1 teaspoon white vinegar to the yolks. Mash everything together with a fork until smooth. Season with salt and pepper to taste. Taste it—this is important. Adjust the seasoning if needed. The filling should be creamy, tangy, and well-seasoned.
Step 6: Fill the Egg Whites
Spoon the filling into the egg whites, mounding it slightly. Alternatively, transfer the filling to a piping bag or zip-top bag with a corner snipped off and pipe it in for a prettier presentation. I usually pipe them because it looks more polished, but spooning works perfectly fine.
Step 7: Create the Spiders
Drain your black olives and pat them dry with a paper towel. For each spider, you’ll need one whole olive for the body and half an olive sliced into legs. Slice one olive in half crosswise, then cut each half into thin strips (about 4-5 strips per half). These are your spider legs. Place a whole olive on top of each deviled egg, slightly off-center. Arrange 4-5 olive leg strips on each side of the body, pressing them gently into the filling so they stay in place. The legs should curve outward slightly for a more realistic spider look.
Step 8: Garnish and Serve
Lightly sprinkle paprika over the exposed filling (avoid the olive spiders if you want them to stay dark and visible). Serve immediately or refrigerate until ready to serve. These look especially creepy on a dark platter with some fake spiderweb decorations around the edges.
A quick note on timing: the entire process takes about 25 minutes, including boiling and cooling. The eggs can be boiled and peeled a day ahead, which makes party day assembly a breeze. I often prep the filling and slice the olives the night before, then just assemble right before guests arrive.
Cooking Tips & Techniques
I’ve made these eggs for three Halloweens now, and I’ve learned a few things the hard way. Here are my best tips.
Perfect hard-boiled eggs every time: The 10-minute steam method I described above is foolproof. But if you want extra insurance, add a teaspoon of baking soda to the boiling water. It raises the pH of the egg whites, making them less likely to stick to the shell. I do this every time now, and I rarely lose chunks of egg white during peeling.
Olive prep hack: Slice the olives while they’re still cold from the fridge. Cold olives hold their shape better and are less likely to squish under your knife. If you’re making a lot of spiders, slice all the olive legs first, then assemble everything at once. It’s more efficient than going one spider at a time.
Keep the filling stable: If your filling seems too runny, add a little more yolk (if you have extra) or a teaspoon of breadcrumbs to thicken it. Too thick? Add a drop of milk or another teaspoon of mayo. The perfect consistency is like a thick paste that holds its shape when piped.
My biggest failure: The first time I made these, I used sliced black olives for the bodies too. They looked like sad, flat blobs. Whole olives are non-negotiable for the body. Trust me on this one.
Timing strategy: Boil and peel your eggs up to two days in advance. Store them unpeeled in the fridge for best results. The filling can be made a day ahead and stored in a piping bag in the fridge. Assemble everything within an hour of serving for the freshest look.
Variations & Adaptations
This recipe is super flexible. Here are some ways to change it up.
Dietary Variations:
– Keto/Low-Carb: These are already keto-friendly! Just use full-fat mayo and skip any sweetened mustard. The olives add healthy fats, making this a perfect low-carb party snack.
– Gluten-Free: Naturally gluten-free, as long as your mustard and mayo are certified gluten-free. Most are, but always check the label.
– Dairy-Free: These are dairy-free as written. Just ensure your mayo doesn’t contain any dairy derivatives.
Flavor Twists:
– Spicy Spider: Add a dash of cayenne pepper or hot sauce to the filling. A little sriracha mixed in gives it a nice kick that pairs surprisingly well with the briny olives.
– Bacon Spider: Crumble crispy bacon over the filling before adding the olive spider. Because everything is better with bacon, including Halloween appetizers.
– Herb Garden Spider: Mix fresh dill or chives into the filling. The freshness cuts through the richness and adds a layer of complexity.
Other Spooky Shapes:
Use the same olive technique to create mini spiders on witch finger cookies or as decorations on a spiderweb cookie cake. The olive spiders are surprisingly versatile and add a fun touch to any Halloween spread.
My favorite variation: I once made these with smoked paprika mixed into the filling itself, not just sprinkled on top. The smoky flavor paired with the briny olives was incredible. I’ve never gone back to plain paprika since.
Serving & Storage Suggestions
These spider deviled eggs are best served chilled or at room temperature. I prefer them straight from the fridge because the filling holds its shape better, but they’re delicious either way.
Presentation tips: Arrange the eggs on a dark-colored platter to make the white eggs and black spiders pop. Add some fake spiderweb decorations around the edges, or scatter a few loose olive slices to look like baby spiders crawling away. Kids love this touch.
Pairing suggestions: These pair beautifully with other Halloween finger foods. Serve them alongside mummy hot dog bites for a savory spread, or balance the plate with something sweet like white chocolate candy corn bark for dessert. A bowl of creamy chicken and wild rice soup on the side makes it a full meal for Halloween night.
Storage: Store leftover deviled eggs in an airtight container in the refrigerator for up to 2 days. The olive spiders may slide around a bit, so place them carefully and don’t stack the eggs. I don’t recommend freezing deviled eggs—the texture of the filling becomes grainy and watery upon thawing.
Reheating: Don’t. These are served cold. If you’ve refrigerated them, just let them sit at room temperature for 10 minutes before serving to take the chill off.
Flavor development: These actually taste better after a few hours in the fridge. The flavors meld together, and the filling becomes even creamier. If you can, make them a few hours ahead of your party and let them rest in the fridge.
Nutritional Information & Benefits
Here’s the approximate nutritional breakdown per spider deviled egg (1 egg half with filling and olive spider):
- Calories: 85
- Protein: 6g
- Fat: 6g
- Carbohydrates: 1g
- Fiber: 0g
- Sugar: 0g
Health Benefits:
Eggs are a fantastic source of high-quality protein and contain all nine essential amino acids. They’re rich in choline, which supports brain health, and contain lutein and zeaxanthin for eye health. The olives add healthy monounsaturated fats and antioxidants. This is actually a pretty nutrient-dense snack, especially compared to the typical Halloween candy lineup.
Dietary Considerations:
These are naturally gluten-free, low-carb, keto-friendly, and dairy-free. The main allergens are eggs and (rarely) mustard. If you’re serving a crowd with allergies, label them clearly.
My perspective: I love that these feel indulgent without being junk food. They’re protein-packed and satisfying, which means guests fill up on something nutritious before diving into the candy bowl. It’s a win-win in my book.
Conclusion
These Easy Spooky Spider Deviled Eggs are proof that Halloween appetizers don’t have to be complicated to be impressive. With just seven ingredients and about 25 minutes, you can create something that looks like it took hours of effort. The creamy, tangy filling paired with the briny olive spiders is genuinely delicious, and the presentation is guaranteed to get oohs and ahhs from kids and adults alike.
I love this recipe because it’s the kind of thing that makes you look like a Halloween hero without the stress. It’s forgiving, flexible, and always a hit. Whether you’re hosting a big party or just want something fun for the family on Halloween night, these little spiders deliver.
Now I want to hear from you! Have you made these? Did your kids love them? Did you try a fun variation? Drop a comment below and let me know how they turned out. And if you share a photo on social media, tag me—I love seeing your spooky creations. Happy Halloween, and happy cooking!
Frequently Asked Questions
Can I make these spider deviled eggs ahead of time?
Absolutely! You can boil and peel the eggs up to two days in advance. The filling can be made a day ahead and stored in the fridge. Assemble everything within an hour of serving for the best presentation.
How do I keep the olive spiders from falling off?
Press the olive legs gently into the filling so they’re partially embedded. The filling acts like glue. If your filling is too firm, let the eggs sit at room temperature for a few minutes to soften slightly before adding the olives.
Can I use a different type of olive?
Large, pitted black olives work best because they’re dark and look like spiders. Green olives would work visually but have a different flavor profile. Kalamata olives are too soft and tend to fall apart when sliced.
How long do these last in the fridge?
Stored in an airtight container, these deviled eggs will keep for up to 2 days. After that, the filling may start to weep and the whites can become rubbery. I recommend making them fresh for best quality.
Can I make these without the spider decorations?
Of course! Omit the olives and you have classic deviled eggs that are perfect for any occasion. Sprinkle with paprika and fresh chives for a beautiful presentation that works year-round.
Pin This Recipe!
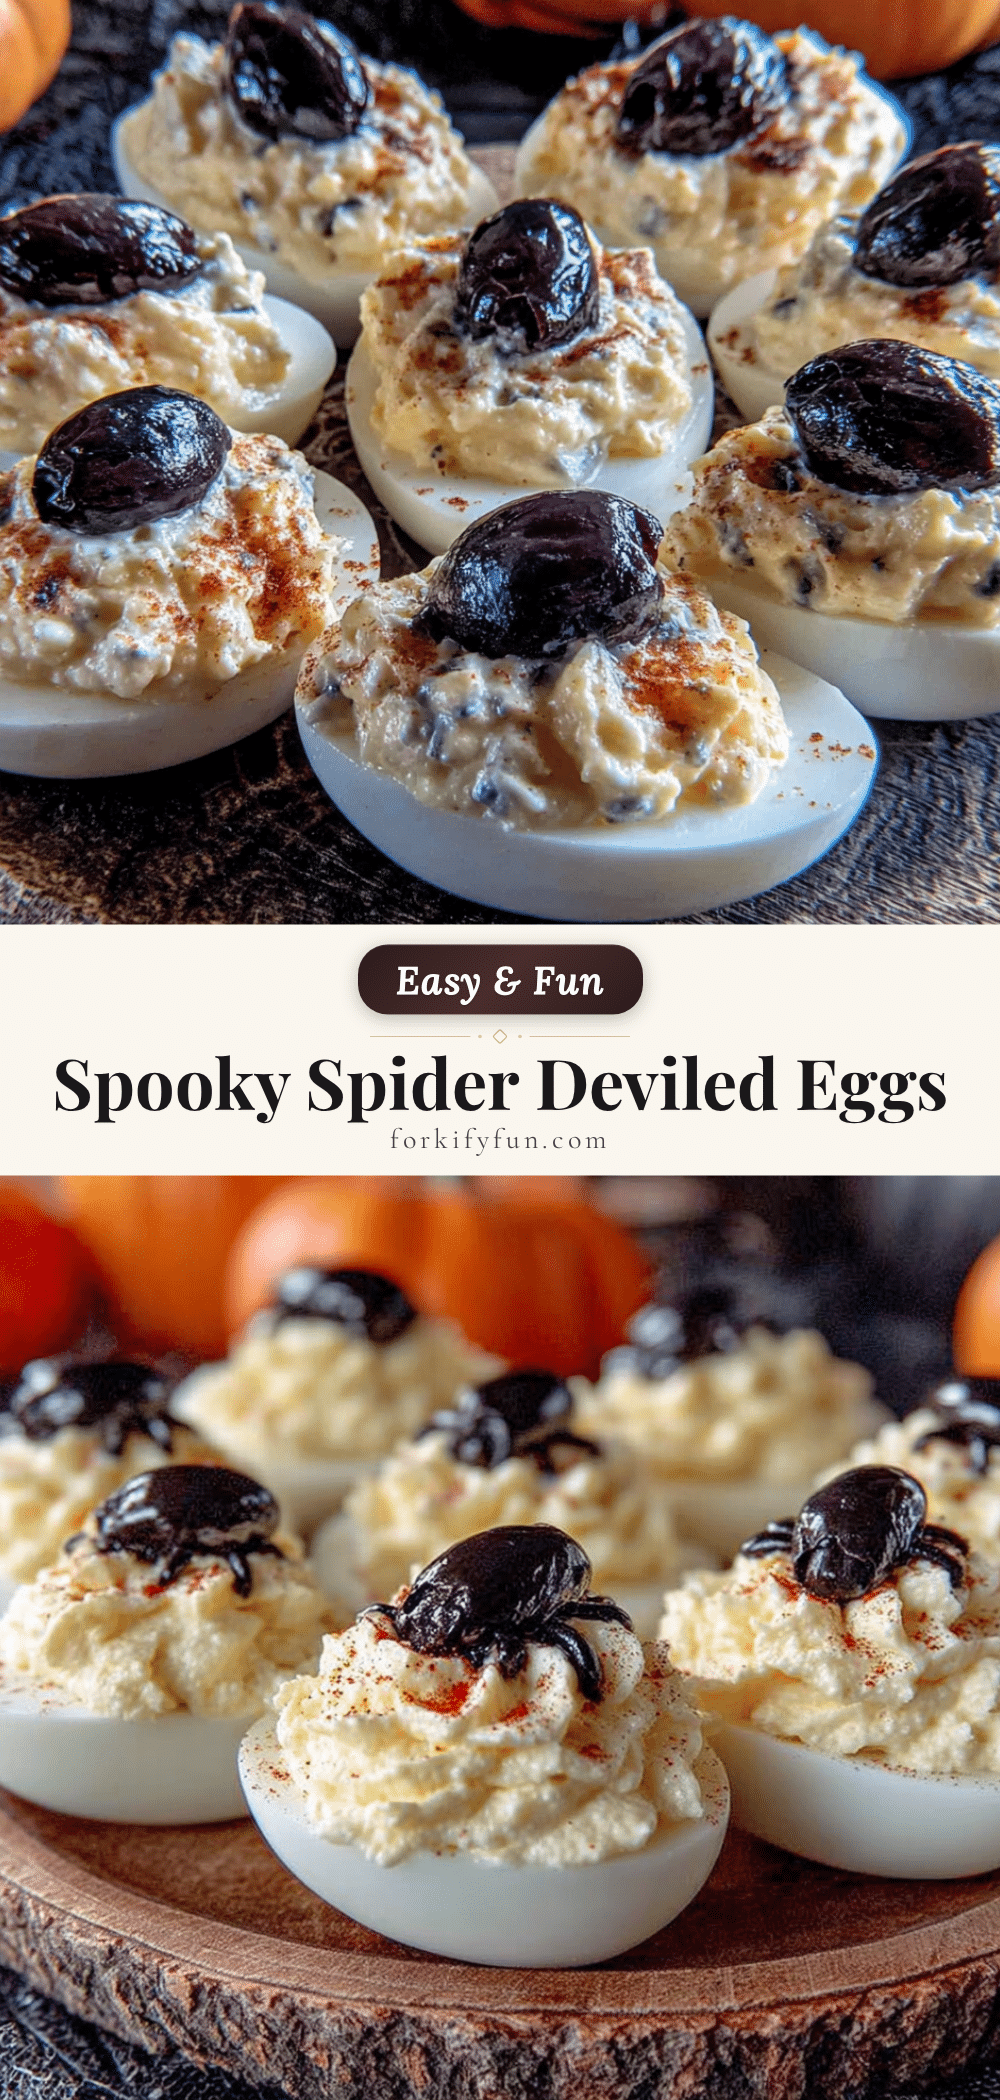
Easy Spooky Spider Deviled Eggs: Best Halloween Appetizer
These Easy Spooky Spider Deviled Eggs are a quick and fun Halloween appetizer made with simple ingredients. Creamy deviled eggs topped with olive spiders are a creepy-crowd-pleaser that takes only 25 minutes to make.
- Prep Time: 15 minutes
- Cook Time: 10 minutes
- Total Time: 25 minutes
- Yield: 12 servings 1x
- Category: Appetizer
- Cuisine: American
Ingredients
- 6 large eggs
- 3 tablespoons mayonnaise
- 1 teaspoon yellow mustard
- 1 teaspoon white vinegar
- Salt and black pepper to taste
- Paprika for garnish
- 1 can (6 ounces) black olives, drained
Instructions
- Place 6 eggs in a single layer in a medium saucepan. Cover with cold water by about an inch. Bring to a rolling boil over high heat. As soon as it reaches a full boil, turn off the heat, cover, and let sit for exactly 10 minutes.
- While eggs are sitting, fill a bowl with ice and cold water. After 10 minutes, transfer eggs to the ice bath using a slotted spoon. Let chill for at least 5 minutes.
- Gently tap each egg on the counter to crack the shell all over, then roll between palms to loosen. Peel starting from the wider end. Run under cold water while peeling if needed.
- Slice each peeled egg lengthwise with a sharp knife. Pop out yolks into a mixing bowl. Arrange white halves on a serving platter, cut side up.
- Add 3 tablespoons mayonnaise, 1 teaspoon yellow mustard, and 1 teaspoon white vinegar to the yolks. Mash together with a fork until smooth. Season with salt and pepper to taste.
- Spoon or pipe the filling into the egg whites, mounding slightly.
- Drain black olives and pat dry. For each spider, use one whole olive for the body. Slice another olive in half crosswise, then cut each half into thin strips (4-5 strips per half) for legs. Place a whole olive on top of each deviled egg, slightly off-center. Arrange 4-5 olive leg strips on each side of the body, pressing gently into the filling.
- Lightly sprinkle paprika over the exposed filling. Serve immediately or refrigerate until ready to serve.
Notes
Boil and peel eggs up to two days in advance. The filling can be made a day ahead and stored in a piping bag in the fridge. Assemble within an hour of serving for best presentation. Press olive legs gently into the filling so they stay in place. For perfect hard-boiled eggs, add a teaspoon of baking soda to the boiling water to make peeling easier. These taste even better after a few hours in the fridge as flavors meld.
Nutrition
- Serving Size: 1 deviled egg half w
- Calories: 85
- Sodium: 180
- Fat: 6
- Saturated Fat: 1.5
- Carbohydrates: 1
- Protein: 6
Keywords: Halloween appetizer, deviled eggs, spider deviled eggs, easy Halloween recipe, spooky appetizer, party food, finger food