My nephew asked for this spiderweb cookie cake three weekends in a row, and honestly, I didn’t even see it coming. He’s usually a candy bar kid—give him a bag of sour gummy worms and he’s set for the afternoon. But the first time I pulled this giant, chocolate-studded cookie cake out of the oven with its white chocolate web stretched across the top, he stopped mid-cartoon and just stared at it. Then he asked for a second slice before finishing the first. That never happens.
I had been testing Halloween desserts for the blog, trying to find something that felt festive without requiring a piping degree or a trip to a specialty baking store. Everything I found was either too fussy or just not impressive enough for a Halloween party table. I wanted something that looked like it took hours but actually came together in about forty minutes. Something that made people say “whoa” when they walked into the kitchen.
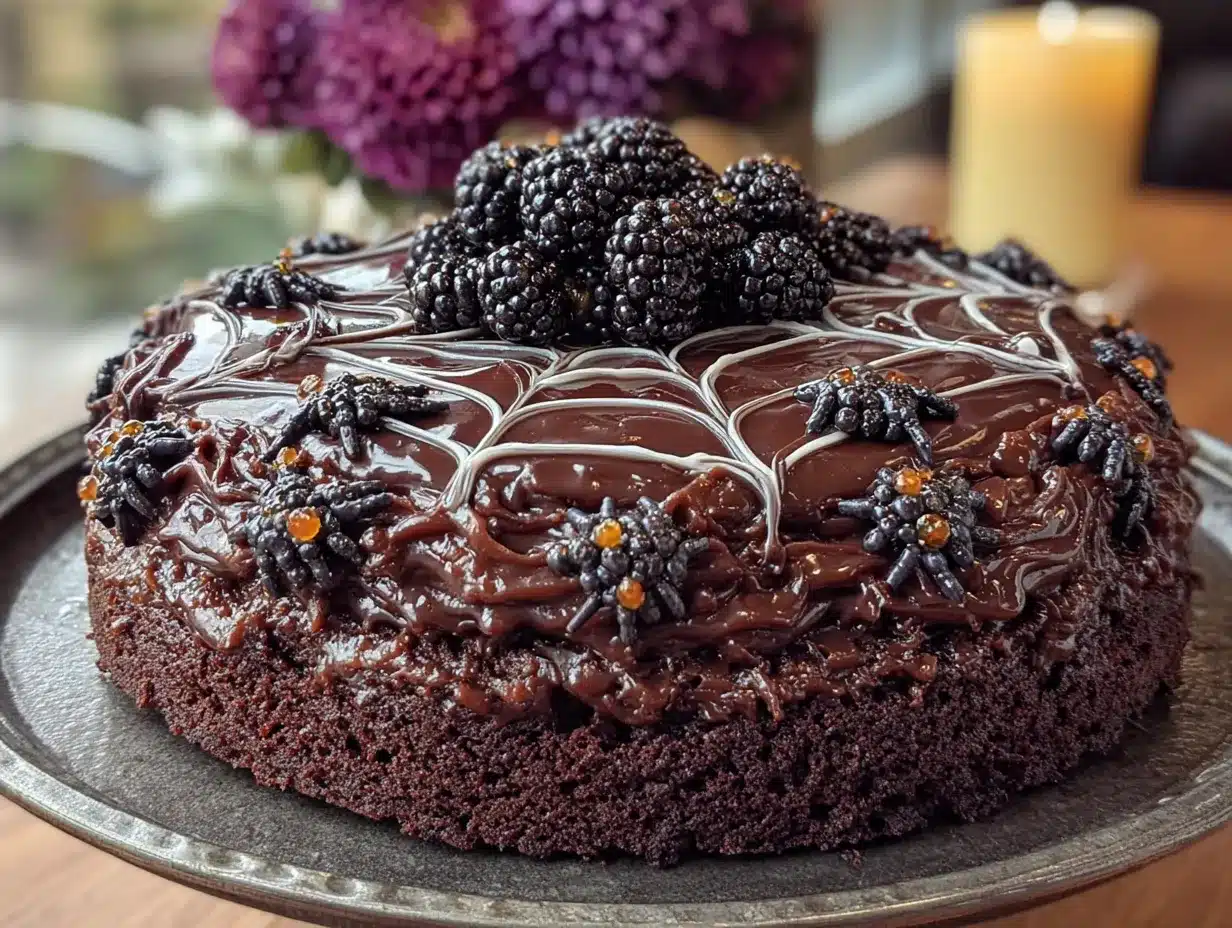
So I took my go-to soft-batch chocolate chip cookie recipe—the one I’ve been tweaking for years—and baked it into a single giant skillet-sized round. Then I drizzled a spiderweb pattern on top with melted white chocolate. It looked so good I almost didn’t want to cut into it. Almost. The combination of the crackly, slightly crisp edges, the gooey center loaded with dark chocolate chunks, and that dramatic web on top turned out to be the kind of dessert that makes everyone at the party ask for the recipe before they’ve even finished chewing. And honestly? That’s exactly what you want from a Halloween treat.
Why You’ll Love This Spooky Spiderweb Halloween Cookie Cake
This isn’t just another Halloween cookie recipe. It’s the one that actually delivers on both looks and taste—no compromises. Here’s why it works so well:
- Quick & Easy: From mixing bowl to decorated cookie cake in under an hour. No chilling the dough, no complicated decorating tools. Just simple steps that even beginner bakers can nail on the first try.
- Simple Ingredients: You probably have most of these in your pantry right now. Butter, sugar, flour, eggs, vanilla, chocolate chips. The only special purchase is a bar of white chocolate for the web, and that’s easy to find at any grocery store.
- Perfect for Halloween Parties: This cookie cake is a showstopper. It sits in the center of the dessert table and draws people in. Kids love the spiderweb design, and adults appreciate that it’s not overly sweet or artificial-tasting.
- Crowd-Pleaser: I’ve brought this to three different gatherings now, and every single time, someone asks for the recipe. It’s familiar enough to satisfy cookie lovers but unique enough to feel special for the holiday.
- Unbelievably Delicious: The texture is what gets people. The edges are slightly crisp and golden, while the center stays soft and almost underbaked. The dark chocolate chunks melt into pockets of richness, and the white chocolate web adds a sweet, creamy contrast that makes every bite interesting.
What makes this recipe different from the rest is the technique. I use a combination of melted butter and a slightly higher brown sugar ratio to get that chewy, caramel-like texture without needing to chill the dough. And the spiderweb pattern isn’t just for show—it adds a layer of white chocolate that complements the dark chocolate beautifully. This isn’t just another version of a chocolate chip cookie. It’s the best version, dressed up for Halloween.
What Ingredients You Will Need
This recipe relies on straightforward, pantry-friendly ingredients to create something that looks far more complicated than it actually is. Each component plays a specific role in building texture, flavor, or visual impact. Here’s what you’ll need and why each one matters.
For the Cookie Cake Base
- Unsalted butter, melted (1 cup / 2 sticks / 226g): Melting the butter instead of creaming it with sugar gives the cookie a denser, chewier texture. It also makes the dough come together faster—no waiting for butter to soften. I use Land O’Lakes or Kerrygold for the best flavor.
- Light brown sugar, packed (1 cup / 200g): Brown sugar adds moisture and a subtle molasses flavor that makes the cookie taste caramelized. It’s the key to that soft, chewy center.
- Granulated sugar (½ cup / 100g): White sugar helps the cookie spread slightly and contributes to those crispy edges. The combination of both sugars gives you the best of both worlds.
- Large eggs (2, room temperature): Eggs bind the dough and add richness. Room temperature eggs incorporate more evenly into the melted butter, so don’t skip letting them sit out for 15 minutes.
- Vanilla extract (2 teaspoons): Pure vanilla extract makes a noticeable difference. Imitation vanilla works in a pinch, but the real stuff adds depth that complements the chocolate.
- All-purpose flour (2 ¼ cups / 280g): Standard all-purpose flour gives the cookie structure without making it tough. Spoon and level your flour—scooping directly from the bag can pack in too much and make the cookie dry.
- Baking soda (1 teaspoon): This helps the cookie spread and rise slightly. Make sure it’s fresh—test it by dropping a pinch into vinegar; it should bubble vigorously.
- Salt (½ teaspoon): Salt balances the sweetness and enhances the chocolate flavor. I use fine sea salt for even distribution.
- Dark chocolate chunks or chips (1 ½ cups / 255g): I prefer dark chocolate (60-70% cacao) because it doesn’t make the cookie overly sweet. Ghirardelli or Guittard chips work well. You can also chop a high-quality dark chocolate bar for bigger, more irregular chunks.
For the Spiderweb Decoration
- White chocolate melting wafers or chopped white chocolate (½ cup / 85g): Melting wafers are the easiest option because they don’t require tempering. If using a white chocolate bar, chop it finely so it melts evenly. Ghirardelli white chocolate melting wafers are my go-to.
- Coconut oil or vegetable shortening (½ teaspoon): This is optional but helps thin the white chocolate to a drizzling consistency. It also prevents the chocolate from seizing if it gets too hot.
Ingredient Selection Tips: For the best texture, use a good-quality dark chocolate bar and chop it yourself. Pre-made chips often contain stabilizers that prevent them from melting as smoothly. If you’re using chocolate chips, look for brands that list cocoa butter as an ingredient rather than palm oil. For the white chocolate, avoid “white morsels” that are actually vanilla-flavored candy coating—they don’t melt as smoothly and have a waxy texture. Real white chocolate contains cocoa butter and will give you a creamier, more authentic flavor.
Substitution Guidance: You can swap the dark chocolate for semi-sweet or milk chocolate if you prefer a sweeter cookie. For a dairy-free version, use vegan butter sticks and dairy-free chocolate chips. The white chocolate web is harder to replace, but you can skip it entirely and just dust the cookie with powdered sugar for a “ghostly” look. If you’re gluten-free, substitute a 1:1 gluten-free baking flour blend—I’ve had good results with King Arthur Measure for Measure.
Equipment Needed
You don’t need a professional bakery setup for this recipe. Here’s what you’ll actually use:
- 10-inch cast iron skillet or 9-inch round cake pan: A cast iron skillet gives you those gorgeous golden edges and holds heat beautifully. If you don’t have one, a standard round cake pan works perfectly—just grease it well.
- Large mixing bowl: For combining the wet and dry ingredients. Any large bowl will do.
- Whisk and rubber spatula: The whisk is for mixing the wet ingredients; the spatula is for folding in the chocolate chunks and scraping the bowl clean.
- Measuring cups and spoons: Accurate measurements matter in baking. Use dry measuring cups for flour and sugar, and liquid measuring cups for the melted butter.
- Parchment paper: If you’re using a cake pan, lining it with parchment makes lifting the cookie cake out much easier.
- Small microwave-safe bowl: For melting the white chocolate. Glass or ceramic works best.
- Piping bag or zip-top bag: For drizzling the spiderweb. A small zip-top bag with the corner snipped off is the easiest option—no fancy piping tips needed.
- Toothpick or skewer: For dragging the spiderweb pattern through the white chocolate. A wooden toothpick works perfectly.
Budget-Friendly Alternatives: Don’t have a cast iron skillet? A 9-inch pie plate works in a pinch, though the cookie will be slightly thicker. No piping bag? A sturdy zip-top bag is actually better because you can control the flow more easily. I’ve made this recipe with a cheap cake pan from the dollar store, and it turned out great—just keep an eye on the baking time since thinner pans heat up faster.
Preparation Method
Let’s walk through this step by step. The whole process takes about 45 minutes from start to finish, and most of that is hands-off baking time.
- Preheat your oven to 350°F (175°C). Position the rack in the center of the oven. If you’re using a cast iron skillet, place it in the oven while it preheats—this helps the edges start cooking immediately when you add the dough.
- Melt the butter. In a large microwave-safe bowl, melt 1 cup of unsalted butter in 30-second intervals, stirring between each, until completely liquid. Let it cool for 2-3 minutes—you don’t want it hot enough to cook the eggs. It should be warm but not steaming.
- Mix the sugars and butter. Add 1 cup packed light brown sugar and ½ cup granulated sugar to the melted butter. Whisk vigorously for about a minute until the mixture looks smooth and slightly thickened. This step helps dissolve the sugar and creates that shiny, crackly top.
- Add the eggs and vanilla. Crack 2 large eggs into the butter-sugar mixture. Add 2 teaspoons of vanilla extract. Whisk until everything is fully combined and the mixture looks pale and creamy, about 30 seconds. Don’t overmix at this stage—just until the eggs are incorporated.
- Combine the dry ingredients. In a separate bowl, whisk together 2 ¼ cups all-purpose flour, 1 teaspoon baking soda, and ½ teaspoon salt. Make sure there are no lumps. The baking soda should be evenly distributed through the flour.
- Fold the dry ingredients into the wet. Add the flour mixture to the wet ingredients in two additions, folding gently with a rubber spatula after each. Stop mixing as soon as you no longer see streaks of flour. Overmixing develops gluten and makes the cookie tough.
- Add the chocolate chunks. Fold in 1 ½ cups of dark chocolate chunks or chips. Reserve about ¼ cup to press into the top of the dough later—this makes the cookie look extra loaded with chocolate.
- Prepare your pan. If using a cast iron skillet, carefully remove it from the oven (it’s hot!) and grease it with butter or non-stick spray. If using a cake pan, line the bottom with parchment paper and grease the sides. The parchment makes it much easier to lift the cookie cake out later.
- Press the dough into the pan. Transfer the dough to your prepared pan. Use your hands or the back of a spatula to press it into an even layer. It should be about ¾-inch thick. Press the reserved chocolate chunks into the top of the dough so they’re visible after baking.
- Bake for 22-26 minutes. The edges should be golden brown and set, but the center should still look slightly soft and underdone. A toothpick inserted near the center should come out with a few moist crumbs attached—not wet batter. If you overbake it, the cookie will be dry instead of gooey.
- Cool completely in the pan. This is important. Let the cookie cake cool in the pan for at least 30 minutes. The center will continue to set as it cools. If you try to decorate it while it’s warm, the white chocolate will melt and slide right off.
- Make the spiderweb. Place ½ cup white chocolate melting wafers in a small microwave-safe bowl. Microwave in 20-second intervals, stirring after each, until smooth. If the chocolate seems too thick, stir in ½ teaspoon of coconut oil. Transfer the melted white chocolate to a small piping bag or a zip-top bag with a tiny corner snipped off.
- Pipe the web. Starting from the center of the cookie cake, pipe a spiral of white chocolate working outward. It doesn’t have to be perfect—just a continuous line from the middle to the edge. Then, using a toothpick or skewer, drag lines from the center outward through the spiral, like you’re drawing spokes on a wheel. This creates the classic spiderweb pattern. Wipe the toothpick clean between each drag for the cleanest lines.
- Let the web set. Allow the white chocolate to harden completely before slicing, about 15-20 minutes at room temperature. If you’re in a hurry, pop the pan in the fridge for 10 minutes.
Sensory Cues: When you whisk the melted butter and sugars, the mixture should look like wet sand—grainy but glossy. When you add the eggs, the batter should become smooth and almost pourable. The finished dough should be thick but scoopable, not stiff. During baking, your kitchen will smell like toasty butter and vanilla. The edges will turn a deep golden brown while the center stays pale and puffy—that’s exactly what you want.
Cooking Tips & Techniques
I’ve made this cookie cake at least a dozen times, and I’ve learned a few things the hard way. Here’s what I wish someone had told me:
Don’t overbake it. This is the most common mistake. You want to pull the cookie cake out when the center still looks slightly underdone. It will continue to bake from the residual heat of the pan as it cools. If you wait until the center looks fully set, you’ll end up with a dry, crumbly cookie instead of a soft, gooey one. Trust the jiggle.
Use a light hand with the flour. Scooping flour directly from the bag with your measuring cup can pack in up to 25% more flour than the recipe calls for. Instead, spoon the flour into your measuring cup and level it off with a knife. This small step makes a huge difference in texture.
Let the butter cool before adding eggs. I once added eggs to butter that was still hot, and the eggs started to scramble in the bowl. Not a disaster, but it left little cooked egg bits in the dough. Let the melted butter sit for a few minutes until it’s warm but not hot to the touch.
Press chocolate chunks into the top. This is a pro move. If you just fold all the chocolate into the dough, most of it will sink to the bottom during baking. Reserving a handful to press into the surface ensures every slice has visible chocolate on top. It also makes the cookie look more appealing.
Use a toothpick for the web, not a knife. The first time I tried making a spiderweb, I used a butter knife to drag the lines. It was too thick and messy. A toothpick gives you thin, precise lines that look much more delicate and professional. Wipe it clean between each drag for the best results.
Multitask wisely. While the cookie cake is baking and cooling, you can melt the white chocolate and prepare your piping bag. This keeps the process flowing smoothly and means you’re not scrambling at the end.
Variations & Adaptations
This recipe is flexible enough to adapt for different tastes, dietary needs, and occasions. Here are a few ways to change it up:
Gluten-Free Version: Substitute the all-purpose flour with a 1:1 gluten-free baking flour blend. I’ve tested this with King Arthur Measure for Measure, and it works beautifully. The texture is slightly more tender, but the cookie still holds together well. Add an extra tablespoon of milk if the dough seems too dry.
Dairy-Free Version: Use vegan butter sticks (I like Miyoko’s or Country Crock Plant Butter) and dairy-free chocolate chips. For the white chocolate web, look for dairy-free white chocolate chips or make a simple glaze with powdered sugar and plant-based milk instead.
Halloween Candy Twist: Swap half the dark chocolate chunks for chopped Halloween candy bars—Reese’s Pieces, chopped Snickers, or candy corn. The colors add a festive touch, and the different textures make every bite a surprise.
Peanut Butter Spiderweb: Instead of white chocolate, melt ½ cup of peanut butter chips for the web. The peanut butter flavor pairs beautifully with the chocolate cookie base, and it gives the web a slightly different color and texture. Just be aware that peanut butter chips don’t thin out as much as white chocolate, so the lines will be thicker.
Individual Cookie Cups: Press the dough into a greased muffin tin instead of a skillet. Bake for 12-14 minutes, then decorate each mini cookie with its own spiderweb. These are perfect for Halloween party favor bags or for kids who want their own personal cookie.
Spooky Color Addition: Add a few drops of orange or black food coloring to the dough before adding the chocolate chunks. A little goes a long way—start with 2-3 drops and mix until the color is evenly distributed. This makes the cookie cake even more Halloween-themed without affecting the flavor.
Serving & Storage Suggestions
This cookie cake is best served slightly warm, when the chocolate chunks are still soft and the edges have a gentle crunch. Let it cool completely after decorating, then reheat individual slices in the microwave for 10-15 seconds if you want that fresh-from-the-oven experience.
Presentation Ideas: Place the skillet or cake pan on a wooden board or a Halloween-themed platter. Add a few fake spiders around the edge for a fun, spooky touch. You can also dust the edges with a little powdered sugar to look like “ghostly dust.” For a party, set out small plates and forks so guests can serve themselves.
Complementary Dishes: This cookie cake pairs beautifully with a scoop of vanilla bean ice cream or a dollop of freshly whipped cream. For a Halloween-themed spread, serve it alongside creamy no-churn salted caramel ice cream for an indulgent dessert duo. If you’re hosting a fall gathering, a warm mug of spiced apple cider or hot chocolate balances the richness perfectly.
Storage Instructions: Store leftover cookie cake in an airtight container at room temperature for up to 3 days. Place a piece of bread in the container to help maintain moisture—the bread will absorb excess air and keep the cookie soft. Change the bread every day if you’re storing it longer.
Freezer Instructions: You can freeze the baked, undecorated cookie cake for up to 3 months. Wrap it tightly in plastic wrap, then in a layer of aluminum foil. Thaw at room temperature, then decorate with the white chocolate web fresh. Do not freeze the cookie after decorating—the white chocolate will discolor and develop a grainy texture.
Reheating Tips: For a single slice, microwave for 10-15 seconds. For the whole cookie cake, warm it in a 300°F oven for 5-7 minutes. Watch it carefully—you just want to take the chill off, not re-bake it.
Flavor Development: Honestly, this cookie cake tastes even better the next day. The flavors meld together overnight, and the texture becomes even more fudgy and dense. If you can resist eating it right away, cover it and let it sit at room temperature overnight. It’s worth the wait.
Nutritional Information & Benefits
Let’s be real—this is a dessert, and it’s meant to be enjoyed as a treat. But there are a few redeeming qualities worth noting.
Estimated Nutritional Values (per serving, 1/12 of cookie cake):
- Calories: 385
- Total Fat: 21g
- Saturated Fat: 13g
- Cholesterol: 65mg
- Sodium: 195mg
- Total Carbohydrates: 47g
- Dietary Fiber: 2g
- Sugars: 31g
- Protein: 5g
Health Benefits of Key Ingredients: Dark chocolate (60% cacao or higher) contains antioxidants called flavonoids, which may support heart health. It also provides small amounts of iron, magnesium, and zinc. The eggs in this recipe add high-quality protein and essential vitamins like B12 and riboflavin. Using real butter instead of margarine means you’re getting natural vitamins A, D, and E without the trans fats found in processed spreads.
Dietary Considerations: This recipe contains gluten, dairy, and eggs. For a gluten-free option, see the variations section above. For a dairy-free option, use vegan butter and dairy-free chocolate. The recipe can be made nut-free by ensuring all ingredients are processed in nut-free facilities—check labels carefully if this is a concern.
Personal Wellness Perspective: I believe in balance. This cookie cake is a celebration treat, not an everyday snack. Enjoy a slice on Halloween night, share it with friends, and don’t stress about the numbers. Food is meant to bring joy, and this recipe delivers plenty of that.
Conclusion
This spooky spiderweb Halloween cookie cake is the kind of recipe that makes you feel like a baking rockstar without actually having to work that hard. It looks dramatic on the table, tastes incredible, and comes together with ingredients you probably already have in your kitchen. The combination of a soft, chewy chocolate chunk cookie base and a delicate white chocolate web is exactly what a Halloween dessert should be—fun, festive, and absolutely delicious.
I love this recipe because it brings people together. My nephew asks for it every year now, and watching his face light up when he sees that spiderweb never gets old. Whether you’re hosting a Halloween party, bringing a dessert to a potluck, or just want to make something special for your family, this cookie cake delivers every single time.
I’d love to hear how yours turns out! Leave a comment below and let me know if you added any fun twists to the recipe. Did you use candy bars instead of chocolate chips? Try a different web pattern? Share your photos and tag me—I can’t wait to see your spooky creations. Happy Halloween, and happy baking!
Frequently Asked Questions
Can I use a different pan if I don’t have a cast iron skillet?
Absolutely. A 9-inch round cake pan works perfectly. Just grease it well and line the bottom with parchment paper for easy removal. A 9-inch pie plate also works, though the cookie will be slightly thicker and may need an extra 2-3 minutes of baking time. Avoid using a springform pan unless you wrap the outside with foil—the butter can leak through the seam.
Why did my cookie cake spread too much?
This usually happens if the butter was too warm when you mixed the dough, or if you didn’t use enough flour. Make sure your melted butter has cooled slightly before adding the eggs. Also, check your flour measurement—spoon and level it rather than scooping directly from the bag. If your pan is too small, the dough will have nowhere to go but outward, so stick with a 10-inch skillet or 9-inch cake pan.
Can I make the dough ahead of time?
Yes, you can prepare the dough up to 48 hours in advance. Press it into the pan, cover tightly with plastic wrap, and refrigerate. When you’re ready to bake, let the pan sit at room temperature for 15 minutes while the oven preheats. You may need to add 2-3 minutes to the baking time since the dough starts out cold. Do not freeze the unbaked dough—the texture changes and the cookie won’t spread as nicely.
How do I get the spiderweb pattern to look perfect?
Practice makes progress, but here’s the trick: start with a small dot of white chocolate in the center of the cookie. Pipe a continuous spiral outward, keeping the lines about ½ inch apart. Then, using a toothpick, drag lines from the center to the edge, like you’re drawing spokes on a wheel. Wipe the toothpick clean between each drag. If the lines look messy, you can gently smooth them with a clean finger while the chocolate is still wet. It doesn’t have to be perfect—imperfect webs look more authentic anyway!
Can I use milk chocolate instead of dark chocolate?
Of course. If you prefer a sweeter cookie, swap the dark chocolate chunks for milk chocolate chips. Keep in mind that the white chocolate web will make the overall cookie quite sweet, so dark chocolate helps balance the flavors. If you do use milk chocolate, consider reducing the granulated sugar by 2 tablespoons to prevent the cookie from being cloying.
Pin This Recipe!
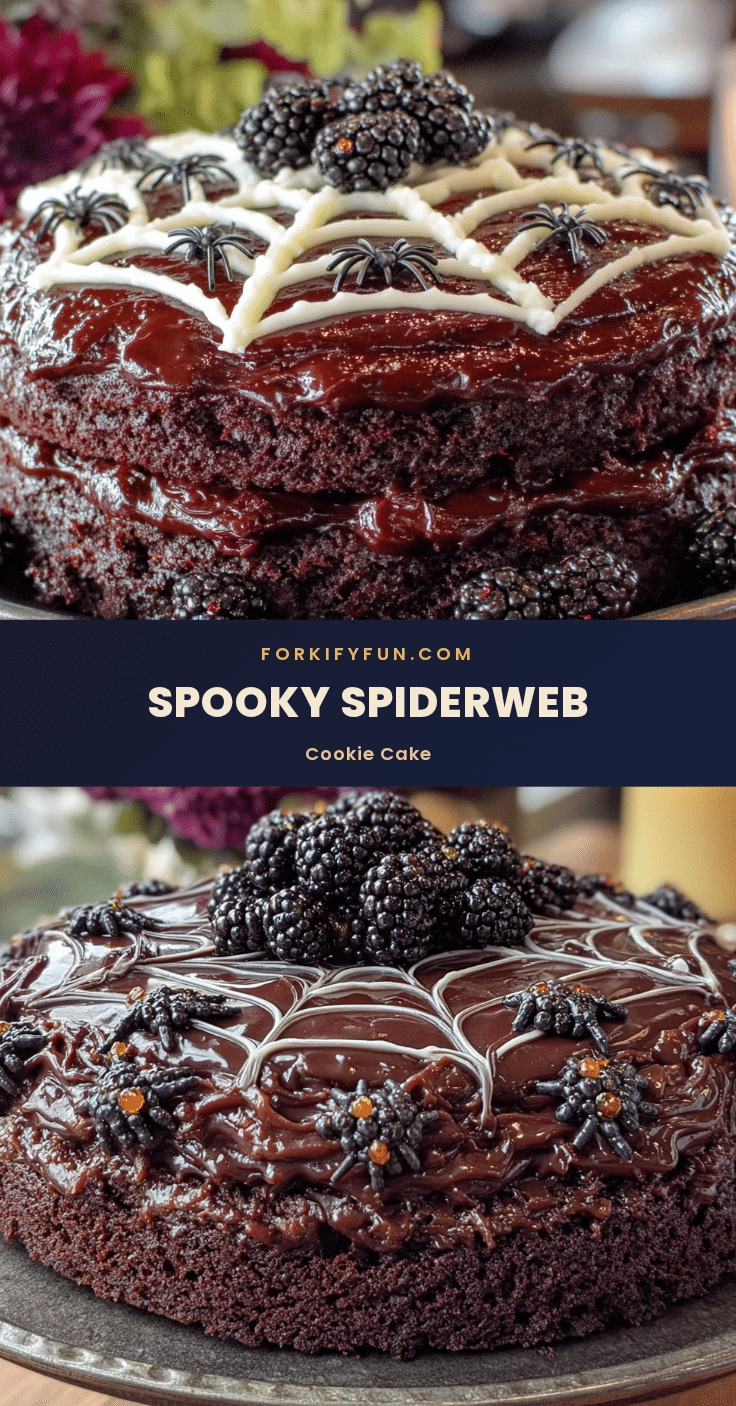
Easy Spiderweb Halloween Cookie Cake Recipe
A giant, chocolate-studded cookie cake topped with a dramatic white chocolate spiderweb. This easy Halloween dessert comes together in under an hour and is a guaranteed crowd-pleaser.
- Prep Time: 15 minutes
- Cook Time: 25 minutes
- Total Time: 40 minutes
- Yield: 12 servings 1x
- Category: Dessert
- Cuisine: American
Ingredients
- 1 cup (2 sticks / 226g) unsalted butter, melted
- 1 cup (200g) light brown sugar, packed
- ½ cup (100g) granulated sugar
- 2 large eggs, room temperature
- 2 teaspoons vanilla extract
- 2 ¼ cups (280g) all-purpose flour
- 1 teaspoon baking soda
- ½ teaspoon salt
- 1 ½ cups (255g) dark chocolate chunks or chips (60-70% cacao)
- ½ cup (85g) white chocolate melting wafers or chopped white chocolate
- ½ teaspoon coconut oil or vegetable shortening (optional)
Instructions
- Preheat your oven to 350°F (175°C). Position the rack in the center of the oven. If using a cast iron skillet, place it in the oven while it preheats.
- Melt the butter in a large microwave-safe bowl in 30-second intervals, stirring between each, until completely liquid. Let it cool for 2-3 minutes until warm but not steaming.
- Add the brown sugar and granulated sugar to the melted butter. Whisk vigorously for about a minute until smooth and slightly thickened.
- Add the eggs and vanilla extract. Whisk until fully combined and the mixture looks pale and creamy, about 30 seconds.
- In a separate bowl, whisk together the flour, baking soda, and salt.
- Add the flour mixture to the wet ingredients in two additions, folding gently with a rubber spatula after each. Stop mixing as soon as no streaks of flour remain.
- Fold in the dark chocolate chunks, reserving about ¼ cup to press into the top of the dough later.
- If using a cast iron skillet, carefully remove it from the oven and grease it with butter or non-stick spray. If using a cake pan, line the bottom with parchment paper and grease the sides.
- Transfer the dough to the prepared pan and press it into an even layer, about ¾-inch thick. Press the reserved chocolate chunks into the top.
- Bake for 22-26 minutes, until the edges are golden brown and set but the center still looks slightly soft and underdone. A toothpick inserted near the center should come out with a few moist crumbs.
- Cool the cookie cake completely in the pan for at least 30 minutes. The center will continue to set as it cools.
- Melt the white chocolate in a small microwave-safe bowl in 20-second intervals, stirring after each, until smooth. Stir in coconut oil if needed to thin.
- Transfer the melted white chocolate to a small piping bag or a zip-top bag with a tiny corner snipped off. Pipe a spiral from the center of the cookie cake outward.
- Using a toothpick or skewer, drag lines from the center outward through the spiral to create a spiderweb pattern. Wipe the toothpick clean between each drag.
- Let the white chocolate web set for 15-20 minutes at room temperature, or 10 minutes in the fridge, before slicing.
Notes
Don’t overbake—pull the cookie cake when the center still looks slightly underdone. Let the butter cool before adding eggs to prevent scrambling. Press reserved chocolate chunks into the top for a loaded look. Use a toothpick for the spiderweb pattern, wiping clean between each drag. The cookie tastes even better the next day.
Nutrition
- Serving Size: 1 slice (1/12 of coo
- Calories: 385
- Sugar: 31
- Sodium: 195
- Fat: 21
- Saturated Fat: 13
- Carbohydrates: 47
- Fiber: 2
- Protein: 5
Keywords: Halloween cookie cake, spiderweb cookie, chocolate chip cookie cake, easy Halloween dessert, spooky cookie


