The scrape of a knife against pumpkin flesh, that hollow thump when you tap the shell, the way orange dust settles on your fingers like powdered rust — carving pumpkins is a sensory sport, not just a holiday activity. And honestly, for years I treated it like a chore. I’d rush through the scooping, hurry the carving, and then stand there with a sticky counter and a grumbling stomach, wondering why nobody thought to plan the actual eating part. That’s where this Perfect Pumpkin Carving Party Snack Board with Roasted Seeds comes in. It’s the board I built out of pure, hungry necessity.
I remember one October afternoon, my friend Jen came over with three massive pumpkins and a dream of creating the most Instagram-worthy jack-o’-lanterns. Two hours in, we were elbow-deep in slimy strings, our hands pruned, and someone (me) was eyeing the bag of chips in the pantry with desperation. The chips were fine. But they weren’t part of the moment. So the next weekend, I tested a board that turned the byproduct of carving — the seeds — into the star of the show. And then I just kept adding things that made sense for cold fingers and happy bellies.
This board isn’t fussy. It’s practical in the best way. You build it while the pumpkins are being gutted, and it sits there, waiting, becoming the centerpiece of the whole messy, wonderful affair. It’s the snack that works as hard as the carvers do. And the pumpkin carving party snack board with roasted seeds? It’s the reason my carving parties actually finish now, with laughter instead of hangry sighs.
Why You’ll Love This Recipe
Let’s be real — most party snacks are an afterthought. You grab a bag of something, dump it in a bowl, and call it a day. This board is different. It’s intentional without being complicated, and it turns the messiest part of pumpkin carving into the most delicious part. Here’s why this one sticks.
- Uses What You’re Already Handling: The roasted seeds aren’t an extra chore. They’re the reward for all that scooping. You’re already elbow-deep in pumpkin guts — might as well make something amazing with them.
- Perfect for Cold Hands: After handling cold pumpkin flesh, warm, salty, crunchy seeds are exactly what your fingers need. Plus, the dips and cheeses are room temperature, so nobody’s eating cold food.
- No-Cook (Except the Seeds): The oven does the heavy lifting for the seeds. Everything else is assembly. You can throw this together in the time it takes to preheat the oven.
- Visually Stunning: This board looks like fall exploded in the best way. The orange pumpkins, green herbs, white cheese, and deep red apples create a color palette that screams “harvest party.”
- Crowd-Pleaser for All Ages: Kids go for the cheese cubes and apple slices. Adults hover around the spiced seeds and the sharp cheddar. Everyone wins.
I’ve tested this board at three different carving parties now, and each time, the seeds disappear first. There’s something deeply satisfying about eating the part of the pumpkin you worked so hard to extract. It’s like closing a loop, you know? Plus, this board is endlessly adaptable — swap in your favorite fall cheeses, change up the seed seasoning, or add whatever crunchy veggies you have on hand. It’s less a strict recipe and more a framework for fall snacking success.
What Ingredients You Will Need
This board is built around simplicity. Most of these ingredients are pantry staples or easy fall finds. The star, of course, is the pumpkin seeds — but the supporting cast is just as important for creating that perfect balance of salty, sweet, crunchy, and creamy.
For the Roasted Pumpkin Seeds
- Fresh pumpkin seeds, rinsed and dried (from 1 medium pumpkin — about 1 ½ cups of seeds)
- Olive oil, 2 tablespoons (helps the seasoning stick and promotes even browning)
- Salt, 1 teaspoon (use flaky sea salt for best texture)
- Garlic powder, ½ teaspoon (adds savory depth without being overpowering)
- Smoked paprika, ½ teaspoon (gives the seeds a subtle, warm smokiness)
- Cayenne pepper, ¼ teaspoon (optional, for a gentle kick — adjust based on your crowd)
For the Snack Board
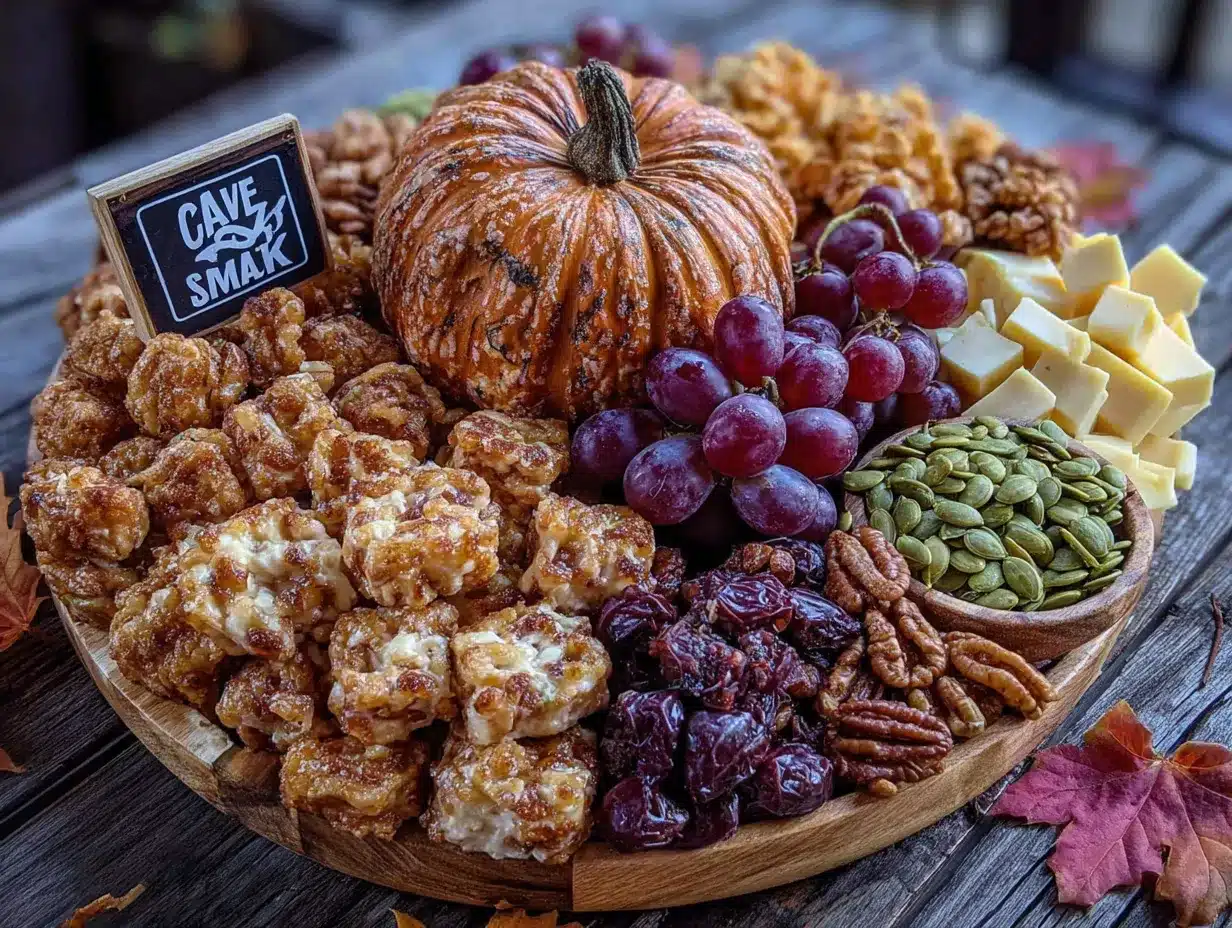
- Sharp cheddar cheese, 8 ounces, cubed (I prefer a good aged cheddar from a local creamery — the sharper the better against the sweet apples)
- Gouda or smoked cheese, 6 ounces, sliced (the smokiness pairs beautifully with the roasted seeds)
- Apple slices, 2 medium apples (use a mix of tart Granny Smith and sweet Honeycrisp for variety)
- Pear slices, 1 large pear (Bosc or Bartlett work well — they hold up without browning too quickly)
- Dried cranberries, ½ cup (adds a chewy, tart pop that cuts through the richness)
- Roasted and salted almonds, ½ cup (or any nut you prefer — pecans would be lovely here too)
- Dark chocolate squares, 3 ounces (broken into pieces — because a little chocolate makes everything better)
- Fresh rosemary sprigs, for garnish (purely decorative, but it makes the board look intentional and festive)
- Honey, for drizzling (optional, but a tiny drizzle over the cheese or apples is magic)
I recommend sourcing your cheese from a good deli counter rather than pre-shredded or pre-packaged blocks. The texture is better, and you can ask for a sample to make sure it’s sharp enough. For the seeds, don’t skip the drying step — wet seeds steam instead of roast, and you’ll end up with chewy, sad little kernels instead of crunchy perfection.
Equipment Needed
- Large baking sheet (rimmed, so the seeds don’t roll off)
- Parchment paper (for easy cleanup — trust me on this one)
- Colander (for rinsing the seeds)
- Clean kitchen towel or paper towels (for drying seeds thoroughly)
- Mixing bowl (medium size)
- Large wooden board or platter (at least 12 by 16 inches — a cutting board works beautifully)
- Small bowls or ramekins (for the seeds and any dips you want to add)
- Sharp knife and cutting board (for slicing apples, pears, and cheese)
- Cheese knife or small spreader (if serving with honey or mustard)
If you don’t have a large wooden board, a sheet pan lined with a clean kitchen towel works surprisingly well. I’ve used a baking sheet in a pinch, and honestly, nobody noticed. The key is having enough surface area to spread everything out so it looks abundant, not crowded.
Preparation Method
- Preheat your oven to 350°F (175°C). Line a large baking sheet with parchment paper for easy cleanup.
- Clean the pumpkin seeds. Separate the seeds from the pumpkin guts as best you can. Place them in a colander and rinse under cold running water, rubbing them gently to remove any remaining stringy bits. This takes a few minutes — be patient. The cleaner the seeds, the better they roast.
- Dry the seeds thoroughly. Spread the rinsed seeds on a clean kitchen towel and pat them dry. Let them sit for 5-10 minutes to air-dry a bit more. This step is non-negotiable — wet seeds won’t get crispy. I learned this the hard way after a batch of soggy, steamed seeds that tasted more like sadness than snack.
- Season the seeds. In a medium mixing bowl, combine the dried seeds with olive oil, salt, garlic powder, smoked paprika, and cayenne (if using). Toss well until every seed is coated. The oil should glisten on the seeds without pooling at the bottom of the bowl.
- Roast the seeds. Spread the seasoned seeds in a single layer on the prepared baking sheet. Roast for 20-25 minutes, stirring halfway through, until the seeds are golden brown and fragrant. Your kitchen will smell incredible — like toasted nuts and warm spices. Let them cool completely on the baking sheet. They’ll crisp up further as they cool.
- Prepare the fruit. While the seeds roast, slice the apples and pear. I like to cut them into thin wedges — not too thick, not too thin. If you’re worried about browning, toss the apple slices in a little lemon juice, but honestly, they’ll disappear too fast for it to matter. Arrange the fruit on a plate and set aside.
- Cut the cheese. Cube the sharp cheddar into bite-sized pieces, about ½ inch each. Slice the gouda into thin triangles or rectangles. Keep the cheese at room temperature for best flavor — it makes a huge difference in how creamy and flavorful it tastes.
- Assemble the board. Place your large board or platter on a flat surface. Start by placing the small bowl of roasted seeds in the center or slightly off-center — this is the anchor of the board. Arrange the cheese cubes and slices around the bowl, creating little clusters. Fan the apple and pear slices in curved lines. Scatter the dried cranberries, almonds, and dark chocolate pieces in the gaps. Tuck the fresh rosemary sprigs here and there for a pop of green.
- Add finishing touches. If using honey, drizzle a small amount over the gouda slices or into a tiny ramekin for dipping. Give the roasted seeds one last stir to break up any clumps. Step back and admire your work — this board is genuinely beautiful.
- Serve immediately. Place the board on the carving table or a nearby surface. Let people graze as they work. The seeds are best eaten the day they’re roasted, but the rest of the board holds up well for a few hours at room temperature.
Cooking Tips & Techniques
Roasting pumpkin seeds seems simple, but there are a few tricks I’ve picked up after many batches of trial and error. First, don’t oversalt the seeds before roasting. Salt draws out moisture, and you want the seeds to dry out in the oven, not sit in salty liquid. I add a moderate amount before roasting and then sprinkle a little more flaky salt right when they come out of the oven. That final salt hits differently — it stays on the surface and gives you that satisfying crunch.
Another thing I learned the hard way: don’t crowd the baking sheet. Seeds need space to breathe. If they’re piled on top of each other, they’ll steam instead of roast. Spread them out in a single layer, and if you have a lot of seeds, use two baking sheets. It’s worth the extra few minutes of cleanup.
For the board itself, think about texture contrast. You want crunchy seeds next to soft cheese, crisp apples next to chewy cranberries. I always include at least one creamy element (the gouda) and one sharp element (the cheddar). The dark chocolate is my secret weapon — it adds a bittersweet note that ties everything together. If you’re serving this at a party where people are drinking, the chocolate also pairs beautifully with red wine or a caramel apple cider sangria.
One more tip: make the seeds first and let them cool completely before adding them to the board. Warm seeds can make the cheese sweat and the fruit soften. Patience here pays off in presentation.
Variations & Adaptations
This board is incredibly flexible. Here are a few ways to change it up based on your crowd or what you have in your kitchen.
- Sweet Seed Swap: Skip the savory spices and toss the seeds with 1 tablespoon of melted butter, 1 tablespoon of brown sugar, and ½ teaspoon of cinnamon. Roast as directed for a sweet, crunchy topping that tastes like autumn in a bite.
- Spicy Board: Add pickled jalapeños or a small bowl of hot honey to the board. Swap the gouda for pepper jack cheese and add some crispy bacon crumbles. This version is perfect for game day — in fact, it pairs beautifully with crispy parmesan garlic tailgate wings.
- Dairy-Free Option: Replace the cheese with marinated olives, roasted red peppers, and a good quality hummus. Use dairy-free dark chocolate and skip the honey drizzle. The seeds are naturally dairy-free, so the board still feels abundant.
- Kid-Friendly Board: Swap the sharp cheddar for mild cheddar or colby jack. Add some pretzel sticks or cinnamon sugar pretzel bites for extra crunch. Keep the seeds mild — just salt and a little garlic powder.
- Herb-Infused Seeds: Add 1 teaspoon of dried rosemary or thyme to the seed seasoning. The earthy herbs complement the pumpkin flavor beautifully and make the board feel more sophisticated.
I once made a version of this board for a Halloween potluck where I swapped the apples for sliced fennel and added a bowl of 5-ingredient queso dip in the center. It was a hit. Don’t be afraid to experiment — the board is a template, not a rulebook.
Serving & Storage Suggestions
This board is best served at room temperature, so take the cheese out of the fridge about 30 minutes before assembling. The roasted seeds can be made a day ahead and stored in an airtight container — they’ll stay crispy for about 3 days, though they rarely last that long. If the seeds lose their crunch, pop them in a 300°F oven for 5 minutes to revive them.
For the fruit, slice the apples and pears as close to serving time as possible to prevent browning. If you need to prep ahead, toss the slices in a little lemon juice or apple cider vinegar and store them in a sealed bag in the fridge. They’ll hold for a few hours without turning brown.
Leftover cheese and chocolate can be wrapped and refrigerated for up to a week. The dried cranberries and almonds will keep in your pantry indefinitely. The board itself doesn’t store well once assembled — the fruit will soften and the seeds will lose their crunch — so only put out what you think will be eaten within a couple of hours. You can always refill the board as needed.
If you’re hosting a larger gathering, consider making two boards — one savory and one sweet. The sweet version could include the cinnamon-sugar seeds, apple slices, and a bowl of salted caramel apple crisp dip for dipping. It’s a fun way to give guests options without overwhelming a single board.
Nutritional Information & Benefits
This board is surprisingly balanced. Pumpkin seeds are a nutritional powerhouse — they’re packed with magnesium, zinc, and healthy fats that support immune function and energy levels. Perfect for powering through a carving session. The apples and pears provide fiber and vitamin C, while the cheese adds calcium and protein.
Here’s an approximate breakdown per serving (based on 8 servings from the full board):
| Nutrient | Amount Per Serving |
|---|---|
| Calories | 320 |
| Protein | 12g |
| Fat | 20g |
| Carbohydrates | 28g |
| Fiber | 5g |
| Sugar | 16g |
| Sodium | 480mg |
This board is naturally gluten-free and can be made vegetarian. If you’re watching sodium, reduce the salt on the seeds and choose low-sodium cheese. The dark chocolate adds antioxidants, and the almonds provide vitamin E. It’s the kind of snack that feels indulgent but actually has some redeeming qualities — which is exactly what you want when you’re standing around a table covered in pumpkin guts.
Conclusion
This Perfect Pumpkin Carving Party Snack Board with Roasted Seeds turned my carving parties from chaotic, hungry affairs into something I genuinely look forward to. The seeds are the hero — they’re the edible proof that you made something from scratch, that you didn’t just buy a snack, you transformed the pumpkin itself into part of the celebration. And the board around them? It’s flexible, forgiving, and completely customizable to whatever your crowd loves.
I’d love to hear how you make this board your own. Did you add something unexpected? Swap the cheese for something wild? Or maybe you discovered a new favorite seed seasoning? Drop a comment below and share your creation. And if you snap a picture of your board, tag me — I’m always looking for inspiration for the next carving party. Until then, happy carving and even happier snacking!
Frequently Asked Questions
Can I use store-bought pumpkin seeds instead of roasting my own?
Absolutely. If you’re short on time or didn’t save the seeds from your pumpkin, grab a bag of raw, unsalted pumpkin seeds from the store. Roast them with the same seasonings and they’ll taste just as good. The only difference is the satisfaction of using seeds from your own pumpkin — but store-bought works in a pinch.
How do I get the seeds completely clean?
Rinse the seeds in a colander under cool running water while rubbing them gently between your fingers. Most of the stringy pumpkin flesh will come off easily. For stubborn bits, let the seeds soak in a bowl of water for 10 minutes before rinsing again. Pat them dry thoroughly before seasoning.
Can I make this board ahead of time for a party?
You can prep the components ahead — roast the seeds up to 3 days in advance, slice the cheese and store it in the fridge, and wash the fruit. But assemble the board no more than 2 hours before serving to keep everything fresh and crisp. The seeds should be added just before serving so they stay crunchy.
What other dips go well with this board?
A small bowl of honey mustard, a pumpkin spice hummus, or even a simple balsamic glaze would all work beautifully. For a sweeter option, try a caramel dip for the apple slices. The key is to keep the dips complementary, not competing — you want to enhance the flavors, not overwhelm them.
How do I prevent the apple slices from browning?
Toss the apple slices in a little lemon juice or apple cider vinegar right after cutting. You only need a tablespoon or two for a whole apple. Alternatively, use a fruit freshener product if you have one. But honestly, at a party, the apples will be eaten too fast for browning to be an issue.
Pin This Recipe!
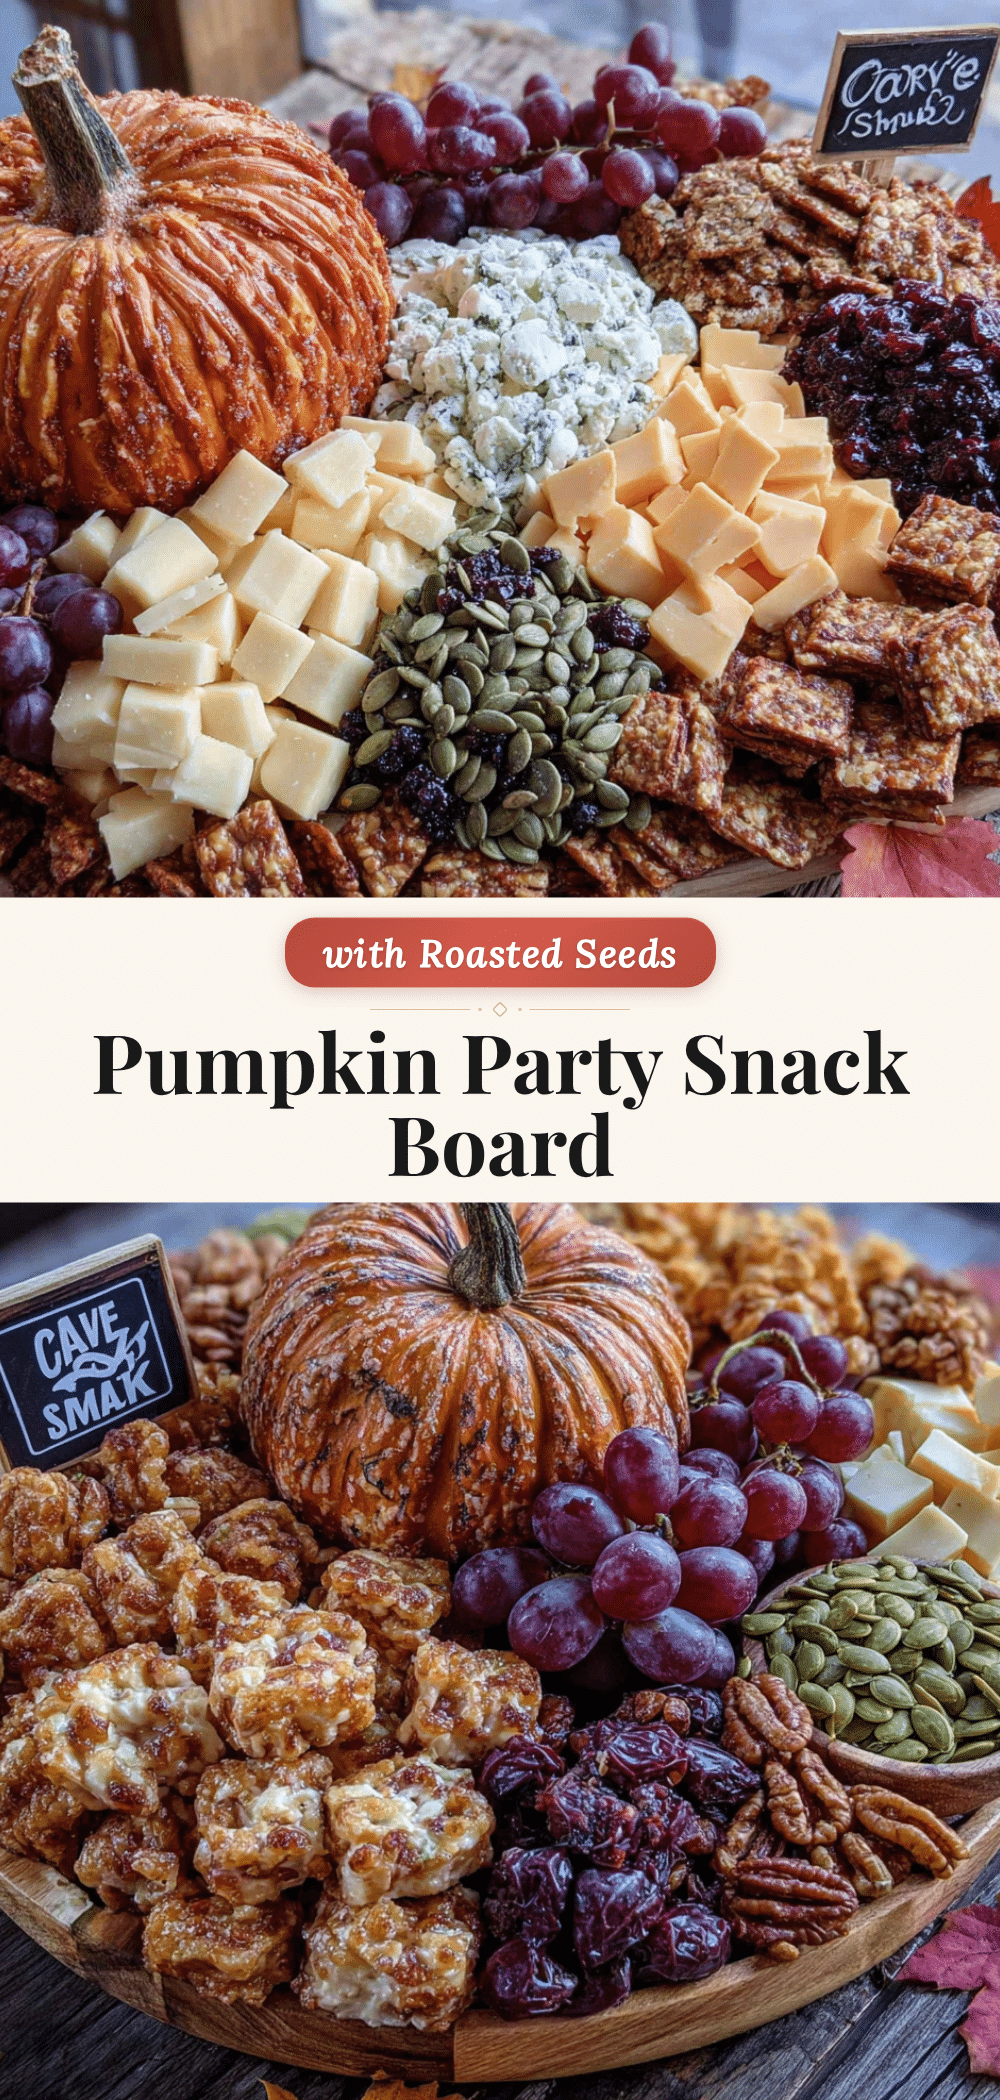
Easy Pumpkin Carving Board with Roasted Seeds
A perfect snack board for pumpkin carving parties, featuring roasted pumpkin seeds, cheese, fruit, and nuts. It’s intentional without being complicated, turning the messiest part of pumpkin carving into the most delicious part.
- Prep Time: 15 minutes
- Cook Time: 25 minutes
- Total Time: 40 minutes
- Yield: 8 servings
- Category: Appetizer
- Cuisine: American
Ingredients
- Fresh pumpkin seeds, rinsed and dried (from 1 medium pumpkin — about 1 ½ cups of seeds)
- Olive oil, 2 tablespoons
- Salt, 1 teaspoon (use flaky sea salt for best texture)
- Garlic powder, ½ teaspoon
- Smoked paprika, ½ teaspoon
- Cayenne pepper, ¼ teaspoon (optional)
- Sharp cheddar cheese, 8 ounces, cubed
- Gouda or smoked cheese, 6 ounces, sliced
- Apple slices, 2 medium apples (mix of Granny Smith and Honeycrisp)
- Pear slices, 1 large pear (Bosc or Bartlett)
- Dried cranberries, ½ cup
- Roasted and salted almonds, ½ cup
- Dark chocolate squares, 3 ounces, broken into pieces
- Fresh rosemary sprigs, for garnish
- Honey, for drizzling (optional)
Instructions
- Preheat your oven to 350°F (175°C). Line a large baking sheet with parchment paper.
- Clean the pumpkin seeds: separate from guts, rinse in a colander under cold water, rubbing gently to remove stringy bits.
- Dry the seeds thoroughly: spread on a clean kitchen towel, pat dry, and let air-dry for 5-10 minutes.
- Season the seeds: in a medium bowl, combine dried seeds with olive oil, salt, garlic powder, smoked paprika, and cayenne (if using). Toss well.
- Roast the seeds: spread in a single layer on the prepared baking sheet. Roast for 20-25 minutes, stirring halfway, until golden brown and fragrant. Let cool completely.
- Prepare the fruit: slice apples and pear into thin wedges. Set aside.
- Cut the cheese: cube sharp cheddar into ½-inch pieces, slice gouda into thin triangles or rectangles. Let come to room temperature.
- Assemble the board: place a large board or platter on a flat surface. Place the bowl of roasted seeds in the center. Arrange cheese cubes and slices around the bowl. Fan apple and pear slices in curved lines. Scatter dried cranberries, almonds, and dark chocolate pieces in gaps. Tuck fresh rosemary sprigs for garnish.
- Add finishing touches: drizzle honey over gouda slices or into a ramekin for dipping if desired.
- Serve immediately.
Notes
Don’t oversalt seeds before roasting; add a little flaky salt after roasting for better crunch. Don’t crowd the baking sheet—seeds need space to roast, not steam. Make seeds first and let cool completely before adding to board to prevent cheese sweating and fruit softening.
Nutrition
- Serving Size: 1 serving (based on
- Calories: 320
- Sugar: 16
- Sodium: 480
- Fat: 20
- Saturated Fat: 8
- Carbohydrates: 28
- Fiber: 5
- Protein: 12
Keywords: pumpkin carving, snack board, roasted pumpkin seeds, fall appetizer, Halloween snack, cheese board


