“You sure this is gonna turn out okay?” my partner asked, glancing skeptically at the single bowl sitting on the counter, half-filled with a vivid red batter. Honestly, I wasn’t convinced either. After a long day where every minute counted, I just wanted something sweet without the mess of multiple bowls and endless dishes. So, I grabbed what I had—some basic pantry staples, a splash of red food coloring, and cream cheese lurking in the fridge—and threw it all together in one bowl.
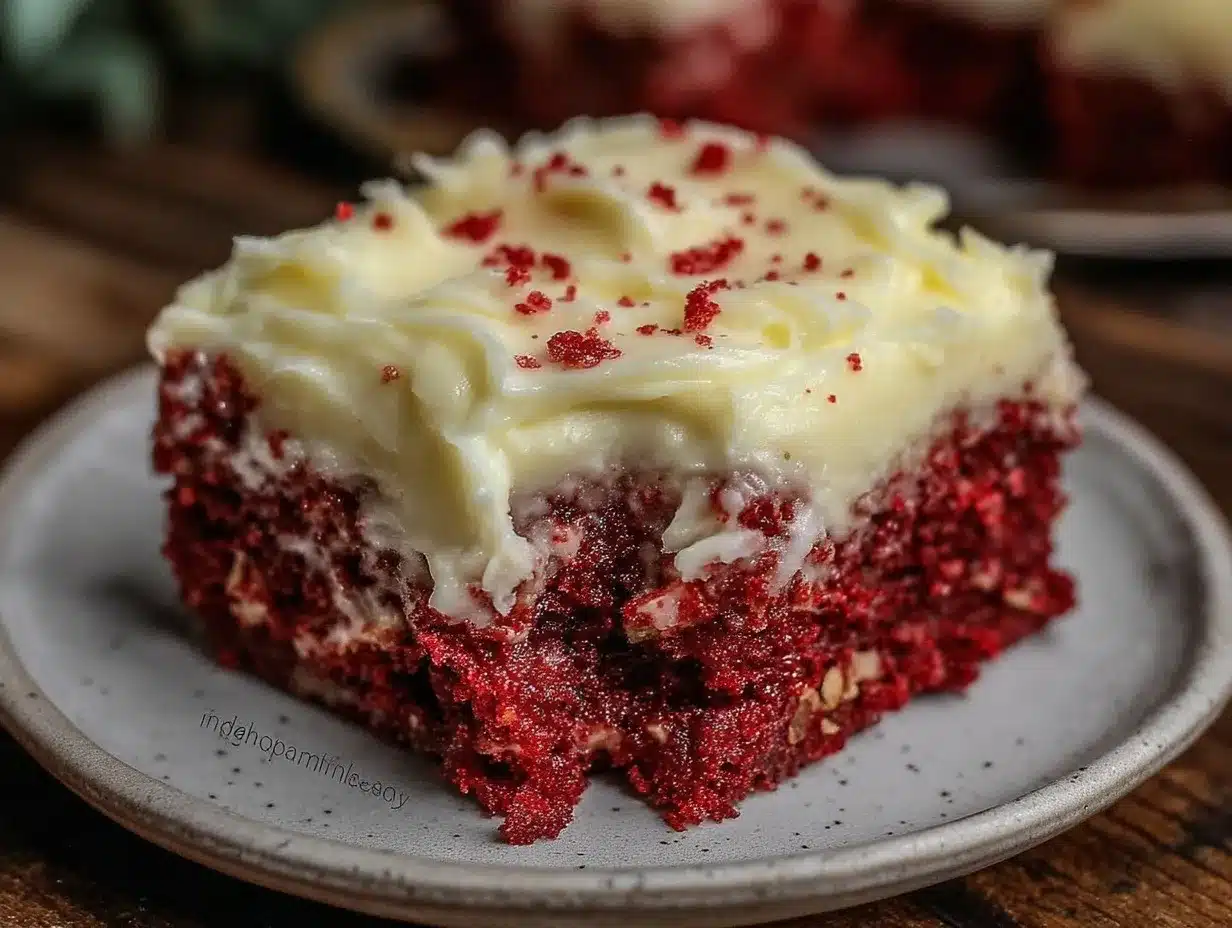
What happened next surprised me—a perfectly tender, moist red velvet cake with a frosting so smooth it practically melted on the tongue. The whole kitchen filled with that comforting smell of cocoa and vanilla, which somehow made the chaos of the day feel a little lighter. It’s funny how a simple recipe can become a quiet anchor amid the rush, right?
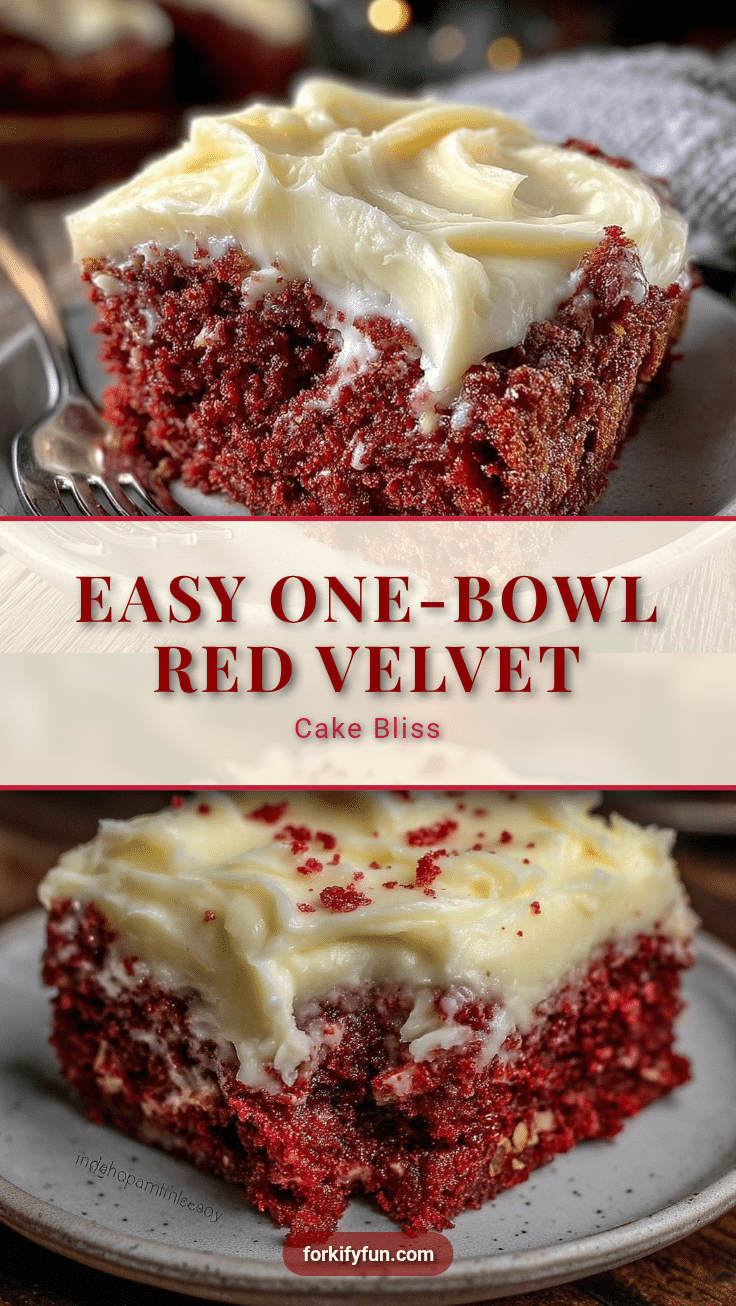
Since that night, this easy one-bowl red velvet cake with silky cream cheese frosting has become my go-to, especially when I’m juggling too many things but craving something special. It’s not fussy, it’s quick, and it always leaves people asking for the recipe (even my partner, the skeptic, now insists I make it whenever we have guests). And between you and me, it’s a little reminder that sometimes, the best treats come from the simplest moments.
So, if you’re like me—needing a sweet reset without the hassle—this recipe might just earn a spot in your kitchen rotation. Let’s get into why this one-bowl wonder deserves your attention.
Why You’ll Love This Recipe
After making this easy one-bowl red velvet cake with silky cream cheese frosting a handful of times, it quickly became clear why it stands out among all the other cakes I’ve tried. Here’s the rundown of why it’s a keeper:
- Quick & Easy: Everything comes together in under 30 minutes, from mixing to the oven. Perfect for those evenings when you want a homemade dessert but don’t have hours to spare.
- Simple Ingredients: No need for specialty stores or hard-to-find items. Most ingredients are pantry staples, which means you can whip this up anytime without a special trip.
- Perfect for Celebrations: Whether it’s a birthday, a cozy dinner, or just a sweet weekend treat, this cake fits the bill beautifully with its classic red velvet charm.
- Crowd-Pleaser: I’ve had kids and adults alike come back for seconds. The balance of flavors and that smooth frosting make it universally loved.
- Unbelievably Delicious: The crumb is tender but holds together well, and the cream cheese frosting is silky, not too sweet, and just the right tang to balance the cocoa.
This is not just “any” red velvet cake. The secret lies in mixing everything in one bowl—no fuss, no extra dishes, and a batter that comes together quickly but still yields a tender crumb. Plus, the frosting is whipped to a creamy silkiness that feels luxurious but stays simple. I’ve also found that using buttermilk or adding a touch of vinegar helps the red velvet flavor pop without overwhelming the palate, making it different from other recipes that rely heavily on food coloring alone.
Honestly, it’s the kind of dessert that makes you close your eyes with that first bite and say, “Yep, this is exactly what I needed.” Whether you’re aiming to impress guests without breaking a sweat or just want a reliable comfort dessert after a busy day, this recipe fits the bill.
What Ingredients You Will Need
This recipe uses straightforward, wholesome ingredients that work together to create that classic red velvet flavor and texture without any fuss. Most of these are probably already in your pantry or fridge, which is a huge win when you want to bake on a whim.
- All-purpose flour – the base of the cake, providing structure (I prefer using King Arthur for consistency)
- Granulated sugar – for sweetness and a tender crumb
- Unsweetened cocoa powder – just a bit to bring the subtle chocolate flavor (use a good-quality Dutch-processed cocoa for smoothness)
- Baking soda – the leavening agent to help the cake rise nicely
- Salt – balances the sweetness and enhances flavor
- Vegetable oil – keeps the cake moist (you can swap with light olive oil if preferred)
- Large eggs, room temperature – for binding and richness
- Buttermilk – adds tenderness and slight tang (if you don’t have buttermilk, mix 1 tablespoon vinegar with milk and let sit for 5 minutes)
- White vinegar – reacts with baking soda for a tender crumb and helps brighten the red color
- Pure vanilla extract – adds depth and warmth
- Red food coloring – the iconic red hue (gel food coloring works best for vibrant color without thinning the batter)
For the frosting:
- Cream cheese, softened – the star of the frosting, providing that classic tang and creamy texture (I like using Philadelphia brand)
- Unsalted butter, softened – adds richness and helps achieve that silky finish
- Powdered sugar – for sweetness and smooth texture
- Pure vanilla extract – rounds out the flavor
- A pinch of salt – balances the sweetness and enhances the cream cheese flavor
These ingredients come together for a cake that’s moist, tender, and beautifully balanced. If you’re feeling adventurous, you can swap the buttermilk with a dairy-free alternative like almond milk mixed with lemon juice, and the frosting can be made with vegan cream cheese and butter substitutes to keep it dairy-free.
Equipment Needed
- Large mixing bowl: Since this is a one-bowl recipe, a sturdy, large bowl is key to comfortably mix the batter without spills.
- Hand mixer or stand mixer: Makes whipping the frosting effortless, but a whisk and some elbow grease can work in a pinch.
- Measuring cups and spoons: Accurate measurements matter for baking, so use standard sets.
- Rubber spatula: Perfect for scraping down the bowl and folding ingredients together gently.
- 9-inch (23 cm) round cake pans: Two pans work best for an even bake and classic layer look. If you don’t have cake pans, a square pan will do but adjust baking time accordingly.
- Cooling rack: To cool cakes evenly and avoid sogginess.
In my experience, using a silicone spatula makes mixing and scraping so much easier, and if you don’t have a hand mixer, a whisk combined with patience can still get the job done. For the cake pans, lined with parchment paper or greased well, you’ll get a smooth release every time. Trust me, I learned the hard way with a crumbly cake stuck to the pan once!
Preparation Method
- Preheat your oven to 350°F (175°C). Grease and flour two 9-inch (23 cm) round cake pans, or line them with parchment paper for easy removal. This step usually takes about 10 minutes including preheating.
- In your large mixing bowl, sift together 2 ½ cups (320 g) all-purpose flour, 1 ½ tablespoons unsweetened cocoa powder, 1 ½ teaspoons baking soda, and ½ teaspoon salt. Sifting avoids lumps and ensures an even mix. Set aside.
- Add 1 ½ cups (300 g) granulated sugar to the dry ingredients and stir to combine. This helps distribute the sugar evenly.
- Make a well in the center of the bowl and add 1 cup (240 ml) vegetable oil, 2 large eggs (room temperature), 1 cup (240 ml) buttermilk, 1 tablespoon white vinegar, 2 teaspoons pure vanilla extract, and 2 tablespoons red food coloring (gel preferred).
- Using a hand mixer or stand mixer on medium speed, mix the batter just until smooth and fully combined, about 2-3 minutes. Avoid over-mixing as it can make the cake dense. The batter should be a vibrant red with a smooth texture.
- Divide the batter evenly between the prepared cake pans. Tap the pans gently on the counter to release any air bubbles. This usually takes about 2 minutes.
- Bake for 25-30 minutes, or until a toothpick inserted into the center comes out clean. Ovens vary, so start checking at 25 minutes. The cake will spring back lightly when touched.
- Remove from oven and let cakes cool in the pans for about 10 minutes. Then, carefully turn them out onto a wire rack to cool completely before frosting. Cooling usually takes 1 hour but you can speed it up by placing the cakes in the fridge wrapped loosely with plastic wrap.
- While cakes cool, prepare the frosting: In a large bowl, beat 8 oz (225 g) softened cream cheese with ½ cup (115 g) softened unsalted butter until smooth and creamy—about 2-3 minutes.
- Add 3 cups (360 g) powdered sugar gradually, beating on low speed to avoid powder clouds, then increase to medium speed until fully blended and fluffy.
- Beat in 1 teaspoon pure vanilla extract and a pinch of salt. Taste and adjust sweetness or saltiness as preferred. The frosting should be silky and spreadable but not runny.
- Once the cakes are fully cooled, place one layer on your serving plate and spread a generous amount of frosting over the top. Add the second cake layer on top and frost the top and sides evenly.
- Chill the cake for 30 minutes to set the frosting before slicing. This step makes slicing neater and lets the flavors meld.
Pro tip: If the frosting feels too soft, chilling it for 15 minutes before spreading helps maintain texture. Also, if you don’t have buttermilk, that vinegar-plus-milk trick works wonders for the tang and rise. And don’t skip tapping the pans before baking—that air bubble release makes for a smoother crumb.
Cooking Tips & Techniques
Making this easy one-bowl red velvet cake is honestly forgiving, but a few tricks make it even better.
- Room temperature ingredients: Always bring eggs, buttermilk, and cream cheese to room temp before starting. It helps everything blend smoothly and prevents lumps in the batter or frosting.
- Don’t over-mix the batter: Once wet and dry ingredients meet, mix just until combined. Overdoing it develops gluten, leading to tough cake instead of tender crumb.
- Use gel food coloring: Liquid colors can thin the batter, changing texture. Gel or paste colors pack that vibrant red punch without messing with consistency.
- Test for doneness early: Start checking your cake at 25 minutes with a toothpick. Overbaking dries it out fast, and a moist crumb is the goal here.
- Frosting consistency: If your cream cheese frosting feels too stiff, add a teaspoon of milk or cream to loosen it. Too soft? Chill it a bit before spreading.
- Multitasking tip: While the cake bakes, whip up the frosting so you’re ready to assemble as soon as the layers cool. Saves time and keeps momentum.
- Personal lesson: I once skipped the vinegar, thinking it was optional, and ended up with a dull cake that lacked that classic red velvet tang. Don’t skip it!
Variations & Adaptations
This recipe is a great base for playing around, whether you want to tweak flavors, adapt for dietary needs, or switch up the presentation.
- Gluten-free: Swap all-purpose flour for a gluten-free blend (like Bob’s Red Mill 1:1). The texture will be slightly different but still delightful.
- Dairy-free frosting: Use vegan cream cheese and dairy-free butter alternatives for the frosting. Coconut cream can add richness too.
- Mini cupcakes: Portion the batter into a lined muffin tin for adorable, individual servings. Bake for 18-20 minutes.
- Seasonal twist: Add a handful of fresh raspberries or strawberries between the layers for a burst of bright flavor and color.
- Chocolate swirl: For a marbled effect, gently swirl some melted dark chocolate into the batter before baking.
My favorite variation is turning this into cupcakes topped with the frosting and a sprinkle of festive sprinkles—perfect for small gatherings or last-minute celebrations. Also, if you like experimenting, try pairing it with a subtle hint of espresso powder added to the batter to deepen the chocolate flavor without overpowering the cake.
Serving & Storage Suggestions
This cake is best served at room temperature to let the cream cheese frosting shine with its silky texture and tang. Slice with a sharp serrated knife for clean edges.
Pair it with a simple cup of black coffee or a creamy latte to balance the sweetness. For a lighter touch, fresh berries or whipped cream on the side add a nice contrast.
Store leftover cake covered in the fridge for up to 4 days. The frosting keeps well chilled and the cake stays moist—though letting it sit out for 20 minutes before serving helps soften it again.
You can also freeze the cake layers (without frosting) wrapped tightly in plastic wrap and foil for up to 3 months. Thaw overnight in the fridge before frosting.
Interestingly, the flavors tend to mellow and become more harmonious after a day, making leftovers even more delicious. Just remember to keep it well covered to avoid fridge odors sneaking in!
Nutritional Information & Benefits
This easy one-bowl red velvet cake with silky cream cheese frosting is an indulgence, but it also brings some benefits depending on how you approach it.
- Each slice (about 1/12th of the cake) typically contains approximately 350-400 calories.
- The cream cheese adds a source of calcium and protein, while the eggs contribute essential vitamins.
- Using vegetable oil instead of butter in the batter can reduce saturated fat content.
- For a lighter version, you can reduce sugar slightly or swap half the flour for whole wheat pastry flour for extra fiber.
- Note: Contains dairy, eggs, and gluten, so not suitable for those with allergies or intolerances unless adapted.
I like to think of this cake as a treat that brings a little joy without guilt when enjoyed mindfully. Balancing it with wholesome meals, like the healthy cauliflower crust pizza I often make, keeps my week well-rounded.
Conclusion
This easy one-bowl red velvet cake with silky cream cheese frosting is proof that baking doesn’t have to be complicated to be delicious. It’s a recipe I turn to when I want a fuss-free dessert that still feels special and looks impressive.
Feel free to tweak the flavors or presentation to suit your style—it’s a forgiving canvas that welcomes creativity. I keep coming back to it because it reminds me that sometimes, the simplest recipes make the biggest impact.
Give it a try, and if you end up loving it as much as I do, I’d love to hear how you made it your own. Happy baking!
FAQs
- Can I make this cake without red food coloring? Yes, but it won’t have the classic red velvet color. You can omit it or use natural alternatives like beet juice, though the color will be less vibrant.
- How do I store leftover cake? Store it covered in the fridge for up to 4 days. Bring to room temperature before serving for best texture.
- Can I freeze this cake? Yes, freeze unfrosted layers wrapped tightly for up to 3 months. Thaw overnight in the fridge before frosting.
- Can I substitute buttermilk? Absolutely! Mix 1 tablespoon vinegar or lemon juice with 1 cup milk and let it sit for 5 minutes as a buttermilk substitute.
- What’s the best way to get a smooth cream cheese frosting? Make sure cream cheese and butter are softened to room temperature, and beat them together until completely smooth before adding powdered sugar.
For a different kind of easy, crowd-pleasing dessert, you might enjoy the creamy copycat Dunkaroos dip, which also comes together quickly and is a hit at parties. And if you ever want to balance your sweet treats with something savory and wholesome, the healthy cauliflower crust pizza is a fantastic, easy recipe to keep in your meal prep arsenal.
Pin This Recipe!
Easy One-Bowl Red Velvet Cake Recipe with Silky Cream Cheese Frosting
A quick and easy one-bowl red velvet cake with a tender crumb and silky cream cheese frosting, perfect for celebrations or a comforting treat.
- Prep Time: 15 minutes
- Cook Time: 30 minutes
- Total Time: 1 hour 45 minutes
- Yield: 12 servings 1x
- Category: Dessert
- Cuisine: American
Ingredients
- 2 ½ cups (320 g) all-purpose flour
- 1 ½ tablespoons unsweetened cocoa powder
- 1 ½ teaspoons baking soda
- ½ teaspoon salt
- 1 ½ cups (300 g) granulated sugar
- 1 cup (240 ml) vegetable oil
- 2 large eggs, room temperature
- 1 cup (240 ml) buttermilk (or 1 cup milk + 1 tablespoon vinegar, let sit 5 minutes)
- 1 tablespoon white vinegar
- 2 teaspoons pure vanilla extract
- 2 tablespoons red food coloring (gel preferred)
- 8 oz (225 g) cream cheese, softened
- ½ cup (115 g) unsalted butter, softened
- 3 cups (360 g) powdered sugar
- 1 teaspoon pure vanilla extract
- A pinch of salt
Instructions
- Preheat oven to 350°F (175°C). Grease and flour two 9-inch round cake pans or line with parchment paper.
- In a large mixing bowl, sift together flour, cocoa powder, baking soda, and salt. Set aside.
- Add granulated sugar to the dry ingredients and stir to combine.
- Make a well in the center and add vegetable oil, eggs, buttermilk, vinegar, vanilla extract, and red food coloring.
- Mix with a hand mixer or stand mixer on medium speed until smooth and combined, about 2-3 minutes. Avoid over-mixing.
- Divide batter evenly between prepared pans and tap pans gently to release air bubbles.
- Bake for 25-30 minutes or until a toothpick inserted in the center comes out clean.
- Cool cakes in pans for 10 minutes, then turn out onto a wire rack to cool completely (about 1 hour).
- For frosting, beat cream cheese and butter until smooth and creamy, about 2-3 minutes.
- Gradually add powdered sugar, beating on low then medium speed until fluffy.
- Beat in vanilla extract and a pinch of salt. Adjust sweetness or saltiness as desired.
- Once cakes are cooled, place one layer on a plate and spread frosting over the top.
- Add second layer and frost top and sides evenly.
- Chill cake for 30 minutes before slicing to set frosting.
Notes
Use room temperature ingredients for best results. Avoid over-mixing batter to keep cake tender. Gel food coloring gives vibrant color without thinning batter. Tap pans before baking to release air bubbles. Chill frosting if too soft before spreading. Buttermilk can be substituted with milk and vinegar mixture.
Nutrition
- Serving Size: 1 slice (1/12th of c
- Calories: 375
- Sugar: 38
- Sodium: 320
- Fat: 18
- Saturated Fat: 7
- Carbohydrates: 52
- Fiber: 1
- Protein: 4
Keywords: red velvet cake, one-bowl cake, cream cheese frosting, easy cake recipe, quick dessert, celebration cake


