“You seriously can have pizza when you’re managing gestational diabetes?” That was my skeptical thought when a friend texted me late one evening, raving about a cauliflower crust pizza she’d whipped up that was totally friendly for diabetics. Honestly, I wasn’t sure what she meant at first — pizza without the usual doughy carbs? Could it really hit the spot? It sounded almost too good to be true.
One restless night, craving comfort food but wary of blood sugar spikes, I gave this healthy gestational diabetes friendly cauliflower crust pizza a try. The smell of roasted cauliflower mixing with warm herbs filled my kitchen and instantly soothed the chaos of the day. The crust wasn’t just edible; it had this surprisingly satisfying texture, a little crisp at the edges and tender inside, which honestly caught me off guard.
What made it stick with me wasn’t just how it tasted but how it made me feel afterward — no guilt, no sugar crash, just a cozy satisfaction. This recipe became my go-to, especially when I didn’t want to fuss over complicated meals but still craved something that felt like a treat. It’s a little miracle for anyone balancing flavor with gestational diabetes needs, and it might just quietly change the way you think about pizza.
There’s something comforting about knowing you can enjoy classic dishes without compromise. That’s why I keep coming back to this cauliflower crust pizza — it’s simple, thoughtful, and surprisingly indulgent in the best way.
Why You’ll Love This Recipe
After testing this healthy gestational diabetes friendly cauliflower crust pizza several times (yes, sometimes twice in one week), I’m confident it’s a recipe worth keeping close. It’s not just about being diabetes-friendly; it’s about making delicious food accessible without stress or sacrifice.
- Quick & Easy: Ready in about 40 minutes from start to finish — perfect when you want a wholesome meal fast.
- Simple Ingredients: No need for specialty stores. Cauliflower, cheese, and pantry staples do all the heavy lifting here.
- Perfect for Gestational Diabetes: Low in carbs and heavy on fiber, this pizza keeps blood sugar steady without skimping on flavor.
- Crowd-Pleaser: Friends and family often ask for seconds — the crispy edges and melty cheese win everyone over.
- Unbelievably Delicious: The crust’s texture is a real surprise; it crisps up nicely and holds toppings without sogginess.
What sets this recipe apart is the simple yet effective trick of squeezing out moisture from the cauliflower thoroughly — it’s the secret to that perfect crust texture. Plus, blending in a bit of mozzarella and Parmesan adds richness without overloading carbs.
Honestly, it’s the kind of pizza that makes you close your eyes after the first bite and feel like you’re indulging without compromise. And if you’ve ever tried to find a tasty diabetic-friendly dinner that doesn’t feel like a chore, you know how rare that is.
What Ingredients You Will Need
This cauliflower crust pizza recipe relies on wholesome, straightforward ingredients that work together to create a crust that’s both sturdy and flavorful. Most of these are pantry staples or easy to find, making it a stress-free option for busy cooks.
- Cauliflower: About 1 medium head (roughly 4 cups riced). Fresh is best, but frozen works if fully thawed and squeezed dry.
- Eggs: 2 large eggs, beaten (helps bind the crust).
- Cheese: ½ cup shredded mozzarella (I prefer part-skim for less fat) and ¼ cup grated Parmesan (adds a tangy depth).
- Almond Flour: 2 tablespoons (adds structure and keeps it low-carb; Bob’s Red Mill brand works well).
- Garlic Powder: 1 teaspoon (for subtle savory notes).
- Dried Italian Herbs: 1 teaspoon (oregano, basil, thyme mix — use what you have on hand).
- Salt: ½ teaspoon, or to taste.
- Olive Oil: 1 tablespoon, for brushing the crust before baking.
- Tomato Sauce: ½ cup, preferably no added sugar (I like a simple marinara or homemade sauce).
- Toppings: Sliced bell peppers, mushrooms, spinach, olives, cooked chicken or turkey sausage (optional and customizable).
- Fresh Basil or Arugula: For garnish after baking (adds freshness and color).
Feel free to swap almond flour with coconut flour for a different texture, but reduce quantity slightly as coconut flour absorbs more moisture. Also, if dairy is a concern, try using a dairy-free cheese alternative, although the melt and flavor will shift a bit.
Equipment Needed
- Food Processor: To rice the cauliflower quickly and evenly. If you don’t have one, a box grater works—just be ready for a little extra elbow grease.
- Large Mixing Bowl: For combining all crust ingredients thoroughly.
- Clean Kitchen Towel or Cheesecloth: Essential for squeezing out cauliflower moisture; skipping this step can lead to a soggy crust.
- Baking Sheet or Pizza Stone: A rimmed baking sheet lined with parchment paper works great. A pizza stone will yield a crisper crust if you have one.
- Oven Mitts: For safety when handling hot pans.
- Spatula or Dough Scraper: Helpful for shaping the crust evenly.
I’ve tried making this crust on silicone mats and parchment paper; parchment tends to hold up better to the olive oil and crisping process. Also, if you don’t have a food processor, pairing this pizza with a quick Korean beef bulgogi rice bowl makes for a speedy dinner that’s equally satisfying.
Preparation Method
- Rice the Cauliflower: Chop the cauliflower into florets and pulse in the food processor until it resembles rice grains. This usually takes about 20-30 pulses. If using a box grater, grate the florets manually. (Tip: Don’t over-process to avoid mushy texture.)
- Steam the Cauliflower Rice: Transfer riced cauliflower into a microwave-safe bowl and cover it loosely. Microwave for 4-5 minutes until soft but not watery. Let it cool slightly. (If you prefer stovetop steaming, 5-7 minutes works too.)
- Squeeze Out Moisture: Once cooled, wrap the cauliflower rice in a clean kitchen towel or cheesecloth. Twist and squeeze firmly to remove as much liquid as possible — this step is crucial to a crisp crust! You should get about a ¼ cup of moisture out.
- Mix Crust Ingredients: In a large bowl, combine the drained cauliflower, beaten eggs, mozzarella, Parmesan, almond flour, garlic powder, herbs, and salt. Stir well until the mixture holds together. It should feel slightly sticky but manageable.
- Shape the Crust: Line a baking sheet with parchment paper and lightly oil it. Transfer the cauliflower mixture onto it and press into a circular pizza shape about 10 inches (25 cm) in diameter and about ¼ inch (6 mm) thick. Use a spatula or your hands (lightly oiled) to smooth the edges.
- Pre-bake the Crust: Bake in a preheated oven at 425°F (220°C) for 15 minutes. The crust should start to turn golden and firm up. (Note: This step helps avoid sogginess after adding toppings.)
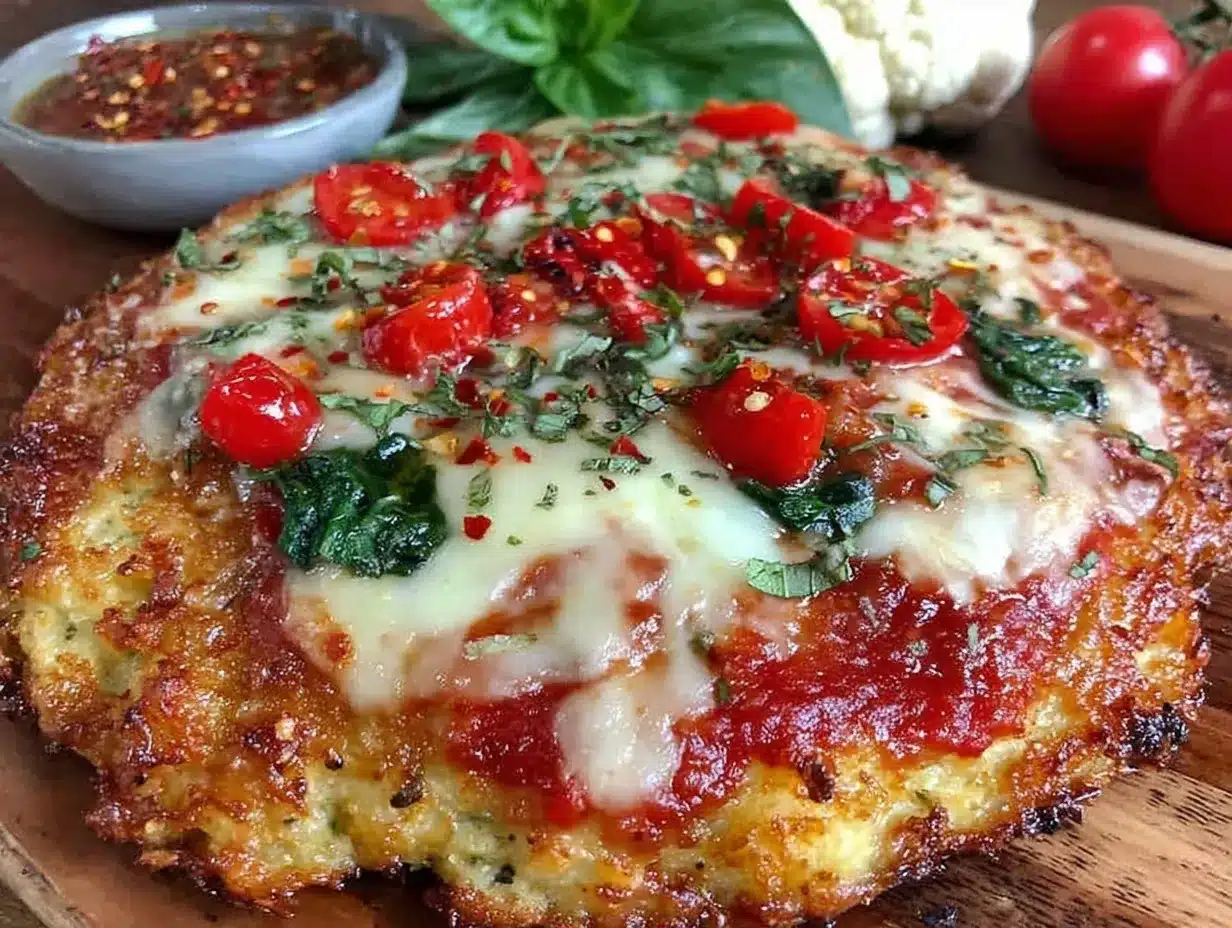
- Add Sauce and Toppings: Remove the crust from the oven. Spread the tomato sauce evenly over the crust, then add your favorite toppings. Keep toppings moderate to avoid a soggy crust — I like spinach, sliced mushrooms, and a sprinkle of part-skim mozzarella.
- Bake Again: Return the pizza to the oven and bake for another 10-12 minutes, until the cheese is melted and bubbly and toppings are cooked through.
- Finish and Serve: Let the pizza cool for a few minutes, then garnish with fresh basil or arugula. Slice and enjoy! (Pro tip: Slice gently with a pizza wheel or sharp knife to keep the crust intact.)
Cooking Tips & Techniques
Making a cauliflower crust pizza that’s crispy yet tender can be tricky at first, but a few tips learned from trial and error make all the difference.
- Moisture Control is Everything: I can’t stress enough how squeezing out cauliflower liquid changes the game. If you skip this, expect a soggy, floppy crust.
- Use Fresh Cauliflower When Possible: Frozen can work but tends to add extra moisture, so squeeze it even more thoroughly.
- Don’t Overload Toppings: Keep it light. Too many toppings weigh down the crust and prevent it from cooking evenly.
- Pre-baking the Crust: This step creates a sturdy base that crisps up nicely. If you skip it, you risk a mushy pizza.
- Oven Temperature: High heat is key for crispness. Don’t lower the temperature — it’ll make the crust soggy instead of golden.
- Work Quickly: Once you squeeze the cauliflower, mix and shape the dough soon after, or it may lose binding power.
One time, I left the cauliflower mixture sitting too long before baking and ended up with a crumbly mess. Lesson learned: timing matters!
Also, multitasking by prepping toppings while the crust pre-bakes saves time and keeps everything moving smoothly, especially on busy weeknights when I pair this with a quick creamy Cajun shrimp pasta for the family.
Variations & Adaptations
This cauliflower crust pizza is wonderfully adaptable depending on your preferences or dietary needs.
- Gluten-Free & Low-Carb: The base recipe is naturally gluten-free and low in carbs, great for gestational diabetes management.
- Dairy-Free Option: Swap cheeses for dairy-free alternatives like cashew-based mozzarella or nutritional yeast for cheesiness without lactose.
- Vegan Version: Replace eggs with flax eggs (1 tablespoon ground flaxseed + 3 tablespoons water per egg) and use vegan cheese.
- Flavor Twists: Add fresh herbs like rosemary or thyme to the crust, or mix in a pinch of smoked paprika for a smoky undertone.
- Different Cooking Methods: Try cooking the crust on a cast-iron skillet for extra crispiness, then transfer to the oven to finish.
Personally, I tried adding a sprinkle of crushed red pepper flakes into the crust mix once — gave it a nice kick without overpowering the toppings. If you’re craving more spice, that’s a neat little trick.
Serving & Storage Suggestions
This pizza is best served warm from the oven, when the cheese is melty and the crust is at its crispiest. I like to garnish it with fresh basil or arugula to add a peppery freshness that balances the richness.
For sides, a simple green salad or steamed veggies complement this pizza nicely without adding extra carbs. If you want to mix it up, pairing it with a light soup like a creamy Thai red curry chicken soup creates a cozy, balanced meal.
Leftovers keep well in the fridge for 2-3 days, stored in an airtight container. Reheat in a toaster oven or on a skillet to keep that crispiness intact — microwaving tends to make the crust soggy.
Flavors tend to meld and deepen when refrigerated overnight, so it can be just as satisfying the next day if reheated properly.
Nutritional Information & Benefits
One serving (about 1/4 of the pizza) offers approximately:
| Calories | 220 kcal |
|---|---|
| Carbohydrates | 10 g (mostly from fiber-rich cauliflower) |
| Protein | 15 g |
| Fat | 12 g (mostly from cheese and olive oil) |
| Fiber | 4 g |
Cauliflower is a powerhouse vegetable, rich in vitamins C and K, and high in fiber, which helps slow sugar absorption. The almond flour adds healthy fats and keeps carbs low, making it friendly for gestational diabetes management.
While dairy provides calcium and protein, the recipe is flexible enough to accommodate lactose intolerance with suitable substitutions.
Personally, I find this pizza hits the sweet spot between nourishing and indulgent, which is essential when juggling gestational diabetes and cravings.
Conclusion
This healthy gestational diabetes friendly cauliflower crust pizza is truly one of those recipes that made me rethink what’s possible in diabetic-friendly cooking. It’s straightforward, flavorful, and fits beautifully into a balanced diet without feeling like a compromise.
Don’t hesitate to customize toppings or tweak herbs to fit your mood — that’s part of the fun. I love how it’s become a little comforting ritual during hectic weeks, reminding me that caring for myself doesn’t mean missing out.
If you try it, I’d love to hear how you make it your own or what toppings you swear by. Sharing these wins is what keeps cooking exciting!
Here’s to meals that nourish and satisfy, without the stress.
FAQs
Can I use frozen cauliflower for the crust?
Yes, you can use frozen cauliflower but make sure to thaw it fully and squeeze out as much moisture as possible to avoid a soggy crust.
Is this recipe suitable for people with gluten intolerance?
Absolutely. This cauliflower crust pizza is naturally gluten-free, making it a great option for those avoiding gluten.
How do I prevent the crust from getting soggy?
The key is squeezing out all excess moisture from the cauliflower and pre-baking the crust before adding toppings.
Can I make the crust ahead of time?
You can prepare and bake the crust in advance, then refrigerate it for up to 2 days. Add toppings and finish baking when ready to serve.
What are some good topping ideas for gestational diabetes?
Go for lean proteins like grilled chicken or turkey sausage, plenty of non-starchy veggies like spinach, mushrooms, and bell peppers, and keep cheese moderate to control fat and calories.
Pin This Recipe!
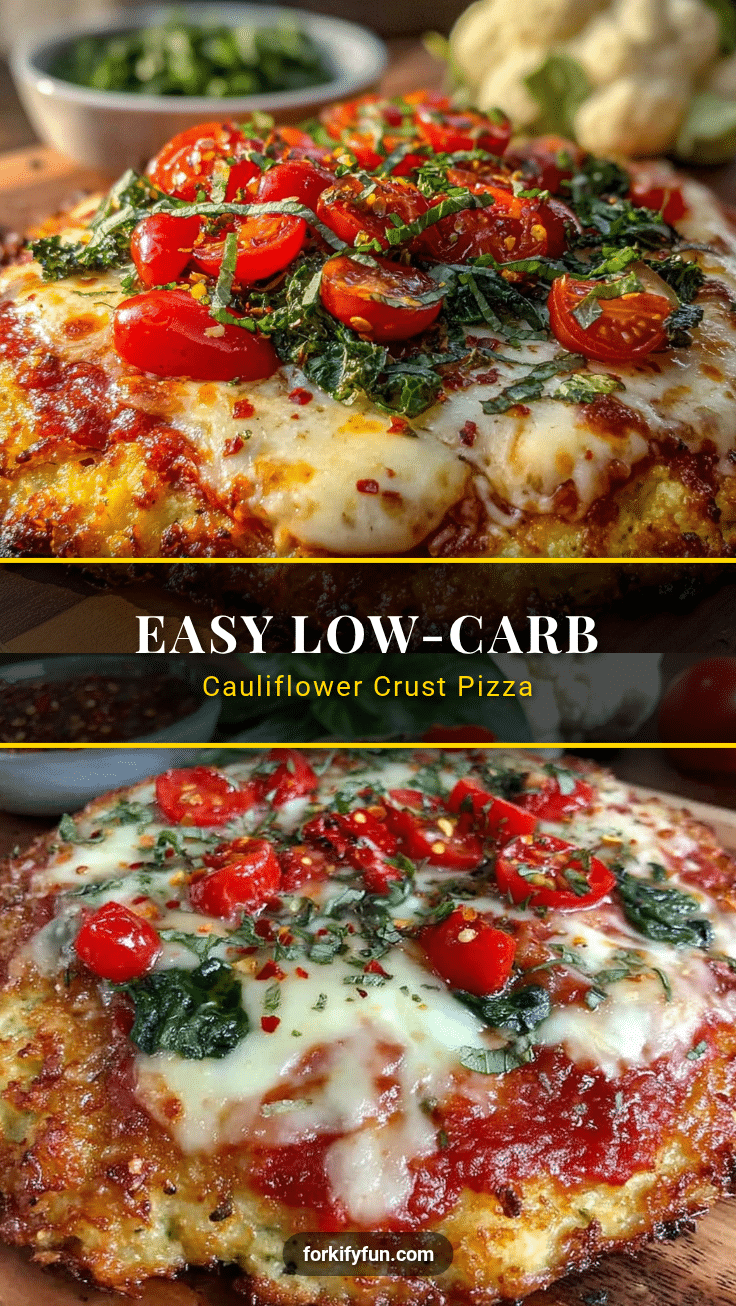
Healthy Gestational Diabetes Friendly Cauliflower Crust Pizza Recipe Easy and Perfect for Diabetics

A delicious and low-carb cauliflower crust pizza recipe perfect for managing gestational diabetes. This recipe offers a crispy, flavorful crust with wholesome toppings that keep blood sugar steady without sacrificing taste.
- Prep Time: 15 minutes
- Cook Time: 25 minutes
- Total Time: 40 minutes
- Yield: 4 servings 1x
- Category: Main Course
- Cuisine: American
Ingredients
- 1 medium head cauliflower (about 4 cups riced)
- 2 large eggs, beaten
- 1/2 cup shredded part-skim mozzarella cheese
- 1/4 cup grated Parmesan cheese
- 2 tablespoons almond flour
- 1 teaspoon garlic powder
- 1 teaspoon dried Italian herbs (oregano, basil, thyme mix)
- 1/2 teaspoon salt, or to taste
- 1 tablespoon olive oil, for brushing the crust
- 1/2 cup tomato sauce (no added sugar preferred)
- Toppings: sliced bell peppers, mushrooms, spinach, olives, cooked chicken or turkey sausage (optional)
- Fresh basil or arugula for garnish
Instructions
- Rice the cauliflower by chopping into florets and pulsing in a food processor until it resembles rice grains (about 20-30 pulses). Alternatively, grate manually with a box grater.
- Steam the riced cauliflower in a microwave-safe bowl covered loosely for 4-5 minutes until soft but not watery. Let cool slightly.
- Wrap the cooled cauliflower rice in a clean kitchen towel or cheesecloth and squeeze firmly to remove as much moisture as possible (about 1/4 cup liquid).
- In a large mixing bowl, combine the drained cauliflower, beaten eggs, mozzarella, Parmesan, almond flour, garlic powder, dried herbs, and salt. Stir until the mixture holds together and feels slightly sticky.
- Line a baking sheet with parchment paper and lightly brush with olive oil. Transfer the cauliflower mixture onto the sheet and press into a 10-inch diameter circle about 1/4 inch thick. Smooth edges with an oiled spatula or hands.
- Pre-bake the crust in a preheated oven at 425°F (220°C) for 15 minutes until golden and firm.
- Remove the crust from the oven and spread tomato sauce evenly over it. Add desired toppings, keeping them moderate to avoid sogginess.
- Bake the pizza again for 10-12 minutes until cheese is melted and toppings are cooked through.
- Let the pizza cool for a few minutes, then garnish with fresh basil or arugula. Slice gently and serve.
Notes
Squeezing out all moisture from the cauliflower is crucial to avoid a soggy crust. Pre-baking the crust before adding toppings helps maintain crispness. Use fresh cauliflower when possible for best results. Keep toppings light to prevent sogginess. Reheat leftovers in a toaster oven or skillet to keep crust crispy; avoid microwaving.
Nutrition
- Serving Size: 1/4 of the pizza
- Calories: 220
- Sugar: 3
- Sodium: 400
- Fat: 12
- Saturated Fat: 4
- Carbohydrates: 10
- Fiber: 4
- Protein: 15
Keywords: cauliflower crust pizza, gestational diabetes friendly, low carb pizza, diabetic friendly recipe, gluten free pizza, healthy pizza, cauliflower pizza crust


