I wasn’t expecting cooking advice from my accountant, but there I was, sitting in his cluttered office during tax season, watching him pull a crumpled piece of paper from his desk drawer. “You like to bake, right?” he asked, sliding the paper across the mountain of receipts. “This is my grandmother’s fudge recipe. It’ll change your life.” I smiled politely, thinking about the dozens of fudge recipes I’d already tried—grainy, too soft, or just plain disappointing. But something about the way he said it, with this quiet confidence, made me stuff that paper into my purse instead of the recycling bin.
That night, I finally looked at it. The ingredients were simple enough—sugar, butter, evaporated milk, chocolate chips, marshmallow creme, and nuts. Nothing fancy. But the method was different from anything I’d tried before. No candy thermometer. No constant stirring. Just a few minutes of boiling and a whole lot of faith. Honestly, I was skeptical. I mean, fudge without a thermometer? That seemed like a disaster waiting to happen. But my accountant had never steered me wrong on taxes, so I figured I’d trust him on dessert too.
The first batch came out perfectly. I’m talking perfectly smooth, perfectly set, perfectly rich. I stood there in my kitchen, spatula in hand, just staring at this pan of fudge like it had performed a magic trick. And honestly, it kind of had. That recipe became my go-to for every holiday gathering, every potluck, every time I needed to show up with something impressive. It never fails. And the best part? It scales beautifully for a crowd. You know that feeling when you’re hosting and you need something that looks like you spent hours on it, but really came together in under twenty minutes? That’s this fudge. My accountant probably has no idea he changed my hosting game forever, but let me tell you—I think about it every time I cut into a fresh pan.
Why You’ll Love This Recipe
Let me be real with you for a second. I’ve tested a lot of fudge recipes over the years. Some were too soft, some were too hard, and some just had that weird grainy texture that nobody wants to talk about. This old-fashioned fantasy fudge with marshmallow creme is different. It’s the one I keep coming back to, and here’s why:
- Foolproof Results Every Time: No candy thermometer needed. No complicated techniques. Just simple steps that work, batch after batch.
- Perfect for a Crowd: This recipe makes a generous amount—enough for a party platter, holiday gift boxes, or just keeping a stash hidden in the freezer for yourself.
- Simple Pantry Ingredients: You probably already have most of these in your kitchen. No fancy grocery store runs required.
- Incredibly Smooth Texture: The marshmallow creme is the secret weapon here. It gives the fudge that silky, melt-in-your-mouth consistency that store-bought versions just can’t match.
- Make-Ahead Friendly: This fudge actually gets better after a day or two. You can make it days before your party and cross it off your to-do list.
What really sets this recipe apart is the marshmallow creme. It’s not just a random addition—it stabilizes the sugar mixture and prevents that grainy crystallization that ruins so many homemade fudges. I’ve tried versions without it, and honestly, they just don’t compare. This is the kind of fudge that makes people close their eyes after the first bite. The kind that gets you texted later asking for the recipe. And when you’re hosting a gathering, that’s exactly the kind of reaction you want.
Plus, it’s so easy to dress up for any occasion. Add some festive sprinkles for Christmas, a sprinkle of sea salt for a fancy touch, or leave it classic with walnuts. Your guests will think you spent hours perfecting it. Let them think that. You’ll know the truth.
What Ingredients You Will Need
This recipe uses simple, wholesome ingredients that come together to create something truly special. Most of these are pantry staples, which makes this fudge perfect for last-minute hosting emergencies—and trust me, those happen more often than you’d think.
For the Fudge Base
- 3 cups granulated sugar (white sugar works best here; don’t substitute with brown sugar, as it changes the texture)
- 3/4 cup unsalted butter (I use Land O’Lakes for consistent results; salted butter will work if you reduce the added salt)
- 2/3 cup evaporated milk (not sweetened condensed milk—they’re different, and this recipe needs the evaporated kind for the right consistency)
- 1/4 teaspoon salt (just a pinch to balance the sweetness)
For the Flavor and Texture
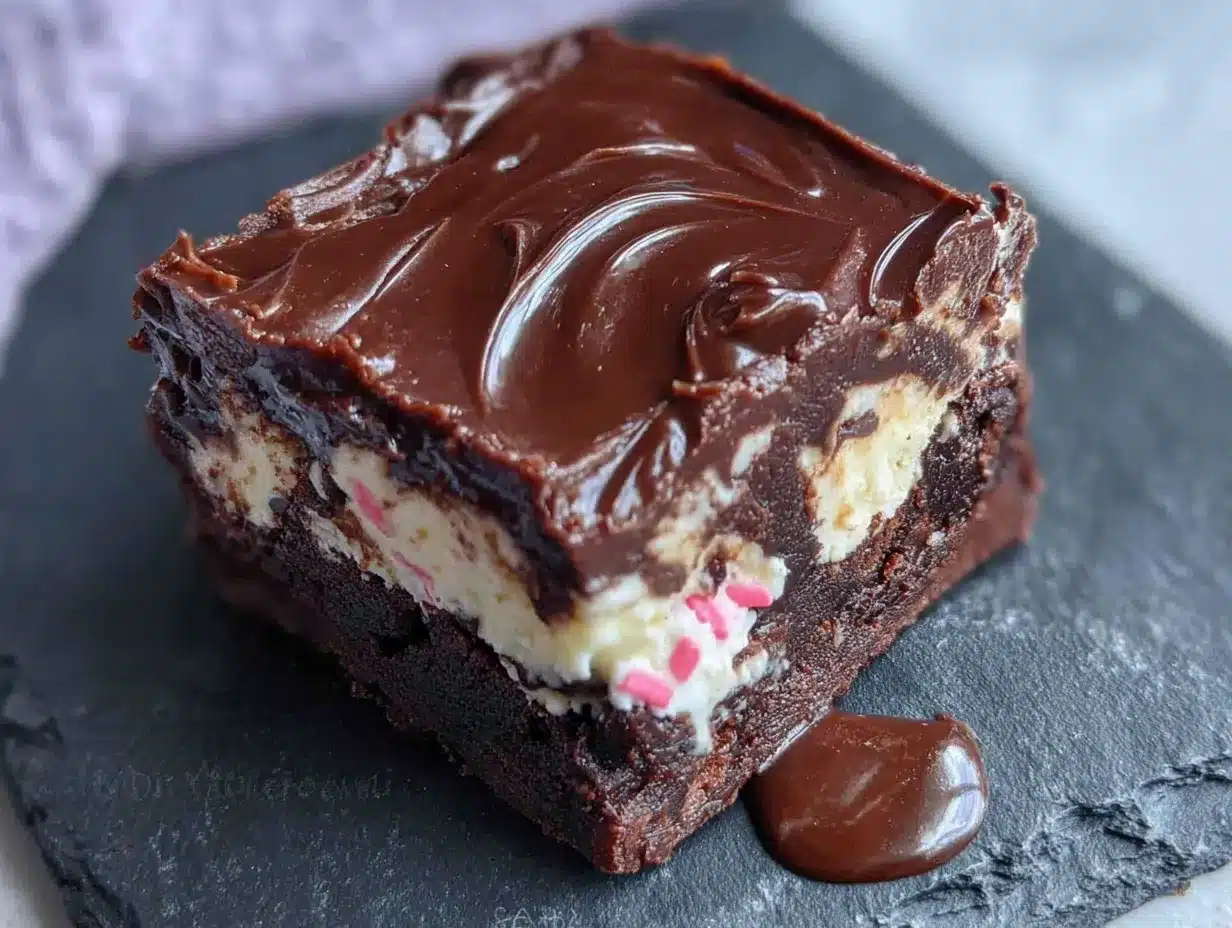
- 12 ounces semi-sweet chocolate chips (I prefer Ghirardelli or Nestle Toll House for reliable melting; use good quality chips for the best flavor)
- 1 jar (7 ounces) marshmallow creme (like Marshmallow Fluff or Jet-Puffed; don’t substitute with mini marshmallows—the creme is key)
- 1 teaspoon vanilla extract (pure vanilla extract, not imitation, if you can swing it)
- 1 cup chopped walnuts or pecans (optional, but highly recommended for that classic fudge texture and nutty crunch)
Ingredient Tips from My Kitchen
Let me share a few things I’ve learned the hard way. First, the marshmallow creme is non-negotiable. I tried making this with melted marshmallows once when I ran out of creme, and it was a disaster—grainy and weird. Just don’t do it. Second, the evaporated milk matters. I’ve used different brands, and they all work fine, but Carnation seems to give the creamiest results. And third, if you’re making this for a party where guests have nut allergies, just leave out the nuts entirely. The fudge is still amazing without them—rich, chocolatey, and perfectly smooth.
For the chocolate chips, I’ve tested this with both milk chocolate and dark chocolate. Semi-sweet is the sweet spot—not too sweet, not too bitter. It balances perfectly with the sugar and marshmallow creme. If you want to get fancy, you can use chopped chocolate bars instead of chips. They melt a little more smoothly, but honestly, chips work great and are easier to find.
One more thing—make sure your butter is at room temperature before you start. Cold butter can cause the sugar mixture to seize up, and nobody wants that. Just let it sit on the counter for about 30 minutes, and you’ll be golden.
Equipment Needed
You don’t need a fancy kitchen to make this fudge. In fact, you probably already have everything you need. Here’s what you’ll want to have on hand:
- Large heavy-bottomed saucepan (at least 3-quart capacity; the heavy bottom helps prevent scorching)
- Wooden spoon or heat-resistant silicone spatula (metal can scratch your pan, and plastic might melt)
- 8×8-inch baking pan (for setting the fudge; a 9×9 works too, but your pieces will be a bit thinner)
- Parchment paper (for lining the pan so the fudge lifts out easily—this is a game changer)
- Candy thermometer (optional, but helpful if you’re nervous about getting the temperature right)
- Sharp knife (for cutting clean pieces; a chef’s knife works better than a butter knife)
- Measuring cups and spoons (accurate measurements matter in candy-making)
If you don’t have a candy thermometer, don’t worry. I’ve made this recipe dozens of times without one. The visual cues—like the mixture coming to a full rolling boil—are enough to get perfect results. But if you’re a beginner and want that extra reassurance, a basic candy thermometer costs about ten bucks and takes the guesswork out of the process.
One tip I learned from a failed batch: use a heavy-bottomed pan. I tried making this in a thin stainless steel pot once, and the sugar mixture scorched on the bottom before it even came to a boil. It was heartbreaking. A good quality saucepan distributes heat evenly and saves you from that disaster.
Preparation Method
Alright, let’s get to the good part. This old-fashioned fantasy fudge comes together in about 20 minutes of active time, plus a few hours of chilling. Here’s exactly how to do it:
- Prep your pan. Line an 8×8-inch baking pan with parchment paper, leaving some overhang on two sides. This makes it super easy to lift the fudge out later. Lightly grease the parchment with butter or non-stick spray. Set it aside.
- Combine the base ingredients. In your large heavy-bottomed saucepan, combine 3 cups of granulated sugar, 3/4 cup of unsalted butter, 2/3 cup of evaporated milk, and 1/4 teaspoon of salt. Stir everything together with your wooden spoon or silicone spatula.
- Heat and stir. Place the saucepan over medium heat. Stir constantly until the butter is completely melted and the sugar has dissolved. You’ll see the mixture become smooth and glossy. This takes about 3-4 minutes. Don’t walk away—sugar burns fast.
- Bring to a full rolling boil. Once the mixture is smooth, increase the heat slightly and bring it to a full rolling boil. You’ll know it’s there when the bubbles cover the entire surface and can’t be stirred down. This is important—a gentle simmer won’t cut it.
- Boil for exactly 5 minutes. Set a timer for 5 minutes. Keep stirring the entire time. The mixture will thicken slightly and turn a light caramel color. If you’re using a candy thermometer, you’re aiming for 234°F (112°C)—the soft-ball stage. But honestly, I just go by the timer and it works every time.
- Remove from heat immediately. As soon as the timer goes off, take the pan off the burner. Don’t let it sit on the hot stove—the residual heat can overcook the sugar.
- Add the chocolate and marshmallow creme. Quickly stir in the 12 ounces of semi-sweet chocolate chips and the full 7-ounce jar of marshmallow creme. Stir vigorously until everything is melted and smooth. The heat from the sugar mixture will melt the chocolate and creme, so keep stirring. This takes about 2-3 minutes. The mixture should be thick, glossy, and uniform in color.
- Add vanilla and nuts. Stir in 1 teaspoon of vanilla extract and 1 cup of chopped walnuts or pecans (if using). Mix until everything is evenly distributed. The nuts should be fully coated in the fudge mixture.
- Pour into prepared pan. Working quickly (the fudge sets fast), pour the mixture into your lined pan. Use your spatula to spread it evenly into the corners. Don’t overwork it—just smooth the top gently.
- Let it set. Allow the fudge to cool at room temperature for about 1 hour, then transfer it to the refrigerator. Let it chill for at least 2-3 hours, or until completely firm. I usually leave it overnight for the cleanest cuts.
- Cut and serve. Once firm, lift the fudge out of the pan using the parchment overhang. Place it on a cutting board and use a sharp knife to cut it into squares. Wipe the knife clean between cuts for the neatest edges. Aim for 1-inch squares—they’re the perfect bite-sized pieces for a party platter.
A few sensory cues to watch for: When the sugar mixture reaches a full rolling boil, it should look like thick lava—bubbling vigorously across the entire surface. The color will deepen slightly from white to a pale golden. When you add the chocolate and marshmallow creme, the mixture will transform from a thin liquid to a thick, fudgy consistency. It should look glossy and smooth, like melted chocolate sauce that’s starting to thicken. If it looks greasy or separated, you might have overheated it—but honestly, that rarely happens with this recipe.
Cooking Tips & Techniques
After making this fudge more times than I can count, I’ve picked up a few tricks that make a real difference. Let me share what I’ve learned so you don’t have to make the same mistakes I did.
The biggest mistake people make is not stirring enough during the boiling phase. I learned this the hard way. The first time I made this, I got distracted by a phone call and stopped stirring for maybe 30 seconds. The sugar started to scorch on the bottom, and the whole batch had these little brown flecks that tasted burnt. Not cute. Stir constantly—your arm might get tired, but it’s worth it.
Another common issue is under-boiling. If your fudge comes out too soft and won’t set properly, you probably didn’t boil it long enough. That 5-minute timer is your friend. Set it, stick to it, and don’t cheat. If you live at high altitude (above 3,000 feet), you might need to boil for an extra minute or two. Just watch for the mixture to reach that soft-ball stage visually.
Here’s a pro tip for timing: I like to have all my ingredients measured out and ready before I start. The marshmallow creme is sticky and hard to scoop out in a hurry, so open the jar and have a spoon ready. The chocolate chips should be measured and waiting. Once you start boiling, there’s no time to search for things. Mise en place, baby.
If you’re making this for a party, here’s my strategy: Make the fudge two days before your event. It actually improves with a day or two of resting—the flavors meld together, and the texture becomes even creamier. Store it in an airtight container in the refrigerator, then cut it into pieces the morning of your party. Your guests will think you’re a candy-making genius.
One thing nobody tells you: Humidity is the enemy of fudge. If you’re making this on a rainy or humid day, the sugar can absorb moisture from the air and cause the fudge to be sticky or grainy. I’ve had this happen twice, and it’s frustrating. Try to make your fudge on a dry day if possible. If you can’t avoid it, just know that it might be a little softer than usual—still delicious, just not as firm.
Variations & Adaptations
This old-fashioned fantasy fudge is incredibly versatile. Over the years, I’ve experimented with all kinds of variations, and here are my favorites:
Chocolate Peanut Butter Fudge
Swap the semi-sweet chocolate chips for milk chocolate chips, and add 1/2 cup of creamy peanut butter along with the marshmallow creme. Stir until smooth. The peanut butter adds a savory richness that balances the sweetness perfectly. I made this for a Super Bowl party once, and it disappeared in minutes.
Mint Chocolate Fudge
Replace the vanilla extract with 1 teaspoon of peppermint extract. Fold in 1/2 cup of crushed candy canes or mint chips at the end. This is my go-to for Christmas parties—the red and white candy cane pieces look festive, and the minty freshness cuts through the richness of the chocolate.
White Chocolate Fantasy Fudge
Use 12 ounces of white chocolate chips instead of semi-sweet. Add 1/2 cup of dried cranberries and 1/2 cup of chopped pistachios for a beautiful red and green color combo. This version is less rich than the original, with a creamier, sweeter profile. It’s perfect for bridal showers or spring gatherings.
Vegan Adaptation
Use vegan butter (like Earth Balance), dairy-free chocolate chips, and a vegan marshmallow creme (some brands are accidentally vegan—check the label). The texture will be slightly different, but it’s still delicious. I tested this for a friend with dairy allergies, and she couldn’t tell the difference.
Spicy Mexican Chocolate Fudge
Add 1/2 teaspoon of cinnamon and a pinch of cayenne pepper along with the vanilla extract. The warmth of the spices complements the chocolate beautifully. This is unexpected and sophisticated—perfect for impressing guests who think they’ve tried everything.
Feel free to mix and match these ideas. One of my favorite batches was a white chocolate peppermint version with crushed candy canes on top. It looked like a winter wonderland in a pan. The beauty of this recipe is that it’s forgiving—once you master the basic method, you can play around with flavors all you want.
Serving & Storage Suggestions
When it comes to serving this fudge, presentation matters—especially when you’re hosting. Here’s how I like to do it:
For parties and gatherings: Arrange the fudge squares on a large platter or cake stand. I like to alternate layers with parchment paper if I’m stacking them. A sprinkle of flaky sea salt on top adds a gourmet touch and balances the sweetness. If you’re feeling fancy, drizzle some melted white chocolate over the top in zigzag patterns. Your guests will think you bought it from a fancy bakery.
What to serve alongside: This fudge pairs beautifully with fresh berries (strawberries or raspberries cut through the richness), a cup of strong black coffee, or a glass of cold milk. If you’re putting together a dessert table, include some shortbread cookies or brownies for variety. The fudge is rich, so a little goes a long way.
Storage instructions: Store the fudge in an airtight container at room temperature for up to 1 week. If your kitchen is warm, keep it in the refrigerator—it will last for 2-3 weeks. For longer storage, wrap the fudge tightly in plastic wrap and then in aluminum foil, and freeze for up to 3 months. Thaw in the refrigerator overnight before serving.
Reheating tips: Honestly, this fudge is best served cold or at room temperature. If you want it softer, let it sit out for 15-20 minutes before serving. Don’t microwave it—it will melt and lose its texture. If you’re serving it straight from the fridge, give it a few minutes to come to room temperature for the best flavor.
How flavors develop over time: Here’s a secret—this fudge actually tastes better on day two. The flavors meld together, and the texture becomes even creamier. So don’t stress about making it fresh the day of your party. Make it ahead, and thank me later.
Nutritional Information & Benefits
Let’s be real—this is fudge, not a health food. But that doesn’t mean it can’t fit into a balanced lifestyle. Here’s the breakdown for one 1-inch square (assuming 36 pieces per batch):
- Calories: Approximately 150-180 per piece
- Fat: 8-10 grams (mostly from butter, chocolate, and nuts)
- Sugar: 18-22 grams
- Protein: 2-3 grams (from the nuts and milk)
- Carbohydrates: 22-25 grams
Now, the good news. Dark chocolate (which semi-sweet chips are made from) contains antioxidants called flavonoids that can support heart health. Walnuts are packed with omega-3 fatty acids, which are great for brain health. And hey, a little indulgence now and then is good for the soul. I’m a firm believer that food should bring joy, and this fudge definitely does that.
Dietary considerations: This recipe contains dairy, gluten (from the vanilla extract and some chocolate chips—check labels), and nuts (if you add them). It’s not suitable for vegans or those with dairy allergies unless you use the adaptations I mentioned above. For a nut-free version, simply omit the walnuts or pecans.
My personal take? I make this fudge for special occasions, not every day. It’s a treat, and it should feel like one. A single square satisfies my sweet tooth completely, and I don’t feel the need to eat half the pan. Portion control is easier when the flavor is this rich and satisfying.
Conclusion
This old-fashioned fantasy fudge with marshmallow creme has become my signature dessert for a reason. It’s reliable, it’s delicious, and it never fails to impress. Whether you’re hosting a holiday party, bringing something to a potluck, or just want to treat yourself, this recipe delivers every single time.
I love that it comes from such an unexpected source—my accountant, of all people. It reminds me that great recipes can come from anywhere, and sometimes the best things in life are the ones we least expect. Every time I make this fudge, I think about that crumpled piece of paper and the quiet confidence in his voice. He was right. It changed my life—or at least my dessert game.
Now I want to hear from you. Have you tried making fantasy fudge before? What’s your favorite variation? Drop a comment below and share your experience. And if you make this for your next gathering, tag me in your photos—I’d love to see how it turns out. Happy cooking, friends. Go make something sweet.
Frequently Asked Questions
Can I use mini marshmallows instead of marshmallow creme?
I don’t recommend it. Marshmallow creme has a different consistency and stabilizes the sugar mixture in a way that regular marshmallows can’t. I tried this once, and the fudge turned out grainy and didn’t set properly. Stick with the creme for the best results.
Why did my fudge turn out grainy?
Grainy fudge usually means the sugar crystallized. This can happen if you didn’t stir constantly during the boiling phase, or if a sugar crystal from the side of the pan fell into the mixture. To avoid this, make sure your spoon and pan are clean, and stir gently but consistently. If it happens, don’t panic—the fudge is still edible, just not as smooth.
Can I double this recipe?
Absolutely. I double this recipe all the time for holiday gift boxes. Just use a larger pan (9×13 inches works well) and make sure your saucepan is big enough to hold the doubled ingredients. The boiling time stays the same—5 minutes—but keep a close eye on it since the larger volume might take a bit longer to come to a full rolling boil.
How do I get clean, even cuts?
Use a sharp chef’s knife and wipe it clean between each cut. I also like to run the knife under hot water and dry it off before slicing—the warmth helps the knife glide through the fudge without sticking. Let the fudge chill for at least 3-4 hours before cutting, or even overnight for the cleanest edges.
Can I make this fudge without nuts?
Yes, absolutely. The fudge is delicious with or without nuts. If you’re serving a crowd and aren’t sure about nut allergies, it’s safer to leave them out. You can also add the nuts to just half the batch by sprinkling them on top before it sets, so people can choose their preference.
Pin This Recipe!
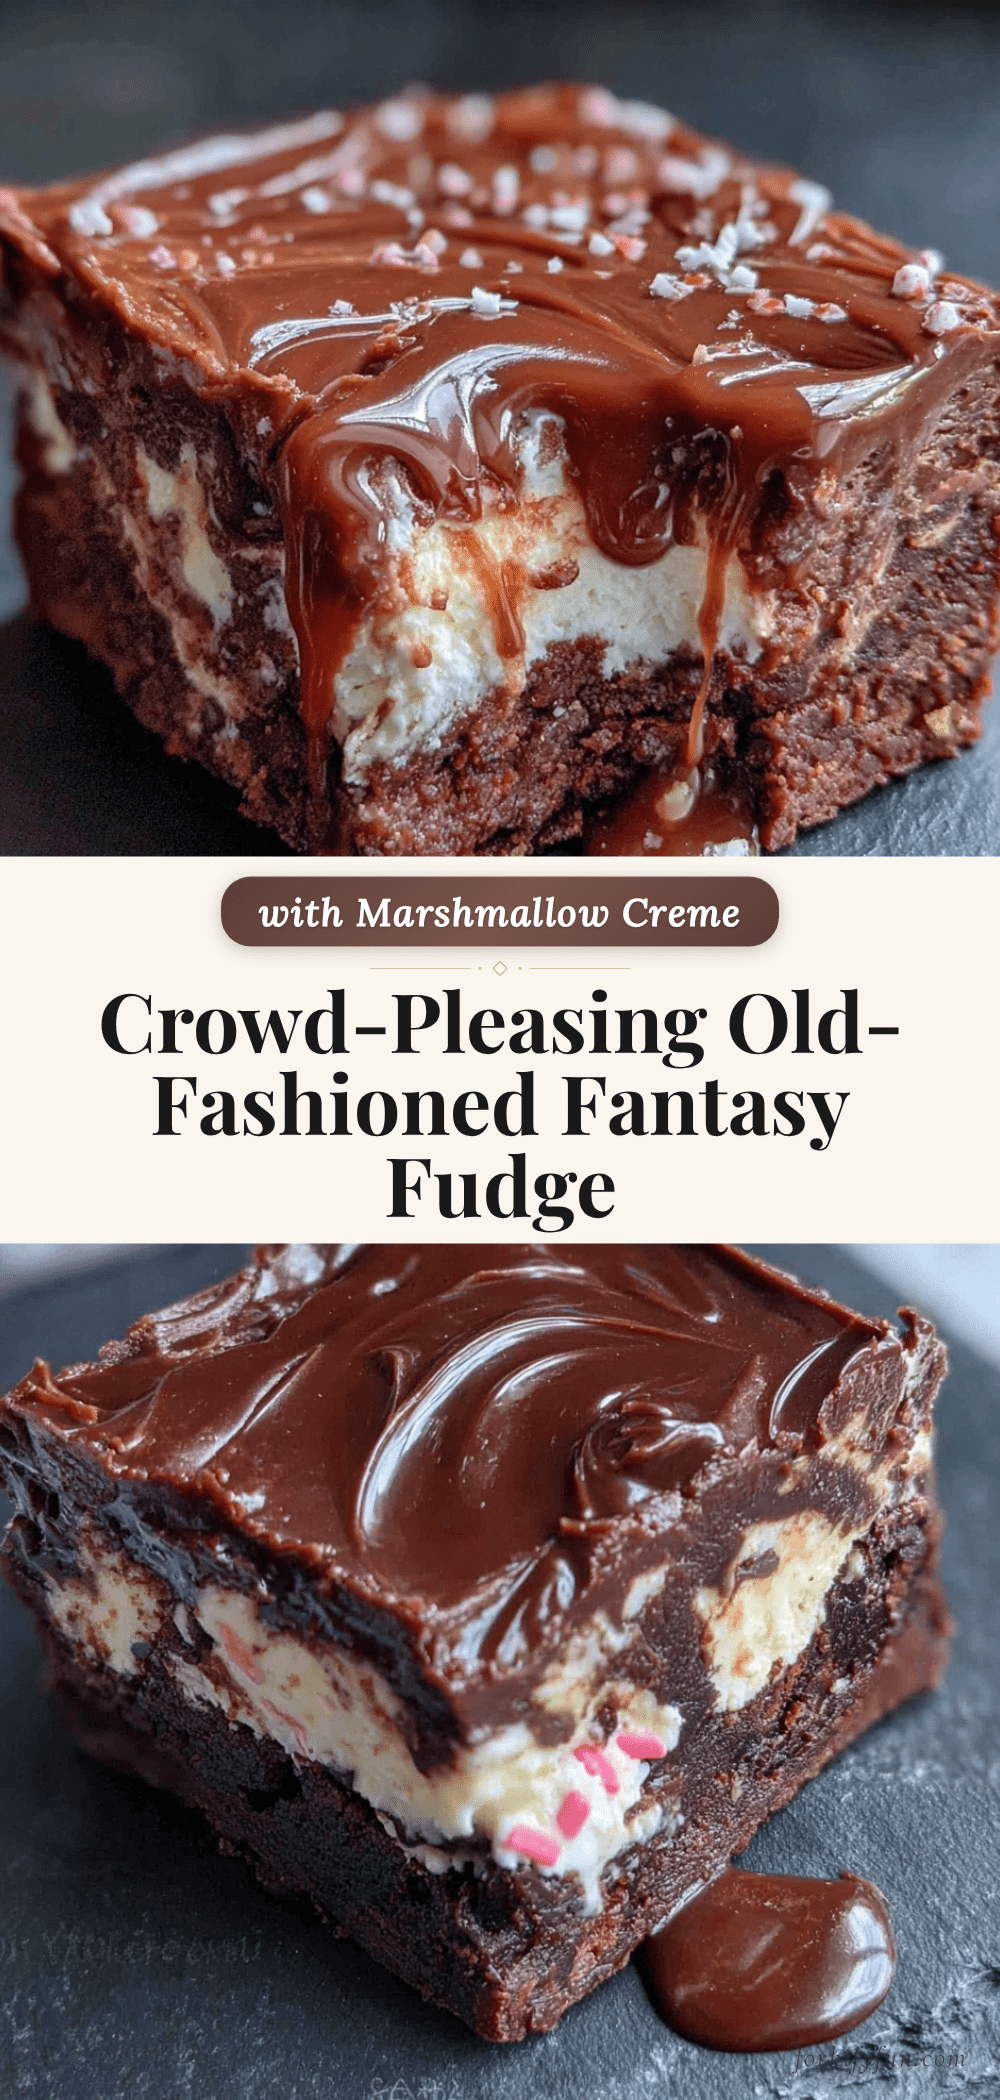
Easy Old-Fashioned Fantasy Fudge with Marshmallow Creme
This foolproof fudge recipe uses marshmallow creme for a silky, melt-in-your-mouth texture. No candy thermometer needed—just simple steps for perfect results every time.
- Prep Time: 15 minutes
- Cook Time: 10 minutes
- Total Time: 3 hours 25 minutes (includes chilling)
- Yield: 36 servings 1x
- Category: Dessert
- Cuisine: American
Ingredients
- 3 cups granulated sugar
- 3/4 cup unsalted butter
- 2/3 cup evaporated milk
- 1/4 teaspoon salt
- 12 ounces semi-sweet chocolate chips
- 1 jar (7 ounces) marshmallow creme
- 1 teaspoon vanilla extract
- 1 cup chopped walnuts or pecans (optional)
Instructions
- Line an 8×8-inch baking pan with parchment paper, leaving overhang on two sides. Lightly grease the parchment with butter or non-stick spray.
- In a large heavy-bottomed saucepan, combine sugar, butter, evaporated milk, and salt. Stir constantly over medium heat until butter is melted and sugar dissolves (3-4 minutes).
- Increase heat and bring mixture to a full rolling boil (bubbles cover entire surface and can’t be stirred down).
- Boil for exactly 5 minutes, stirring constantly. If using a candy thermometer, aim for 234°F (112°C).
- Remove from heat immediately. Stir in chocolate chips and marshmallow creme until melted and smooth (2-3 minutes).
- Stir in vanilla extract and nuts (if using) until evenly distributed.
- Pour mixture into prepared pan and spread evenly. Let cool at room temperature for 1 hour, then refrigerate for at least 2-3 hours or until firm.
- Lift fudge out using parchment overhang, cut into 1-inch squares with a sharp knife, wiping knife clean between cuts.
Notes
Marshmallow creme is non-negotiable for the right texture. Use evaporated milk, not sweetened condensed milk. For best results, make on a dry day (humidity can cause stickiness). Fudge improves after a day or two of resting. Store in an airtight container at room temperature for up to 1 week, or refrigerate for 2-3 weeks. Freeze for up to 3 months.
Nutrition
- Serving Size: 1 piece (1-inch squa
- Calories: 165
- Sugar: 20
- Sodium: 45
- Fat: 9
- Saturated Fat: 5
- Carbohydrates: 23
- Fiber: 1
- Protein: 2
Keywords: fudge, fantasy fudge, marshmallow creme, old-fashioned fudge, chocolate fudge, easy fudge recipe, holiday fudge


