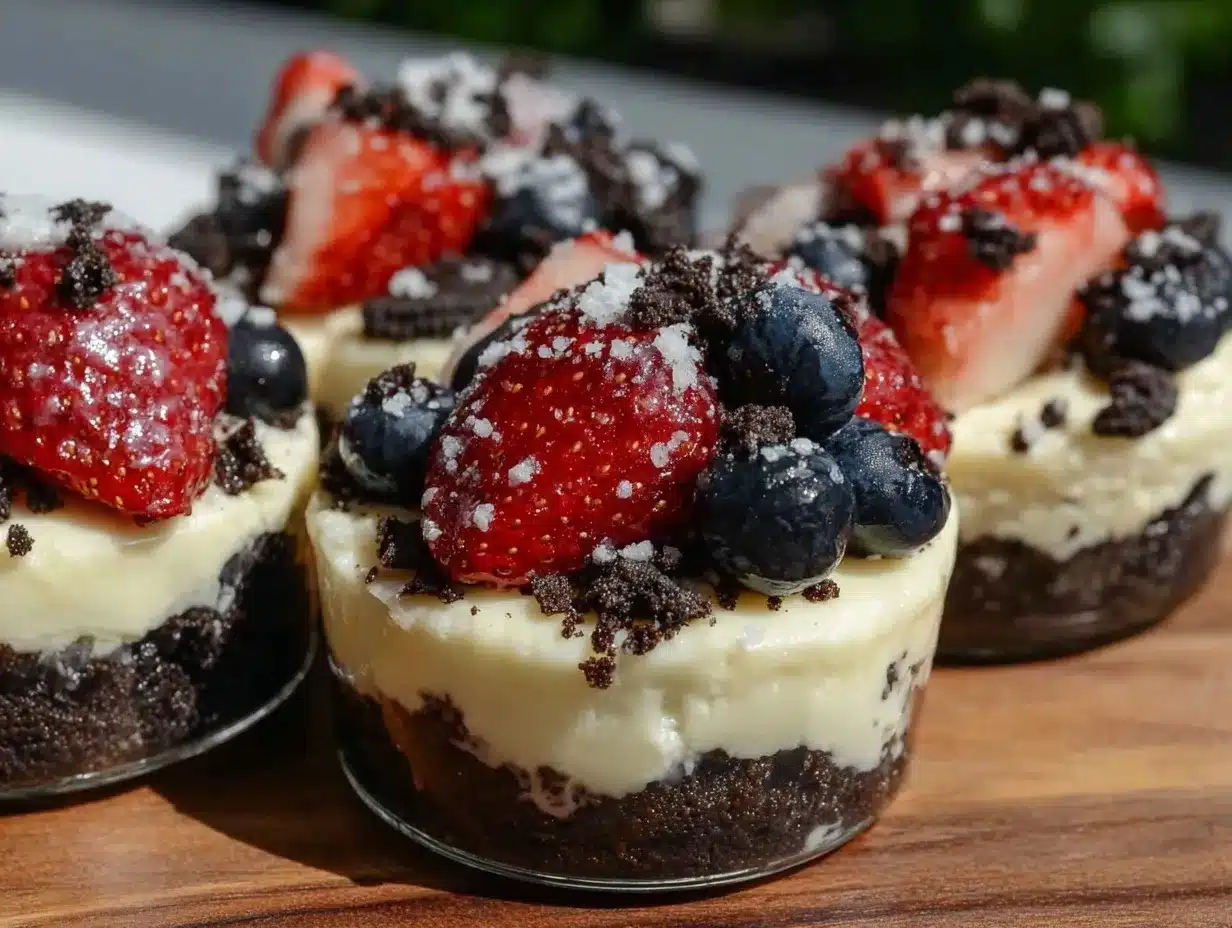
I figured whipping up a festive dessert for the 4th of July would be a bit of a production—layers of red, white, and blue, painstakingly assembled, maybe fiddling with some fancy molds. It took about 15 minutes for that plan to fall apart completely, and honestly, that’s when the Easy No-Bake Patriotic Oreo Cheesecake Cups saved the day. I had this hunch that smashing Oreos and mixing cream cheese could be a shortcut to something crowd-pleasing, but I wasn’t quite ready for how creamy, colorful, and downright addictive these little cups turned out.
The unexpected twist? No oven fuss, no fancy tools—just a handful of ingredients and a little patience in the fridge. The cheesecake filling turned out silkier than I imagined, with just the right balance of sweetness and a subtle tang. And the crushed Oreos gave it a satisfying crunch that made every bite feel like a mini celebration. The red and blue layers, made from simple berry sauces and whipped cream, didn’t just look patriotic—they tasted fresh and bright, a perfect contrast to the rich cheesecake.
What really stuck with me was how this recipe isn’t about perfection—it’s about ease and joy. It’s the kind of dessert you can toss together while the grill’s firing up, and still have time to catch that summer breeze or chat with friends. Every bite brings a little nostalgic spark, but with a twist that feels new enough to keep you coming back. So, if you’re looking for a 4th of July dessert that’s as fuss-free as it is festive, these cheesecake cups might just become your go-to.
Why You’ll Love This Recipe
Having made these Easy No-Bake Patriotic Oreo Cheesecake Cups a handful of times now, I can vouch for how they fit into all sorts of summer celebrations. I’m not a fan of dessert recipes that demand hours or complicated steps, so this one’s a keeper in my book.
- Quick & Easy: These cups come together in under 30 minutes—just enough time to prep before guests arrive or while you’re finishing up your main dishes.
- Simple Ingredients: You don’t need specialty stores or fancy gadgets. Just Oreos, cream cheese, whipped topping, and a couple of berry purées or jams that you might already have.
- Perfect for 4th of July and Beyond: The red, white, and blue theme feels festive but not over the top, so it works for potlucks, backyard barbecues, or just a fun summer treat.
- Crowd-Pleaser: Kids and adults alike usually go for seconds—and sometimes thirds. The Oreo base combined with the creamy filling always gets rave reviews.
- Unbelievably Delicious: The texture combo of crunchy cookie crust, smooth cheesecake, and light whipped layers is just next-level comfort food.
This isn’t just another no-bake cheesecake recipe; the trick is crushing the Oreos just right and folding the filling for that ultra-smooth, luscious texture. Plus, mixing in a bit of berry for the red and blue layers adds a fresh zing that keeps these cups from being too heavy. Honestly, it’s the kind of dessert that makes you pause and smile, maybe close your eyes for a sec, because it tastes like summer happiness in a cup.
What Ingredients You Will Need
This recipe uses simple, wholesome ingredients to deliver bold flavor and satisfying texture without the fuss. Most of these are pantry staples, and the rest are easy to find fresh or frozen depending on your season. Here’s the rundown:
- Oreos: About 24 cookies, crushed roughly (I like to leave some bigger pieces for crunch). You can use original or chocolate crème-filled. For a twist, try golden Oreos.
- Cream Cheese: 8 ounces (225 g), softened. I recommend full-fat cream cheese for best richness—Philadelphia brand is a solid bet.
- Powdered Sugar: 1/2 cup (60 g), to sweeten the cheesecake filling smoothly without graininess.
- Vanilla Extract: 1 teaspoon, pure if possible for that warm, natural flavor.
- Whipped Topping: 1 cup (240 ml), like Cool Whip or homemade whipped cream. This lightens the filling and adds softness.
- Fresh or Frozen Berries: About 1 cup total (150 g), separated by color. Use strawberries or raspberries for red, blueberries for blue. If fresh berries aren’t in season, frozen work just fine after thawing.
- Sugar: 2 tablespoons (25 g), for cooking down the berries into a quick compote.
- Lemon Juice: 1 teaspoon, to brighten the berry sauces.
Ingredient tips: If you want to keep it dairy-free, swap cream cheese and whipped topping for plant-based versions. For a gluten-free option, use gluten-free chocolate sandwich cookies instead of Oreos.
Equipment Needed
Luckily, this recipe doesn’t call for anything fancy or intimidating. Here’s what you’ll want on hand:
- Mixing Bowls: One medium and one large to keep things tidy.
- Electric Mixer or Whisk: An electric hand mixer speeds up the cream cheese and whipped topping blending, but a sturdy whisk works too if you’re feeling the arm workout.
- Food Processor or Zip-top Bag & Rolling Pin: For crushing Oreos. If you don’t have a processor, just bash the cookies in a sealed bag with a rolling pin or heavy pan.
- Spoons and Spatulas: For folding, mixing, and layering the cheesecake cups.
- Serving Cups or Small Mason Jars: These hold the dessert; I love using clear cups so you can see the pretty layers.
Personally, I lean on my trusty hand mixer for smooth filling every time, but I’ve also made these by hand when the mixer was busy with energy balls. No judgment here—whatever keeps the kitchen running smoothly.
Preparation Method
- Crush the Oreos: Place the Oreos in a food processor and pulse until crumbly but not powdery. You want some chunkiness for texture. If no processor, seal in a bag and gently crush with a rolling pin. Set aside about 1/4 cup (30 g) of crumbs for topping. (5 minutes)
- Make the berry sauces: Split your berries into two small saucepans—reds in one, blues in the other. Add 1 tablespoon sugar and 1/2 teaspoon lemon juice to each pan. Cook over medium heat until berries break down and sauce thickens slightly, about 8-10 minutes. Stir occasionally to avoid burning. Let cool. (15 minutes)
- Prepare the cheesecake filling: In a medium bowl, beat the softened cream cheese until smooth (about 2 minutes with an electric mixer). Gradually add powdered sugar and vanilla, beating until creamy. Gently fold in whipped topping until fully combined and airy. (5 minutes)
- Assemble the cups: Spoon about 2 tablespoons (30 g) of Oreo crumbs into each serving cup, pressing lightly to form a crust layer. Next, add a layer of cream cheese filling (about 3 tablespoons or 45 g). Follow with a spoonful of red berry sauce, then another layer of filling, then blue berry sauce on top. Repeat layers if your cups are tall enough, finishing with the reserved Oreo crumbs. (10 minutes)
- Chill: Place the cups in the refrigerator for at least 2 hours to firm up and let flavors meld. They’re best served well chilled but can sit for up to 24 hours. (2+ hours)
Pro tip: When cooking berry sauces, don’t rush the simmer or you’ll lose that fresh berry brightness. And when folding the whipped topping into the cream cheese, be gentle to keep it light and fluffy. These little details make a big difference.
Cooking Tips & Techniques
Even though this recipe is no-bake, a few techniques help nail that perfect cheesecake cup every time.
- Softening Cream Cheese: Don’t skip letting your cream cheese come to room temp. Cold cream cheese leads to lumps and a gritty texture. I usually leave it on the counter for 30 minutes or zap in the microwave for 15 seconds if I’m in a hurry.
- Crushing Oreos: You want a mix of fine crumbs and bigger chunks for contrast. Pulverizing too much into powder makes the base too dense. On the flip side, chunks that are too large can be distracting.
- Berry Sauce Consistency: Aim for a thick but pourable sauce. If it’s too watery, it’ll make your cheesecake cups soggy. A longer simmer with occasional stirring thickens the sauce naturally.
- Folding Technique: When combining whipped topping with cream cheese, fold gently with a spatula instead of stirring vigorously. This keeps the filling airy and prevents deflating.
- Chilling Time: Don’t rush the chill. The flavors need time to marry, and the filling firms up to a luscious texture that holds its shape.
One time, I tried to speed things along by skipping the berry simmer and just layering fresh fruit. It was tasty but lacked that concentrated pop of flavor. Lesson learned—cooked berry sauce is worth the wait. If you want to multitask during the chill, try prepping some savory bites like those bacon-wrapped jalapeño poppers for balance.
Variations & Adaptations
These cheesecake cups are surprisingly flexible, so you can tweak them to suit your preferences or dietary needs.
- Flavor Twists: Swap the berry sauces with cherry or pomegranate for a different festive vibe. I once used a mango-blueberry combo for a tropical Fourth of July, and it was a hit.
- Gluten-Free Version: Use gluten-free sandwich cookies instead of Oreos. There are several brands that mimic the classic Oreo crunch and flavor.
- Dairy-Free Adaptation: Replace cream cheese with a dairy-free cream cheese alternative and whipped topping with coconut whipped cream. The texture won’t be quite the same, but the flavors still shine.
- Mini Cheesecake Pops: Instead of cups, spoon the layers into silicone molds and freeze for bite-sized frozen treats—great for hot summer days.
Feel free to experiment with the layering order too. I sometimes start with a berry sauce layer on the bottom for a surprise burst when you dig in. It’s your dessert, after all—make it yours.
Serving & Storage Suggestions
These cheesecake cups shine best chilled, straight from the fridge. The cool temperature makes the creamy filling silky and refreshing, perfect for warm weather. Serve them with a small spoon (or a festive red, white, and blue cocktail pick) to highlight the layers.
Pair them with light, summery drinks like iced tea, lemonade, or a sparkling rosé. If you want to balance out the sweet, some grilled savory dishes like lemon pepper chicken work beautifully alongside.
For storage, cover the cups tightly with plastic wrap or lids and refrigerate for up to 3 days. If you want to make them ahead for a party, assembling the day before is totally doable. Just give them a gentle stir before serving if the berry sauce settles a bit.
Leftovers can be frozen for up to a month, but the texture softens upon thawing. To reheat slightly, let them sit at room temperature for 15 minutes—don’t microwave or you’ll lose the delicate structure.
Nutritional Information & Benefits
Each serving of these Easy No-Bake Patriotic Oreo Cheesecake Cups packs roughly 320 calories, with 18 grams of fat, 35 grams of carbohydrates, and 5 grams of protein. They’re definitely an indulgence, but the berry sauces bring some antioxidants and vitamin C to the party.
The cream cheese provides a good source of calcium, and by using real fruit in the sauces, you’re cutting down on artificial flavorings and sugars compared to store-bought toppings. For those keeping an eye on gluten or dairy, the recipe can be adapted, as mentioned, to suit dietary needs.
Overall, this dessert feels like a treat with a little fresh fruit goodness—perfect for celebrating while keeping things light enough for a summer evening.
Conclusion
In the end, these Easy No-Bake Patriotic Oreo Cheesecake Cups are exactly what you want when you need a festive dessert that doesn’t demand your whole day. They’re simple, colorful, and satisfyingly creamy with that nostalgic Oreo crunch. Whether you’re prepping for a big barbecue or a casual get-together, they bring a bit of fun and flavor without stress.
Feel free to switch up the berries or cookie base to make them your own. For me, they became a tradition because they’re easy enough to whip up last minute but special enough to feel like a celebration. If you make them, I’d love to hear how you customize the layers or what occasion you serve them for—recipes like this are best when shared!
Enjoy every bite, and here’s to a sweet and simple summer dessert that keeps your kitchen cool and your guests happy.
Frequently Asked Questions About Easy No-Bake Patriotic Oreo Cheesecake Cups
Can I make these cheesecake cups ahead of time?
Absolutely! They actually taste better after chilling for a few hours or overnight. Just keep them covered in the fridge and add the Oreo crumbs right before serving if you want to keep them crunchy.
What can I use instead of Oreos if I have allergies?
Gluten-free sandwich cookies work great, or you can try crushed graham crackers or digestive biscuits for a different flavor profile.
Can I use fresh berries instead of cooked berry sauce?
You can, but cooking the berries into a sauce intensifies the flavor and helps prevent the dessert from getting soggy. Fresh berries are better as a topping or garnish.
Is there a way to make these cups dairy-free?
Yes! Use dairy-free cream cheese and coconut-based whipped topping. The texture might be a bit different but still delicious.
How long do these cheesecake cups last in the fridge?
They keep well for up to 3 days refrigerated. After that, the texture may start to change, so it’s best to consume them sooner rather than later.
Pin This Recipe!
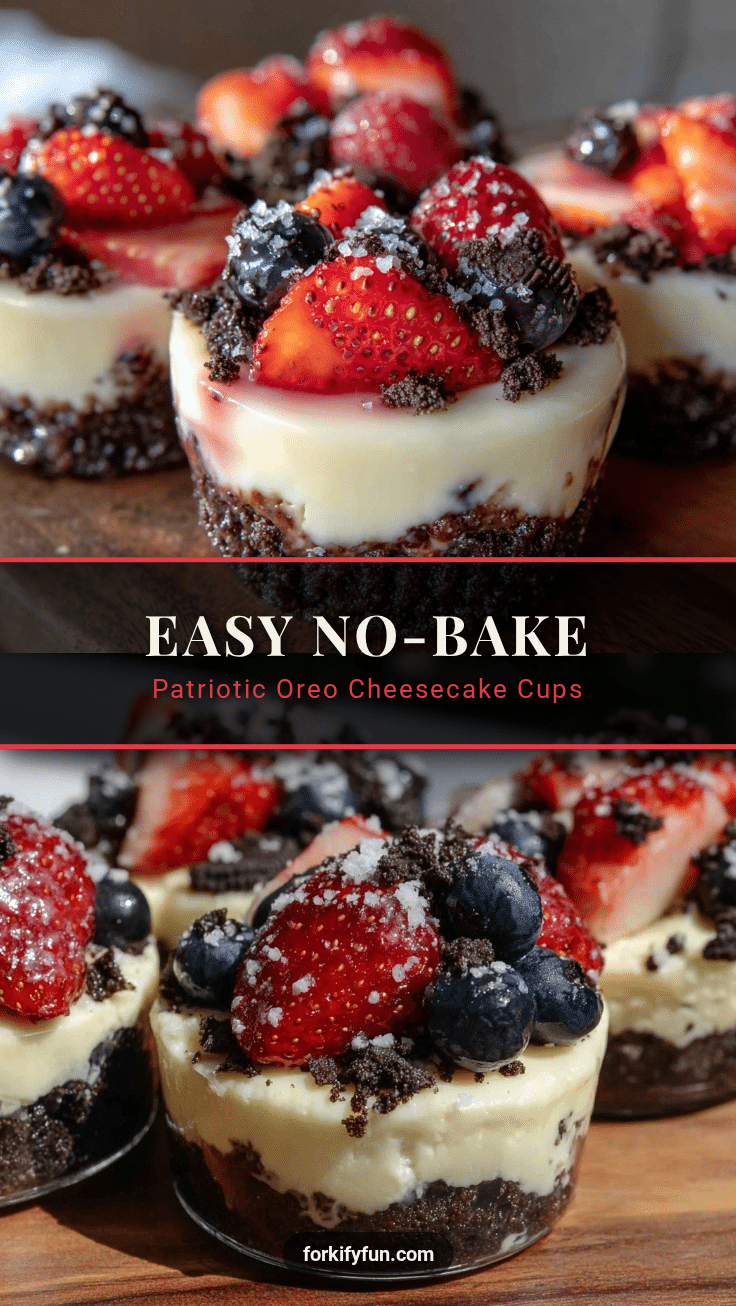
Easy No-Bake Patriotic Oreo Cheesecake Cups

A quick and festive no-bake dessert featuring layers of crushed Oreos, creamy cheesecake filling, and vibrant red and blue berry sauces, perfect for 4th of July celebrations.
- Prep Time: 20 minutes
- Cook Time: 15 minutes
- Total Time: 2 hours 35 minutes
- Yield: 8 servings 1x
- Category: Dessert
- Cuisine: American
Ingredients
- 24 Oreos, crushed roughly (original or chocolate crème-filled; golden Oreos optional)
- 8 ounces (225 g) cream cheese, softened (full-fat recommended)
- 1/2 cup (60 g) powdered sugar
- 1 teaspoon vanilla extract
- 1 cup (240 ml) whipped topping (Cool Whip or homemade whipped cream)
- 1 cup (150 g) fresh or frozen berries, separated by color (strawberries or raspberries for red, blueberries for blue)
- 2 tablespoons (25 g) sugar
- 1 teaspoon lemon juice
Instructions
- Crush the Oreos using a food processor until crumbly but with some chunks remaining. Reserve 1/4 cup (30 g) of crumbs for topping.
- Make the berry sauces by cooking red berries with 1 tablespoon sugar and 1/2 teaspoon lemon juice in one saucepan, and blue berries with the same in another. Simmer over medium heat for 8-10 minutes until thickened. Let cool.
- Prepare the cheesecake filling by beating softened cream cheese until smooth. Gradually add powdered sugar and vanilla extract, beating until creamy. Gently fold in whipped topping until fully combined and airy.
- Assemble the cups by layering about 2 tablespoons (30 g) of Oreo crumbs at the bottom of each serving cup, pressing lightly. Add about 3 tablespoons (45 g) of cheesecake filling, then a spoonful of red berry sauce, another layer of filling, followed by blue berry sauce. Repeat layers if desired, finishing with reserved Oreo crumbs on top.
- Chill the assembled cups in the refrigerator for at least 2 hours to firm up and let flavors meld before serving.
Notes
Let cream cheese come to room temperature before mixing to avoid lumps. Crush Oreos to have a mix of fine crumbs and chunks for texture. Cook berry sauces until thick but pourable to prevent sogginess. Fold whipped topping gently into cream cheese to keep filling airy. Chill at least 2 hours for best texture and flavor melding. Can be made dairy-free or gluten-free with substitutions.
Nutrition
- Serving Size: 1 cheesecake cup
- Calories: 320
- Fat: 18
- Carbohydrates: 35
- Protein: 5
Keywords: no-bake cheesecake, Oreo cheesecake cups, 4th of July dessert, patriotic dessert, easy summer dessert, berry cheesecake cups


