Halloween candy shows up in our house every October, and honestly, I used to just let the kids pick through it until the good stuff was gone, leaving a sad pile of candy corn nobody wanted. For years, I accepted that candy corn was going to sit in a bowl on the counter until late November, when I’d finally toss it with a shrug. That was before I figured out what candy corn was actually meant for—and it wasn’t eating it straight from the bag.
I had been looking for a way to use up all that leftover candy corn that actually tasted good, not just a gimmick. Something that would make the kids actually fight over it instead of leaving it behind. The answer came during a particularly rainy October afternoon when I was staring at a bag of marshmallows and a box of Rice Krispies, completely out of baking inspiration. I melted butter, dumped in the marshmallows, and on a whim, tossed in a generous handful of candy corn right before it all came together.
The way that candy corn melted into the marshmallow mixture was honestly kind of magical. It turned the whole thing a soft, sunset-orange color, and those little pieces that didn’t fully melt left tiny, chewy pockets of sweetness throughout. The first batch disappeared before I could even cut it into squares properly. My husband walked through the kitchen, grabbed a piece, and said, “Wait, these are actually amazing.” That’s when I knew I had stumbled onto something worth keeping.
These Easy Candy Corn Rice Krispie Treats have become our official Halloween tradition now. They’re the dessert that makes everyone smile, uses up candy nobody else wants, and comes together in about ten minutes flat. No oven required, no complicated steps, just pure, nostalgic fun in every bite.
Why You’ll Love This Recipe
Let me tell you why these treats have earned a permanent spot in our fall rotation. I’ve tested this recipe at least six times now, tweaking the ratio of candy corn to marshmallows, testing different brands, and even trying it with stale versus fresh candy corn. What I landed on is genuinely foolproof.
- Quick & Easy : Comes together in under 15 minutes, start to finish. Perfect for last-minute Halloween parties or classroom treats when you forgot to sign up for the bake sale (not that I’ve done that).
- Simple Ingredients : You need exactly four ingredients—butter, marshmallows, Rice Krispies cereal, and candy corn. That’s it. No specialty stores, no weird extracts.
- Perfect for Halloween : These treats look festive without requiring any decorating skills. No piping bags, no food coloring, no stress. The candy corn does all the heavy lifting visually.
- Crowd-Pleaser : Kids go absolutely crazy for these, and adults secretly love them too. I’ve watched grown men sneak seconds when they thought nobody was looking.
- Unbelievably Delicious : The texture is next-level. You get the classic crispy, chewy Rice Krispie base, plus those little pockets of melted candy corn that add a subtle vanilla-honey flavor. It’s not overpowering—it’s just right.
What makes this recipe different from every other Rice Krispie treat out there is the way the candy corn integrates. Most recipes just sprinkle it on top as decoration, but melting it into the marshmallow mixture changes everything. The candy corn softens and blends, creating a creamy, almost butterscotch-like undertone. It’s comfort food reimagined—faster, more festive, but with the same soul-soothing satisfaction you expect from a classic treat.
What Ingredients You Will Need
This recipe uses simple, pantry-friendly ingredients to deliver big Halloween flavor without any fuss. You probably already have most of these on hand, especially if you’ve got leftover Halloween candy floating around.
- Unsalted butter, 6 tablespoons (84 grams) — Use unsalted so you can control the salt level. I prefer Land O’Lakes for consistent results, but any brand works fine.
- Marshmallows, 10 ounces (about 40 regular or 4 cups mini) — Standard Jet-Puffed marshmallows work perfectly. Don’t use stale marshmallows; they won’t melt as smoothly.
- Rice Krispies cereal, 6 cups (180 grams) — The original brand gives the best texture, but any crispy rice cereal works. Store brands tend to be a bit softer, so your treats might be slightly less crunchy.
- Candy corn, 1 cup (about 200 grams) — This is the star of the show. I recommend Brach’s candy corn for consistent melting. Fresh candy corn melts better than stale, so if your bag has been sitting open for weeks, consider buying a fresh one. Seasonal candy corn (like the autumn blend with the brown tips) works great too.
You can also add a pinch of salt (about ¼ teaspoon) if you want that sweet-salty contrast, but it’s totally optional. Some people like to add a teaspoon of vanilla extract, but honestly, the candy corn already brings plenty of vanilla flavor, so I skip it.
Equipment Needed
You don’t need any fancy equipment for this recipe. Here’s what you’ll need:
- Large pot or Dutch oven (4-quart or larger) — You need room to stir everything together without spilling. I use my 5.5-quart Le Creuset, but any heavy-bottomed pot works.
- Rubber spatula or wooden spoon — A silicone spatula is ideal because it won’t scratch your pot and it scrapes the sides clean.
- 9×13-inch baking dish — This gives you thick, satisfying squares. An 8×8 dish works too, but your treats will be thicker and you’ll need to adjust the cooking time slightly.
- Parchment paper or wax paper — Lining the dish makes removal so much easier. Trust me, I’ve learned this the hard way.
- Sharp knife or bench scraper — For cutting clean squares. A serrated knife works best to avoid squishing the treats.
If you don’t have a 9×13 dish, you can use a rimmed baking sheet. Just grease it well and press the mixture into an even layer. The treats will be thinner, but they’ll still taste amazing.
Preparation Method
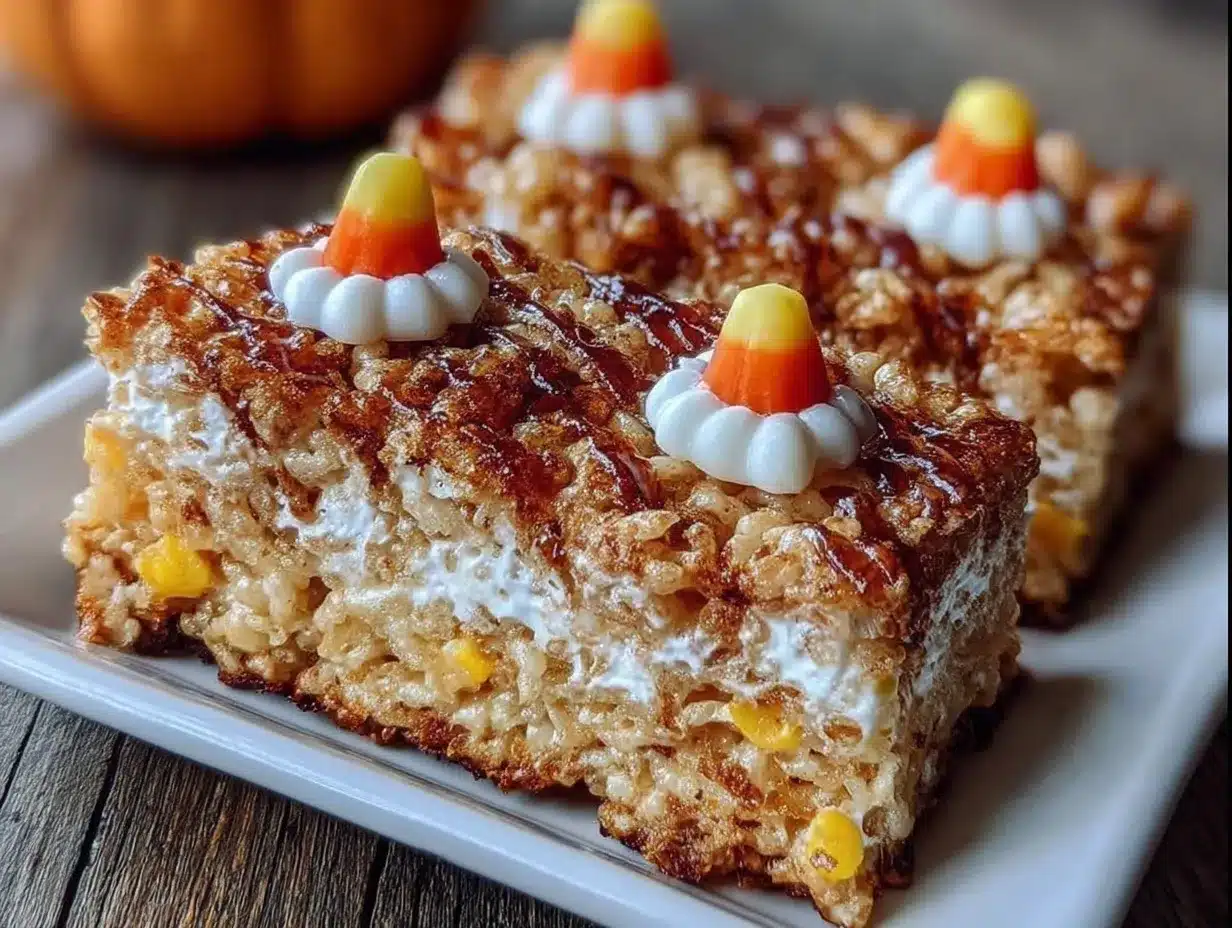
Follow these steps carefully, and you’ll have perfect treats every single time. I’ve made enough batches to know exactly where things can go wrong, so I’ll walk you through it.
- Prep your pan. Line a 9×13-inch baking dish with parchment paper, leaving some overhang on two sides. This creates handles that make lifting the treats out super easy. Lightly grease the parchment with butter or nonstick spray.
- Melt the butter. Place your large pot over medium-low heat and add the 6 tablespoons of butter. Let it melt slowly, swirling the pan occasionally. Don’t rush this—butter burns easily on high heat, and burnt butter will ruin the flavor.
- Add the marshmallows. Once the butter is fully melted, dump in all 10 ounces of marshmallows. Stir constantly with your rubber spatula until the marshmallows are completely melted and smooth. This takes about 3-4 minutes. The mixture will look glossy and slightly thick.
- Add the candy corn. Here’s the crucial step: Remove the pot from the heat first. Then dump in 1 cup of candy corn and stir vigorously for about 30 seconds. You want the candy corn to start melting but not disappear completely. Some pieces will dissolve into the marshmallow, creating that gorgeous orange color, while others will stay partially intact for little chewy surprises. If you add the candy corn while the pot is still on the heat, it will melt too much and you’ll lose the texture.
- Add the cereal. Pour in 6 cups of Rice Krispies cereal. Fold everything together gently but thoroughly. Use a folding motion—lift from the bottom and turn over—until all the cereal is coated in the marshmallow-candy corn mixture. Work quickly here; the mixture stiffens as it cools.
- Press into the pan. Scrape the mixture into your prepared pan. Here’s a trick I learned: lightly grease your hands or the back of a spoon with butter or nonstick spray, then press the mixture into an even layer. Don’t press too hard or the treats will be dense and hard. You want them gently compressed, not squished flat.
- Cool completely. Let the treats sit at room temperature for at least 30 minutes before cutting. This allows them to set properly. If you cut too early, they’ll be sticky and fall apart.
- Cut and serve. Lift the treats out using the parchment handles. Use a sharp knife to cut into squares. For clean cuts, wipe the knife clean between cuts. I like 12 large squares or 24 smaller ones for parties.
Sensory cue: When you’re stirring the candy corn into the marshmallow, you’ll notice the mixture turning a warm, golden-orange color. The smell is incredible—like vanilla and honey with a hint of butter. When you fold in the cereal, listen for that satisfying crackle as the Rice Krispies hit the warm marshmallow. That’s how you know you’ve done it right.
Cooking Tips & Techniques
After making these Easy Candy Corn Rice Krispie Treats more times than I care to admit, I’ve collected a few tips that make a real difference. Trust me, I’ve learned these through trial and error.
Don’t overheat the marshmallows. This is the number one mistake people make. If you cook the marshmallow mixture too long or on too high heat, your treats will turn out hard and brittle instead of soft and chewy. Low and slow is the way to go. Once the marshmallows are just melted, take the pot off the heat immediately.
Fresh candy corn matters. I tested this with a bag of candy corn that had been sitting in my pantry since last Halloween, and it didn’t melt properly. The treats were grainy and the candy corn pieces stayed hard. Fresh candy corn (bought within the last month or two) melts smoothly and integrates beautifully.
Work quickly but gently. Once you add the cereal, you have about 60 seconds to get everything mixed and pressed into the pan before the mixture starts to set. But don’t rush so much that you crush the cereal. Gentle folding is key to maintaining that light, airy texture.
Use a sharp knife for cutting. A dull knife will squish your treats and make messy edges. I use a long serrated knife and saw gently back and forth. If the knife starts to stick, wipe it clean and spray it with a little nonstick spray.
Let them set completely. I know it’s tempting to dig in right away, but patience pays off here. Thirty minutes of cooling time makes the difference between sticky, falling-apart squares and perfectly formed treats that hold their shape.
Variations & Adaptations
One of the best things about this recipe is how easy it is to customize. Here are some variations I’ve tried and loved:
- Chocolate Drizzle : After the treats have cooled, melt ½ cup of semi-sweet chocolate chips with 1 teaspoon of coconut oil and drizzle it over the top. The chocolate pairs beautifully with the candy corn’s vanilla flavor. I did this for a Halloween party and they disappeared in minutes.
- Peanut Butter Twist : Stir ¼ cup of creamy peanut butter into the marshmallow mixture right after you add the candy corn. The salty peanut butter balances the sweetness perfectly. If you’re a fan of Reese’s Peanut Butter Cup Layer Cake, you’ll love this variation.
- Spooky Mix-Ins : Fold in ½ cup of mini chocolate chips or ¼ cup of Halloween sprinkles along with the cereal. The chocolate chips add little melty pockets, and the sprinkles make the treats even more festive.
- Gluten-Free Option : This recipe is naturally gluten-free as long as you use certified gluten-free Rice Krispies (the original brand is not gluten-free, but there are store-brand alternatives that are).
- Vegan Adaptation : Use vegan butter and vegan marshmallows (Dandies brand works great). Candy corn is typically vegan, but double-check the label. The texture will be slightly different, but still delicious.
I personally love the chocolate drizzle version. I made it for a Halloween movie night with the kids, and even my husband—who claims he doesn’t like candy corn—ate three pieces before admitting they were good.
Serving & Storage Suggestions
These treats are best served at room temperature, which is part of what makes them so perfect for parties. You can arrange them on a platter, stack them on a cake stand, or pack them in treat bags for Halloween goodie bags.
Storage: Place the treats in an airtight container at room temperature. They’ll stay fresh for up to 5 days, though honestly, they never last that long in my house. Layer them between sheets of wax paper or parchment to prevent sticking.
Freezer: You can freeze these treats for up to 3 months. Wrap each square individually in plastic wrap, then place them in a freezer-safe bag. To thaw, just leave them at room temperature for about 30 minutes. The texture holds up surprisingly well.
Reheating: If your treats start to get a little stale (which happens around day 4), pop one in the microwave for 5-10 seconds. It softens the marshmallow and brings back that fresh-made texture. Just don’t overdo it, or you’ll end up with a melted mess.
Flavor development: Interestingly, these treats actually taste better the next day. The flavors meld together overnight, and the candy corn’s sweetness becomes more integrated. So if you’re making them for a party, preparing them a day ahead is actually a great idea.
These treats pair wonderfully with a warm drink. For a cozy fall combo, try them alongside a Creamy Pumpkin Cold Foam Iced Latte. The pumpkin and candy corn flavors are a surprisingly good match.
Nutritional Information & Benefits
Let’s be real—these are a treat, not a health food. But here’s the estimated nutritional breakdown for one square (based on 12 servings):
- Calories: Approximately 220
- Fat: 7g
- Carbohydrates: 40g
- Protein: 2g
- Sugar: 25g
Health considerations: This recipe contains dairy (butter) and is not suitable for vegans unless modified. It’s naturally egg-free and nut-free (check your candy corn label for potential cross-contamination). The treats are also gluten-free if you use certified gluten-free cereal.
Ingredient benefits: While these aren’t exactly a superfood, the Rice Krispies do provide a small amount of iron and B vitamins from fortification. The butter adds a touch of vitamin A. And honestly, sometimes the best thing you can do for your mental health is enjoy a nostalgic treat that makes you smile. Balance is everything.
Conclusion
These Easy Candy Corn Rice Krispie Treats have genuinely changed how I feel about Halloween candy. Instead of dreading the leftover candy corn, I actually look forward to making a batch (or three) every October. They’re quick, they’re fun, and they turn something nobody wants into something everyone fights over.
The beauty of this recipe is how customizable it is. You can keep it simple or dress it up with chocolate, sprinkles, or peanut butter. You can make it for a Halloween party, a classroom celebration, or just a cozy night in with the family. However you make it, I promise you’ll love the result.
I’d love to hear how yours turn out! Drop a comment below and let me know if you tried any variations, or tag me in your photos on social media. Did your kids love them? Did you add chocolate? Did you finally use up that bag of candy corn that’s been sitting in your pantry since last Halloween? Share your stories—I read every single one.
Happy Halloween, and happy snacking!
Frequently Asked Questions
Can I use stale candy corn for this recipe?
I don’t recommend it. Stale candy corn doesn’t melt as smoothly and can leave your treats with a grainy texture. Fresh candy corn (bought within the last couple of months) works best. If your candy corn is hard and dry, it’s better to buy a new bag.
Can I make these treats ahead of time?
Absolutely! In fact, they taste even better the next day as the flavors meld together. Store them in an airtight container at room temperature for up to 5 days. You can also freeze them for up to 3 months.
Why did my treats turn out hard?
This usually happens when the marshmallow mixture is cooked too long or on too high heat. Once the marshmallows are just melted, remove the pot from the heat immediately. Also, pressing the mixture too firmly into the pan can make the treats dense and hard.
Can I use a different type of cereal?
Yes, you can substitute other crispy rice cereals, but the texture may vary. Store brands tend to be slightly softer, so your treats might be less crunchy. You can also try Fruity Pebbles for a fun, colorful twist—just note that the flavor will change significantly.
How do I prevent the treats from sticking to the knife when cutting?
Spray your knife with a little nonstick cooking spray or wipe it with butter before cutting. Wipe the blade clean between cuts to prevent sticky buildup. A serrated knife with a gentle sawing motion works best.
Pin This Recipe!

Easy Candy Corn Rice Krispie Treats

These Easy Candy Corn Rice Krispie Treats are a quick and festive Halloween dessert that transforms leftover candy corn into a crowd-pleasing treat. With just four ingredients and no oven required, they come together in about 15 minutes for a nostalgic, chewy, and delicious snack.
- Prep Time: 10 minutes
- Cook Time: 5 minutes
- Total Time: 15 minutes
- Yield: 12 servings 1x
- Category: Dessert
- Cuisine: American
Ingredients
- 6 tablespoons (84 grams) unsalted butter
- 10 ounces (about 40 regular or 4 cups mini) marshmallows
- 6 cups (180 grams) Rice Krispies cereal
- 1 cup (about 200 grams) candy corn
- Optional: ¼ teaspoon salt
- Optional: 1 teaspoon vanilla extract
Instructions
- Line a 9×13-inch baking dish with parchment paper, leaving overhang on two sides. Lightly grease the parchment with butter or nonstick spray.
- Place a large pot over medium-low heat and melt 6 tablespoons of butter slowly, swirling occasionally.
- Add 10 ounces of marshmallows to the melted butter. Stir constantly until completely melted and smooth, about 3-4 minutes.
- Remove the pot from the heat. Add 1 cup of candy corn and stir vigorously for about 30 seconds until partially melted.
- Pour in 6 cups of Rice Krispies cereal. Fold gently but thoroughly until all cereal is coated.
- Scrape the mixture into the prepared pan. Lightly grease your hands or the back of a spoon, then press the mixture into an even layer without pressing too hard.
- Let the treats cool completely at room temperature for at least 30 minutes.
- Lift the treats out using the parchment handles. Cut into squares with a sharp knife, wiping the blade clean between cuts.
Notes
Use fresh candy corn for best melting results. Don’t overheat the marshmallows or the treats will become hard. Work quickly once cereal is added. For cleaner cuts, spray the knife with nonstick spray. Treats taste even better the next day as flavors meld.
Nutrition
- Serving Size: 1 square
- Calories: 220
- Sugar: 25
- Sodium: 150
- Fat: 7
- Saturated Fat: 4
- Carbohydrates: 40
- Protein: 2
Keywords: candy corn, Rice Krispie treats, Halloween dessert, easy dessert, no-bake, kid-friendly, fall recipe