Third time this week I found myself standing over a cutting board at 7:15 AM, a stack of bread slices waiting, and the dog watching me like I might drop something. The first batch I made Monday morning had the edges sealed just right, but the centers leaked. Tuesday I overstuffed them and the bread split. This morning—Wednesday—I finally stopped guessing and started paying attention to what the bread was actually telling me.
It sounds silly to obsess over a sandwich your kid will probably trade for a bag of goldfish anyway. But here’s the thing: those store-bought frozen ones are convenient, sure, but they’re also packed with preservatives, weird stabilizers, and that slightly plasticky aftertaste you can never un-taste once you notice it. I wanted something I could make ahead, freeze, and grab without guilt. Something that actually tasted like real food.
So I kept making them. Adjusted the spread ratio, tested different bread types, figured out the sealing trick that actually holds. And somewhere between loaf number two and three, I realized this wasn’t just about convenience anymore. It was about having one less thing to think about at 7:15 AM when the bus is coming and someone can’t find their left shoe.
These easy DIY kindergarten uncrustable sandwiches became my little morning win. And honestly? They might become yours too.
Why You’ll Love This Recipe
Let me be straight with you—I’ve tested this recipe through every possible failure mode. Soggy bread. Leaky seals. Frozen sandwiches that tasted like cardboard. I made the mistakes so you don’t have to. Here’s what makes these different:
- Simple Ingredients : No high-fructose corn syrup, no hydrogenated oils, no ingredients you can’t pronounce. You probably have everything in your kitchen right now.
- Quick & Easy : Once you get the hang of it, you can assemble a dozen in under 15 minutes. That’s less time than a trip to the store.
- Perfect for Busy Mornings : Grab one from the freezer, toss it in a lunchbox, and by lunchtime it’s perfectly thawed. No morning assembly required.
- Kid-Approved : My niece actually asked for seconds. That never happens.
- Budget-Friendly : Homemade costs a fraction of the pre-packaged versions, especially when you buy ingredients in bulk.
What makes this recipe different from all the other copycat versions out there? It’s the sealing technique. Most tutorials tell you to just press the edges with a fork and hope for the best. I figured out that lightly toasting the bread before assembly creates a better seal and prevents sogginess. It’s a small tweak, but it makes a huge difference.
This isn’t just another recipe—it’s the one that makes you feel like you’ve got your act together, even on chaotic mornings. There’s something deeply satisfying about opening your freezer and seeing a stack of these ready to go.
What Ingredients You Will Need
This recipe uses simple, everyday ingredients to create a lunchbox staple that actually tastes good. No fancy grocery trips needed—you likely already have everything in your kitchen.
- 8 slices soft white bread (or whole wheat, brioche, or sourdough—see notes below)
- 4 tablespoons creamy peanut butter (I prefer Skippy Natural or Justin’s for best texture; avoid the super oily natural kinds that separate too much)
- 4 tablespoons strawberry jam or jelly (seedless jam works best for little kids; Bonne Maman is my go-to brand)
- 2 tablespoons unsalted butter, softened (optional, for toasting the outside before freezing)
Ingredient Selection Tips:
- Bread matters more than you think. Cheap white bread can get gummy when frozen and thawed. I’ve had the best luck with Sara Lee Artesano or Pepperidge Farm Farmhouse—they’re sturdy enough to hold up but soft enough to squish down properly. Whole wheat works too, but look for a softer variety, not the dense, seedy kind.
- Peanut butter choice is crucial. Avoid the natural stuff that separates into oil and solids—it’ll make your sandwiches soggy. You want a creamy peanut butter that stays spreadable even when cold. If you need a nut-free option, SunButter or WowButter work beautifully.
- Jam vs. jelly: Jelly holds up better in the freezer because it has less water content. If you’re using jam, make sure it’s thick and not too runny. I’ve had good luck with seedless raspberry jam—it spreads easily and doesn’t make the bread wet.
- Butter is optional but recommended. A thin layer of butter on the outside of the bread before toasting creates a barrier that helps prevent freezer burn and adds a subtle richness. Skip it if you’re watching calories, but don’t skip it if you want the best texture.
Substitution Guidance:
- Nut-free option: Use sunflower seed butter or soy nut butter. Just note that sunflower butter can turn green when baked or frozen—it’s completely safe to eat, just not pretty.
- Low-sugar option: Use sugar-free jam or make your own chia seed jam (it’s surprisingly easy and has way less sugar).
- Gluten-free option: Use gluten-free bread, but look for a softer variety. Canyon Bakehouse makes a good one that holds up to freezing.
- Vegan option: Use plant-based butter and check your bread label (many store-bought breads contain milk or eggs).
Equipment Needed
- Uncrustable sandwich cutter/sealer (the official gadget makes it easy, but a 3-4 inch round cookie cutter works in a pinch)
- Rolling pin (for flattening the bread evenly)
- Butter knife or offset spatula (for spreading fillings)
- Baking sheet (for flash-freezing)
- Parchment paper (to prevent sticking)
- Freezer-safe zip-top bags (for storage)
- Sharp knife (if cutting by hand)
If you don’t have an uncrustable maker, don’t stress. I actually prefer using a wide-mouth mason jar ring—it’s the perfect size and costs nothing. Press down firmly and crimp the edges with a fork. The key is getting a good seal, not having fancy equipment.
I’ve also used a 4-inch biscuit cutter with decent results. The edges won’t be as pretty, but they’ll hold together fine. Budget tip: check thrift stores for sandwich sealers—I found mine for $2 and it works perfectly.
Preparation Method

- Set up your workstation. Lay out your bread slices, peanut butter, jam, and butter. Have your cutter and a baking sheet lined with parchment paper ready. This goes fast once you start, so having everything within arm’s reach makes a difference.
- Lightly toast the bread. Pop the bread slices in the toaster on the lowest setting—just enough to warm them slightly and dry out the surface. You don’t want color, just a slight crispness on the outside. This step is non-negotiable if you want to avoid soggy sandwiches later. Let the bread cool for 2 minutes before handling.
- Flatten the bread. Using a rolling pin, gently roll each slice to about 1/4-inch thickness. Focus on the center—you want it thin enough to seal properly but not so thin it tears. If you don’t have a rolling pin, a clean wine bottle works. Trust me, I’ve been there.
- Spread the peanut butter. Take 4 slices of flattened bread and spread about 1 tablespoon of peanut butter on each, leaving a 1/2-inch border around the edges. The border is important—if you spread all the way to the edge, the filling will squeeze out when you seal it.
- Add the jam. Spread about 1 tablespoon of jam on top of the peanut butter on the same 4 slices. Keep that border clear! The jam should sit right in the center, not touching the edges.
- Top with remaining bread. Place the remaining 4 slices of flattened bread on top of the filled ones. Press down gently around the edges to start the sealing process.
- Cut and seal. Place your uncrustable cutter or cookie cutter over the sandwich, centering it so the filling is in the middle. Press down firmly and evenly. You should hear a satisfying crunch as it cuts through all layers. Twist slightly to release, then lift straight up. If you’re using a fork method, press the tines firmly around the edges, working your way around the entire circle.
- Check the seal. Run your finger around the edge of each sandwich. If you feel any gaps or thin spots, press them together again. A good seal is the difference between a sandwich that stays intact and a leaky mess in the lunchbox.
- Flash freeze. Place the sealed sandwiches on the parchment-lined baking sheet in a single layer, not touching each other. Pop them in the freezer for 1-2 hours, or until they’re solid to the touch. This prevents them from sticking together when you bag them.
- Transfer to storage bags. Once frozen solid, transfer the sandwiches to freezer-safe zip-top bags. Squeeze out as much air as possible before sealing. Label with the date—they’ll keep for up to 3 months.
Timing Breakdown:
- Prep time: 10 minutes
- Assembly time: 10 minutes (for 4 sandwiches)
- Flash freeze time: 1-2 hours
- Total active time: 20 minutes
Sensory Cues:
- The bread should feel slightly warm and dry to the touch after toasting—not hot, not soft
- When you press the cutter down, you should feel a clean cut, not a squishy resistance
- The sealed edges should look uniform and slightly compressed, like a pie crust edge
- After flash freezing, the sandwiches should feel solid and make a slight tapping sound when you drop one on the counter
Cooking Tips & Techniques
I learned most of these the hard way—through failed batches and disappointed kids. Here’s what actually works:
The Bread Mistake I Made Three Times: I kept using fresh, soft bread straight from the bag. It seemed right, right? Wrong. Fresh bread is too pliable and compresses unevenly, creating weak spots where filling leaks out. Lightly toasting it (or even leaving it out on the counter for an hour) dries the surface just enough to create a better seal. This was my biggest “aha” moment.
The Filling Ratio That Actually Works: Too much filling and your sandwich explodes. Too little and it’s dry. The sweet spot is exactly 1 tablespoon of peanut butter and 1 tablespoon of jam per sandwich. Measure it the first few times—your eyes will learn what that looks like. I use a small cookie scoop for the peanut butter and it’s been a game-changer.
Don’t Skip the Flash Freeze: I know, it’s tempting to just throw them all in a bag together. But they’ll freeze into one giant clump, and you’ll be wrestling with frozen sandwich icebergs at 7 AM. The 1-hour flash freeze is worth every minute. I make a batch every Sunday afternoon while I’m watching football, and it’s become part of my routine.
Multitasking Strategy: While the first batch is flash freezing, I start the next batch. By the time I’ve assembled 8 sandwiches, the first 4 are ready to bag. It’s a nice little assembly line rhythm that makes the process feel efficient rather than tedious.
The Secret to Preventing Soggy Bread: Besides toasting, here’s another trick: spread the peanut butter on both slices of bread, not just one. The peanut butter acts as a barrier between the jam and the bread, preventing moisture migration. It’s a small extra step, but it makes a noticeable difference in texture after thawing.
Variations & Adaptations
1. Nut-Free Sunflower Butter Version: Swap the peanut butter for sunflower seed butter. Pro tip: add a pinch of salt and a drizzle of honey to balance the slightly bitter taste of sunflower butter. My niece actually prefers this version now—go figure.
2. Cream Cheese and Jam: Replace the peanut butter with softened cream cheese (use 2 tablespoons per sandwich). The tangy cream cheese pairs beautifully with strawberry or raspberry jam. This is my personal favorite for a slightly more grown-up version.
3. Chocolate Hazelnut Dream: Use Nutella or a similar chocolate-hazelnut spread instead of peanut butter. Add a few mini chocolate chips in the center for extra indulgence. Warning: these will disappear from the freezer mysteriously fast.
4. Seasonal Fruit Fillings: In summer, use fresh mashed berries mixed with a little honey instead of jam. In fall, try apple butter or pumpkin butter. Just make sure the filling is thick enough not to soak through the bread. If you’re looking for a strawberry cheesecake flag trifle vibe, you could even add a thin layer of cream cheese under the fruit.
5. Savory Option: Yes, really. Use cream cheese, thinly sliced cucumber, and a sprinkle of everything bagel seasoning. Seal and freeze the same way. These are surprisingly good for a quick lunch or snack that’s not sweet. My husband steals these from the freezer all the time.
Allergen Substitutions: For a school-safe version, use sun butter or soy nut butter, and check that your bread is nut-free. Many commercial breads are processed on shared equipment. If you need to avoid dairy, skip the butter and use a dairy-free margarine.
Serving & Storage Suggestions
Serving Temperature: These sandwiches are designed to be eaten thawed—not cold, not warm. Pack them frozen in the morning, and by lunchtime they’ll be perfectly defrosted and ready to eat. If your kid prefers them cold, they’re fine straight from the fridge too.
Presentation Tips: Cut them in half for little hands, or leave them whole for bigger kids. I sometimes cut them into fun shapes using cookie cutters before sealing—stars, hearts, dinosaurs. It makes lunch feel special without any extra effort.
Complementary Sides: Pair with fresh fruit, veggie sticks, yogurt pouches, or a handful of soft classic chocolate chip cookies for a complete lunch. These sandwiches also work great for picnics, road trips, or as a quick snack after school.
Storage Instructions:
- Freezer: Store in freezer-safe bags for up to 3 months. Remove as much air as possible to prevent freezer burn.
- Refrigerator: If you’re using them within 3-4 days, you can keep them in the fridge instead of freezing. They’ll stay fresh and ready to grab.
- Thawing: Let thaw at room temperature for about 30 minutes, or overnight in the fridge. Don’t microwave—it makes the bread rubbery.
Flavor Development Note: These sandwiches actually taste better after a day or two in the freezer. The flavors meld together, and the bread softens slightly. I’ve noticed the peanut butter and jam seem to marry into something more cohesive than a freshly made sandwich. It’s weird but true.
Nutritional Information & Benefits
Estimated per sandwich (using white bread, peanut butter, and strawberry jam):
- Calories: 280
- Protein: 8g
- Carbohydrates: 32g
- Fat: 14g
- Fiber: 2g
- Sugar: 14g
Health Benefits: Peanut butter provides protein and healthy fats that keep kids full and focused through the afternoon. Whole wheat bread adds fiber for digestive health. Even the jam offers a small dose of fruit antioxidants. Compared to store-bought versions, these have less sugar, no preservatives, and real ingredients you can feel good about.
Dietary Considerations: This recipe can be made gluten-free, nut-free, dairy-free, and vegan with simple substitutions. It’s naturally vegetarian. If you’re watching sugar, use sugar-free jam or reduce the amount.
Potential Allergens: Peanuts, wheat/gluten, dairy (if using butter). Always check labels if serving to someone with allergies.
Personal Wellness Perspective: I don’t believe in making every meal perfectly healthy. But I do believe in knowing exactly what’s in your food. These sandwiches give me peace of mind—I know my kid is getting real peanut butter, real fruit, and bread I chose myself. That’s worth more than any nutrition label.
Conclusion
These easy DIY kindergarten uncrustable sandwiches became my little morning win—and they can be yours too. They’re simple, customizable, and save you money while giving you control over what goes into your family’s food.
I love that I can make a batch on Sunday and not think about lunch prep all week. I love that my kid actually eats them without complaints. And I love that I’m not contributing to the plastic waste of individually wrapped store-bought sandwiches.
Try them with your favorite fillings. Experiment with the variations. Leave a comment below telling me which combination your family loved most—I’m always looking for new ideas to test in my own kitchen! And if you’re looking for more easy lunchbox ideas, check out our easy cheesy chicken quesadilla roll-ups or these fluffy buttermilk pancakes that freeze beautifully too.
Happy sandwich making, friends. Your freezer is about to become your favorite kitchen appliance.
Frequently Asked Questions
Can I use any type of bread for these sandwiches?
Yes, but softer breads work best. I’ve had success with white, whole wheat, brioche, and even sourdough (though sourdough can be a bit chewy). Avoid very dense, seedy breads—they don’t seal as well and can crack when frozen.
How long do these last in the freezer?
Properly stored in an airtight freezer bag, they’ll stay fresh for up to 3 months. After that, the bread may start to develop freezer burn or lose texture. I recommend labeling your bags with the date so you know which batch to use first.
Do I have to toast the bread first?
It’s not strictly necessary, but I highly recommend it. Toasting dries out the surface of the bread, which helps create a better seal and prevents sogginess. If you’re in a hurry, you can skip this step, but your sandwiches might not hold up as well.
Can I make these without a special cutter?
Absolutely. A 3-4 inch round cookie cutter works perfectly. You can also use a wide-mouth mason jar ring or even just a sharp knife to cut circles. The key is getting a good seal—press the edges firmly with a fork all the way around.
My sandwiches are leaking in the lunchbox. What am I doing wrong?
This usually happens for one of three reasons: too much filling, not sealing the edges well enough, or using bread that’s too soft. Try reducing your filling to 1 tablespoon each, make sure you leave a border when spreading, and press the edges firmly. Also, make sure your bread is lightly toasted before assembly.
Pin This Recipe!
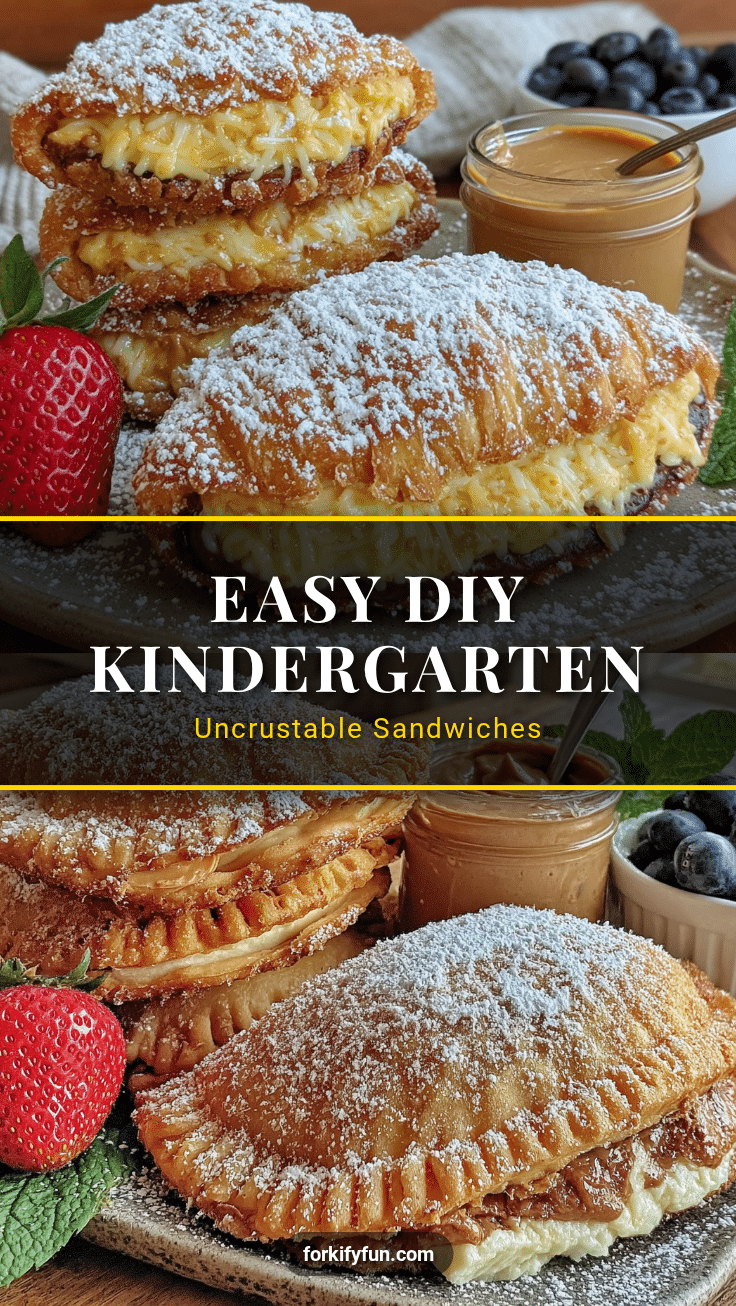
Easy DIY Kindergarten Uncrustable Sandwiches

Make-ahead freezer sandwiches that taste like real food, not preservatives. This recipe uses simple ingredients and a clever sealing technique to create kid-approved lunchbox sandwiches that stay fresh for months.
- Prep Time: 10 minutes
- Cook Time: 10 minutes
- Total Time: 20 minutes (plus 1-2 hours flash freeze)
- Yield: 4 servings 1x
- Category: Lunch
- Cuisine: American
Ingredients
- 8 slices soft white bread (or whole wheat, brioche, or sourdough)
- 4 tablespoons creamy peanut butter (Skippy Natural or Justin’s recommended)
- 4 tablespoons strawberry jam or jelly (seedless jam works best)
- 2 tablespoons unsalted butter, softened (optional, for toasting outside before freezing)
Instructions
- Set up your workstation. Lay out bread slices, peanut butter, jam, and butter. Have your cutter and a baking sheet lined with parchment paper ready.
- Lightly toast the bread on the lowest setting until just warm and slightly dry on the surface. Let cool for 2 minutes.
- Using a rolling pin, gently roll each slice to about 1/4-inch thickness, focusing on the center.
- Spread about 1 tablespoon of peanut butter on 4 slices of flattened bread, leaving a 1/2-inch border around the edges.
- Spread about 1 tablespoon of jam on top of the peanut butter on the same 4 slices, keeping the border clear.
- Place the remaining 4 slices of flattened bread on top of the filled ones. Press down gently around the edges.
- Place your uncrustable cutter or cookie cutter over the sandwich, centering it. Press down firmly and evenly. Twist slightly to release, then lift straight up. If using a fork, press tines firmly around the edges.
- Check the seal by running your finger around the edge of each sandwich. Press together any gaps or thin spots.
- Place sealed sandwiches on the parchment-lined baking sheet in a single layer. Freeze for 1-2 hours until solid.
- Transfer frozen sandwiches to freezer-safe zip-top bags, squeezing out as much air as possible. Label with the date and store for up to 3 months.
Notes
Lightly toasting the bread before assembly creates a better seal and prevents sogginess. Spread peanut butter on both slices of bread to act as a barrier against jam moisture. Flash freezing individually prevents sandwiches from sticking together. These taste better after a day or two in the freezer as flavors meld.
Nutrition
- Serving Size: 1 sandwich
- Calories: 280
- Sugar: 14
- Sodium: 220
- Fat: 14
- Saturated Fat: 3
- Carbohydrates: 32
- Fiber: 2
- Protein: 8
Keywords: uncrustable, homemade uncrustable, freezer sandwiches, lunchbox ideas, kid-friendly, make-ahead lunch, peanut butter and jelly, DIY lunch