“Peanut butter and chocolate together again?” my roommate joked one late night while I was fiddling with some protein powder, peanut butter, and cocoa in the kitchen. Honestly, I was just trying to whip up a quick snack that would keep me fueled for my early morning workouts but still satisfy my sweet tooth without derailing my nutrition goals. I didn’t expect much, maybe a bland, dry bar at best.
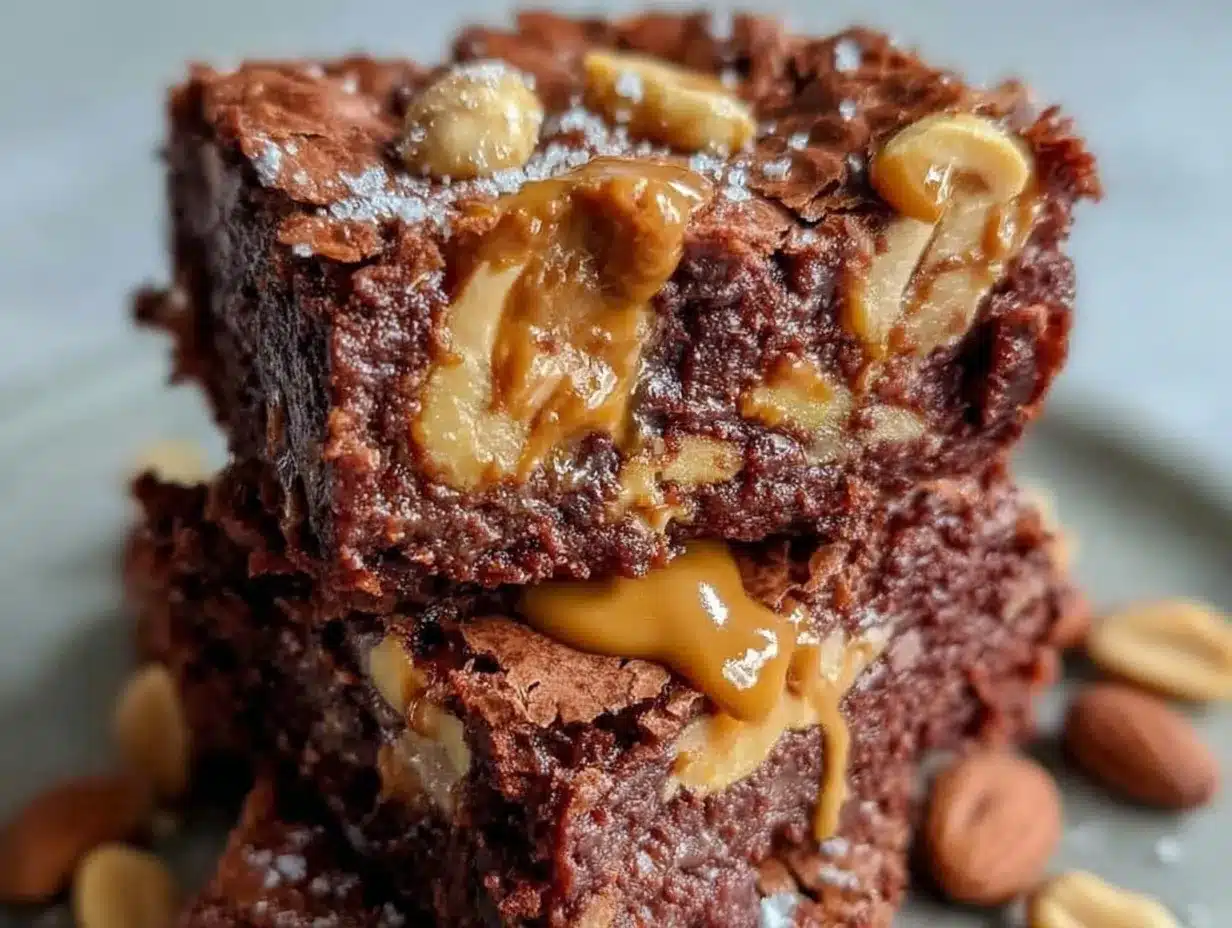
But as I pulled those warm, fudgy bars out of the oven, the rich chocolate aroma mingled with the nutty peanut butter scent, filling the small apartment kitchen with something cozy and inviting. I hesitated before taking a bite—skeptical that something so simple, made with just five ingredients, could hold up to my usual cravings.
Well, that skepticism melted away with the first taste. A perfect balance of dense, chewy brownie texture and creamy peanut butter undertones made these protein brownie bars a surprise hit. I ended up making them multiple times in just one week, tweaking the recipe little by little, until I landed on this version that I swear by now.
They’re easy to make, packed with protein, and just the right kind of indulgent. If you’re anything like me—sometimes too tired to bake elaborate desserts, but still wanting something homemade and wholesome—these Delicious Chocolate Peanut Butter Protein Brownie Bars might just become your new go-to. No fuss, no fancy ingredients, just honest flavor and texture that stick with you.
Why You’ll Love This Recipe
This recipe isn’t just another protein bar you grab at the store. Having tested countless combinations, I can confidently say this one nails the taste and texture every single time. Here’s why it’s a keeper:
- Quick & Easy: Comes together in under 20 minutes, ideal for busy mornings or post-workout snacks.
- Simple Ingredients: You don’t need to hunt for anything exotic—just five staples you probably already have.
- Perfect for Anytime: Whether it’s a grab-and-go breakfast or a midday energy boost, these bars fit right in.
- Crowd-Pleaser: I brought these to a friend’s potluck recently, and they were devoured before I knew it.
- Unbelievably Delicious: The fudgy texture with the peanut butter swirl hits that sweet spot between dessert and nutrition.
What sets this recipe apart? It’s the way the peanut butter is gently folded in, creating little pockets of creamy goodness instead of being mixed in completely. Plus, the use of a high-quality chocolate protein powder adds depth without overpowering the natural nutty flavor. I prefer brands like Orgain or Vega for their smooth texture and clean taste.
Honestly, after the first bite, you might find yourself closing your eyes briefly—just soaking in that comforting flavor combo. It’s not just a protein bar; it’s the kind of treat that reminds you homemade snacks can be both satisfying and nourishing.
What Ingredients You Will Need
This recipe uses simple, wholesome ingredients that come together to create bold flavor and a satisfying texture without any unnecessary fuss. Most are pantry staples, and substitutions are easy if needed.
- Chocolate protein powder (about 1 cup / 100g) – I recommend a smooth whey or plant-based option like Orgain for best texture.
- Natural peanut butter (1/2 cup / 125g) – creamy or chunky works, but creamy gives a more uniform texture.
- Maple syrup (1/4 cup / 60ml) – adds natural sweetness and moisture; honey works too.
- Eggs (2 large) – room temperature helps with mixing evenly.
- Cocoa powder (2 tablespoons / 15g) – unsweetened, for that rich chocolate depth.
Optional tweaks: For a gluten-free friendly bar, stick to gluten-free protein powder and ensure your cocoa powder is certified gluten-free. If you prefer a dairy-free option, swap eggs for flax eggs (1 tablespoon ground flaxseed + 3 tablespoons water per egg), though texture might be a little denser. During summer, adding a handful of fresh raspberries on top before baking adds a lovely tang.
Equipment Needed
- Mixing bowls: One medium bowl for wet ingredients, another for dry.
- Measuring cups and spoons: Accurate measurement is key to getting that perfect texture.
- 8×8-inch baking pan: Line it with parchment paper for easy removal.
- Spatula or wooden spoon: For folding ingredients gently.
- Oven: Preheated to 350°F (175°C).
Alternatives: If you don’t have an 8×8 pan, a similarly sized dish or even a loaf pan works fine. Just keep an eye on baking time as thickness affects cooking. Using a silicone spatula makes folding easier and reduces sticking. When it comes to cleanup, parchment paper is a lifesaver—trust me, it saved me from scrubbing once or twice.
Preparation Method
- Preheat your oven to 350°F (175°C). Line an 8×8-inch baking pan with parchment paper, letting some overhang for easy lifting later. This step saves cleanup hassle and helps you remove the bars cleanly.
- In a medium bowl, whisk together the eggs and maple syrup until smooth and slightly frothy—about 1-2 minutes. This helps incorporate air and gives the bars a lighter texture.
- Add the natural peanut butter to the wet mixture. Stir using a spatula until the peanut butter blends in evenly, but don’t overmix. You want little swirls to remain for that melty texture.
- In a separate bowl, sift together the chocolate protein powder and cocoa powder. This prevents clumps and ensures even chocolate flavor throughout.
- Gradually fold the dry ingredients into the wet mixture. Use gentle strokes—fold just until combined. Overmixing can lead to tougher bars, and honestly, nobody wants that.
- Pour the batter into the prepared pan. Use an offset spatula or the back of a spoon to smooth the top evenly. If you want, drizzle a little extra peanut butter on top and swirl it in with a knife for a pretty marbled effect.
- Bake for 15-18 minutes. Check at 15 minutes by inserting a toothpick in the center—it should come out with a few moist crumbs but not wet batter. Baking time depends on your oven, so keep an eye on it.
- Remove from oven and let cool completely in the pan on a wire rack. This cooling step helps the bars firm up and makes cutting easier.
- Use the parchment paper edges to lift the bars out. Cut into 12 squares with a sharp knife. Store in an airtight container at room temperature for up to 3 days, or refrigerate for up to a week.
Quick tip: If you find your bars are too chewy or dense, try using a slightly lighter hand when folding or reduce the baking time by a minute or two next round.
Cooking Tips & Techniques
Getting the perfect chewy yet tender texture is all about balance here. One common mistake is overmixing the batter, which can activate the protein powder’s binding qualities too much, making the bars tough. Folding gently is your friend.
Another tip: let the peanut butter come to room temperature before mixing; it blends more easily and creates those delightful creamy pockets.
For timing, multitask by prepping your lunch or cleaning while the bars bake—they come together quickly, so efficiency helps.
In my early attempts, I baked too long and ended up with dry bars—lesson learned! Now, I set a timer for 15 minutes and check closely, pulling them out as soon as they’re set but still moist inside.
For consistent results, weigh your protein powder if possible (1 cup = approx 100g) since scoops vary by brand.
Variations & Adaptations
- Nut-Free Version: Swap peanut butter with sunflower seed butter and use a nut-free protein powder. The flavor changes slightly but remains delicious.
- Chocolate Chip Boost: Stir in 1/4 cup (45g) dark chocolate chips for extra gooey bites. Great for a treat with a bit more indulgence.
- Vegan Adaptation: Replace eggs with flax eggs and use a plant-based protein powder. Baking time may increase by a few minutes, so watch closely.
- Seasonal Twist: Add a teaspoon of cinnamon or a pinch of cayenne for warmth and complexity—especially nice in cooler months.
- Personally, I once sprinkled flaky sea salt on top before baking—such a simple touch but it made the chocolate and peanut butter flavors pop beautifully.
Serving & Storage Suggestions
These bars are perfect served at room temperature or slightly warmed—just 10 seconds in the microwave brings out that melty peanut butter goodness. They pair wonderfully with a cold glass of milk or a cup of coffee for breakfast.
For a quick snack, grab one on the go or cut into smaller squares for portion control. They also make a great addition to a packed lunch or post-exercise refuel.
Store leftovers in an airtight container at room temperature for up to 3 days, or refrigerate for up to a week. For longer storage, freeze in a zip-top bag for up to 3 months; thaw at room temperature before enjoying.
Flavors deepen after a day, so if you can resist, letting them sit overnight often improves the taste and texture.
Nutritional Information & Benefits
Each bar packs approximately 150-170 calories, with around 10-12 grams of protein depending on your protein powder choice. The peanut butter adds healthy fats and fiber, while the maple syrup provides natural sweetness without refined sugars.
This recipe suits gluten-free diets when using certified gluten-free protein powder, and it’s low in processed ingredients. A great option for anyone looking to balance indulgence with nutritional benefits.
Personally, I appreciate how these bars help me meet my protein needs without feeling like a chore to eat. They’re a reliable way to satisfy cravings while keeping my energy steady throughout busy days.
Conclusion
If you’re searching for a homemade snack that combines rich chocolate, creamy peanut butter, and a solid protein boost, these Delicious Chocolate Peanut Butter Protein Brownie Bars fit the bill perfectly. They’re simple enough to whip up on a whim but tasty enough to impress any crowd.
Feel free to customize the recipe based on your tastes or dietary needs—it’s flexible and forgiving. I find it’s become a staple in my kitchen, especially when I want a quick, satisfying bite that doesn’t compromise my goals.
Give it a try, and don’t hesitate to share your own twists or experiences with these bars. There’s something special about creating snacks that feel both indulgent and nourishing, and this recipe hits that sweet spot for me every time.
FAQs
Can I use a different type of protein powder?
Yes! Whey, plant-based, or even collagen powders work well. Just keep in mind that texture and flavor may vary slightly.
How do I store these bars to keep them fresh?
Store in an airtight container at room temperature for up to 3 days, refrigerate for up to a week, or freeze for longer storage.
Can I make these bars ahead of time?
Absolutely! They keep well in the fridge and actually taste better after sitting overnight. Just slice and store.
Are these bars suitable for a vegan diet?
With substitutions like flax eggs and plant-based protein powder, yes—they become vegan-friendly.
What’s the best way to cut the bars cleanly?
Use a sharp knife and wait until the bars are completely cooled. Wiping the knife between cuts helps prevent sticking.
By the way, if you enjoy homemade treats packed with flavor, you might also appreciate the rich, creamy comfort of creamy one-pot Cajun chicken pasta or the delightful crunch from crispy baked parmesan chicken cutlets. Both make fantastic meal options when you want something hearty and satisfying alongside your snack game.
Pin This Recipe!
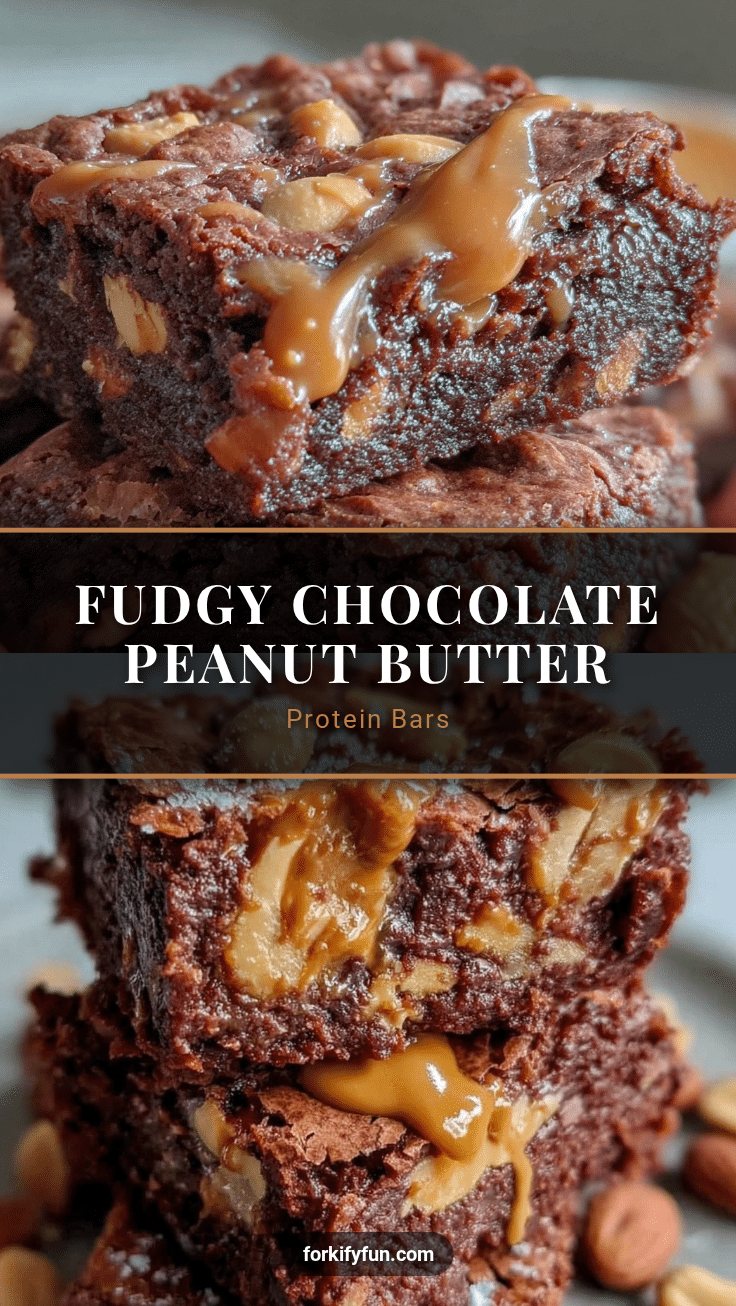
Delicious Chocolate Peanut Butter Protein Brownie Bars
These protein brownie bars combine rich chocolate and creamy peanut butter in a fudgy, chewy texture. Made with just five simple ingredients, they are quick to prepare and perfect for a nutritious snack or breakfast.
- Prep Time: 10 minutes
- Cook Time: 15-18 minutes
- Total Time: 25-28 minutes
- Yield: 12 bars 1x
- Category: Snack
- Cuisine: American
Ingredients
- 1 cup (100g) chocolate protein powder (whey or plant-based)
- 1/2 cup (125g) natural peanut butter (creamy or chunky)
- 1/4 cup (60ml) maple syrup (or honey)
- 2 large eggs (room temperature)
- 2 tablespoons (15g) unsweetened cocoa powder
Instructions
- Preheat your oven to 350°F (175°C). Line an 8×8-inch baking pan with parchment paper, letting some overhang for easy lifting later.
- In a medium bowl, whisk together the eggs and maple syrup until smooth and slightly frothy, about 1-2 minutes.
- Add the natural peanut butter to the wet mixture. Stir using a spatula until the peanut butter blends in evenly, but do not overmix to keep swirls.
- In a separate bowl, sift together the chocolate protein powder and cocoa powder to prevent clumps.
- Gradually fold the dry ingredients into the wet mixture using gentle strokes until just combined.
- Pour the batter into the prepared pan and smooth the top evenly. Optionally, drizzle extra peanut butter on top and swirl with a knife for a marbled effect.
- Bake for 15-18 minutes. Check at 15 minutes by inserting a toothpick in the center; it should come out with a few moist crumbs but not wet batter.
- Remove from oven and let cool completely in the pan on a wire rack.
- Use the parchment paper edges to lift the bars out. Cut into 12 squares with a sharp knife.
- Store in an airtight container at room temperature for up to 3 days, refrigerate for up to a week, or freeze for up to 3 months.
Notes
Do not overmix the batter to avoid tough bars; folding gently preserves a chewy texture. Let peanut butter come to room temperature for easier mixing and creamy pockets. Check bars at 15 minutes to avoid overbaking. For vegan version, replace eggs with flax eggs and use plant-based protein powder, baking time may increase slightly. Adding a handful of fresh raspberries on top before baking adds a nice tang. Flaky sea salt sprinkled on top before baking enhances flavor.
Nutrition
- Serving Size: 1 bar (1/12 of recip
- Calories: 150170
- Sugar: 68
- Sodium: 100150
- Fat: 810
- Saturated Fat: 1.52
- Carbohydrates: 1215
- Fiber: 23
- Protein: 1012
Keywords: protein bars, chocolate peanut butter bars, homemade protein snack, easy protein brownies, healthy snack, quick protein bars


