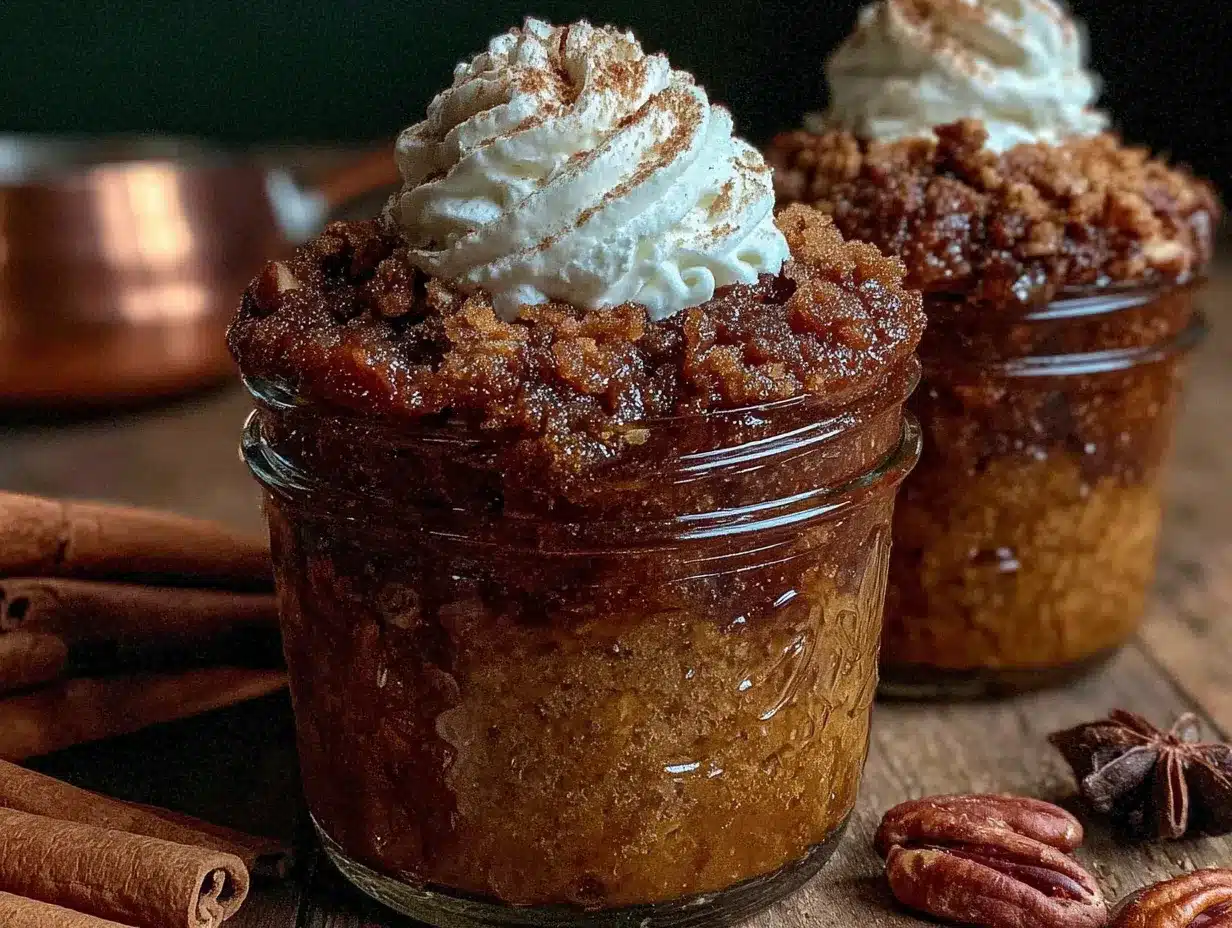
I figured a dump cake was supposed to be a big, sloppy thing you served from a 9×13 pan. It took about one bite of these little jars to realize I had been missing the whole point. The first time I made them, I was just trying to use up a half-can of pumpkin puree and a few leftover jars from a batch of homemade vanilla bean fig jam. I threw some cake mix on top, baked it, and honestly expected a mess. What came out of the oven was something else entirely—a perfectly portioned, deeply personal little dessert that felt like it had been made just for me. The edges were crisp and buttery, the center was soft and warm, and the pumpkin flavor had concentrated into something almost caramel-like. That accidental experiment turned into my go-to fall dessert, the one I make when I want the comfort of a big cake without committing to a whole pan. These individual pumpkin dump cakes in mason jars are cozy, portable, and somehow feel more special than their larger cousin. They are the kind of dessert that makes you slow down and actually enjoy the season.
Why You’ll Love This Recipe
Let me tell you why these little jars of pumpkin goodness are about to become your new fall favorite. I have tested this recipe more times than I care to admit, tweaking the ratios and the baking times until everything clicked. Here is what makes them stand out.
- Quick & Easy: From start to finish, you are looking at about 30 minutes. That is faster than a trip to the bakery and way more satisfying.
- Simple Ingredients: You probably have most of this stuff in your pantry right now. No weird extracts or hard-to-find spices—just real, honest ingredients.
- Perfect for Fall Gatherings: These are great for Thanksgiving, Friendsgiving, or just a cozy night in. They travel well, so you can bring them to a potluck without stressing.
- Crowd-Pleaser: I have served these to kids, adults, and even my picky mother-in-law. They disappear every single time.
- Unbelievably Delicious: The contrast between the crunchy, buttery topping and the soft, spiced pumpkin underneath is pure magic. It is comfort food in a jar.
What makes this recipe different from the hundreds of other pumpkin dump cakes out there? It is the ratio. Most recipes use way too much cake mix, leaving you with a dry, powdery top. I have dialed it in so you get a perfect crust every time—crispy on top, tender underneath, and not a single dry crumb in sight. And the jar format? That is just genius. It makes portion control easy (or at least easier) and turns a humble dessert into something that feels like a gift.
What Ingredients You Will Need
This recipe uses simple, wholesome ingredients that come together to create something way more complex than the sum of their parts. Here is what you will need to grab.
- For the Pumpkin Base:
- 1 can (15 oz) pumpkin puree (not pumpkin pie filling—make sure it is 100% pure pumpkin)
- 1/2 cup granulated sugar
- 1/4 cup brown sugar, packed (light or dark works, dark gives a deeper flavor)
- 2 large eggs, room temperature
- 1/2 cup whole milk (or any milk you have on hand)
- 1 teaspoon vanilla extract
- 1 1/2 teaspoons pumpkin pie spice (or 1 teaspoon cinnamon + 1/2 teaspoon ginger + 1/4 teaspoon nutmeg + 1/4 teaspoon cloves)
- 1/4 teaspoon salt
- For the Topping:
- 1 box (15.25 oz) yellow cake mix (I prefer Duncan Hines or Betty Crocker—avoid the pudding-in-the-mix varieties for best texture)
- 1/2 cup unsalted butter, melted (salted butter works too, just reduce the added salt in the pumpkin base to 1/8 teaspoon)
- 1/2 cup chopped pecans or walnuts (optional, but highly recommended)
- For Serving:
- Whipped cream or vanilla ice cream (absolutely non-negotiable in my book)
- Caramel sauce (for drizzling, if you are feeling extra fancy)
Ingredient Tips: I have tried this with both homemade pumpkin puree and canned, and honestly, canned Libby’s gives the most consistent results. The moisture content is more reliable. For the cake mix, stick with yellow or butter golden—spice cake mix sounds like it would work, but it tends to overwhelm the pumpkin flavor. And please, please use real butter. Margarine or spreadable butter substitutes contain too much water and will make your topping soggy. If you need a dairy-free option, use a good quality plant-based butter stick (not the tub kind).
Equipment Needed
You do not need much for this recipe, which is part of its charm. Here is what you will need.
- 4 wide-mouth 8 oz mason jars: Wide-mouth is key here. Regular mouth jars are too narrow and the layers get all squished. I have used both Ball and Kerr brands with great results.
- Mixing bowls: One medium bowl for the pumpkin base, one small bowl for the topping
- Whisk: For smoothing out the pumpkin mixture
- Measuring cups and spoons: Standard set will do
- Baking sheet: Place the jars on a baking sheet before baking to catch any drips (learned this the hard way)
- Oven mitts: Those jars get hot, folks
Budget-Friendly Tip: If you do not have mason jars, you can use 4-ounce ramekins or even small oven-safe ceramic bowls. Just adjust the baking time slightly since different materials conduct heat differently. I have also made these in disposable aluminum foil cups for tailgating—works like a charm.
Maintenance Note: Mason jars are dishwasher safe, but I recommend hand-washing them to keep the glass clear and free of cloudiness. Let them dry completely before storing with the lids off to prevent any musty smells.
Preparation Method
Alright, let us get baking. This is straightforward, but there are a few little tricks I have picked up along the way that make a real difference.
- Preheat your oven to 350°F (175°C). Place your 4 wide-mouth mason jars on a baking sheet. Do not skip the baking sheet—I had a jar overflow once and it was a mess to clean up.
- Make the pumpkin base. In a medium mixing bowl, whisk together the pumpkin puree, granulated sugar, brown sugar, eggs, milk, vanilla extract, pumpkin pie spice, and salt. Whisk until everything is smooth and well combined. The mixture should be thick but pourable, like a thick milkshake. If it looks curdled or separated, your eggs might have been too cold—let them sit on the counter for 15 minutes before mixing.
- Fill the jars. Divide the pumpkin mixture evenly among the 4 jars, filling them about halfway to two-thirds full. Each jar should get about 1/2 cup of the mixture. Leave some room at the top—the topping will puff up as it bakes.
- Prepare the topping. In a separate small bowl, combine the cake mix and the chopped nuts (if using). Pour the melted butter over the top and stir with a fork until the mixture looks like coarse, crumbly sand. You want some larger clumps and some smaller bits—that texture is what gives you those perfect crispy edges.
- Top the jars. Sprinkle the cake mix mixture evenly over the pumpkin base in each jar. Do not press it down—just let it sit on top. Use about 1/3 cup of topping per jar. If you have extra, you can sprinkle it on top of the baking sheet to make little crispy bits (a cook’s treat, if you ask me).
- Bake. Place the baking sheet with the jars in the preheated oven and bake for 22-28 minutes. The tops should be golden brown and the filling should be bubbly around the edges. If you see any spots that are browning too fast, you can tent the jars loosely with foil for the last 5 minutes.
- Cool slightly. Let the jars cool on the baking sheet for at least 10 minutes before serving. The filling will be molten hot straight out of the oven—ask me how I know. The jars will retain heat, so they will stay warm for a good 20-30 minutes.
- Serve. Top each jar with a generous dollop of whipped cream or a scoop of vanilla ice cream. Drizzle with caramel sauce if you are feeling extra. Eat directly from the jar with a small spoon—that is the whole point.
Sensory Cues: When the topping is ready, it will look deeply golden and slightly cracked in places. You should be able to see little bubbles of pumpkin peeking through. The smell is what gets me every time—warm cinnamon, nutty butter, and that unmistakable pumpkin aroma that just screams fall.
Cooking Tips & Techniques
I have made this recipe maybe two dozen times now, and I have learned a few things the hard way. Let me save you some trouble.
The butter temperature matters. I know, I know, melted butter is melted butter, right? Wrong. If your butter is too hot when you mix it with the cake mix, it will create a greasy paste instead of crumbly bits. Let it cool for a minute or two after melting. You want it warm but not scorching.
Do not overmix the topping. Stir just until the butter is incorporated and you see those lovely clumps. If you keep going, you will end up with a doughy paste that sinks into the pumpkin instead of staying on top. I did this once and ended up with what I can only describe as pumpkin-flavored bread pudding. Good, but not the goal.
Watch your oven like a hawk. Every oven runs differently. Mine runs a little hot, so I start checking at the 20-minute mark. If the tops are getting too dark but the filling is still liquidy, tent with foil and keep baking. If the tops are pale but the filling is bubbling, you are good to go—take them out and let carry-over cooking do the rest.
Room temperature ingredients are not optional. I know it is annoying to wait for eggs and milk to come to room temperature, but it makes a real difference. Cold ingredients will seize up the butter in the topping and give you a lumpy, uneven bake. Set everything out on the counter 30 minutes before you start.
Make extra topping. I always make a little extra cake mix mixture and bake it on a small sheet pan alongside the jars. Those crispy bits are amazing sprinkled over ice cream or yogurt the next day. Waste not, want not.
Variations & Adaptations
This recipe is incredibly flexible. Here are a few ways I have changed it up over the years.
- Gluten-Free Version: Use a gluten-free yellow cake mix. I have had good luck with King Arthur Measure for Measure and Bob’s Red Mill. The texture is slightly more crumbly, but the flavor is spot on. Just make sure your pumpkin pie spice is certified gluten-free if that is a concern.
- Dairy-Free Adaptation: Swap the butter for a high-quality plant-based butter (I like Miyoko’s or Country Crock Plant Butter). Use oat milk or almond milk in the pumpkin base. The topping will be a little less crispy, but still delicious.
- Spice It Up: Add 1/4 teaspoon of cardamom or allspice to the pumpkin base for a more complex flavor profile. I tried this last Thanksgiving and it was a huge hit. You can also add a pinch of cayenne for a subtle warmth—trust me on this one.
- Chocolate Lover’s Version: Swap the yellow cake mix for a chocolate cake mix. The chocolate-pumpkin combo is surprisingly good. Add a few chocolate chips to the topping for extra indulgence.
- Apple-Pumpkin Fusion: Layer 1/4 cup of finely diced apple (I like Honeycrisp or Granny Smith) at the bottom of each jar before adding the pumpkin mixture. The apple softens as it bakes and adds a lovely tart contrast.
I have also tried making these in a slow cooker, and honestly, it works but the topping does not get as crispy. If you are camping or don’t have access to an oven, you can cook them on low for about 2 hours with the lid slightly vented. Just don’t expect the same crunch.
Serving & Storage Suggestions
Serving: These are best served warm, straight from the oven. The contrast between the warm, soft pumpkin and the cold whipped cream or ice cream is what makes them special. I like to set up a little topping bar with whipped cream, caramel sauce, and a sprinkle of cinnamon so everyone can customize their own jar. If you are serving these at a party, you can bake them ahead of time and reheat them in a 300°F oven for 5-7 minutes before serving.
Storage: Leftover jars (if you have any) can be covered with the mason jar lids and stored in the refrigerator for up to 3 days. Do not leave them at room temperature for more than 2 hours since they contain dairy and eggs. To reheat, remove the lid and microwave for 30-45 seconds, or pop them back in a 350°F oven for 10 minutes. The topping will not be as crispy as day one, but the flavor actually gets better as the pumpkin and spice meld together overnight.
Freezer Instructions: These freeze beautifully. Let the jars cool completely, then screw on the lids and freeze for up to 3 months. To serve, thaw in the refrigerator overnight and reheat as directed above. I have a stash of these in my freezer right now for those random fall cravings in the middle of winter.
Flavor Development: Here is a little secret—the flavor actually improves after a day in the fridge. The spices mellow out and meld together, and the pumpkin flavor becomes more pronounced. If you can resist eating them all immediately, try one the next day. It is a different but equally delicious experience.
Nutritional Information & Benefits
Let me be real with you—this is a dessert, not a health food. But that does not mean it is without some redeeming qualities. Here is the estimated nutrition per jar (without toppings).
| Nutrient | Amount Per Serving |
|---|---|
| Calories | 410 |
| Total Fat | 18g |
| Saturated Fat | 9g |
| Cholesterol | 85mg |
| Sodium | 420mg |
| Total Carbohydrates | 59g |
| Dietary Fiber | 3g |
| Sugars | 38g |
| Protein | 5g |
| Vitamin A | 190% DV |
| Iron | 10% DV |
Pumpkin is packed with vitamin A, which is great for your eyes and immune system. It is also a good source of fiber, which helps keep you full and satisfied. The nuts add healthy fats and a little protein. Is it a balanced meal? No. Is it a perfectly reasonable treat that also happens to have some nutritional value? Absolutely. I like to think of it as a dessert that does not make me feel terrible after eating it, and honestly, that is a win in my book.
Dietary Considerations: This recipe contains gluten, dairy, and eggs. It can be made gluten-free and dairy-free with the substitutions listed above. It is not suitable for vegans as written, but you could experiment with flax eggs and plant-based milk—I have not tested that version, so let me know if you do!
Conclusion
These cozy individual pumpkin dump cakes in mason jars are exactly the kind of dessert I want to make when the leaves start turning and the air gets crisp. They are simple enough for a Tuesday night but special enough for a holiday gathering. The best part? They make you feel like you are treating yourself, even though they come together in about half an hour with ingredients you probably already have. I love that I can make a batch for myself and not be tempted by a whole pan of cake sitting on the counter. I love that I can hand one to a friend and watch their face light up. And I really love that first bite—warm, spiced, buttery, and exactly what fall should taste like.
I would love to hear how these turn out for you. Did you try any of the variations? Did you come up with your own twist? Drop a comment below and let me know—I read every single one and I always answer. And if you are looking for more cozy fall recipes, check out this salted caramel apple crumble bars or this brown butter snickerdoodle blondies for more seasonal inspiration. Happy baking, friends!
Frequently Asked Questions
Can I use pumpkin pie filling instead of pumpkin puree?
I would not recommend it. Pumpkin pie filling already has sugar and spices added, which will throw off the balance of this recipe. You will end up with something way too sweet and the texture will be off. Stick with 100% pure pumpkin puree for best results.
Do I have to use mason jars, or can I use something else?
You can definitely use other oven-safe containers. Ramekins, small ceramic bowls, or even disposable foil cups all work great. Just keep an eye on the baking time since different materials conduct heat differently. Glass jars give you that nice visual of the layers, but the flavor is the same no matter what you use.
Can I make these ahead of time for a party?
Absolutely. You can assemble the jars completely (minus the topping) up to 24 hours in advance and store them covered in the fridge. Add the topping right before baking. Or you can bake them fully, let them cool, and reheat them in a 300°F oven for 10 minutes before serving. The texture will be slightly different, but still delicious.
Why did my topping sink into the pumpkin mixture?
This usually happens for one of two reasons. Either your pumpkin mixture was too thin (maybe your pumpkin puree had too much water content) or you pressed the topping down instead of sprinkling it. Make sure your pumpkin puree is not watery—if it looks loose, let it drain in a fine-mesh sieve for 15 minutes before using. And remember, sprinkle the topping gently, do not pack it down.
Can I double this recipe?
Yes, easily. Just double all the ingredients and bake in batches if your oven cannot fit more than 4 jars at once. Make sure to leave enough space between the jars for air to circulate so they bake evenly. If you are making a big batch for a crowd, you can also bake them in a 9×13 pan as a traditional dump cake—just add 10-15 minutes to the baking time.
Pin This Recipe!
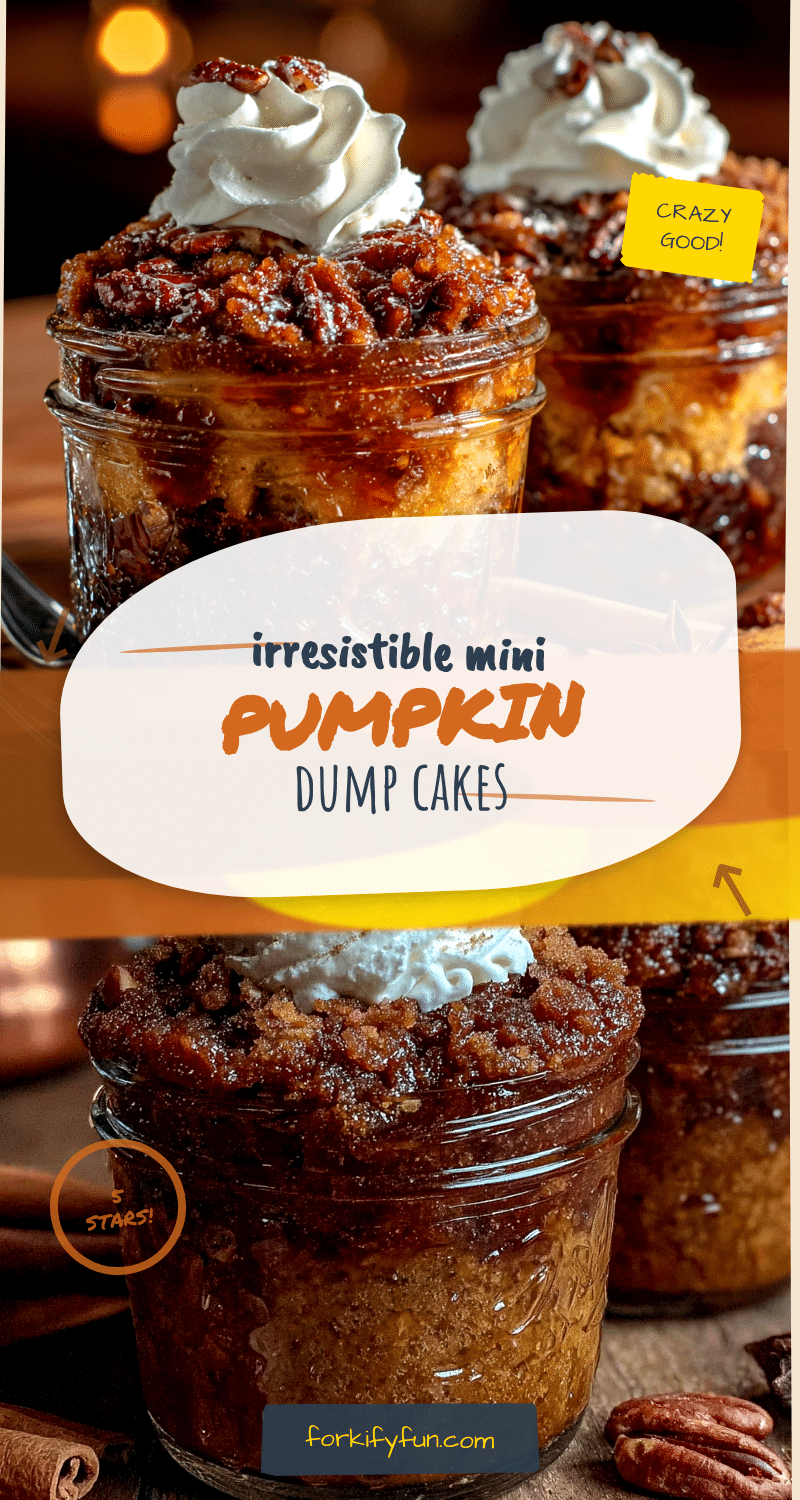
Cozy Individual Pumpkin Dump Cakes in Mason Jars: Easy Fall Dessert
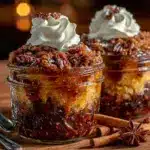
These individual pumpkin dump cakes in mason jars are cozy, portable, and somehow feel more special than their larger cousin. They are the kind of dessert that makes you slow down and actually enjoy the season.
- Prep Time: 10 minutes
- Cook Time: 25 minutes
- Total Time: 35 minutes
- Yield: 4 servings 1x
- Category: Dessert
- Cuisine: American
Ingredients
- 1 can (15 oz) pumpkin puree (not pumpkin pie filling)
- 1/2 cup granulated sugar
- 1/4 cup brown sugar, packed
- 2 large eggs, room temperature
- 1/2 cup whole milk (or any milk)
- 1 teaspoon vanilla extract
- 1 1/2 teaspoons pumpkin pie spice (or 1 teaspoon cinnamon + 1/2 teaspoon ginger + 1/4 teaspoon nutmeg + 1/4 teaspoon cloves)
- 1/4 teaspoon salt
- 1 box (15.25 oz) yellow cake mix (avoid pudding-in-the-mix varieties)
- 1/2 cup unsalted butter, melted
- 1/2 cup chopped pecans or walnuts (optional)
- Whipped cream or vanilla ice cream (for serving)
- Caramel sauce (for serving, optional)
Instructions
- Preheat your oven to 350°F (175°C). Place your 4 wide-mouth mason jars on a baking sheet.
- Make the pumpkin base: In a medium mixing bowl, whisk together the pumpkin puree, granulated sugar, brown sugar, eggs, milk, vanilla extract, pumpkin pie spice, and salt until smooth and well combined.
- Fill the jars: Divide the pumpkin mixture evenly among the 4 jars, filling them about halfway to two-thirds full (about 1/2 cup per jar).
- Prepare the topping: In a separate small bowl, combine the cake mix and the chopped nuts (if using). Pour the melted butter over the top and stir with a fork until the mixture looks like coarse, crumbly sand.
- Top the jars: Sprinkle the cake mix mixture evenly over the pumpkin base in each jar (about 1/3 cup per jar). Do not press it down.
- Bake: Place the baking sheet with the jars in the preheated oven and bake for 22-28 minutes, until the tops are golden brown and the filling is bubbly around the edges.
- Cool slightly: Let the jars cool on the baking sheet for at least 10 minutes before serving.
- Serve: Top each jar with a generous dollop of whipped cream or a scoop of vanilla ice cream. Drizzle with caramel sauce if desired. Eat directly from the jar.
Notes
Use 100% pure pumpkin puree, not pumpkin pie filling. For best texture, avoid cake mixes with pudding. Let butter cool slightly after melting before mixing with cake mix. Do not overmix the topping. Room temperature ingredients are important for best results. Jars can be stored in the refrigerator for up to 3 days or frozen for up to 3 months.
Nutrition
- Serving Size: 1 jar
- Calories: 410
- Sugar: 38
- Sodium: 420
- Fat: 18
- Saturated Fat: 9
- Carbohydrates: 59
- Fiber: 3
- Protein: 5
Keywords: pumpkin dump cake, mason jar dessert, individual dessert, fall dessert, easy pumpkin recipe, small batch dessert