Three pounds of figs sitting on my counter, and honestly, I was about to panic. I’d bought them at the farmers’ market with grand plans—figs with prosciutto, figs in a salad, figs on toast—but life got in the way. Work ran late, the kids needed help with projects, and suddenly it was day three and those beautiful Black Mission figs were starting to wrinkle at the stems. You know that feeling when good intentions meet reality? That was me, staring down a colander of fruit that was about to go south. I couldn’t eat them fast enough, and tossing them felt like throwing money in the trash.
So I did what any slightly frazzled home cook would do. I grabbed a pot, a vanilla bean I’d been hoarding from a baking spree, and decided to make jam. Not a huge batch—just enough to salvage what I had. What came out of that twenty-minute experiment was honestly better than any store-bought fig jam I’ve ever paid too much for. The vanilla softened the fig’s natural sweetness without overpowering it, and the whole thing tasted like something you’d get at a fancy brunch spot. Except I made it in my sweatpants while half-watching the news.
That’s the thing about this homemade vanilla bean fig jam. It doesn’t need a special occasion or a perfectly planned day. It rescues fruit that’s past its prime and turns it into something you’ll want to put on everything. I’ve been making this small batch recipe ever since, and it’s become my secret weapon for breakfast, cheese boards, and even last-minute gifts. You don’t need canning experience or fancy equipment. Just a pot, a spoon, and a little patience. Trust me on this one.
Why You’ll Love This Recipe
I’ve tested this recipe about a dozen times now, tweaking the sugar ratio, playing with cooking times, and even trying it with different fig varieties. What I landed on is the sweet spot—literally. This isn’t one of those overly complicated preserves that requires a candy thermometer and a degree in food science. It’s straightforward, forgiving, and incredibly rewarding.
- Small Batch Perfection : This recipe makes just about 2 cups of jam. No massive canning operation required. It’s perfect for using up a pint of figs without committing to a year’s supply.
- Simple Ingredients : Figs, sugar, lemon juice, and a vanilla bean. That’s it. You probably have most of these in your kitchen right now.
- Quick & Easy : From start to finish, you’re looking at about 30 minutes of active time. The jam sets while you clean up the kitchen.
- Versatile as Can Be : I’ve slathered it on toast, spooned it over creamy no-churn salted caramel ice cream, and paired it with sharp cheddar on crackers. It does it all.
- No Pectin Required : Figs have enough natural pectin to set beautifully. No boxed stuff needed.
What makes this recipe different from other fig jams is the vanilla bean. I tried it first with vanilla extract, and it was fine—good, even. But the vanilla bean brings this floral, almost creamy note that melds with the fig’s honey-like flavor in a way that feels intentional. It’s like they were meant to be together. Every time I open a jar, I get that rich vanilla aroma mixed with the deep sweetness of cooked figs, and it stops me in my tracks.
This isn’t just a recipe for preserving fruit. It’s a recipe for feeling accomplished when you’ve saved something from going to waste. There’s a quiet satisfaction in looking at a jar of homemade jam and knowing you made it yourself, with your own hands, from fruit that might have otherwise ended up in the compost. That feeling never gets old.
What Ingredients You Will Need
This recipe uses a handful of simple ingredients that work together to create something truly special. The quality of your ingredients matters here, especially the figs and vanilla bean, so don’t skimp if you can help it.
- Fresh Figs (1 pound / about 450g) : Look for ripe but firm figs that yield slightly to pressure. Black Mission, Brown Turkey, or Kadota figs all work beautifully. If your figs are very soft and almost overripe, that’s actually perfect for jam—they’ll break down faster and create a deeper flavor. Just trim off any bruised spots. I prefer using a mix of varieties when I can find them; the flavor becomes more complex.
- Granulated Sugar (3/4 cup / 150g) : Regular white sugar works best here. It helps preserve the jam and creates that glossy texture. You can reduce it slightly if your figs are very sweet, but don’t go below 1/2 cup or the jam won’t set properly. I’ve tested this with coconut sugar too, and while it works, the flavor is noticeably different—more molasses-like. Stick with white sugar for the classic result.
- Fresh Lemon Juice (2 tablespoons / 30ml) : This isn’t just for brightness—it helps balance the sweetness and activates the natural pectin in the figs. Use freshly squeezed lemon juice, not the bottled stuff. The difference is subtle but real. One lemon usually gives you enough juice.
- 1 Vanilla Bean : This is the star of the show alongside the figs. Look for plump, moist vanilla beans—if they’re dry and brittle, they’ve been sitting around too long. Madagascar or Tahitian vanilla beans both work, though Tahitian beans have a more floral note. Split the bean lengthwise and scrape out the seeds, then toss the pod into the pot too. The pod releases flavor as it cooks and gets strained out later (or you can leave it in the jar for looks).
- Pinch of Salt : A tiny pinch of flaky sea salt or kosher salt enhances all the flavors without making the jam taste salty. Don’t skip it.
Optional Add-Ins : Sometimes I add a tablespoon of bourbon or brandy near the end of cooking for a warm, boozy note. A sprig of fresh rosemary or thyme can also be steeped in the jam as it cools, then removed—it adds an unexpected savory element that’s gorgeous with cheese. If you want a bit of heat, a small dried chili or a pinch of red pepper flakes works surprisingly well with figs.
Ingredient Selection Tips : Figs don’t ripen after they’re picked, so what you buy is what you get. If they’re rock hard, they’ll never soften into jammy goodness. If they’re oozing and fermented-smelling, they’re too far gone. Look for figs that are plump, slightly soft, and smell faintly sweet. Farmers’ markets are your best bet during fig season, which runs from late summer through early fall depending on where you live.
Equipment Needed
You don’t need a professional canning setup for this small batch recipe. I’ve made it in a cramped apartment kitchen and a full-sized home kitchen with equal success.
- Medium Heavy-Bottomed Pot or Dutch Oven : A 3 to 4-quart pot is ideal. The heavy bottom prevents scorching, which is important since jam can burn easily. I use my enameled cast iron Dutch oven, but a stainless steel pot works fine too. Avoid nonstick—you want some browning for flavor.
- Wooden Spoon or Silicone Spatula : You’ll be stirring frequently, so use something that won’t scratch your pot. Wooden spoons are traditional and work great.
- Sharp Knife and Cutting Board : For trimming the fig stems and splitting the vanilla bean.
- Measuring Cups and Spoons : Accuracy matters in jam-making, even for a small batch.
- Glass Jars with Lids (2 half-pint jars or 1 pint jar) : Sterilize them by boiling for 10 minutes or running them through the dishwasher on the sanitize cycle. I reuse pasta sauce jars—just make sure the lids are new or in good condition.
- Funnel (optional but helpful) : A wide-mouth funnel makes transferring the hot jam into jars much less messy.
- Small Plate (for testing set) : Keep a small plate in the freezer to test if your jam is ready. This trick has saved me more times than I can count.
If you don’t have a vanilla bean, you can use 1 teaspoon of good vanilla extract added at the end of cooking. The flavor won’t be quite as complex, but it’s still delicious. And if you don’t have a heavy-bottomed pot, just stir more frequently and watch the heat carefully.
Preparation Method
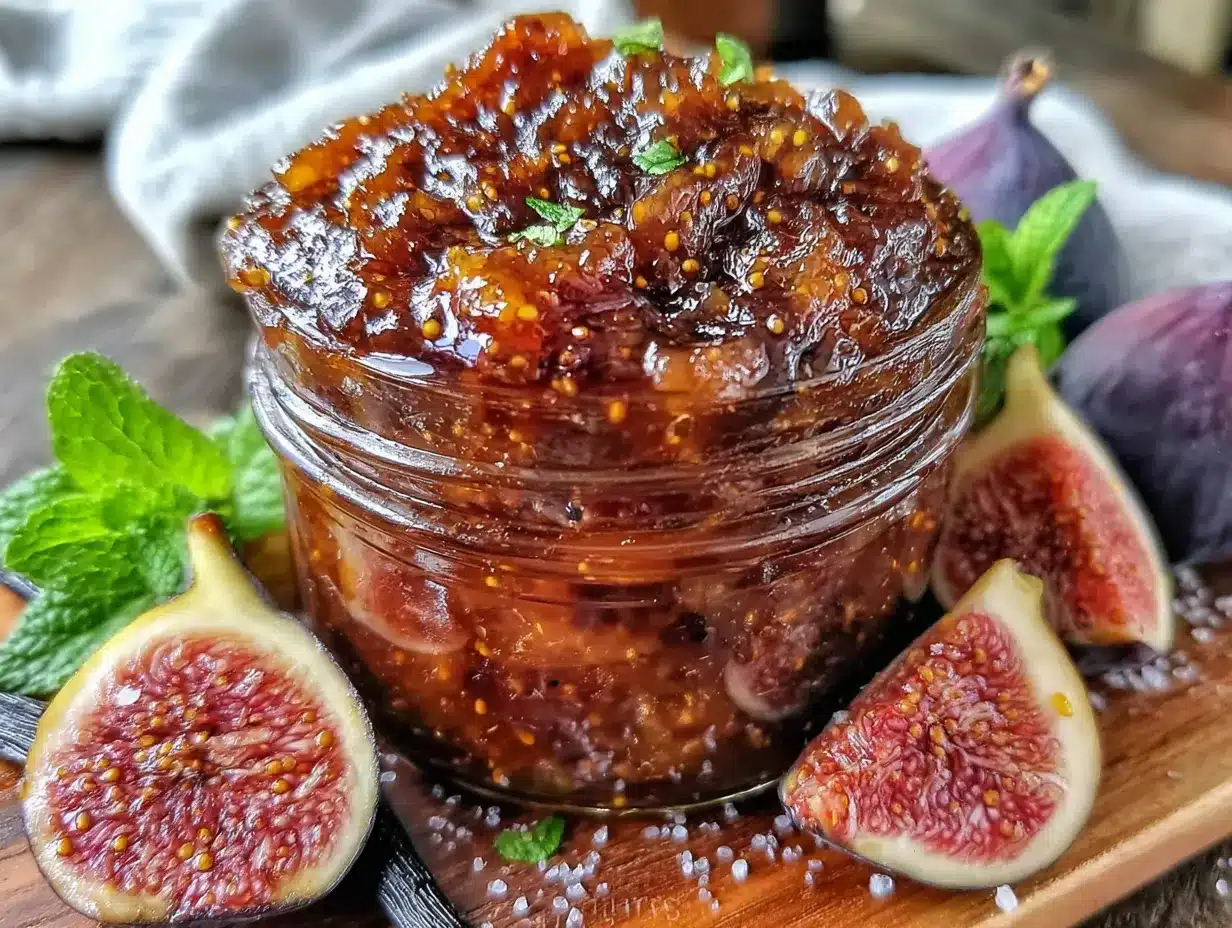
Making jam is one of those kitchen activities that feels almost meditative. There’s something satisfying about watching fruit transform into something glossy and spreadable. Here’s exactly how to do it.
- Prep the Figs (5 minutes) : Rinse your figs gently under cool water and pat them dry. Trim off the stems—just cut a thin slice off the top where the stem attaches. Don’t go too deep; you want to keep as much fruit as possible. Cut each fig into quarters or sixths, depending on size. Smaller pieces break down faster, but I like leaving some chunks for texture. If you have very large figs, chop them into half-inch pieces.
- Split the Vanilla Bean (2 minutes) : Lay the vanilla bean flat on your cutting board. Use a sharp paring knife to slice it lengthwise from tip to tip, cutting through one side only. Open it up like a book and use the back of your knife to scrape out the tiny black seeds. Don’t throw away the pod—it’s full of flavor and will infuse the jam as it cooks.
- Combine Ingredients in the Pot (3 minutes) : Add the chopped figs, sugar, lemon juice, vanilla bean seeds, and the empty vanilla pod to your pot. Add that pinch of salt too. Stir everything together until the figs are well coated with sugar. Let it sit for about 10 minutes if you have time—this helps draw out the fig’s natural juices and starts the maceration process. If you’re in a rush, you can skip this step, but the jam will take a few minutes longer to cook.
- Bring to a Simmer (5-7 minutes) : Place the pot over medium heat. Stir occasionally as the sugar dissolves and the figs start releasing their juices. You’ll see the mixture go from chunky and dry to wet and bubbling. Once it reaches a gentle simmer—not a furious boil—reduce the heat to medium-low. You want steady bubbles, not a volcano.
- Cook and Stir (15-20 minutes) : This is where the magic happens. Stir the jam every few minutes, scraping the bottom and sides of the pot to prevent sticking. The figs will soften and break down naturally. If you prefer a smoother jam, you can mash some of the larger pieces with the back of your spoon as you stir. I like leaving about half the figs chunky for texture. The jam will darken and thicken as it cooks. You’ll notice it starting to pull away from the sides of the pot when it’s getting close.
- Test for Doneness (2 minutes) : After about 15 minutes of simmering, start testing. Place a small spoonful of jam on your frozen plate. Let it sit for 30 seconds, then push it with your finger. If it wrinkles and holds its shape without flooding back together, it’s done. If it’s still runny, cook for another 2-3 minutes and test again. Remember that jam continues to thicken as it cools, so it’s better to pull it off slightly early than to overcook it into a sticky mess.
- Remove the Vanilla Pod (1 minute) : Fish out the vanilla bean pod with tongs or a fork. Give it a quick scrape over the pot to get any remaining seeds, then discard the pod (or rinse it and add it to a jar of sugar for vanilla sugar—zero waste!).
- Cool and Jar (10-15 minutes) : Let the jam cool in the pot for about 5 minutes, then ladle it into your sterilized jars. Leave about 1/4 inch of headspace at the top. Wipe the rims clean with a damp paper towel, screw on the lids, and let the jars cool completely at room temperature. You’ll hear the lids pop as they seal—that satisfying sound means you’ve done it right. Once cooled, refrigerate any jars that didn’t seal.
Prep Note : If you’re planning to give this jam as gifts, make sure your jars are fully sterilized and the lids are new. Process the filled jars in a boiling water bath for 10 minutes for shelf-stable storage. For everyday use, just refrigerating is fine.
Cooking Tips & Techniques
I’ve made this recipe enough times to have learned a few things the hard way. Let me spare you some of my mistakes.
Don’t Walk Away : Jam can go from perfectly thickened to burnt in about 90 seconds. I learned this when I stepped away to answer a phone call and came back to a pot that smelled like caramel gone wrong. Stay close, stir often, and keep your heat at a steady medium-low.
The Frozen Plate Trick Is Non-Negotiable : I cannot stress this enough. Testing on a frozen plate is the most reliable way to check your jam’s set without needing a thermometer. Put a few small plates in your freezer before you start cooking. They’ll be ready when you need them. If you don’t have room in your freezer, a cold spoon works in a pinch, but the plate method is better.
Adjust the Sugar to Your Taste : Figs vary in sweetness depending on the variety and ripeness. Start with 3/4 cup of sugar, but taste the raw fig mixture before cooking. If your figs are incredibly sweet, you can reduce the sugar to 2/3 cup. If they’re on the tart side, keep it at 3/4 cup or even go up to 1 cup. Just remember that sugar helps with preservation and texture, so don’t cut it too drastically.
Use a Splatter Guard : Jam bubbles and spits as it cooks, and fig jam is particularly prone to popping. A splatter guard over your pot saves you from scrubbing sticky residue off your stovetop. Trust me on this one.
Texture Control : For a chunkier jam, cook the figs whole or halved and stir gently to keep pieces intact. For a smoother jam, mash the figs with a potato masher about halfway through cooking. I’ve done both, and it really depends on my mood. Both versions are fantastic.
Timing Tip : Make this jam on a day when you’re already hanging around the kitchen. It doesn’t require constant attention, but you do need to check on it every few minutes. I like making it while I’m cleaning up after dinner or on a lazy Sunday morning when I’m puttering around.
Variations & Adaptations
One of the best things about this recipe is how easily it adapts to what you have on hand or what you’re craving. Here are a few variations I’ve tried and loved.
Fig and Rosemary Jam : Add a 4-inch sprig of fresh rosemary to the pot along with the figs. Let it simmer with the jam, then remove it before jarring. The rosemary adds an earthy, almost pine-like note that pairs beautifully with figs. I serve this version with roasted pork or on a cheese board with aged gouda. It’s also fantastic on a turkey and brie sandwich.
Spiced Fig Jam : Add 1 cinnamon stick, 2 star anise pods, and 3 whole cloves to the pot at the beginning. Fish them out before jarring. This version tastes like the holidays in a jar. I like to give it as Christmas gifts paired with a wedge of manchego cheese. The spices warm up the fig flavor without overwhelming it.
Honey-Sweetened Fig Jam : Replace half the granulated sugar with honey. Use a mild honey like clover or orange blossom—strong honey like buckwheat can overpower the figs. The jam will be slightly softer and more floral. Keep in mind that honey-sweetened jam doesn’t keep as long at room temperature, so store it in the fridge and use within 3 weeks.
Low-Sugar Fig Jam : Reduce the sugar to 1/2 cup and add 1 tablespoon of chia seeds to help with thickening. The texture will be more like a chia seed spread than traditional jam, but it’s still delicious. Cook the jam for about 10 minutes, then stir in the chia seeds and let it cool. This version sets up as it chills in the fridge.
Dried Fig Jam : If fresh figs aren’t in season, you can make this with dried figs. Use 8 ounces of dried figs (look for moist, soft ones), chop them finely, and simmer them in 1 cup of water or apple juice for 10 minutes to rehydrate before adding the sugar and lemon juice. The flavor is more concentrated and almost date-like. I’ve made this in the middle of winter when I was craving summer flavors, and it hit the spot perfectly.
I once made a batch with fresh thyme and a splash of balsamic vinegar, and it was incredible on crispy garlic herb smashed potatoes as a sweet-savory topping. Don’t be afraid to experiment—figs are surprisingly versatile.
Serving & Storage Suggestions
This jam is incredibly versatile, and I’ve found myself reaching for it in ways I never expected. Here’s how I use and store it.
How to Serve : This jam is best served at room temperature or slightly warm. Cold jam straight from the fridge is thick and harder to spread, so let it sit out for 15-20 minutes before using. The classic use is on toast or a warm fluffy buttermilk pancake with a pat of butter. It’s also incredible on a cheese board—try it with aged cheddar, manchego, brie, or blue cheese. I’ve even spooned it over roasted pork tenderloin in the last few minutes of cooking for a gorgeous glaze.
Breakfast Ideas : Swirl it into yogurt or oatmeal, spread it on scones or croissants, or use it as a filling for crepes. My kids love it on peanut butter sandwiches—it’s like a fancy PB&J without the effort.
Dessert Applications : Drizzle it over creamy no-churn salted caramel ice cream, use it as a layer in a trifle, or spoon it over pound cake with whipped cream. I’ve also used it as a filling for thumbprint cookies—just make a dent in your cookie dough, fill it with a teaspoon of jam, and bake as usual.
Storage Instructions : Store sealed jars in a cool, dark place for up to 6 months if processed in a water bath. If you skip the water bath processing (which I often do for small batches), store the jam in the refrigerator for up to 3 months. Once opened, always refrigerate and use within 4 weeks. The jam will darken slightly over time, but the flavor only gets better.
Freezer Option : This jam freezes beautifully. Pour cooled jam into freezer-safe containers or zip-top bags, leaving 1/2 inch of headspace for expansion, and freeze for up to 1 year. Thaw in the refrigerator overnight before using. I like freezing it in small 4-ounce jars so I can thaw just what I need.
Reheating Note : If your jam crystallizes or becomes too thick in the fridge, microwave it for 10-15 seconds or warm it gently on the stovetop with a splash of water. Stir until it loosens up.
Nutritional Information & Benefits
While jam isn’t exactly health food, this small batch version is made with real ingredients and no preservatives or artificial anything. Here’s a rough breakdown per tablespoon serving.
| Nutrient | Amount per 1 tbsp (20g) |
|---|---|
| Calories | 45 |
| Total Carbohydrates | 11g |
| Sugars | 10g |
| Fiber | 1g |
| Vitamin B6 | 2% DV |
| Copper | 3% DV |
| Potassium | 2% DV |
Figs are a good source of dietary fiber, which supports digestive health, and they contain antioxidants like polyphenols that help fight inflammation. The vanilla bean adds a touch of vanillin, which has been studied for its calming properties. Of course, this jam does contain sugar, so enjoy it in moderation. But honestly, a tablespoon on your morning toast is a perfectly reasonable way to add flavor and a little fruit to your day.
Dietary Considerations : This recipe is naturally gluten-free, dairy-free, and vegan. It contains no nuts or soy. The only potential allergen is the figs themselves, which are a fruit and generally well-tolerated. If you’re watching your sugar intake, try the low-sugar variation with chia seeds.
Conclusion
This homemade vanilla bean fig jam has become one of those recipes I make on repeat, not just because it’s delicious, but because it makes me feel like I’ve accomplished something real. There’s a deep satisfaction in taking fruit that’s about to go bad and turning it into something that feels luxurious. Every time I open a jar and catch that first whiff of vanilla and fig, I remember that I made this with my own hands.
I hope you give this recipe a try, whether you’re rescuing a farmers’ market haul or just want to treat yourself to something special. Don’t be afraid to play with the flavors—add a spice, swap in honey, or throw in a herb sprig. The best recipes are the ones that become yours through experimentation.
If you make this jam, I’d love to hear about it. Drop a comment below and tell me what you used it on, or share a photo of your jars. Did you try a variation? Did it become a new favorite? Let me know. And if you’re looking for more ways to use up seasonal fruit, check out that flavorful peach jalapeño chicken thighs recipe—it uses a similar sweet-savory approach that you might love.
Happy cooking, and save a jar for yourself. You deserve it.
Frequently Asked Questions
Can I use dried figs instead of fresh?
Absolutely. Use 8 ounces of dried figs, chop them finely, and simmer in 1 cup of water or apple juice for 10 minutes before adding the other ingredients. The flavor will be more concentrated and almost date-like. It’s a great option when fresh figs aren’t in season.
Do I need to use a vanilla bean, or can I use extract?
You can use 1 teaspoon of good vanilla extract added at the end of cooking. The flavor won’t be quite as complex, and you’ll miss those beautiful vanilla bean specks, but it’s still delicious. I’ve done it plenty of times when I didn’t have a vanilla bean on hand.
How do I know when the jam is done without a thermometer?
Use the frozen plate test. Put a small plate in the freezer before you start cooking. When you think the jam might be ready, drop a spoonful onto the cold plate, wait 30 seconds, and push it with your finger. If it wrinkles and holds its shape, it’s done. If it’s still runny, cook for 2-3 more minutes and test again.
Can I reduce the sugar in this recipe?
Yes, but don’t go below 1/2 cup of sugar or the jam won’t set properly. For a lower-sugar option, try the chia seed variation mentioned above. The texture will be different—more like a spread than traditional jam—but it’s still tasty and uses less sugar.
How long does this jam last?
If you process the jars in a boiling water bath for 10 minutes, they’ll keep in a cool, dark place for up to 6 months. Without water bath processing, store the jam in the refrigerator for up to 3 months. Once opened, use within 4 weeks. The jam also freezes beautifully for up to 1 year.
Pin This Recipe!
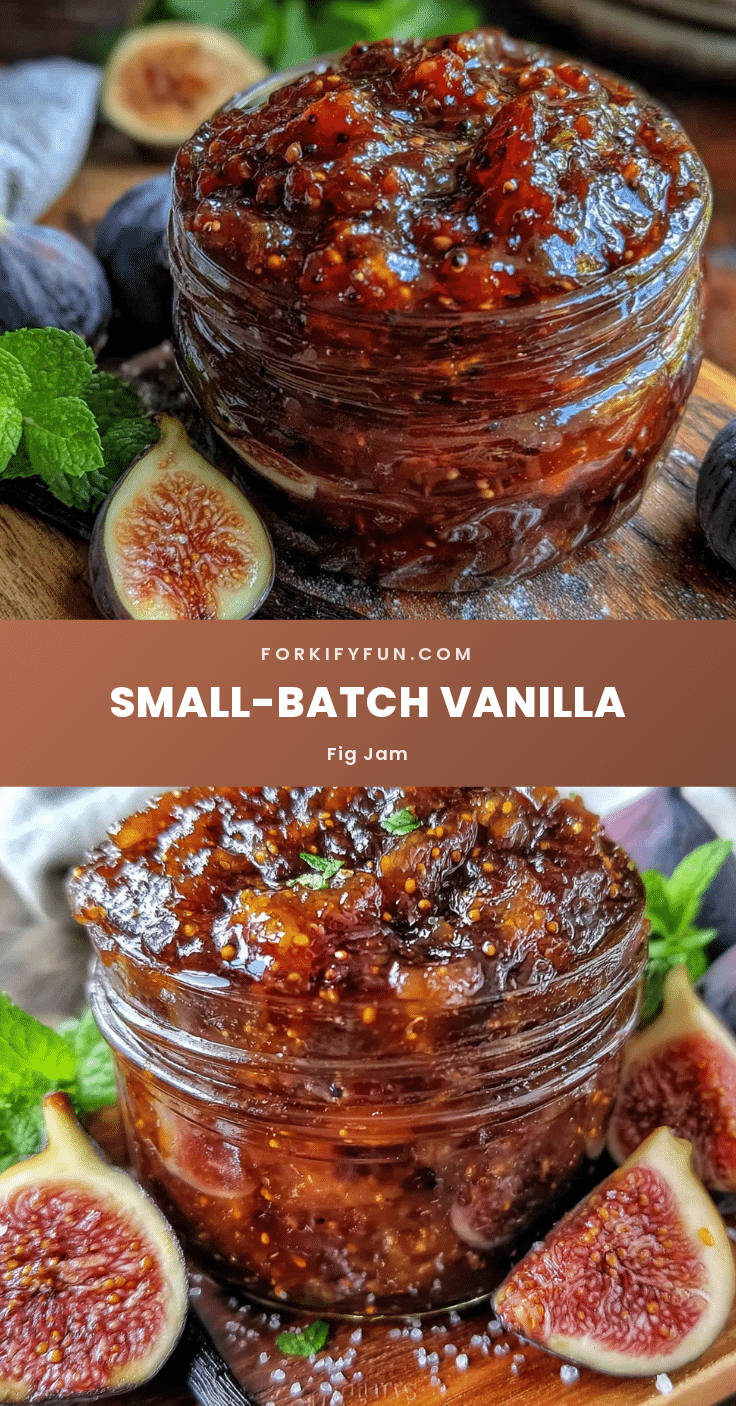
Homemade Vanilla Bean Fig Jam – Best Small Batch Recipe
This small batch vanilla bean fig jam is made with simple ingredients and no pectin, perfect for using up fresh figs. It’s quick, easy, and incredibly versatile for breakfast, cheese boards, or last-minute gifts.
- Prep Time: 10 minutes
- Cook Time: 20 minutes
- Total Time: 30 minutes
- Yield: 2 cups (about 16 servings) 1x
- Category: Preserves
- Cuisine: American
Ingredients
- 1 pound fresh figs (about 450g), stems trimmed and quartered
- 3/4 cup granulated sugar (150g)
- 2 tablespoons fresh lemon juice (30ml)
- 1 vanilla bean, split and seeds scraped
- Pinch of flaky sea salt or kosher salt
Instructions
- Rinse figs gently under cool water and pat dry. Trim off stems and cut each fig into quarters or sixths.
- Lay vanilla bean flat on a cutting board. Slice lengthwise, open like a book, and scrape out seeds with the back of a knife. Reserve the pod.
- In a medium heavy-bottomed pot or Dutch oven, combine chopped figs, sugar, lemon juice, vanilla bean seeds, the empty vanilla pod, and a pinch of salt. Stir to coat figs. Let sit for 10 minutes if time allows.
- Place pot over medium heat. Stir occasionally until sugar dissolves and figs release juices, about 5-7 minutes. Reduce heat to medium-low once mixture reaches a gentle simmer.
- Cook for 15-20 minutes, stirring every few minutes to prevent sticking. Mash some fig pieces with the back of a spoon for desired texture.
- Test for doneness: place a small spoonful of jam on a frozen plate. Let sit 30 seconds, then push with finger. If it wrinkles and holds its shape, it’s done. If still runny, cook 2-3 more minutes and test again.
- Remove vanilla bean pod with tongs. Scrape any remaining seeds back into the jam, then discard pod (or rinse and add to sugar for vanilla sugar).
- Let jam cool in pot for 5 minutes. Ladle into sterilized glass jars, leaving 1/4 inch headspace. Wipe rims, screw on lids, and let cool completely at room temperature. Refrigerate any jars that don’t seal.
Notes
For a smoother jam, mash figs with a potato masher halfway through cooking. For a chunkier jam, cook figs whole or halved and stir gently. The frozen plate test is the most reliable way to check doneness. Jam continues to thicken as it cools, so remove from heat slightly early. If giving as gifts, process filled jars in a boiling water bath for 10 minutes for shelf-stable storage.
Nutrition
- Serving Size: 1 tablespoon (20g)
- Calories: 45
- Sugar: 10
- Carbohydrates: 11
- Fiber: 1
Keywords: fig jam, vanilla bean, small batch, homemade jam, no pectin, fig preserve, easy jam recipe