“You really need to try this,” my friend texted me on a cold Friday evening. Honestly, I was skeptical—giant cookie in a skillet? It sounded like one of those trendy desserts that looks fun but ends up dry or too sweet. But I was craving something warm and comforting, so I tossed caution aside and gave it a go. The moment I pulled that sizzling, golden pizookie from the oven, the smell alone had me hooked. That buttery, caramelized edge with gooey, soft centers? Paired with a scoop of real vanilla bean ice cream melting over the top? It was a game-changer.
It wasn’t just the taste — it was the whole vibe of the moment. Cozy lighting, a little mess on the counter, and friends gathered around the skillet, spoons digging in, laughter floating around. That pizookie recipe quickly became my go-to for those nights when nothing else sounds better than warm, indulgent comfort food meant for sharing. I’ve made it more times than I can count (not exaggerating), and each time it’s like a little celebration in my kitchen. You might think it’s just a cookie, but honestly, it’s a mood.
Now, I’m sharing this cozy giant pizookie skillet cookie with vanilla bean ice cream recipe because it’s perfect for those moments when you want to slow down, savor something sweet, and maybe even impress a crowd without much fuss. The best part? It’s forgiving, straightforward, and the kind of dessert that makes you close your eyes after the first bite — you know that feeling.
Why You’ll Love This Cozy Giant Pizookie Skillet Cookie Recipe
This cozy giant pizookie skillet cookie recipe has been tested over many cozy nights and casual get-togethers, earning its spot as a crowd favorite. Here’s why it deserves a place in your dessert rotation:
- Quick & Easy: Ready in under 30 minutes, this recipe is perfect for last-minute dessert cravings or unwinding after a long day.
- Simple Ingredients: No need to hunt for rare items — this uses pantry staples you probably already have on hand.
- Perfect for Sharing: The giant skillet format makes it ideal for dessert with friends or family, creating a warm, inviting atmosphere.
- Crowd-Pleaser: Kids, adults, picky eaters — everyone asks for seconds. It’s just that good.
- Unbelievably Delicious: The combination of a crispy edge, chewy center, and creamy vanilla bean ice cream is pure comfort food magic.
This isn’t just another cookie recipe. What sets it apart is the technique of baking the cookie directly in a cast-iron skillet, which creates that perfect balance of textures — crispy on the outside, soft and gooey inside. Plus, using real vanilla bean ice cream adds a depth of flavor that elevates the whole dessert without being complicated.
It’s the kind of recipe that turns an ordinary night into something memorable. A dessert that invites you to slow down, share, and savor. And honestly, it’s hard not to fall for that.
What Ingredients You Will Need
This cozy giant pizookie skillet cookie comes together with straightforward, familiar ingredients that work in harmony to deliver the perfect sweet treat. Most of these are pantry basics, making it easy to whip up anytime.
- Unsalted butter, softened (adds richness and helps with that buttery edge)
- Granulated sugar (for sweetness and a little crispness)
- Brown sugar, packed (brings moisture and chewy texture)
- Large eggs, room temperature (for structure and binding)
- Pure vanilla extract (real vanilla makes a noticeable difference here)
- All-purpose flour (you can swap with almond flour for gluten-free, though texture will vary)
- Baking soda (helps the cookie rise and gives a bit of lift)
- Salt (balances flavor and enhances sweetness)
- Chocolate chips — I prefer semi-sweet or dark chocolate chunks for that melty texture and rich flavor
- Vanilla bean ice cream — homemade or store-bought; the flecks of vanilla bean really make it special
For best results, look for a firm, slightly softened butter and fresh eggs. If you want to switch up the chocolate, you can try white chocolate chips or even chunks of your favorite candy bar. In summer, I sometimes toss in fresh raspberries for a surprising pop of tartness.
Equipment Needed
- 10-inch cast iron skillet — This is key for even cooking and that beloved crispy edge. If you don’t have cast iron, a heavy oven-safe skillet works, but the texture might differ slightly.
- Mixing bowls — One for wet ingredients, one for dry.
- Hand mixer or stand mixer — Makes creaming butter and sugars easy but a sturdy whisk and some elbow grease works too.
- Measuring cups and spoons — Accuracy matters for baking.
- Rubber spatula — Helps scrape the bowl and evenly spread the dough in the skillet.
- Oven mitts — Because that skillet gets hot!
I’ve tried making this in different skillets, and honestly, the cast iron is worth the investment if you love baking. It creates that perfect crust. Plus, it’s a kitchen workhorse for savory dishes too, like the cozy French onion soup for one I often make on chilly nights.
Preparation Method

- Preheat your oven to 350°F (175°C). Place your 10-inch cast iron skillet in the oven while it heats to warm it up slightly — this helps the cookie bake evenly and get that crisp edge.
- In a medium bowl, whisk together the dry ingredients: 1 ½ cups (190g) all-purpose flour, ½ teaspoon baking soda, and ¼ teaspoon salt. Set aside.
- In a large bowl, cream the softened butter (½ cup or 115g) with ¾ cup (150g) granulated sugar and ½ cup (110g) packed brown sugar using a hand mixer or stand mixer until light and fluffy — about 3 minutes.
- Add two large eggs, one at a time, beating well after each addition. Then stir in 2 teaspoons pure vanilla extract. The batter should be smooth and shiny.
- Gradually add the dry ingredients to the wet, mixing on low speed until just combined. Be careful not to overmix — you want tender cookies, not tough ones.
- Fold in 1 ½ cups (270g) chocolate chips or chunks using a spatula, making sure they’re evenly distributed.
- Carefully remove the hot skillet from the oven (use oven mitts!) and grease it lightly with butter or non-stick spray.
- Press the cookie dough evenly into the skillet — it will be thick, so use your fingers or a spatula to spread it out to the edges.
- Bake for 20-25 minutes, or until the edges are golden brown and the center looks just set but still soft. A toothpick inserted near the center should come out with a few moist crumbs.
- Remove from oven and let the pizookie cool for 5 minutes — this keeps it gooey but firm enough to scoop.
- Serve warm with generous scoops of vanilla bean ice cream on top. The ice cream will melt into the cookie, creating a luscious, creamy contrast.
Pro tip: If you want a more gooey center, shave off a minute or two from the baking time and watch it closely. Overbaking will dry it out, and nobody wants that.
Cooking Tips & Techniques
Baking the perfect pizookie is all about timing and texture. One thing I learned early on is that cast iron skillets really make the difference — they hold heat so well, creating that crisp edge that contrasts beautifully with the soft center.
Don’t rush the creaming step. Properly creamed butter and sugars trap air, which helps the cookie rise and develop that tender crumb. I usually mix for a bit longer than the recipe says, just until the mixture looks noticeably lighter and fluffier.
Also, resist the urge to overmix once you add the flour. Overworking the dough can lead to a tougher cookie. Fold gently with a spatula instead.
When baking, keep an eye on the pizookie after 20 minutes. Ovens vary, and since you want that gooey middle, it’s better to underbake slightly than overbake.
If you want to multitask, start melting the butter and softening the eggs earlier in the day. This little step makes mixing much smoother and faster.
Lastly, I’ve tried stirring in nuts or toffee bits for extra crunch — they add a fun texture contrast but aren’t necessary for the classic cozy pizookie vibe.
Variations & Adaptations
- Gluten-Free Version: Substitute the all-purpose flour with a 1:1 gluten-free baking flour blend. The texture will be slightly denser but still delicious.
- Salted Caramel Twist: Drizzle salted caramel sauce over the baked pizookie just before serving for an indulgent upgrade.
- Peanut Butter Swirl: Dollop peanut butter on top of the raw dough and swirl it in with a knife before baking for a rich, nutty flavor.
- Seasonal Fruits: Add fresh or frozen berries or chopped apples with a sprinkle of cinnamon for a fruity spin.
- Dairy-Free Option: Use vegan butter and coconut-based vanilla ice cream to make this recipe dairy-free without losing creaminess.
Personally, I once swapped chocolate chips for chunks of dark chocolate and added a handful of chopped toasted pecans. It gave the pizookie a lovely bittersweet crunch that paired beautifully with the smooth vanilla bean ice cream.
Serving & Storage Suggestions
Serve this cozy giant pizookie warm straight from the skillet, topped with a generous scoop of vanilla bean ice cream. The contrast of hot and cold, crunchy and creamy, is the heart of the experience.
For presentation, garnish with a light dusting of powdered sugar or a few fresh mint leaves for a pop of color. It pairs wonderfully with a cup of freshly brewed coffee or a glass of cold milk.
Leftovers (if there are any!) can be stored covered in the refrigerator for up to 3 days. Reheat gently in a warm oven or microwave for 20-30 seconds to bring back that gooey texture before adding fresh ice cream.
Flavors actually deepen after a day, so if you have the patience, letting it rest overnight wrapped tightly in the fridge can make it taste even better.
Nutritional Information & Benefits
Estimated per serving (assuming 6 servings): approximately 350 calories, 18g fat, 45g carbohydrates, and 4g protein.
The richness comes from butter and chocolate, so it’s definitely an indulgence. However, using real vanilla bean ice cream adds a natural flavor boost without artificial additives or excessive sugar.
For those watching gluten or dairy, the recipe’s flexibility allows substitutions to fit gluten-free or dairy-free diets. The use of eggs provides a good source of protein, and dark chocolate chips offer antioxidants when used instead of milk chocolate.
Honestly, this cozy giant pizookie skillet cookie is a treat best enjoyed mindfully — a little celebration of sweetness that balances well with a wholesome meal like the healthy cauliflower crust pizza on a different night.
Conclusion
This cozy giant pizookie skillet cookie with vanilla bean ice cream recipe has proven itself time and again as a crowd-pleasing, comforting dessert that’s easy enough for any home cook to master. Its warm, gooey center and crisp edges offer that perfect texture combo, while the real vanilla bean ice cream adds a creamy, fragrant finish.
Whether you’re sharing it with friends, indulging on a solo night in, or surprising guests with something special, this pizookie brings a little joy and sweetness to the table. I love how it invites connection, slows the moment, and reminds me that a simple dessert can be something truly memorable.
Give it a try, tweak it your way, and let me know how it turns out. I’m always curious about what creative spins you add! There’s something special about a big skillet cookie that just makes you want to linger a little longer.
FAQs About Cozy Giant Pizookie Skillet Cookie
Can I make the pizookie without a cast iron skillet?
Yes, you can use any oven-safe skillet or baking dish, though cast iron gives the best crispy edges. Just keep an eye on baking time as it might vary slightly.
How do I know when the pizookie is done baking?
The edges should be golden brown and the center just set but still soft. A toothpick inserted near the middle should come out with a few moist crumbs.
Can I prepare the dough ahead of time?
Absolutely. You can make the dough and refrigerate it for up to 24 hours before baking. Just let it sit at room temperature for 10-15 minutes before spreading in the skillet.
What’s the best way to serve leftover pizookie?
Reheat gently in the oven or microwave until warm and soft, then add a fresh scoop of vanilla bean ice cream for the best experience.
Can I add nuts or other mix-ins?
Yes! Chopped walnuts, pecans, or even dried fruit work well. Just fold them in with the chocolate chips before baking.
Pin This Recipe!
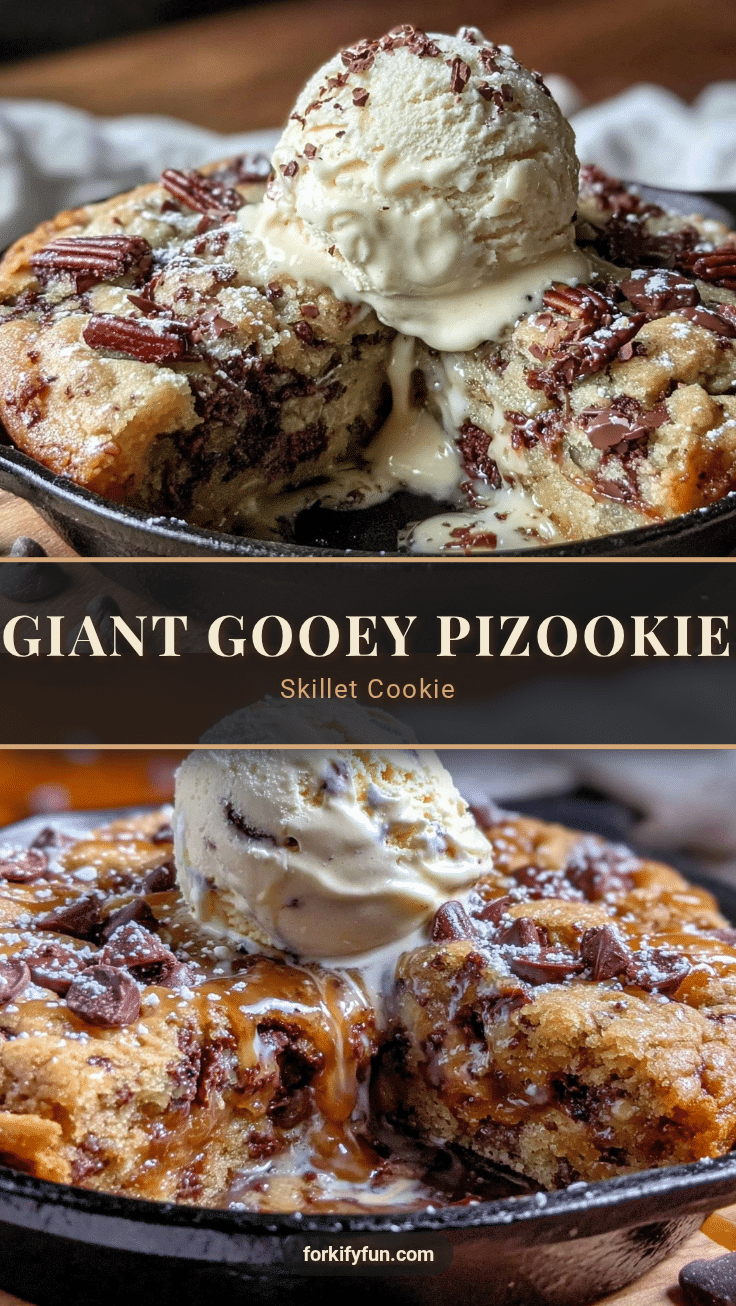
Cozy Giant Pizookie Skillet Cookie Recipe with Vanilla Bean Ice Cream Perfect for Sharing

A warm, indulgent giant cookie baked in a cast iron skillet with a crispy edge and gooey center, served with creamy vanilla bean ice cream. Perfect for sharing and comforting dessert moments.
- Prep Time: 10 minutes
- Cook Time: 20-25 minutes
- Total Time: 30-35 minutes
- Yield: 6 servings 1x
- Category: Dessert
- Cuisine: American
Ingredients
- ½ cup (115g) unsalted butter, softened
- ¾ cup (150g) granulated sugar
- ½ cup (110g) packed brown sugar
- 2 large eggs, room temperature
- 2 teaspoons pure vanilla extract
- 1 ½ cups (190g) all-purpose flour
- ½ teaspoon baking soda
- ¼ teaspoon salt
- 1 ½ cups (270g) chocolate chips or chunks
- Vanilla bean ice cream, for serving
Instructions
- Preheat your oven to 350°F (175°C). Place your 10-inch cast iron skillet in the oven while it heats to warm it up slightly.
- In a medium bowl, whisk together the dry ingredients: all-purpose flour, baking soda, and salt. Set aside.
- In a large bowl, cream the softened butter with granulated sugar and brown sugar using a hand mixer or stand mixer until light and fluffy, about 3 minutes.
- Add two large eggs, one at a time, beating well after each addition. Stir in pure vanilla extract until the batter is smooth and shiny.
- Gradually add the dry ingredients to the wet, mixing on low speed until just combined. Be careful not to overmix.
- Fold in chocolate chips or chunks using a spatula, ensuring even distribution.
- Carefully remove the hot skillet from the oven using oven mitts and grease it lightly with butter or non-stick spray.
- Press the cookie dough evenly into the skillet, spreading it out to the edges.
- Bake for 20-25 minutes, or until the edges are golden brown and the center looks just set but still soft. A toothpick inserted near the center should come out with a few moist crumbs.
- Remove from oven and let the pizookie cool for 5 minutes to keep it gooey but firm enough to scoop.
- Serve warm with generous scoops of vanilla bean ice cream on top.
Notes
For a more gooey center, reduce baking time by 1-2 minutes and watch closely. Avoid overmixing the dough to keep cookies tender. Cast iron skillet is recommended for best texture but any oven-safe skillet can be used. Dough can be prepared up to 24 hours ahead and refrigerated. Leftovers can be stored in the refrigerator for up to 3 days and reheated gently.
Nutrition
- Serving Size: 1/6 of the pizookie
- Calories: 350
- Fat: 18
- Carbohydrates: 45
- Protein: 4
Keywords: pizookie, skillet cookie, giant cookie, vanilla bean ice cream, dessert, comfort food, easy dessert, chocolate chip cookie


