“You forgot the dessert again?” my partner teased as I stared blankly at a kitchen counter scattered with random ingredients. Honestly, I was wiped from a long day, and the thought of turning on the oven was just… nope. But the craving for something sweet was loud, insistent. That’s when I spotted a half-empty box of Nilla Wafers and a bunch of bananas on the counter. I’d always been curious about banana pudding but never took the plunge. So, in a moment of low energy kitchen magic, I mixed together a quick, creamy no-bake banana pudding using what I had on hand.
The texture was unreal—super smooth with just the right hint of vanilla and banana sweetness. The Nilla Wafers added that nostalgic crunch that kept everyone asking for more. It wasn’t fancy or planned, but honestly, it became my go-to comfort dessert for busy nights since then. There’s something about the way the pudding sets up without any baking that feels almost like a little kitchen secret. It’s soft, luscious, and just sweet enough without being over the top.
Now, I find myself making this creamy no-bake banana pudding with Nilla Wafers almost every week—sometimes as a quick treat after dinner, other times as a surprise for friends dropping in unannounced. It’s the kind of dessert that feels like a warm hug but is also light and refreshing. If you’re anything like me, juggling a million things but still wanting something special, this recipe will quietly become your favorite too.
Why You’ll Love This Creamy No-Bake Banana Pudding with Nilla Wafers
After testing this recipe a dozen times (okay, maybe more), I can confidently say it nails that dreamy banana pudding vibe without the fuss. It’s not just another banana pudding—it’s creamy, smooth, and perfectly balanced so every bite feels indulgent but simple.
- Quick & Easy: Ready in under 30 minutes with no oven required, making it perfect for busy weeknights or spontaneous dessert cravings.
- Simple Ingredients: Uses pantry staples like Nilla Wafers, ripe bananas, and basic dairy ingredients—no need for specialty shopping trips.
- Perfect for Any Occasion: Great for potlucks, family dinners, or even a relaxed weekend treat. It pairs wonderfully with lighter meals like my Korean Beef Bulgogi Rice Bowls when you want to finish on a sweet note without heaviness.
- Crowd-Pleaser: Kids adore the creamy texture and crunchy wafers, while adults appreciate the natural banana sweetness and smooth vanilla custard.
- Unbelievably Delicious: The pudding’s velvety creaminess combined with the crisp wafers is a comfort food dream come true.
What sets this recipe apart is the no-bake method—honestly, it feels like cheating but tastes like the real deal. The pudding has this perfectly silky texture thanks to a simple technique I learned after several trial runs: folding whipped cream into the pudding base to keep it light yet rich. Also, using fresh ripe bananas (not too bruised but definitely sweet) gives the pudding that natural fruit flavor without artificialness. This isn’t just a quick fix dessert; it’s the kind that makes you pause with your eyes closed, savoring each spoonful.
What Ingredients You Will Need
This creamy no-bake banana pudding with Nilla Wafers relies on straightforward ingredients that create layers of flavor and texture without complication. Most of these are pantry and fridge staples, so chances are you’re already set.
- Bananas: 3 ripe bananas, sliced (the star of the show—ripe but firm for the best flavor and texture)
- Nilla Wafers: About 60 wafers (regular size; these add the signature crunch and vanilla flavor)
- Instant Vanilla Pudding Mix: 1 (3.4 oz / 96g) package (I prefer brands like JELL-O for consistent flavor and texture)
- Milk: 2 cups (480 ml) whole milk or 2% milk (for creaminess; you can swap almond or oat milk for dairy-free versions)
- Heavy Whipping Cream: 1 cup (240 ml), chilled (whipped to soft peaks to make the pudding extra creamy and light)
- Powdered Sugar: 2 tablespoons (to sweeten the whipped cream slightly)
- Vanilla Extract: 1 teaspoon (pure vanilla extract adds depth and warmth to the pudding)
Optional but recommended for garnish:
- Extra Nilla Wafers: Crushed or whole, for topping and extra texture
- Banana Slices: Fresh, for layering on top
If you’re looking for tweaks, you can easily swap the pudding mix for a homemade custard or use coconut whipped cream for a vegan-friendly twist. When bananas are in season and extra sweet, this dessert shines brightest, but even off-season bananas work well when ripe. I always keep a box of Nilla Wafers handy because they’re just magical paired with creamy desserts like this or even my Cajun Shrimp Pasta for a casual dinner party.
Equipment Needed
One of the best parts about this creamy no-bake banana pudding is its minimal equipment requirement. You won’t need any special tools, which makes it perfect for any kitchen.
- Mixing Bowls: One medium and one large bowl for pudding mix and whipped cream.
- Electric Mixer or Whisk: An electric hand mixer makes whipping the cream faster and fluffier, but a sturdy whisk works fine if you don’t mind a little arm workout.
- Measuring Cups and Spoons: For precise milk, sugar, and extract measurements.
- Spoon or Spatula: For folding the whipped cream into the pudding gently.
- Serving Dish or Trifle Bowl: A clear glass bowl or trifle dish is ideal to show off the pretty layers, but any medium-sized bowl or individual dessert cups work just as well.
If you don’t have an electric mixer, chilling the bowl and beaters beforehand helps the cream whip faster. I’ve also found that silicone spatulas are great for folding without deflating the whipped cream. For storage, a tight-fitting lid or cling wrap will keep the pudding fresh in the fridge.
Preparation Method
- Prepare the pudding: In a medium bowl, whisk together the instant vanilla pudding mix with 2 cups (480 ml) of cold milk. Beat for about 2 minutes until thickened and smooth. Set aside for 5 minutes to fully set.
- Whip the cream: In a large chilled bowl, beat 1 cup (240 ml) heavy whipping cream with 2 tablespoons powdered sugar and 1 teaspoon vanilla extract. Whip until soft peaks form (the cream should hold a slight peak when you lift the whisk but still be soft and fluffy).
- Fold whipped cream into pudding: Gently fold about half of the whipped cream into the pudding mixture using a spatula. This lightens the pudding, making it creamy and airy. Then fold in the remaining whipped cream carefully, avoiding overmixing.
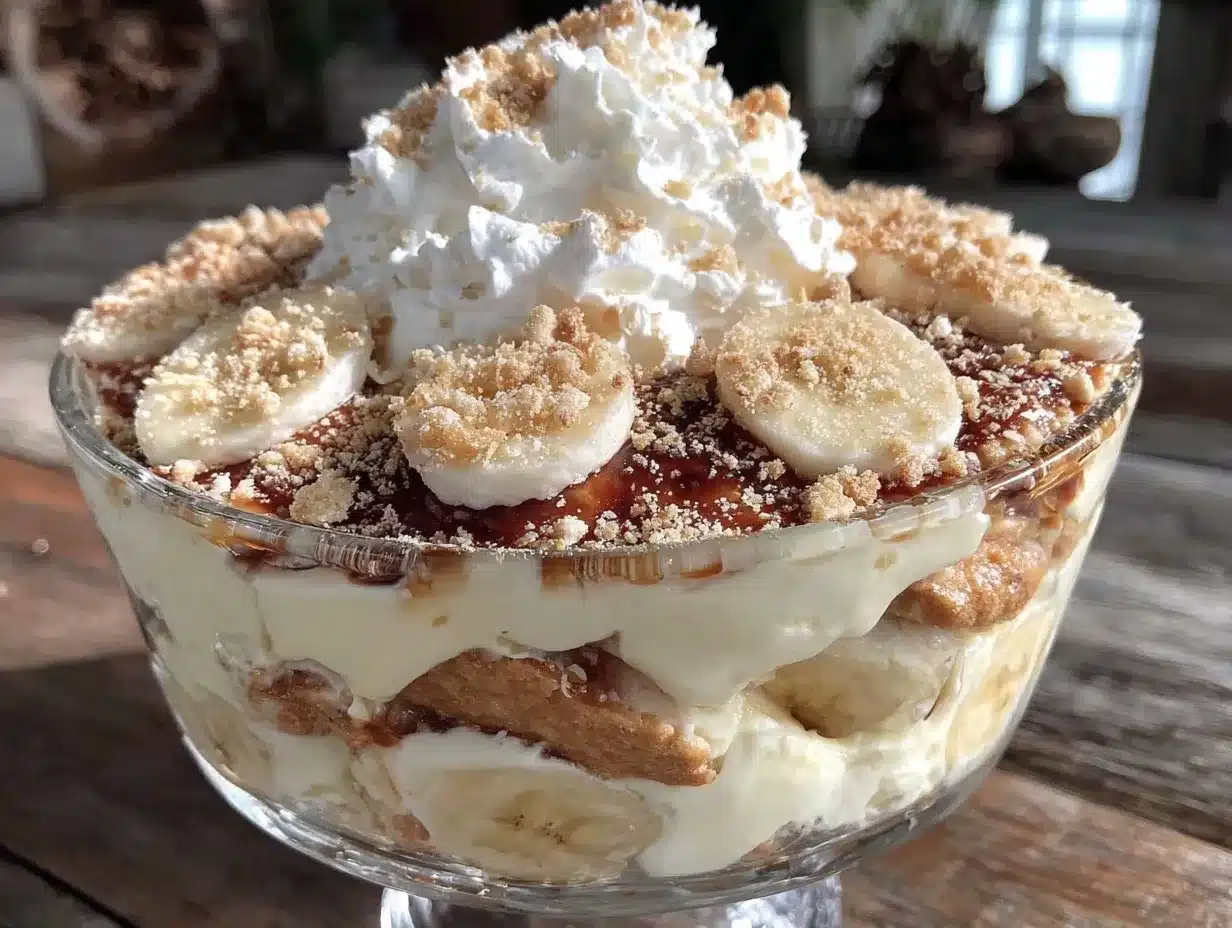
- Layer the pudding: In your serving dish or individual cups, start with a layer of Nilla Wafers (about 20 wafers). Next, add a layer of sliced bananas (about 1 banana sliced evenly). Then spoon a layer of the creamy pudding mixture on top. Repeat layers until all ingredients are used, finishing with a pudding layer on top.
- Chill: Cover the dish tightly with plastic wrap and refrigerate for at least 3 hours or overnight. This allows the wafers to soften slightly and the flavors to meld beautifully.
- Serve: Just before serving, garnish with extra Nilla Wafers (whole or crushed) and fresh banana slices to add texture and visual appeal.
Pro tip: If you notice the pudding mixture is too thick after chilling, a quick whisk before serving can restore its silky texture. Also, ripe bananas can brown quickly, so slice them just before layering or serving to keep things fresh-looking.
Cooking Tips & Techniques for the Best No-Bake Banana Pudding
Making this creamy no-bake banana pudding with Nilla Wafers is straightforward, but a few tips can really make a difference in texture and flavor.
- Whip cream to soft peaks: Over-whipping can turn cream grainy or buttery, which you don’t want. Soft peaks give the pudding that light, fluffy feel without being runny.
- Folding, not stirring: When mixing whipped cream into the pudding, fold gently with a spatula. This keeps the air in and prevents the pudding from becoming dense.
- Use ripe but firm bananas: Too ripe and they’ll get mushy and brown fast; too firm and you miss that natural sweetness. Medium-ripe bananas are your best bet for balanced flavor and texture.
- Layer evenly: Distribute bananas and wafers evenly to avoid soggy spots or dry bites. The pudding should soak into the wafers just enough to soften them, creating a creamy, melt-in-your-mouth experience.
- Chill long enough: Patience is key here—at least 3 hours or overnight lets all the flavors marry and the pudding to set perfectly.
I learned the hard way that rushing the chilling step made the wafers too crunchy and the pudding too loose. Also, sometimes I’ve swapped the instant pudding for homemade custard, but that involves cooking and cooling, which isn’t quite as quick. For truly easy weeknight dessert wins, this no-bake version is unbeatable.
Variations & Adaptations for Your Banana Pudding
You can tweak this creamy no-bake banana pudding with Nilla Wafers in several fun ways to suit tastes and occasions:
- Chocolate Banana Pudding: Add a layer of chocolate pudding or sprinkle mini chocolate chips between layers for a decadent twist.
- Gluten-Free Version: Swap Nilla Wafers for gluten-free vanilla cookies or crushed graham crackers for similar texture.
- Dairy-Free Adaptation: Use coconut milk or almond milk instant pudding mixes and coconut whipped cream. Make sure your wafers are dairy-free too.
- Tropical Flair: Add diced pineapple or toasted coconut flakes between layers for a summery vibe.
- Nutty Crunch: Sprinkle chopped toasted pecans or walnuts on top for added texture.
One personal favorite variation is adding a splash of bourbon or rum to the pudding mix for adult gatherings—it’s subtle but adds a warm depth of flavor. Also, if you want a quicker single-serve option, layering everything in cups makes for perfect portion control and easy storage.
Serving & Storage Suggestions
This banana pudding is best served chilled, straight from the fridge, allowing the creamy layers and softened wafers to shine. Serving it in a clear glass trifle bowl or individual jars lets those pretty layers peek through, making it as lovely to look at as it is to eat.
Pair this dessert with simple coffee or a light herbal tea to balance the sweetness, or after a savory meal like the Thai Red Curry Chicken Soup for a comforting finish. It also plays nicely alongside fresh fruit salads or light sorbets for variety.
For storage, cover tightly with plastic wrap or a lid and refrigerate for up to 3 days. The texture improves slightly as it sits—the wafers soften more and absorb the pudding’s flavor, making each bite more cohesive. Avoid freezing, as the pudding’s texture can change and become grainy.
When reheating leftovers (if you must!), let the pudding come to room temperature and give it a gentle stir. But honestly, it’s best enjoyed cold and fresh!
Nutritional Information & Benefits
Each serving of this creamy no-bake banana pudding with Nilla Wafers offers:
- Approximately 250-300 calories
- Moderate protein from milk and cream
- Natural carbohydrates from ripe bananas and wafers
- Calcium and vitamin D from dairy ingredients
Bananas provide potassium and dietary fiber, aiding digestion and heart health. Using instant pudding mix keeps prep easy, and swapping to lower-fat milk or dairy-free options can adjust calories and fat content. The recipe is naturally gluten-containing due to wafers but can be easily adapted for gluten-free diets.
From a wellness perspective, this dessert strikes a balance between indulgence and nourishment. It’s not overly sweet, emphasizes whole fruit, and avoids artificial additives when you choose quality ingredients. Perfect for treating yourself without guilt.
Conclusion
This creamy no-bake banana pudding with Nilla Wafers has quietly become a dessert staple for those moments when you want something easy, comforting, and downright delicious. It’s forgiving, fast, and flexible enough to suit any taste or occasion.
Whether you stick to the classic layers or try a chocolate or tropical twist, this recipe invites you to make it your own. I love how it feels like a special treat without any stress or fuss—just pure creamy goodness with a nostalgic crunch.
If you try it out, I’d love to hear what variations you come up with or how it fits into your weeknight routine. Sharing a simple dessert that brings a smile is always worth it. So go on, give this no-bake banana pudding a whirl—you won’t regret it!
Frequently Asked Questions about Creamy No-Bake Banana Pudding with Nilla Wafers
Can I make this banana pudding ahead of time?
Yes! It actually tastes better after chilling for several hours or overnight, allowing the flavors to meld and the wafers to soften perfectly.
What if I don’t have instant pudding mix?
You can make a homemade vanilla custard, but it requires cooking and cooling time. The instant pudding mix keeps this recipe quick and easy.
How do I keep sliced bananas from browning?
Slice bananas just before layering and refrigerate promptly. For extra protection, toss slices lightly in lemon juice to slow browning.
Can I use a different cookie instead of Nilla Wafers?
Absolutely! Vanilla wafers are classic, but gluten-free cookies, graham crackers, or even shortbread work well.
Is this dessert suitable for a crowd?
Yes! Simply multiply the ingredients and layer in a large trifle bowl or several smaller bowls for easy serving.
Pin This Recipe!
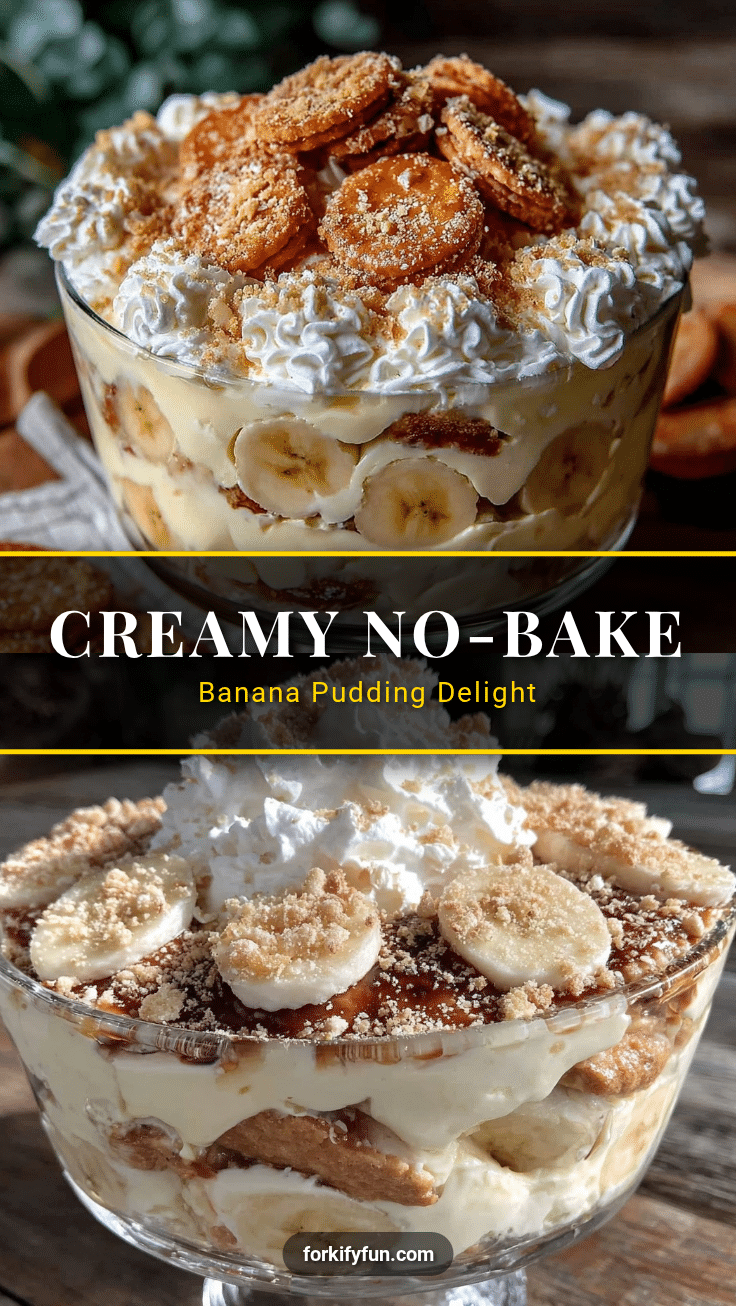
Creamy No-Bake Banana Pudding Recipe with Nilla Wafers

A quick and easy no-bake banana pudding layered with Nilla Wafers and ripe bananas, perfect for a comforting and nostalgic dessert without the oven.
- Prep Time: 15 minutes
- Cook Time: 0 minutes
- Total Time: 3 hours 15 minutes
- Yield: 8 servings 1x
- Category: Dessert
- Cuisine: American
Ingredients
- 3 ripe bananas, sliced
- About 60 Nilla Wafers (regular size)
- 1 (3.4 oz / 96g) package instant vanilla pudding mix
- 2 cups (480 ml) whole milk or 2% milk
- 1 cup (240 ml) heavy whipping cream, chilled
- 2 tablespoons powdered sugar
- 1 teaspoon vanilla extract
- Optional garnish: extra Nilla Wafers (crushed or whole), banana slices
Instructions
- In a medium bowl, whisk together the instant vanilla pudding mix with 2 cups (480 ml) of cold milk. Beat for about 2 minutes until thickened and smooth. Set aside for 5 minutes to fully set.
- In a large chilled bowl, beat 1 cup (240 ml) heavy whipping cream with 2 tablespoons powdered sugar and 1 teaspoon vanilla extract. Whip until soft peaks form.
- Gently fold about half of the whipped cream into the pudding mixture using a spatula. Then fold in the remaining whipped cream carefully, avoiding overmixing.
- In your serving dish or individual cups, start with a layer of about 20 Nilla Wafers. Add a layer of sliced bananas (about 1 banana). Spoon a layer of the creamy pudding mixture on top. Repeat layers until all ingredients are used, finishing with a pudding layer on top.
- Cover the dish tightly with plastic wrap and refrigerate for at least 3 hours or overnight to allow wafers to soften and flavors to meld.
- Just before serving, garnish with extra Nilla Wafers (whole or crushed) and fresh banana slices.
Notes
Whip cream to soft peaks to avoid grainy texture. Fold whipped cream gently into pudding to keep it light and airy. Use ripe but firm bananas for best flavor and texture. Chill at least 3 hours or overnight for best results. Slice bananas just before layering to prevent browning. If pudding is too thick after chilling, whisk gently before serving.
Nutrition
- Serving Size: 1/8 of the recipe
- Calories: 275
- Sugar: 22
- Sodium: 150
- Fat: 14
- Saturated Fat: 8
- Carbohydrates: 34
- Fiber: 2
- Protein: 4
Keywords: banana pudding, no-bake dessert, Nilla Wafers, easy dessert, creamy pudding, quick dessert, layered pudding