I want pumpkin cheesecake bars right now, and I have everything except the patience for a crust. That’s the whole thought, sitting there in my brain at 9:47 on a Tuesday morning while I’m staring into the fridge like it owes me something. The cream cheese is there. The pumpkin puree is there. And honestly, I’ve been thinking about this particular flavor combination since the first leaf turned color last week.
Here’s the thing about fall baking that nobody tells you—sometimes you want the rich, spiced comfort of a pumpkin dessert without the fuss of pressing graham crackers into a pan. You just want the good part. The creamy, velvety, melt-in-your-mouth center that makes you close your eyes after the first bite. So I decided to skip the crust entirely and see what happened.
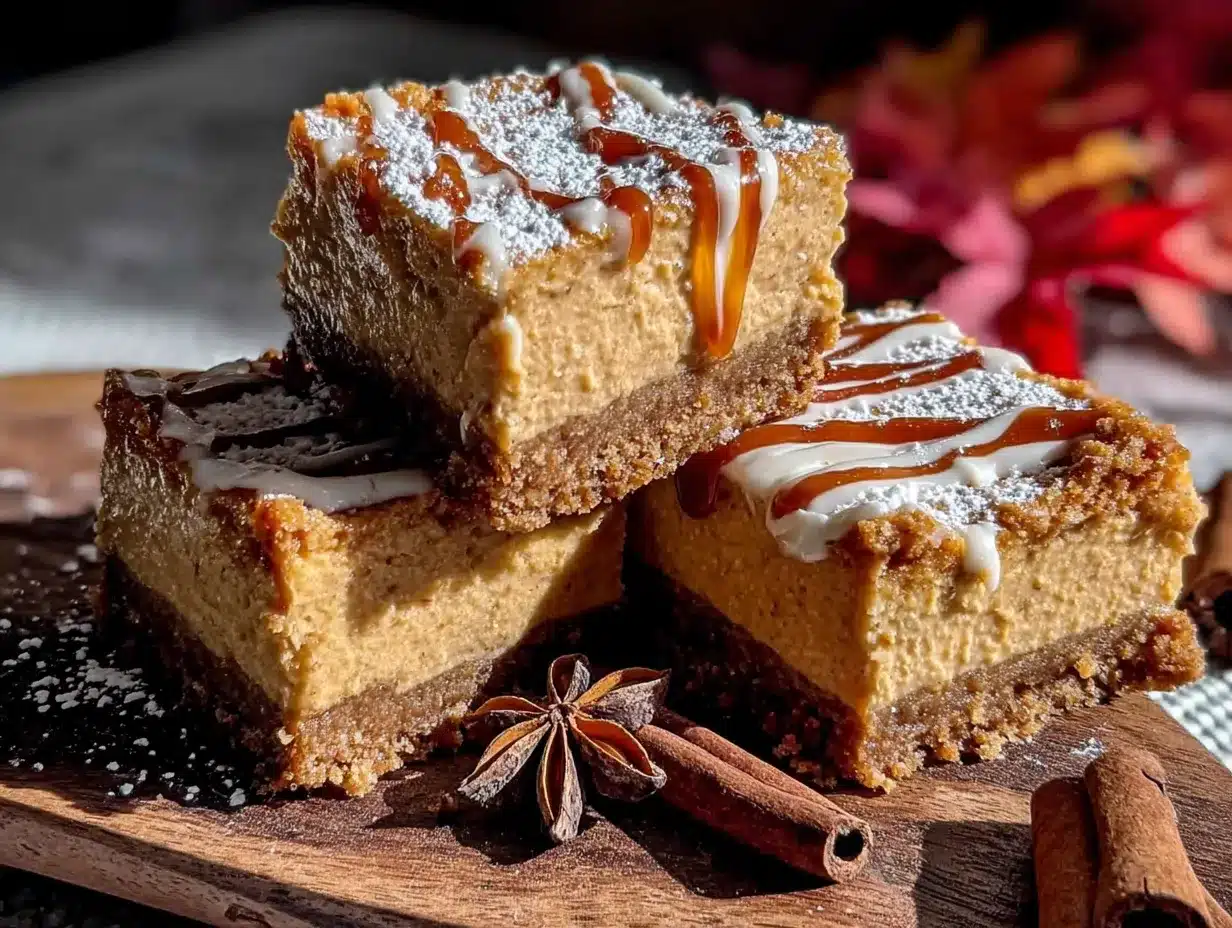
What happened was these Creamy Crustless Pumpkin Spice Cheesecake Bars—five ingredients, zero crust, and all the satisfaction. They’re the kind of dessert that feels like you planned it for days when really, you just had a craving and refused to overcomplicate it. The texture is almost pudding-like, dense but silky, with that warm pumpkin spice hit that tastes like autumn in a single bite.
I’ve made these three times in the past two weeks, and each batch disappeared faster than the last. My neighbor tried one and asked for the recipe before she finished chewing. That’s when I knew this wasn’t just a lazy shortcut—it was something worth sharing.
Why You’ll Love This Recipe
Let me tell you why these bars have become my unofficial fall signature dessert. First off, they’re stupidly easy. Like, embarrassingly easy. Five ingredients, one bowl, and you’re done mixing in under ten minutes. No crust means no rolling, no pressing, no worrying about soggy bottoms. It’s pure cheesecake filling, baked until perfectly set, and that’s it.
- Quick & Easy: From start to oven in under 10 minutes. Seriously, the hardest part is waiting for them to cool.
- Simple Ingredients: You probably have everything in your kitchen right now. Cream cheese, pumpkin puree, sugar, eggs, and pumpkin pie spice. That’s the whole list.
- Perfect for Fall Gatherings: These bars are made for Thanksgiving, Friendsgiving, or just a cozy Tuesday when you need something sweet. They travel well, slice cleanly, and everyone loves them.
- Crowd-Pleaser: I’ve served these to kids, adults, picky eaters, and dessert snobs. Every single person has asked for seconds.
- Unbelievably Delicious: Without a crust, the filling becomes the star. It’s creamy, spiced perfectly, and has this almost mousse-like texture that feels luxurious without being heavy.
What makes these bars different from every other pumpkin cheesecake recipe out there? It’s the texture. By skipping the crust, you get a denser, creamier bar that’s almost like a cross between cheesecake and pumpkin pie. The edges get slightly firmer while the center stays soft and silky. Plus, you save yourself the calories and effort of a crust, which means you can eat two without guilt. (I speak from experience.)
This is the recipe you make when you want to impress people without actually trying. It’s comfort food reimagined—simpler, faster, but with the same soul-soothing satisfaction that makes you want to curl up under a blanket with a cup of coffee and a plate of these bars.
What Ingredients You Will Need
This recipe uses five simple, wholesome ingredients to deliver bold pumpkin spice flavor and that signature creamy texture without any fuss. Everything is a pantry staple, which means you can make these bars on a whim without a special trip to the store.
- Cream Cheese (16 oz, softened to room temperature) — This is the backbone of your bars. Use full-fat block cream cheese for the best texture. I recommend Philadelphia cream cheese because it’s consistently creamy and reliable. Make sure it’s truly softened—cold cream cheese will leave you with lumpy batter. (Pro tip: leave it on the counter for at least an hour before starting.)
- Pumpkin Puree (1 cup, not pumpkin pie filling) — Look for 100% pure pumpkin puree, not the pre-sweetened pie filling. Libby’s is my go-to brand because it’s thick and not watery. If your pumpkin puree seems extra wet, blot it with a paper towel before mixing.
- Granulated Sugar (3/4 cup) — Regular white sugar works perfectly here. It sweetens without overpowering the pumpkin or spice flavors. You can reduce it to 1/2 cup if you prefer a less sweet dessert, but I wouldn’t go lower than that.
- Large Eggs (2, room temperature) — Eggs give structure and richness. Room temperature eggs incorporate more smoothly into the batter, which means a silkier final texture. If you forgot to take them out early, place them in a bowl of warm water for 5 minutes.
- Pumpkin Pie Spice (2 teaspoons) — You can use store-bought or make your own blend. I actually prefer making my own because I can adjust the ratios. Mix 1 teaspoon cinnamon, 1/2 teaspoon ginger, 1/4 teaspoon nutmeg, 1/4 teaspoon cloves, and a pinch of allspice. The aroma alone will make your kitchen smell like heaven.
That’s genuinely it. Five ingredients, no hidden surprises, no exotic shopping list. The beauty of this recipe is that each ingredient pulls its weight, and together they create something that tastes far more complicated than it actually is.
Optional add-ins you might consider: a teaspoon of vanilla extract adds warmth, and a pinch of salt balances the sweetness. I sometimes add a tablespoon of bourbon or dark rum for depth, but that’s totally optional. If you’re feeling fancy, a drizzle of caramel sauce or a dollop of whipped cream takes these bars over the top.
Equipment Needed
You don’t need a fancy kitchen to make these bars, which is part of why I love this recipe so much. Here’s what you’ll need:
- 8×8-inch Baking Pan — This is the perfect size for these bars. A 9×9 will work too, but your bars will be slightly thinner and may bake a few minutes faster. Line it with parchment paper for easy removal.
- Electric Mixer (hand or stand) — You can technically mix by hand, but an electric mixer gives you that smooth, lump-free texture. A hand mixer works perfectly and is easier to clean.
- Large Mixing Bowl — One bowl. That’s all you need. Less dishes means more time eating cheesecake bars.
- Spatula — For scraping down the sides of the bowl and smoothing the batter into the pan.
- Parchment Paper — Not strictly necessary, but it makes lifting the bars out of the pan so much easier. Trust me on this one.
- Cooling Rack — Helps the bars cool evenly. If you don’t have one, just let them cool in the pan on the counter.
That’s it. No springform pan, no water bath, no special gadgets. If you have these basic tools, you’re ready to go. I’ve made these in a friend’s kitchen with a dollar store mixing bowl and a whisk, and they still turned out amazing.
Preparation Method
Alright, let’s get to the good part. Follow these steps, and you’ll have creamy, dreamy pumpkin cheesecake bars in no time.
- Preheat your oven to 325°F (160°C). Line your 8×8-inch baking pan with parchment paper, leaving some overhang on two sides. This creates handles for lifting the bars out later. (I learned this trick after struggling to remove crustless bars from the pan—game changer.)
- Beat the cream cheese until smooth. In your large mixing bowl, beat the softened cream cheese on medium speed for about 2 minutes. You want it completely smooth with no lumps. Scrape down the sides and bottom of the bowl with your spatula halfway through. This step is crucial—lumpy cream cheese means lumpy bars.
- Add the sugar and beat again. Pour in the 3/4 cup of granulated sugar and beat on medium speed for another 1-2 minutes until the mixture is light and fluffy. It should look like a thick, creamy frosting at this point. Scrape the bowl again.
- Add the eggs one at a time. Crack your first room-temperature egg into the mixture and beat on low speed just until incorporated. Add the second egg and do the same. Don’t overmix here—you don’t want to incorporate too much air, which can cause cracks. The batter should look smooth and glossy.
- Mix in the pumpkin puree and spices. Add the 1 cup of pumpkin puree and 2 teaspoons of pumpkin pie spice. Beat on low speed until everything is combined and the batter is a uniform orange color. Scrape the bowl one more time and give it a final stir by hand with your spatula to make sure everything is incorporated.
- Pour the batter into the prepared pan. Use your spatula to spread it evenly into the corners. The batter will be fairly thin—that’s normal. Give the pan a gentle tap on the counter to release any air bubbles.
- Bake for 35-40 minutes. The edges should look set and slightly puffed, but the center should still have a slight jiggle when you gently shake the pan. Don’t overbake! A slightly jiggly center will set perfectly as it cools. Overbaking leads to dry, cracked bars.
- Cool completely at room temperature. Place the pan on a cooling rack and let it cool for about 1 hour. The bars will continue to set as they cool. Don’t rush this step—putting warm cheesecake in the fridge can cause condensation and a watery texture.
- Refrigerate for at least 4 hours (overnight is best). Once cooled, cover the pan with plastic wrap and refrigerate. This is the hardest part because your kitchen will smell amazing. But trust me, the texture improves dramatically after a full chill. The bars become firm, sliceable, and incredibly creamy.
- Slice and serve. Use the parchment paper handles to lift the entire block out of the pan. Place it on a cutting board and use a sharp knife to cut into 9 or 16 squares. For clean slices, wipe the knife clean between cuts. I like to warm the knife under hot water and dry it before each cut.
One thing I want to emphasize: the cooling and chilling process is non-negotiable. I know it’s tempting to dig in while they’re still warm, but you’ll end up with a goopy mess. These bars need time to set up properly. I usually make them the night before I plan to serve them, and they’re always perfect the next day.
Cooking Tips & Techniques
After making these bars more times than I care to count, I’ve picked up a few tricks that make a real difference. Let me share what I’ve learned.
Room temperature ingredients are your friend. I cannot stress this enough. Cold cream cheese creates lumps that won’t smooth out no matter how long you beat it. Cold eggs don’t incorporate properly. Take everything out of the fridge at least an hour before you start. If you’re in a hurry, cut the cream cheese into cubes and microwave it in 10-second bursts until it’s soft but not melted.
Don’t overmix after adding the eggs. This was a hard lesson for me. I used to beat the batter until it was perfectly smooth, which introduced too much air. The result? Bars that puffed up in the oven and then collapsed, leaving cracks all over the surface. Now I mix on low speed and stop as soon as the eggs disappear into the batter.
The jiggle test is more reliable than a toothpick. Cheesecake bars are done when the edges are set and the center has a gentle wobble—like Jell-O, not like liquid. If you insert a toothpick, it will come out looking wet even when the bars are perfectly baked. Learn to trust the jiggle. It takes practice, but you’ll get it.
Let them cool gradually. I used to move my bars straight from the oven to the fridge, thinking I was being efficient. Wrong. The sudden temperature change caused condensation, which made the surface watery. Now I let them cool on the counter for a full hour before refrigerating. Patience pays off.
Slice with confidence. Use a long, sharp knife and wipe it clean between each cut. If the knife sticks, dip it in hot water and dry it off. This gives you those beautiful, clean edges that look like they came from a bakery.
One mistake I made early on: I used low-fat cream cheese to save calories. Don’t do it. The texture was grainy and the bars never set properly. Full-fat cream cheese gives you that luxurious, silky texture that makes these bars so special. If you’re watching calories, just eat a smaller piece. Trust me, it’s worth it.
Variations & Adaptations
One of the best things about this recipe is how versatile it is. Here are some ways to make it your own.
Maple Pecan Version: Swap 1/4 cup of the granulated sugar with maple syrup (reduce the sugar by 1/4 cup to compensate for the liquid). Sprinkle chopped pecans on top before baking. The nutty crunch against the creamy cheesecake is divine. I made this for a Friendsgiving dinner, and people were literally scraping the pan.
Chocolate Pumpkin Swirl: Melt 1/4 cup of dark chocolate chips and drizzle it into the batter before baking. Use a knife to swirl it gently through the batter. You get ribbons of rich chocolate throughout the pumpkin cheesecake. This version tastes like a fancy coffee shop dessert but costs a fraction of the price.
Dairy-Free Adaptation: Use dairy-free cream cheese (I like Kite Hill or Violife) and it works surprisingly well. The texture is slightly less dense but still creamy and delicious. Make sure all your ingredients are at room temperature for the best results.
Mini Cheesecake Bites: Pour the batter into a greased mini muffin tin and bake for 12-15 minutes. These are perfect for parties or portion control. Just reduce the baking time and watch them carefully. They make great lunchbox treats too—if you’re looking for more easy lunch ideas, I’ve got plenty of healthy after-school snack board ideas that pair beautifully with these mini bites.
Gingersnap Topping: Crush about 1/2 cup of gingersnap cookies and sprinkle them over the batter before baking. They sink slightly into the top layer, creating a crunchy, spicy crust-like topping without the work of an actual crust. This is my current favorite variation.
Pumpkin Spice Latte Version: Add 2 tablespoons of strong brewed coffee or espresso to the batter along with the pumpkin. The coffee enhances the pumpkin spice flavor without making it taste like coffee. It’s subtle but sophisticated.
Feel free to experiment with different spice blends too. I’ve made these with chai spice blend (cardamom-forward) and even a pinch of cayenne for a spicy-sweet kick. The basic recipe is forgiving enough to handle creativity.
Serving & Storage Suggestions
These bars are wonderful at room temperature or straight from the fridge. I personally prefer them chilled—the texture is firmer and almost fudge-like. If you’re serving them at a gathering, let them sit out for about 15 minutes before serving to take the chill off without losing the structure.
Presentation ideas: Dust the tops with a light sprinkle of cinnamon or pumpkin pie spice right before serving. A dollop of creamy pumpkin cold foam on the side makes for an incredible fall dessert pairing. For a more elegant look, drizzle with caramel sauce and add a few toasted pecans on top.
What to serve with them: These bars pair beautifully with coffee, hot cider, or a warm chai latte. For a dessert spread, serve them alongside salted caramel apple crumble bars for a fall dessert duo that’ll steal the show. A scoop of vanilla ice cream or a swirl of whipped cream turns these into an elevated dessert experience.
Storage: Keep the bars in an airtight container in the refrigerator for up to 5 days. Layer them with parchment paper between each layer to prevent sticking. The flavor actually improves after a day or two as the spices meld together.
Freezing instructions: These bars freeze beautifully. Slice them into individual portions, wrap each piece tightly in plastic wrap, and place them in a freezer-safe bag. They’ll keep for up to 3 months. To thaw, move a piece to the refrigerator overnight or let it sit at room temperature for about 30 minutes. I always keep a stash in my freezer for unexpected cravings or last-minute guests.
Reheating tip: If you prefer a softer, warmer texture, microwave an individual bar for about 10-15 seconds. It won’t be hot, just slightly warm, which brings out the pumpkin spice aroma beautifully. Don’t overheat or the texture will become grainy.
One thing I’ve noticed: the bars are actually better on day two. The flavors deepen, the texture becomes more uniform, and they slice even more cleanly. So if you can plan ahead, make them a day before you need them.
Nutritional Information & Benefits
Here’s the approximate nutritional breakdown for one bar (based on 9 servings):
| Nutrient | Amount Per Serving |
|---|---|
| Calories | 245 |
| Total Fat | 17g |
| Saturated Fat | 10g |
| Cholesterol | 95mg |
| Sodium | 210mg |
| Total Carbohydrates | 20g |
| Dietary Fiber | 1g |
| Sugars | 17g |
| Protein | 5g |
| Vitamin A | 120% DV |
| Calcium | 6% DV |
| Iron | 4% DV |
Pumpkin is packed with vitamin A, which supports eye health and immune function. It’s also rich in fiber and antioxidants. The cream cheese provides calcium and protein, making this dessert more satisfying than your average sugar bomb. While these bars are definitely a treat, they offer more nutritional value than many other desserts.
Dietary considerations: This recipe is naturally vegetarian and can be made gluten-free (just check your pumpkin pie spice blend). It’s not suitable for vegans as written, but the dairy-free adaptation works well. If you’re watching your sugar intake, you can reduce the sugar to 1/2 cup for a less sweet version that still tastes great.
Potential allergens: Contains dairy and eggs. If you’re serving these at a gathering, it’s worth noting that they’re nut-free (unless you add the pecan variation) and soy-free if you choose your cream cheese carefully.
Look, I’m not saying these bars are health food. They’re dessert, and they’re meant to be enjoyed. But compared to a traditional cheesecake with a butter-and-crumb crust? You’re saving some calories and getting a nice dose of vitamin A in the process. That’s a win in my book.
FAQs
Can I use pumpkin pie filling instead of pumpkin puree?
I wouldn’t recommend it. Pumpkin pie filling is pre-sweetened and spiced, which will throw off the sugar and spice balance in this recipe. Stick with 100% pure pumpkin puree for the best results. If you accidentally bought pie filling, reduce the sugar by half and skip the extra pumpkin pie spice.
Why did my cheesecake bars crack on top?
Cracks usually happen from overbaking or overmixing. Make sure you take the bars out while the center still has a slight jiggle. Also, don’t overbeat the batter after adding the eggs—too much air can cause the bars to puff up and crack as they cool. A water bath isn’t necessary for this recipe, but if cracks bother you, you can place a pan of hot water on the oven rack below the bars while they bake.
Can I make these bars in a different size pan?
Absolutely. A 9×9 pan will work, but your bars will be thinner and may bake 5-10 minutes faster. A 9×13 pan will give you very thin bars that bake in about 20-25 minutes. Just keep an eye on them and use the jiggle test to determine doneness. For mini muffin pans, bake for 12-15 minutes.
How do I know when the bars are done baking?
The edges should look set and slightly puffed, while the center should have a gentle wobble when you shake the pan. Think Jell-O, not liquid. A toothpick inserted in the center will come out looking wet—that’s normal for cheesecake. Trust the jiggle test over the toothpick test.
Can I freeze these cheesecake bars?
Yes, and they freeze beautifully! Slice them into individual portions, wrap each piece tightly in plastic wrap, and store in a freezer-safe bag for up to 3 months. Thaw overnight in the refrigerator or at room temperature for about 30 minutes. They taste just as good as fresh.
Conclusion
These Creamy Crustless Pumpkin Spice Cheesecake Bars are proof that simple doesn’t mean boring. Five ingredients, one bowl, and you’ve got a dessert that tastes like you spent hours in the kitchen. The texture is impossibly creamy, the pumpkin spice flavor is warm and comforting, and the fact that there’s no crust means you get more of the good stuff in every bite.
I love this recipe because it’s forgiving. You don’t need to be a pastry chef to nail it. You don’t need special equipment or hard-to-find ingredients. You just need a craving for something pumpkin-spiced and the willingness to wait for them to chill. (I know, the waiting is the hardest part.)
Make these for your next fall gathering. Make them for a cozy night in. Make them just because pumpkin season is too short to waste on complicated recipes. And when you do, I’d love to hear how they turned out. Leave a comment below and let me know if you tried any variations—especially if you discovered something amazing I haven’t tried yet. Happy baking, friends!
Pin This Recipe!
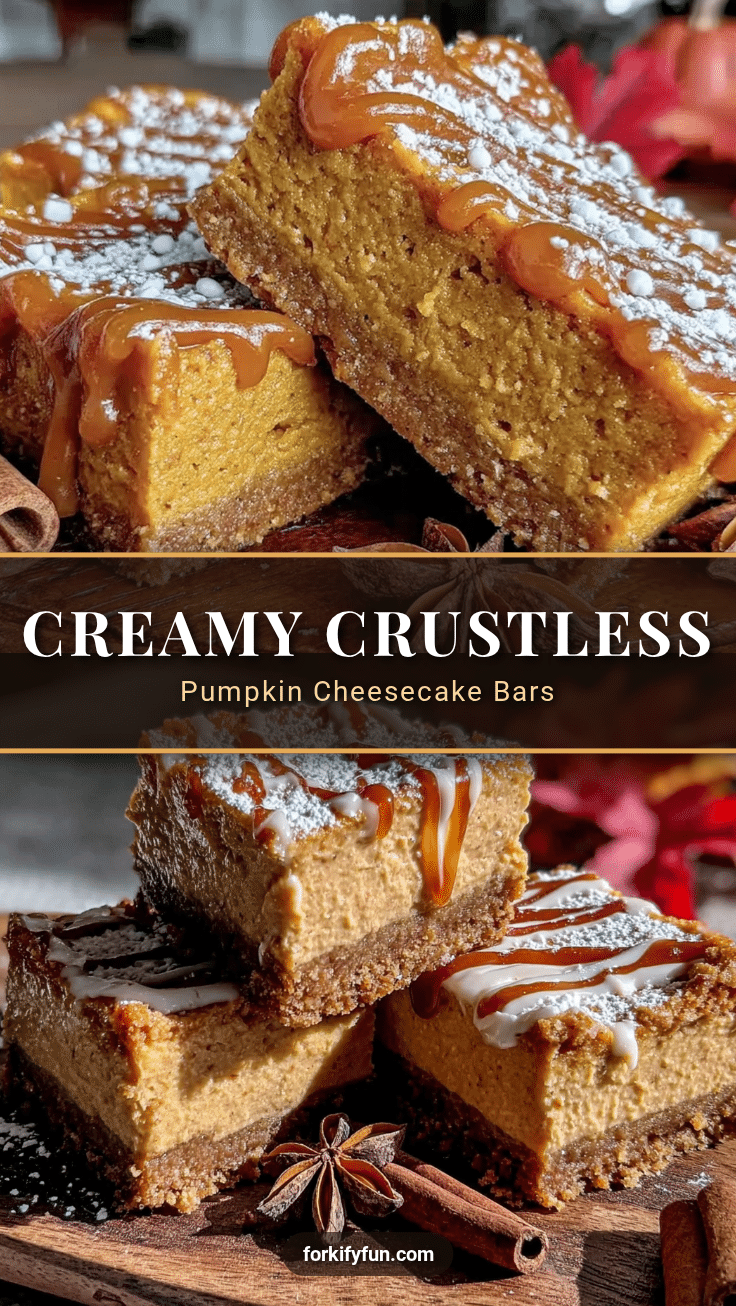
Creamy Crustless Pumpkin Spice Cheesecake Bars: Easy 5-Ingredient Dessert
These creamy crustless pumpkin spice cheesecake bars are made with just five ingredients and no crust, offering a velvety, pudding-like texture with warm pumpkin spice flavor. Perfect for fall gatherings or a quick, satisfying dessert.
- Prep Time: 10 minutes
- Cook Time: 35-40 minutes
- Total Time: 4 hours 45 minutes (including chilling)
- Yield: 9-16 servings 1x
- Category: Dessert
- Cuisine: American
Ingredients
- 16 oz cream cheese, softened to room temperature
- 1 cup pumpkin puree (not pumpkin pie filling)
- 3/4 cup granulated sugar
- 2 large eggs, room temperature
- 2 teaspoons pumpkin pie spice
Instructions
- Preheat your oven to 325°F (160°C). Line an 8×8-inch baking pan with parchment paper, leaving overhang on two sides.
- In a large mixing bowl, beat the softened cream cheese on medium speed for about 2 minutes until completely smooth. Scrape down the sides and bottom of the bowl halfway through.
- Add the granulated sugar and beat on medium speed for another 1-2 minutes until light and fluffy. Scrape the bowl again.
- Add the eggs one at a time, beating on low speed just until incorporated after each addition. Do not overmix.
- Add the pumpkin puree and pumpkin pie spice. Beat on low speed until combined and the batter is a uniform orange color. Scrape the bowl and stir by hand with a spatula to ensure everything is incorporated.
- Pour the batter into the prepared pan and spread evenly. Gently tap the pan on the counter to release air bubbles.
- Bake for 35-40 minutes, until the edges are set and the center has a slight jiggle when shaken. Do not overbake.
- Cool completely at room temperature on a cooling rack for about 1 hour.
- Refrigerate for at least 4 hours, preferably overnight, until firm.
- Use the parchment paper handles to lift the bars out of the pan. Slice into 9 or 16 squares with a sharp knife, wiping the knife clean between cuts.
Notes
Room temperature ingredients are crucial for a smooth texture. Do not overmix after adding eggs to prevent cracks. Use the jiggle test for doneness; the center should wobble slightly. Cool completely before refrigerating to avoid condensation. For clean slices, warm the knife under hot water and dry it between cuts.
Nutrition
- Serving Size: 1 bar (based on 9 se
- Calories: 245
- Sugar: 17
- Sodium: 210
- Fat: 17
- Saturated Fat: 10
- Carbohydrates: 20
- Fiber: 1
- Protein: 5
Keywords: pumpkin cheesecake bars, crustless cheesecake, easy pumpkin dessert, 5-ingredient dessert, fall dessert, pumpkin spice