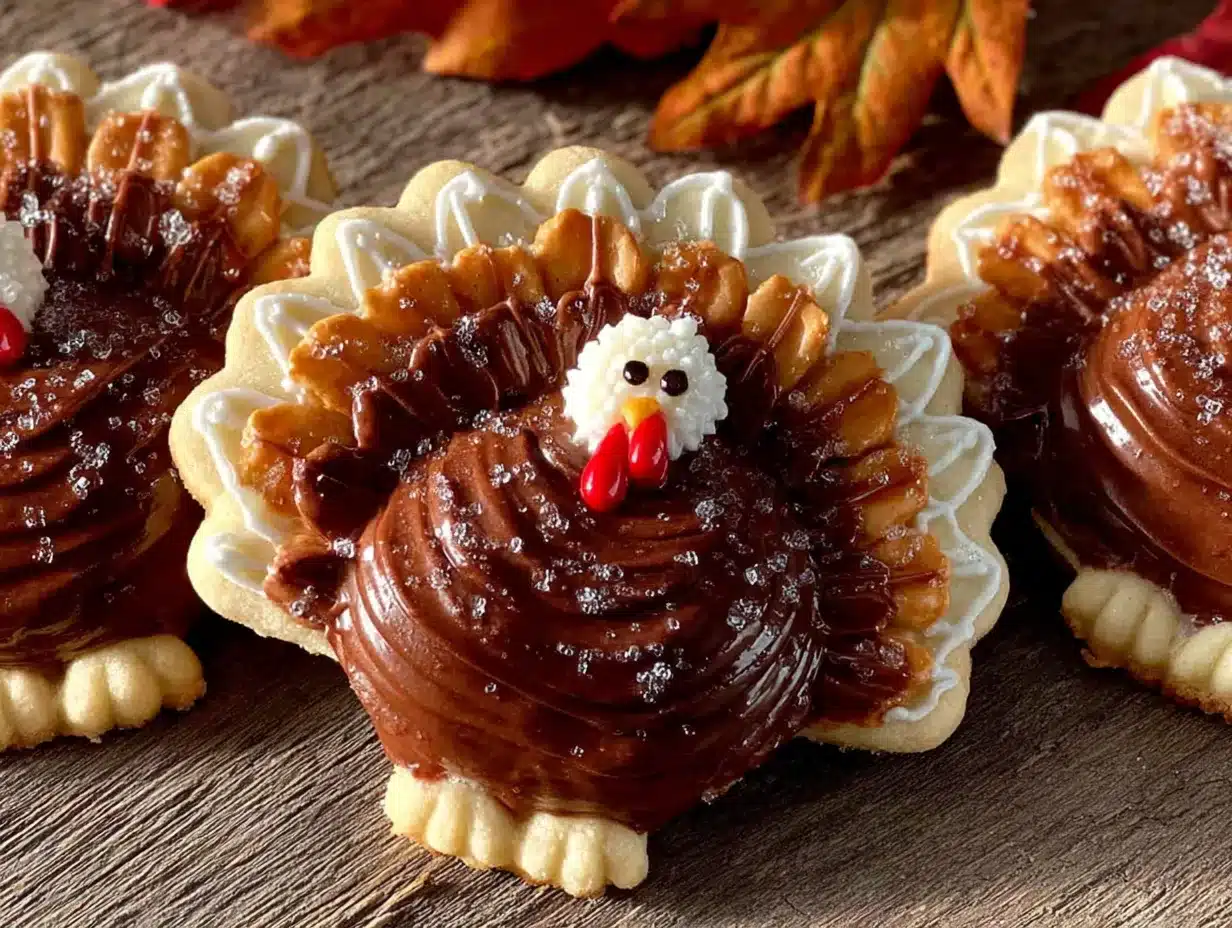
My sister-in-law, Jen, does not bake. She says it with a kind of pride, honestly, like it’s a personality trait she’s carefully cultivated. So when she texted me a photo of a sugar cookie shaped like a turkey, its royal icing feathers perfectly layered in shades of burnt orange and rust, I almost dropped my phone. “Made these for the kids’ class party,” she wrote. “Not hard. You should try them.” I stared at the screen. Jen? The woman who burns toast? I did not believe her. I figured she’d bought them from that fancy bakery downtown and was just pretending. But then she sent a video—a shaky, poorly-lit one of her piping a wattle onto a cookie. That grainy footage, that wobbly little beak, was the proof I needed. If she could make these adorable Thanksgiving sugar cookies with turkey royal icing, maybe I could, too. And maybe—just maybe—this was the year I stopped buying the sad, pre-made cookies from the grocery store and actually showed up to Thanksgiving with something I made myself.
I’m not a sugar cookie person, usually. Too much fuss, too much rolling, too much of a mess for a single bite. But watching Jen’s video, I saw something else. I saw a project, sure, but I also saw a story. A little turkey cookie, made with a steady hand and a little bit of patience, could be the thing that makes a kid’s eyes light up at the kids’ table. It could be the thing you bring to a Friendsgiving that makes people say, “Wait, you made these?” And honestly? It could be the thing that finally makes you feel like you’ve got this holiday thing down. So I grabbed my apron, called Jen for some tips, and got to work. And now I’m here, covered in a fine dusting of powdered sugar, to tell you that these cookies are not just doable—they’re fun. They’re the kind of fun that makes you forget you’re “working” in the kitchen.
This recipe is built for people like Jen. And people like me. And probably people like you. It’s forgiving, it’s straightforward, and the payoff is genuinely ridiculous. You get these little works of art that taste like butter and vanilla and a bit of powdered sugar magic. The royal icing sets up firm enough to stack, but soft enough to bite through without cracking. And the decorating? That’s the best part. You don’t need to be a pastry chef. You just need a little patience, a few piping bags, and the willingness to laugh at your first few turkeys. I promise they’ll still taste amazing.
Why You’ll Love This Recipe
Let me be real with you—I tested this recipe four times before I got it right. The first batch spread into blobs. The second batch was dry. The third batch? The icing was too runny and all the feathers bled together into a brown mess. But that fourth batch? That was the one. And I’m sharing every single lesson I learned so you can skip straight to the good part.
- Foolproof Cookie Dough: This dough doesn’t spread. It holds its shape perfectly, which is non-negotiable when you’re trying to make a turkey silhouette. No chilling shortcuts here—I tried that, and it ended in tears (and flat cookies).
- Simple Royal Icing: No weird ingredients. Just powdered sugar, meringue powder, and water. It dries hard and shiny, perfect for that glossy turkey feather look.
- Kid-Friendly Project: This is the perfect activity for a rainy November afternoon. My niece (age 6) decorated her own turkeys, and they were honestly more charming than mine. The imperfections are part of the charm.
- Make-Ahead Magic: Bake the cookies a week ahead and freeze them. Decorate them a day or two before Thanksgiving. One less thing to stress about on the big day.
- Customizable Colors: You can go traditional fall tones—burnt orange, deep red, golden yellow—or get wild with neon feathers. I’ve seen people do a “Mardi Gras” turkey, and it was a hit.
What makes these different from every other turkey cookie out there? It’s the combination of a sturdy, no-spread cookie base and a royal icing that flows like a dream. The icing consistency is the secret. It’s thick enough to hold a line, but thin enough to flood the feather section smoothly. I’ve tested the ratios, and this is the sweet spot. Plus, I’m including my trick for getting that perfect, sharp feather edge without any bleeding. It’s a game-changer.
These cookies aren’t just cute—they’re a little piece of holiday joy you can hold in your hand. When you bite into one, you get that crisp-tender cookie, the slight crunch of the dried icing, and that pure, buttery vanilla flavor. It’s comfort, it’s tradition, and it’s a little bit of edible art. And you made it. That’s the best part.
What Ingredients You Will Need
This recipe uses simple, pantry-friendly ingredients to create a cookie that’s sturdy enough for decorating but tender enough to enjoy. The list looks long, but most of it is for the icing. Don’t skip the meringue powder—it’s what gives the royal icing that professional, rock-hard finish.
For the Sugar Cookies
- 3 cups (360g) all-purpose flour – Spoon and level this. Scooping directly from the bag packs in too much flour and makes dry cookies. I use Gold Medal unbleached for the most consistent results.
- 1 teaspoon baking powder – Make sure it’s fresh. Old baking powder = flat cookies.
- ½ teaspoon salt – Fine sea salt works best. It balances the sweetness without being noticeable.
- 1 cup (226g) unsalted butter, softened – This is crucial. Butter that’s too cold won’t cream properly; butter that’s too soft (melty) will make the dough greasy. Leave it on the counter for about an hour before you start.
- 1 cup (200g) granulated sugar – Regular white sugar. I don’t recommend substitutes here—the texture changes.
- 1 large egg, room temperature – Cold egg will seize the butter. If you forgot to take it out, place it in a bowl of warm water for 5 minutes.
- 1 teaspoon vanilla extract – Pure vanilla, not imitation. It makes a difference in the flavor. I prefer Nielsen-Massey.
- ½ teaspoon almond extract (optional) – This adds a subtle, almost marzipan-like flavor that’s lovely with the butter. I always add it, but it’s not required.
For the Royal Icing
- 4 cups (480g) powdered sugar, sifted – Sifting removes lumps. Don’t skip it unless you want lumpy icing. I use C&H for the smoothest texture.
- 3 tablespoons meringue powder – This is non-negotiable for royal icing that dries hard and shiny. Wilton brand is reliable and easy to find at craft stores.
- 6-7 tablespoons warm water – Start with 6 tablespoons and add more if needed. The consistency should be like thick honey for outlining, and like runny honey for flooding.
- Gel food coloring – I use Americolor brand. The colors are vibrant and don’t thin the icing out. You’ll need: brown (for the turkey body), red (for the wattle), orange (for the beak), and 3-4 fall colors for the feathers (golden yellow, burnt orange, deep red, and a warm brown).
For Decorating
- Turkey cookie cutter – You can find these online or at craft stores. I got mine on Amazon for $8. It’s about 4 inches tall.
- Piping bags or zip-top bags – Disposable piping bags are easier. If using zip-top bags, cut a very small tip off the corner.
- Wilton tip #2 or #3 – For outlining. A #2 tip gives you a finer line, which is better for the small details like the beak and wattle.
- Toothpicks or scribe tool – For popping air bubbles and spreading icing into tight corners.
Equipment Needed
You don’t need a professional bakery setup here, but a few key tools make the process much smoother. I learned this the hard way when I tried using a butter knife to spread icing on my first batch. Don’t be me.
- Stand mixer or hand mixer – A stand mixer is ideal for creaming the butter and sugar, but a hand mixer works fine. You’ll just need to cream a little longer.
- Rolling pin – I prefer a French rolling pin (no handles) because I have more control, but any rolling pin works. If you have a rolling pin with adjustable rings, use it. It guarantees even thickness.
- Parchment paper – Lining your baking sheets is essential. It prevents sticking and makes cleanup a breeze.
- Baking sheets – Heavy-duty, light-colored sheets are best. Dark sheets absorb heat and can over-brown the bottoms.
- Cookie spatula – A thin, flexible metal spatula is best for transferring cut cookies to the baking sheet.
- Piping tips and bags – As mentioned above, a #2 or #3 tip is ideal. I also use a coupler to switch tips without changing bags.
- Cooling rack – Cookies must cool completely before decorating. A wire rack allows air to circulate.
- Small bowls or cups – For mixing your different icing colors. I use small ramekins.
If you don’t have a stand mixer, don’t worry. I made my first batch with a hand mixer and a lot of elbow grease. Just make sure the butter is properly softened. If you’re looking for another fun fall baking project, you might also enjoy these brown butter pumpkin snickerdoodle cookies—they use similar techniques and are perfect for a cozy afternoon.
Preparation Method
Step 1: Make the Cookie Dough
In a medium bowl, whisk together the flour, baking powder, and salt. Set aside. In the bowl of a stand mixer fitted with the paddle attachment, beat the softened butter and granulated sugar on medium speed until light and fluffy—about 3 minutes. You’re looking for a pale, creamy texture. Scrape down the sides of the bowl. Add the egg, vanilla extract, and almond extract (if using). Beat on low until combined. The mixture might look slightly curdled—that’s okay. Gradually add the dry ingredients, mixing on low just until the dough comes together. It will be soft but not sticky. If it feels too sticky to handle, add a tablespoon of flour.
Step 2: Chill the Dough
Divide the dough in half, shape each half into a flat disc, and wrap tightly in plastic wrap. Refrigerate for at least 2 hours, or up to 3 days. This step is not optional. Chilling solidifies the butter, which prevents the cookies from spreading in the oven. I once skipped this step because I was impatient, and my turkeys turned into abstract blobs. Learn from my mistake.
Step 3: Roll and Cut
Preheat your oven to 350°F (175°C). Line two baking sheets with parchment paper. Lightly flour your work surface and rolling pin. Remove one disc of dough from the fridge. Roll it out to ¼-inch thickness. If the dough starts to crack at the edges, let it sit at room temperature for 5 minutes to soften slightly. Use your turkey cookie cutter to cut out shapes. Re-roll the scraps once—after that, the dough gets tough from overworking. Place the cut cookies on the prepared baking sheets, spacing them about 2 inches apart.
Step 4: Bake the Cookies
Bake for 8-10 minutes, rotating the baking sheet halfway through. The cookies are done when the edges are just barely golden. The centers will look pale and slightly puffy—that’s perfect. Let them cool on the baking sheet for 5 minutes, then transfer to a wire rack to cool completely. Do not decorate warm cookies. The icing will melt and run off.
Step 5: Make the Royal Icing
In the bowl of a stand mixer fitted with the whisk attachment (or using a hand mixer), combine the sifted powdered sugar and meringue powder. Add 6 tablespoons of warm water. Mix on low speed until combined, then increase to medium-high and beat for 5 minutes. The icing should be thick, glossy, and form stiff peaks. If it’s too thick, add water ½ teaspoon at a time. If it’s too thin, add more sifted powdered sugar.
Step 6: Color the Icing
Divide the icing into separate bowls—one for each color. I usually make: brown (for the body), red (for the wattle), orange (for the beak), and three fall colors for the feathers (golden yellow, burnt orange, and deep red). For the feather colors, you’ll need to thin the icing to a “flood” consistency. To do this, add water a few drops at a time until the icing flows like warm honey and a ribbon sinks back into the bowl within 10 seconds. The brown, red, and orange icing should be slightly thicker—a “15-second” consistency, where a ribbon sinks back in about 15 seconds.
Step 7: Decorate the Turkey Cookies
This is the fun part. Fill your piping bags with the different colored icings. Start with the outline. Using the brown icing, pipe a border around the entire turkey body. Then, use the flood consistency brown icing to fill in the body. Use a toothpick to spread it into the corners and pop any air bubbles. Let the body dry for about 30 minutes. Next, pipe the feathers. Outline each feather section with the appropriate color, then flood it. Work in sections so the colors don’t bleed into each other. Let the feathers dry for another 30 minutes. Finally, pipe the beak (orange) and wattle (red). For the eye, you can use a tiny dot of black icing or a purchased edible marker.
Cooking Tips & Techniques
I’ve messed up this recipe more times than I care to admit. Here’s everything I learned so you don’t have to repeat my mistakes.
- The Dough Temperature Trap: If your dough gets too warm while rolling, it will stick to the counter and the cutter. Don’t fight it. Just pop it back in the fridge for 15 minutes. Patience is a virtue, especially in cookie baking.
- Icing Consistency is Everything: Too thick, and it won’t flood smoothly. Too thin, and it will run right off the cookie. The “10-second rule” is your friend: drag a knife through the icing, and count to 10. If the line disappears in 10 seconds, it’s perfect for flooding. For outlining, it should hold a stiff peak.
- Avoid the Bleeding: If your feather colors bleed into each other, it means the first color hasn’t dried enough before you added the next. Let each section dry for at least 30 minutes before adding an adjacent color. A fan set on low near the cookies can speed this up.
- Practice on Parchment: Before you pipe on a cookie, practice a few turkey shapes on a piece of parchment paper. It helps you get a feel for the pressure and flow.
- Multitasking Strategy: While the cookies are baking and cooling, make the icing. While the icing is drying on the first batch of cookies, start decorating the second batch. It’s an assembly line, and it works.
If you’re looking for another crowd-pleasing holiday treat, check out these no-bake s’mores icebox cake. It’s a 10-minute dessert that pairs perfectly with a plate of these cookies.
Variations & Adaptations
One of the best things about this recipe is how easy it is to adapt. Here are a few ways to make it your own.
- Gluten-Free Version: Substitute the all-purpose flour with a 1:1 gluten-free baking flour blend (like Bob’s Red Mill). The dough will be slightly more crumbly, but it works. Add 1 teaspoon of xanthan gum if your blend doesn’t already include it.
- Vegan Royal Icing: Replace the meringue powder with aquafaba (the liquid from a can of chickpeas). Use 3 tablespoons of aquafaba in place of the meringue powder and water. The icing will be slightly less glossy, but it still dries hard.
- Spiced Sugar Cookies: Add 1 teaspoon of cinnamon, ½ teaspoon of nutmeg, and ¼ teaspoon of cloves to the dry ingredients. This gives the cookies a warm, chai-like flavor that’s perfect for fall.
- Mini Turkey Cookies: Use a smaller cookie cutter to make bite-sized turkeys. These are perfect for party favors or for kids who want to decorate their own. Reduce the baking time to 6-7 minutes.
- Chocolate Turkey Cookies: Replace ¼ cup of the flour with ¼ cup of unsweetened cocoa powder. The chocolate flavor pairs beautifully with the sweet royal icing.
Serving & Storage Suggestions
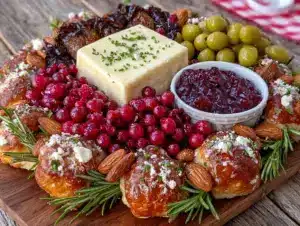
These cookies are best served at room temperature. The royal icing needs at least 2 hours to fully set after decorating, so plan accordingly. I like to arrange them on a platter with some fresh cranberries and rosemary sprigs for a festive look. They’re perfect for a Thanksgiving dessert table, a Friendsgiving gathering, or as a treat for the kids’ classroom party.
For storage, place the decorated cookies in a single layer in an airtight container. Separate layers with parchment paper. They will keep at room temperature for up to 2 weeks. Do not refrigerate them—the moisture in the fridge can make the icing sticky. You can also freeze the undecorated cookies for up to 3 months. Just thaw them at room temperature before decorating. The flavors actually develop and deepen after a day or two, so these are a great make-ahead option.
If you’re planning a full Thanksgiving spread, consider pairing these cookies with a warm, cozy drink like caramel apple cider sangria for the adults or a simple glass of cold milk for the kids. The combination of sweet cookie and tangy cider is unbeatable.
Nutritional Information & Benefits
Let’s be honest—these are a treat. But knowing what’s in them helps you enjoy them mindfully. Per cookie (based on a 4-inch turkey shape, including icing), here’s the approximate breakdown:
- Calories: 180-200
- Fat: 8g (5g saturated)
- Carbohydrates: 28g (18g sugar)
- Protein: 2g
- Fiber: 0g
- Sodium: 85mg
The butter provides a small amount of vitamin A, and the meringue powder adds a touch of protein. But the real benefit here is the joy of creating something beautiful and sharing it with people you love. There’s a mental health benefit to baking that you can’t measure in grams. The process is meditative, the result is satisfying, and the act of giving these cookies to someone is a genuine act of care. Plus, this recipe is naturally nut-free (if you skip the almond extract) and can easily be made gluten-free or vegan as noted above. The main allergens to note are dairy (butter) and eggs.
Conclusion
These adorable Thanksgiving sugar cookies with turkey royal icing are more than just a dessert—they’re a memory in the making. They’re the cookie that your nephew will talk about for years. They’re the project that turns a stressful holiday prep into a fun, creative afternoon. And they’re the proof that you don’t need to be a professional baker to make something that looks like it came from a bakery. The dough is forgiving, the icing is forgiving, and the process is genuinely fun. I’ve made these with my niece, with my sister-in-law Jen (who is now a cookie-convert), and even solo on a quiet Sunday afternoon. Every time, they bring a smile to my face.
So go ahead. Grab that turkey cookie cutter, dust off your piping bags, and get to work. Make a mess. Laugh at your first few attempts. And then watch as everyone at the table reaches for one of your cookies before the pumpkin pie even gets a glance. I’d love to hear how yours turn out—drop a comment below and share your decorating wins (and your funny fails). And if you’re looking for another fun holiday project, try making these small batch pumpkin cream cheese muffins for a quick breakfast treat. Happy baking, and happy Thanksgiving!
Frequently Asked Questions
Can I use a different cookie cutter shape?
Absolutely. You can use any shape you like—leaves, pumpkins, or even a simple round cookie. Just adjust the decorating design to fit the shape. The turkey design works best with a dedicated turkey cutter, but you can get creative with a round cookie and pipe the feathers on freehand.
Why did my cookies spread in the oven?
This usually happens for one of three reasons: the dough wasn’t chilled long enough, the butter was too soft, or the baking sheet was too warm when you placed the cookies on it. Make sure your dough chills for at least 2 hours, and always use a cool baking sheet for each batch.
Can I make the royal icing ahead of time?
Yes, but it’s best to use it within 24 hours. Store it in an airtight container at room temperature. Before using, give it a good stir. If it’s too thick, add a drop of water. If it’s too thin, add a little more sifted powdered sugar.
How do I get the icing colors to be vibrant?
Use gel food coloring, not liquid. Liquid food coloring will thin out the icing and make the colors pastel. Gel colors are concentrated and give you rich, vibrant shades. Start with a tiny amount (a toothpick’s worth) and add more until you reach the desired shade.
Can I freeze the decorated cookies?
I don’t recommend freezing decorated cookies. The royal icing can crack or become sticky when thawed. Freeze the undecorated cookies instead, and then decorate them once they’ve thawed. This way, the icing stays perfect.
Pin This Recipe!
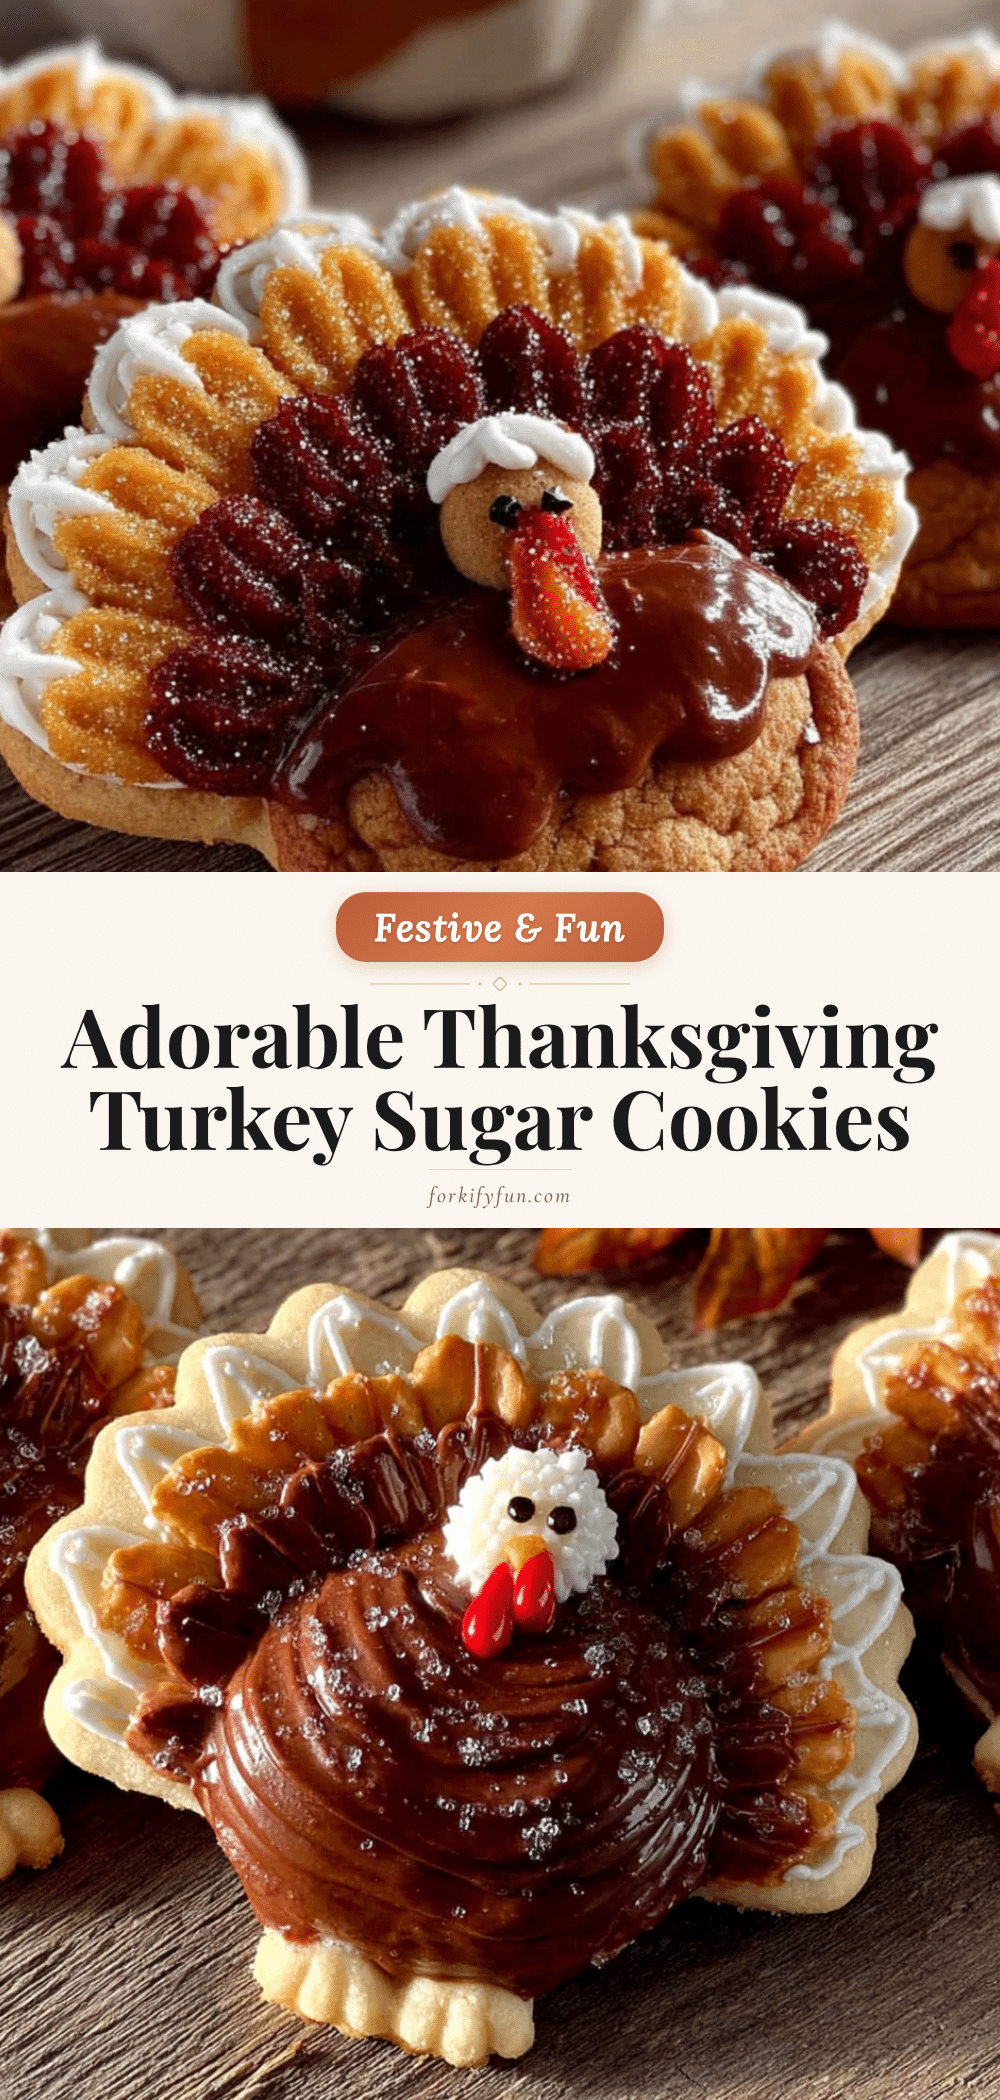
Easy Thanksgiving Turkey Sugar Cookies – Best Homemade
These adorable Thanksgiving sugar cookies with turkey royal icing are forgiving, straightforward, and the payoff is genuinely ridiculous. You get little works of art that taste like butter and vanilla and a bit of powdered sugar magic.
- Prep Time: 30 minutes
- Cook Time: 10 minutes
- Total Time: 2 hours 40 minutes (includes chilling and decorating time)
- Yield: 24 servings 1x
- Category: Dessert
- Cuisine: American
Ingredients
- 3 cups (360g) all-purpose flour
- 1 teaspoon baking powder
- ½ teaspoon fine sea salt
- 1 cup (226g) unsalted butter, softened
- 1 cup (200g) granulated sugar
- 1 large egg, room temperature
- 1 teaspoon pure vanilla extract
- ½ teaspoon almond extract (optional)
- 4 cups (480g) powdered sugar, sifted
- 3 tablespoons meringue powder
- 6–7 tablespoons warm water
- Gel food coloring (brown, red, orange, golden yellow, burnt orange, deep red)
Instructions
- In a medium bowl, whisk together the flour, baking powder, and salt. Set aside.
- In the bowl of a stand mixer fitted with the paddle attachment, beat the softened butter and granulated sugar on medium speed until light and fluffy—about 3 minutes. Scrape down the sides of the bowl.
- Add the egg, vanilla extract, and almond extract (if using). Beat on low until combined.
- Gradually add the dry ingredients, mixing on low just until the dough comes together. It will be soft but not sticky.
- Divide the dough in half, shape each half into a flat disc, and wrap tightly in plastic wrap. Refrigerate for at least 2 hours, or up to 3 days.
- Preheat your oven to 350°F (175°C). Line two baking sheets with parchment paper.
- Lightly flour your work surface and rolling pin. Remove one disc of dough from the fridge. Roll it out to ¼-inch thickness.
- Use your turkey cookie cutter to cut out shapes. Re-roll the scraps once.
- Place the cut cookies on the prepared baking sheets, spacing them about 2 inches apart.
- Bake for 8-10 minutes, rotating the baking sheet halfway through. The cookies are done when the edges are just barely golden.
- Let them cool on the baking sheet for 5 minutes, then transfer to a wire rack to cool completely.
- In the bowl of a stand mixer fitted with the whisk attachment (or using a hand mixer), combine the sifted powdered sugar and meringue powder. Add 6 tablespoons of warm water. Mix on low speed until combined, then increase to medium-high and beat for 5 minutes. The icing should be thick, glossy, and form stiff peaks.
- Divide the icing into separate bowls—one for each color. For the feather colors, thin the icing to a ‘flood’ consistency by adding water a few drops at a time until it flows like warm honey.
- Fill piping bags with the different colored icings. Start with the outline: using brown icing, pipe a border around the entire turkey body. Then, use the flood consistency brown icing to fill in the body. Use a toothpick to spread it into the corners and pop any air bubbles. Let the body dry for about 30 minutes.
- Pipe the feathers: outline each feather section with the appropriate color, then flood it. Let the feathers dry for another 30 minutes.
- Finally, pipe the beak (orange) and wattle (red). For the eye, use a tiny dot of black icing or a purchased edible marker.
Notes
Chilling the dough is not optional—it prevents spreading. For icing consistency, use the ’10-second rule’: drag a knife through the icing; if the line disappears in 10 seconds, it’s perfect for flooding. Let each color section dry for at least 30 minutes before adding an adjacent color to prevent bleeding. Practice on parchment before piping on cookies.
Nutrition
- Serving Size: 1 cookie
- Calories: 190
- Sugar: 18
- Sodium: 85
- Fat: 8
- Saturated Fat: 5
- Carbohydrates: 28
- Protein: 2
Keywords: Thanksgiving cookies, turkey cookies, sugar cookies, royal icing, fall baking, holiday cookies, easy cookie recipe