My nephew Liam looked at the bowl of chocolate pudding I was stirring and said, “That’s not dirt. Dirt has worms.” He was seven, and he was not wrong. I had signed up to bring dessert for his class Halloween party, and I thought I was being clever with some store-bought pudding cups and a few gummy worms stuck in the top. Liam, who has never been shy about his opinions, informed me that my version was “boring dirt.” So I had a choice. I could argue with a second-grader about the aesthetic standards of simulated soil, or I could figure out what real Halloween dirt cups were supposed to look like. I chose the latter. And honestly, that kid did me a favor.
I spent that evening in my kitchen, which looked like a chocolate explosion had gone off in it, trying to make something that would actually impress a room full of sugar-crazed seven-year-olds. The first batch was too wet. The second batch had the wrong texture. By the third attempt, I had crushed Oreos into a fine, dark crumble that actually looked like fresh potting soil. I layered it with a creamy chocolate pudding that was rich but not too heavy, and then I stuck gummy worms in at weird angles so they looked like they were crawling out. When I dropped the cups off at the school the next day, Liam texted me from his mom’s phone: “This is real dirt. Good job.” That was the highest compliment I could have gotten.
What I love about this recipe is that it is genuinely fun without being complicated. You don’t need any special baking skills or fancy equipment. It is the kind of dessert that makes people smile the second they see it, and it takes about ten minutes to put together. Whether you are making it for a classroom party, a Halloween gathering, or just a Tuesday night when you want to eat something that looks like a science experiment, these dirt cups deliver. They are silly, they are delicious, and they are exactly what a Halloween dessert should be.
Why You’ll Love This Recipe
I have made a lot of Halloween desserts over the years. Some of them were complicated. Some of them were beautiful. But these dirt cups are the ones I keep coming back to, and here is why they work so well.
- Ready in 10 Minutes: This is not a recipe that requires you to plan ahead or set aside an afternoon. From start to finish, you can have these cups assembled and in the fridge in under ten minutes. That is faster than most trips to the store.
- Simple Ingredients: You need chocolate pudding, Oreos, gummy worms, and a few extras. Nothing weird. Nothing expensive. You probably already have most of this stuff in your kitchen.
- Perfect for Halloween Parties: Whether you are hosting a costume party, sending treats to school, or just want something festive for movie night, these cups fit the bill. They are portable, they are individual servings, and they look great on a dessert table.
- Crowd-Pleaser: I have yet to meet a kid who does not love these. Adults love them too, by the way. There is something about eating pudding out of a cup with a gummy worm sticking out that makes everyone feel like a kid again.
- Unbelievably Delicious: The combination of creamy chocolate pudding and crunchy Oreo crumble is already a winner. Add in the chewy gummy worms, and you have got a texture party in every spoonful.
What makes this version different from the basic dirt cup recipes you see everywhere is the attention to detail. I spent time figuring out the right ratio of pudding to crumble so that every bite has enough of both. I also figured out how to make the Oreo crumble look like actual soil instead of just crushed cookies. And I learned the hard way that you need to let the pudding set before you add the worms, or they will sink to the bottom like sad little swimmers. These are the little things that make a difference.
This recipe is not just good. It is the kind of dessert that makes people close their eyes after the first bite. It is comfort food with a spooky twist, and it is perfect for anyone who wants to enjoy Halloween without spending hours in the kitchen.
What Ingredients You Will Need
This recipe uses simple, everyday ingredients to create something that looks impressive and tastes even better. Here is what you need to gather before you start.
For the Pudding Base
- 2 boxes (3.9 ounces each) instant chocolate pudding mix – I prefer Jell-O brand for consistency, but any instant pudding mix works. Do not use cook-and-serve pudding; it takes too long to set and the texture is different.
- 3 cups cold whole milk – Whole milk gives the pudding a richer, creamier texture. You can use 2% if that is what you have, but avoid skim milk. The pudding needs the fat to set up properly and taste indulgent.
For the Dirt Crumble
- 1 family-size package (about 36 cookies) Oreo cookies – You need the whole cookie, cream filling and all. The cream helps the crumble stick together slightly and gives it that dark, earthy color. Do not scrape the filling out; that is a waste of time and flavor.
For the Garnish
- 1 bag gummy worms – Get the sour kind if you want a tangy contrast to the sweet pudding. I like the classic bright-colored worms because they pop against the dark crumble. You can also use gummy spiders or bugs if you want to mix it up.
- Optional: 8-10 small clear plastic cups (7-ounce size) – Clear cups are important because the whole point is to see the layers. You can use small mason jars or even paper cups if that is what you have, but clear plastic cups really show off the dirt effect.
- Optional: 1 cup whipped topping – Some people like to add a layer of whipped cream between the pudding and the crumble. I skip it most of the time because I think it dilutes the chocolate flavor, but it is a nice addition if you want a lighter texture.
- Optional: 2 tablespoons powdered sugar – If you are making your own whipped cream, a little powdered sugar helps stabilize it. Store-bought whipped topping works fine without any adjustments.
Ingredient Selection Tips
I have tested this recipe with different brands of pudding mix, and the instant kind really does work best. The cook-and-serve version takes longer to set and ends up with a thinner consistency that does not hold up well in the cups. For the Oreos, the original variety gives the darkest crumble, but double-stuffed works too if that is what you have. Just be aware that the crumble will be slightly lighter in color because there is more cream filling.
If you are making these for a school event and need to avoid nuts, check the labels on your pudding mix and Oreos. Most are nut-free, but it is always worth verifying. For a dairy-free version, you can use almond milk or oat milk with the instant pudding, though the texture will be slightly less creamy. I have tried it with oat milk and it worked fine, just not quite as rich.
Equipment Needed
One of the best things about this recipe is that you do not need any special equipment. Here is what you will need to pull it together.
- Large mixing bowl – You need a bowl big enough to whisk the pudding without splashing. A standard 4-quart bowl works well.
- Whisk – A balloon whisk is best for getting the pudding smooth. You can use a hand mixer if you want, but honestly, whisking by hand takes about two minutes and works just as well.
- Measuring cups – You need a liquid measuring cup for the milk and a dry measuring cup if you are portioning out the crumble.
- Rolling pin or food processor – To crush the Oreos into a fine crumble. I prefer using a food processor because it gives you a consistent texture, but a rolling pin and a zip-top bag work great if you want to let the kids help. Just make sure the bag is sealed tight before you start smashing.
- 8 to 10 clear plastic cups (7-ounce size) – Clear cups are not strictly necessary, but they make the dessert look so much better. You can find them at any grocery store or party supply shop.
- Spatula or spoon – For layering the pudding and crumble. A small offset spatula is nice for smoothing the top layer, but a regular spoon works fine.
- Refrigerator – You need space to chill the cups for at least 30 minutes before serving. Longer is better.
If you do not have a food processor, do not worry. I have made this recipe plenty of times using a rolling pin and a lot of elbow grease. The texture ends up a little more uneven, which actually looks more like real dirt. So there is no wrong way to do it.
Preparation Method
Let me walk you through exactly how to make these dirt cups. The process is simple, but there are a few tricks that make the difference between okay dirt cups and great ones.
Step 1: Make the Chocolate Pudding
Pour the cold milk into your large mixing bowl. Add both boxes of instant chocolate pudding mix. Whisk vigorously for about 2 minutes, until the mixture starts to thicken. You will feel it get heavier as you whisk. Scrape the bottom and sides of the bowl to make sure there are no dry pockets of powder. Let the pudding sit for 5 minutes to fully set. It should be thick enough that it holds its shape when you lift the whisk.
Pro tip: If your pudding is not thickening after 2 minutes, your milk might not be cold enough. Pop the bowl in the fridge for 5 minutes and then whisk again. Cold milk is essential for the instant pudding to set properly.
Step 2: Crush the Oreos
While the pudding is setting, crush the Oreos. If you are using a food processor, pulse the cookies until they become a fine crumble. You want the texture to resemble potting soil, not sand. There should be some small chunks mixed in with the finer crumbs. If you are using a rolling pin, place the cookies in a zip-top bag and smash them until you reach the desired consistency. This is the step where kids love to help, and honestly, it is pretty satisfying.
Sensory cue: The crumble should look dark and earthy, with tiny specks of lighter cream filling throughout. If it looks like black sand, you have gone too far. If it looks like broken cookies, you need to keep crushing.
Step 3: Layer the Cups
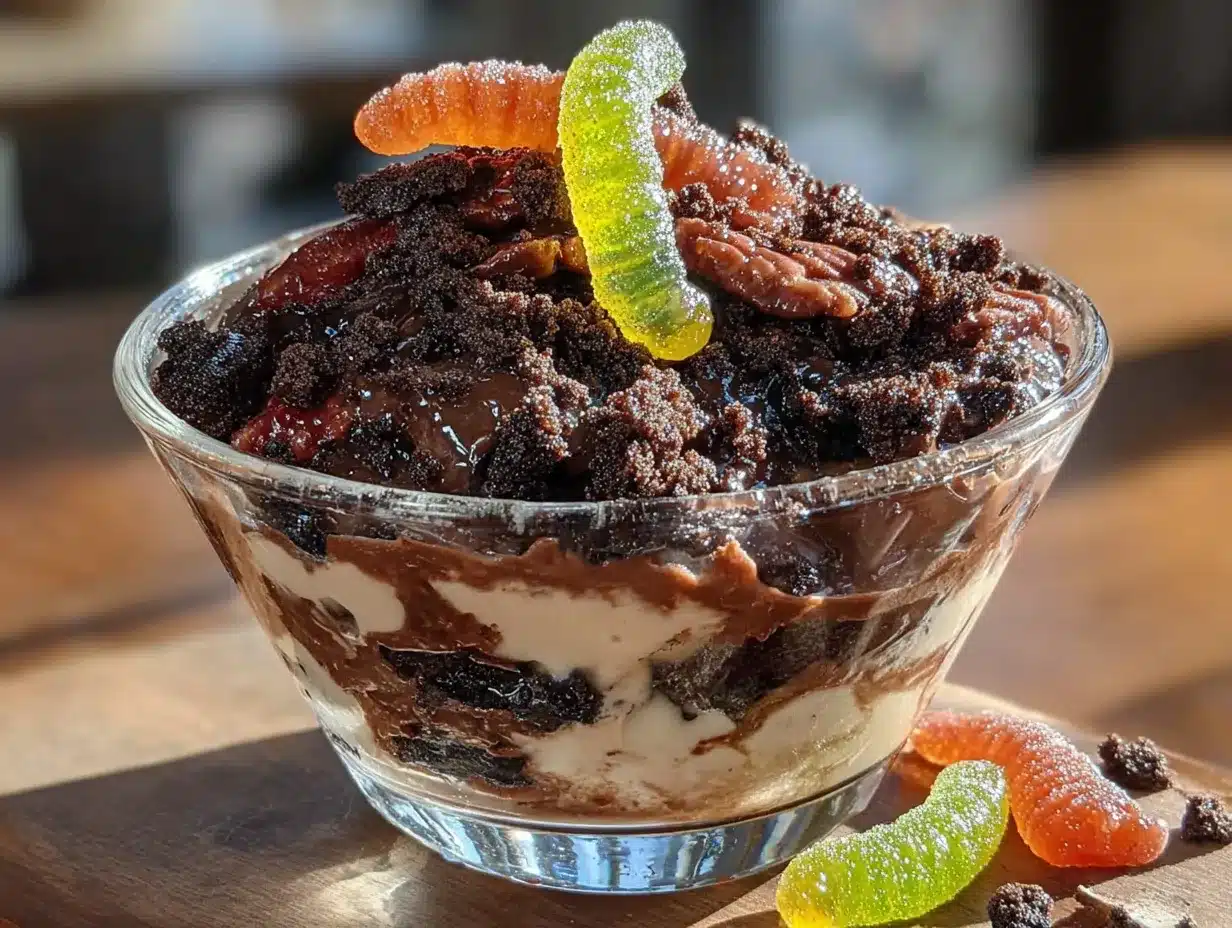
Now comes the fun part. Spoon about 2 tablespoons of the Oreo crumble into the bottom of each clear cup. This creates the base layer of dirt. Next, spoon or pour the chocolate pudding on top, filling each cup about two-thirds full. Leave some room at the top for the final layer of crumble. Tap the cups gently on the counter to settle the pudding and remove any air bubbles.
Pro tip: If you want cleaner layers, use a piping bag or a zip-top bag with the corner snipped off to pipe the pudding into the cups. This prevents the pudding from smearing on the sides of the cup. But honestly, a spoon works fine and creates less mess.
Step 4: Add the Worms
This is the step I messed up the first time. If you stick the gummy worms into the pudding before it sets, they will sink to the bottom and disappear. So here is what you do. After you have added the pudding layer, gently press one or two gummy worms into the pudding so they are partially submerged. Leave the rest of the worm sticking out. You want it to look like the worm is crawling out of the dirt, not drowning in it.
Pro tip: For the best visual effect, position the worms at different angles in each cup. Some should be poking straight up, others should be curved over the edge of the cup. It makes the whole thing look more alive, which is the whole point.
Step 5: Top with Crumble
Sprinkle the remaining Oreo crumble over the top of each cup, covering the pudding completely. You want a thick enough layer that you cannot see any pudding peeking through. This is the final layer of dirt. If you want to add more worms on top, now is the time. Gently press a few worms into the crumble so they look like they are emerging from the soil.
Sensory cue: The top should look like a little pot of dark, crumbly earth. The worms should be visible but partially buried. It should look slightly messy and organic, not perfectly arranged.
Step 6: Chill and Serve
Place the cups in the refrigerator for at least 30 minutes before serving. This allows the pudding to fully set and the flavors to meld together. If you are making these ahead of time, you can refrigerate them for up to 24 hours. Just wait to add any extra worms on top until right before serving so they stay bright and chewy.
Cooking Tips & Techniques
Over the years, I have made these dirt cups more times than I can count. Here are the things I have learned along the way.
Use cold milk. This is the most important rule for instant pudding. If your milk is even slightly warm, the pudding will not set properly. I keep my milk in the fridge until the last possible second. If I am in a hurry, I even stick the mixing bowl in the freezer for a few minutes before I start.
Crush the Oreos in batches. If you try to crush all 36 cookies at once in a food processor, the bottom ones will turn to dust while the top ones stay whole. Work in two or three batches for a more even texture. And do not over-process. You want some texture in the crumble, not a fine powder.
Let the pudding rest. I know it is tempting to start layering right away, but the pudding needs those 5 minutes to fully set. If you layer it too soon, it will be runny and will mix with the crumble. Patience pays off here.
Double the recipe. I am not kidding. These disappear fast, and you will regret only making one batch. I usually make two batches for any party, and they still go quickly. They are that popular.
Make your own whipped cream. If you decide to add a whipped cream layer, make it from scratch. Store-bought whipped topping is fine, but homemade whipped cream with a touch of vanilla takes these cups to another level. Just whip 1 cup of heavy cream with 2 tablespoons of powdered sugar and 1 teaspoon of vanilla until soft peaks form. Layer it between the pudding and the crumble for an extra treat.
Watch the worms. Gummy worms can bleed color into the pudding if they sit in it for too long. If you are making these more than a few hours ahead, stick the worms in right before serving. The cups will still look great, and you will avoid any weird color bleeding.
Variations & Adaptations
These dirt cups are incredibly versatile. Here are some ways to change them up depending on your mood, your dietary needs, or what you have on hand.
Gluten-Free Version: Use gluten-free chocolate sandwich cookies instead of Oreos. There are several good brands available now, and they crush up the same way. The pudding is naturally gluten-free as long as you check the label.
Dairy-Free Version: Use almond milk, oat milk, or coconut milk for the pudding. The texture will be slightly less creamy, but it still works. Skip the whipped cream or use a dairy-free alternative. I have made these with oat milk and they were a hit at a dairy-free Halloween party.
Peanut Butter Dirt Cups: Add a layer of peanut butter between the pudding and the crumble. Just warm a few tablespoons of peanut butter in the microwave for 15 seconds and drizzle it over the pudding before adding the crumble. It adds a salty, nutty contrast that is amazing.
Pumpkin Dirt Cups: For a fall twist, swap the chocolate pudding for pumpkin pudding. You can find instant pumpkin pudding mix in stores around Halloween, or you can make your own by blending 1 cup of pumpkin puree with 1 box of vanilla pudding mix and the required milk. Top with the Oreo crumble and gummy worms for a pumpkin patch effect.
Adult Version: Add a splash of Kahlua or Bailey’s to the pudding before it sets. About 2 tablespoons per batch adds a nice grown-up kick. Just reduce the milk by the same amount to keep the pudding from getting too thin.
Brownie Dirt Cups: For an even richer dessert, crumble up some brownies and use them instead of Oreos. The texture is different, but the chocolate-on-chocolate effect is incredible. I made this version for a birthday party once and it was gone in minutes.
I have tried most of these variations myself, and my personal favorite is the peanut butter version. The combination of chocolate pudding, peanut butter, and Oreo crumble is dangerously good. If you are a peanut butter fan, you have to try it.
Serving & Storage Suggestions
These dirt cups are best served cold, straight from the refrigerator. The contrast between the cold, creamy pudding and the crunchy Oreo crumble is what makes them so satisfying. Here are some tips for serving and storing them.
Serving Temperature: Serve them chilled, but not ice cold. If they have been in the fridge for more than a few hours, let them sit on the counter for about 5 minutes before serving. This takes the edge off the chill and lets the flavors come through.
Presentation: Arrange the cups on a platter or tray and scatter a few extra gummy worms around the base for a spooky effect. You can also add small plastic spiders or Halloween-themed picks to each cup for extra flair. If you are serving these at a party, label them with a cute sign that says something like “Worm Dirt” or “Halloween Mud.”
Complementary Dishes: These dirt cups pair perfectly with other Halloween treats. If you are putting together a dessert table, consider adding some brown butter pumpkin snickerdoodle cookies or a batch of no-bake s’mores icebox cake for variety. For a drink, try a caramel apple cider sangria if you are serving adults, or just some cold apple cider for the kids.
Storage: Store the assembled cups in the refrigerator, covered with plastic wrap or a lid, for up to 3 days. The Oreo crumble will soften over time, so the texture is best within the first 24 hours. If you are making them ahead, I recommend assembling the cups without the top layer of crumble and without the worms. Add those right before serving for the best texture and appearance.
Freezing: I do not recommend freezing these cups. The pudding will become watery when it thaws, and the texture will be off. These are best made fresh or within a day of serving.
How Flavors Develop: The flavors actually get better after a few hours in the fridge. The chocolate pudding deepens and the Oreo crumble absorbs a little moisture, which makes it taste more like real dirt. If you can make these a few hours ahead, they will taste even better.
Nutritional Information & Benefits
Let me be honest with you. These are a treat, not a health food. But here is the nutritional breakdown per serving, assuming you make 8 cups from the recipe.
- Calories: Approximately 380 per cup
- Total Fat: 14g
- Saturated Fat: 6g
- Cholesterol: 15mg
- Sodium: 480mg
- Total Carbohydrates: 58g
- Dietary Fiber: 2g
- Sugars: 42g
- Protein: 6g
Health Benefits: Okay, so there are not a ton of health benefits here, but I will give you what I can. The milk provides calcium and vitamin D, which are good for bone health. The cocoa in the pudding has antioxidants, which is a nice bonus. And the gummy worms? Well, they make you smile, and that counts for something.
Dietary Considerations: This recipe contains dairy and gluten. It is not suitable for vegans or those with dairy or gluten sensitivities unless you use the substitutions I mentioned earlier. The pudding and Oreos may also contain soy, so check labels if you have soy allergies.
Personal Perspective: I believe in balance. These dirt cups are a fun, indulgent treat that you make for special occasions. They are not an everyday dessert, and they do not need to be. Halloween is about having fun and enjoying yourself, and these cups deliver on both fronts. Make them, enjoy them, and do not worry about the calories. That is what November is for.
Conclusion
These Easy Halloween Dirt Cups are the kind of recipe that makes you feel like a kitchen hero without actually having to work that hard. They look impressive, they taste amazing, and they come together in about ten minutes. What more could you ask for from a Halloween dessert?
I love this recipe because it reminds me of that night in my kitchen, trying to impress a seven-year-old who had very strong opinions about what dirt should look like. And honestly, that kid taught me something important. Sometimes the simplest recipes are the ones that bring the most joy. There is no fancy technique here. No complicated steps. Just chocolate pudding, crushed cookies, and gummy worms. But when you put them together, you get something that makes people smile the second they see it.
I encourage you to customize these cups based on what you like. Add peanut butter. Swap in pumpkin pudding. Use gummy spiders instead of worms. Make them your own. That is the beauty of a simple recipe like this. It is a canvas for your creativity.
If you make these dirt cups, I would love to hear about it. Leave a comment below and let me know how they turned out. Did you add any fun variations? Did the kids love them? Did the adults sneak a few extra cups? Share your stories. And if you are looking for more Halloween inspiration, check out some of the other recipes on the site. There is plenty of spooky fun to be had.
Now go make some dirt. Your Halloween party will thank you.
Frequently Asked Questions
Can I make these dirt cups ahead of time?
Yes, you can assemble them up to 24 hours in advance. I recommend adding the top layer of Oreo crumble and the gummy worms right before serving to keep the crumble crunchy and the worms from bleeding color. The pudding base and the bottom layer of crumble hold up perfectly overnight.
Can I use sugar-free pudding mix?
Absolutely. Sugar-free instant chocolate pudding works the same way as regular. Just follow the same instructions. The taste is slightly different, but it is still good. If you are watching your sugar intake, this is an easy swap.
What if I do not have clear cups?
You can use any small cups or bowls you have. Paper cups, small mason jars, or even small glass bowls work fine. You just will not be able to see the layers as clearly. If you want the visual effect, clear cups are worth picking up, but they are not essential.
Can I use homemade chocolate pudding instead of instant?
Yes, but you will need to let it cool completely before layering. Homemade pudding tends to be thinner than instant, so it may not set up as firmly. If you go this route, let the pudding chill in the fridge for at least 2 hours before assembling the cups.
How do I keep the gummy worms from sinking?
Let the pudding set completely before you add the worms. If you stick them in while the pudding is still soft, they will sink to the bottom. Wait until the pudding is firm, then gently press the worms in so they are partially submerged. The rest of the worm should stick out above the surface.
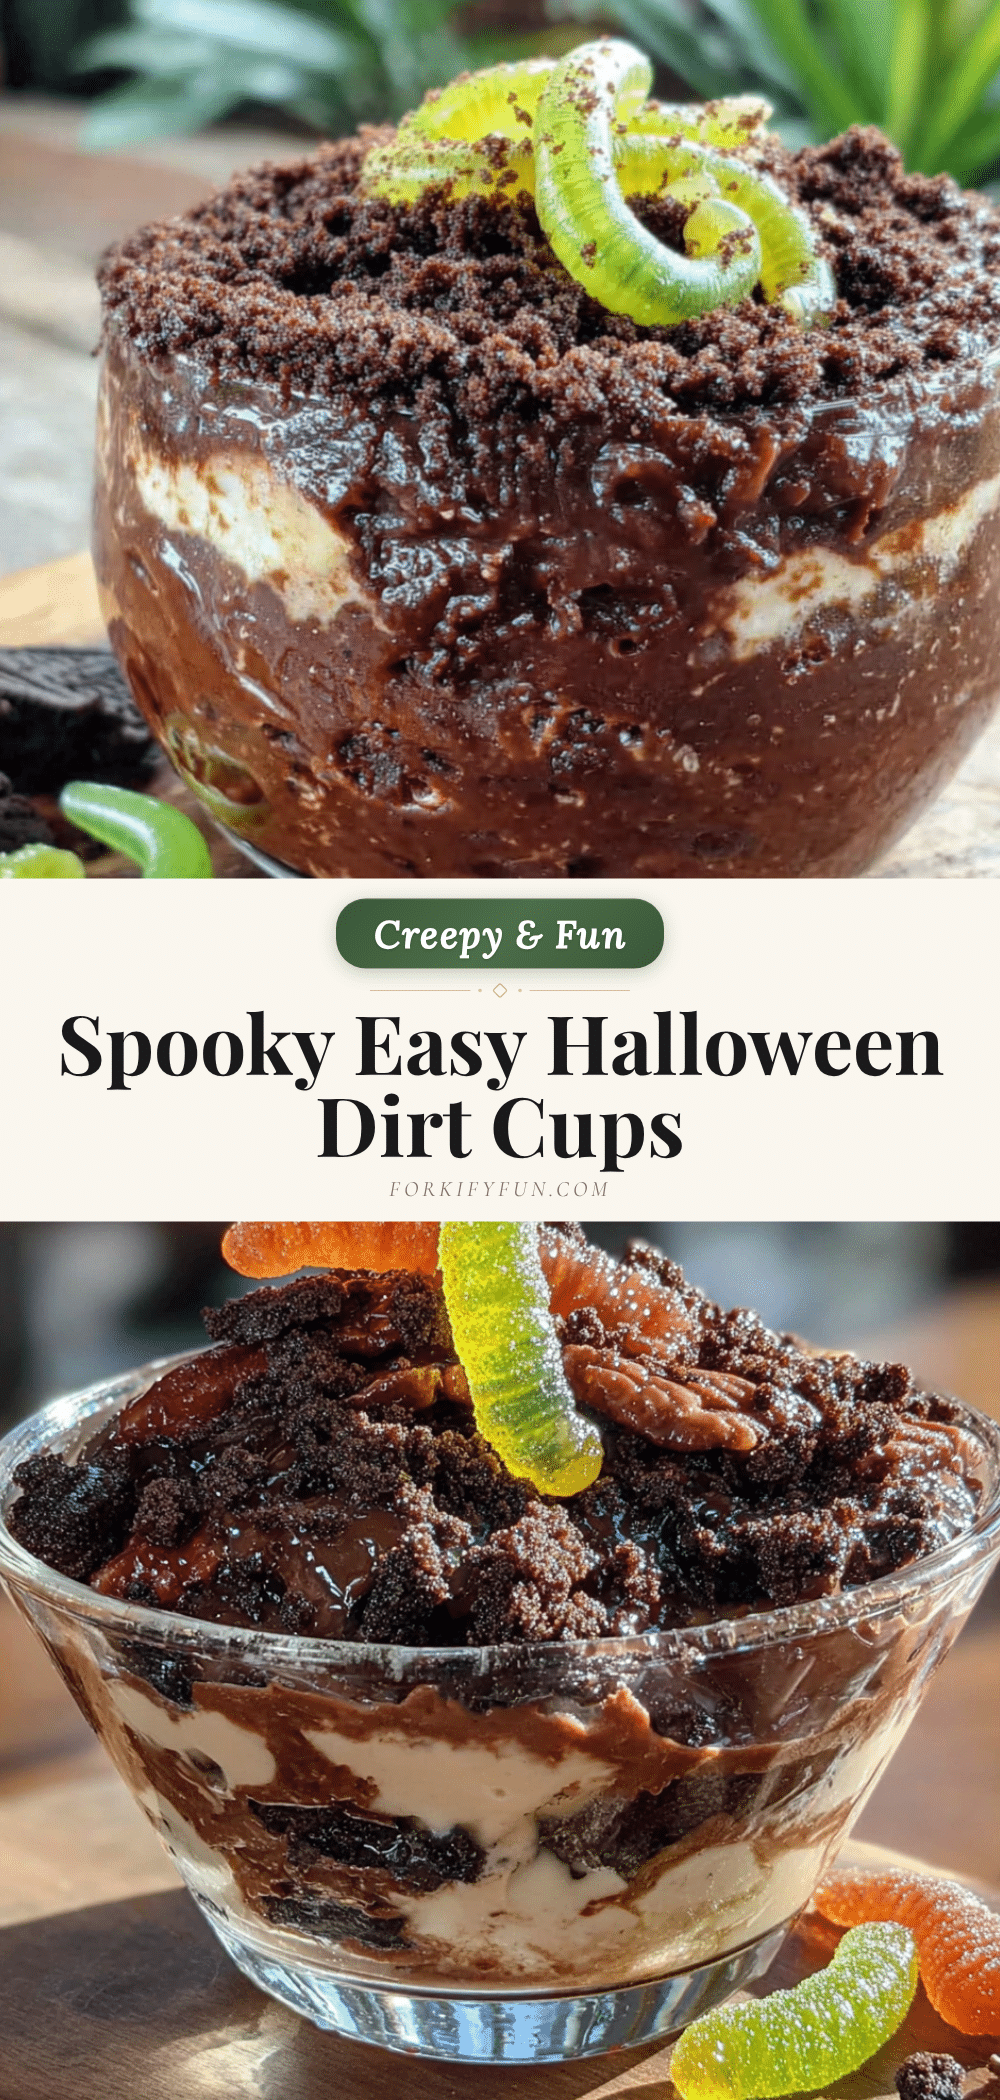
Pin This Recipe!
Easy Halloween Dirt Cups: Best Gummy Worm Dessert in 10 Minutes
These Easy Halloween Dirt Cups are a fun and delicious no-bake dessert made with creamy chocolate pudding, crushed Oreo cookies, and gummy worms. Ready in just 10 minutes, they are perfect for Halloween parties, school events, or any spooky celebration.
- Prep Time: 10 minutes
- Cook Time: 0 minutes
- Total Time: 40 minutes (including chilling)
- Yield: 8-10 servings 1x
- Category: Dessert
- Cuisine: American
Ingredients
- 2 boxes (3.9 ounces each) instant chocolate pudding mix
- 3 cups cold whole milk
- 1 family-size package (about 36 cookies) Oreo cookies
- 1 bag gummy worms
- 8–10 small clear plastic cups (7-ounce size) (optional)
- 1 cup whipped topping (optional)
- 2 tablespoons powdered sugar (optional)
Instructions
- Make the chocolate pudding: Pour the cold milk into a large mixing bowl. Add both boxes of instant chocolate pudding mix. Whisk vigorously for about 2 minutes until the mixture starts to thicken. Let the pudding sit for 5 minutes to fully set.
- Crush the Oreos: While the pudding is setting, crush the Oreos in a food processor or by placing them in a zip-top bag and using a rolling pin until they become a fine crumble resembling potting soil.
- Layer the cups: Spoon about 2 tablespoons of the Oreo crumble into the bottom of each clear cup. Then spoon or pour the chocolate pudding on top, filling each cup about two-thirds full. Tap the cups gently on the counter to settle the pudding.
- Add the worms: Gently press one or two gummy worms into the pudding so they are partially submerged, leaving the rest sticking out to look like they are crawling out of the dirt.
- Top with crumble: Sprinkle the remaining Oreo crumble over the top of each cup, covering the pudding completely. Gently press a few more gummy worms into the crumble if desired.
- Chill and serve: Place the cups in the refrigerator for at least 30 minutes before serving. Serve chilled.
Notes
Use cold milk for the pudding to set properly. Let the pudding set completely before adding gummy worms to prevent them from sinking. For best texture, add the top layer of Oreo crumble and gummy worms just before serving if making ahead. The cups can be stored in the refrigerator for up to 3 days, but the crumble will soften over time.
Nutrition
- Serving Size: 1 cup
- Calories: 380
- Sugar: 42
- Sodium: 480
- Fat: 14
- Saturated Fat: 6
- Carbohydrates: 58
- Fiber: 2
- Protein: 6
Keywords: Halloween dirt cups, gummy worm dessert, easy Halloween dessert, no-bake dessert, chocolate pudding cups, Oreo crumble, spooky treats