I was halfway through measuring the flour when I realized I’d grabbed the wrong mixing bowl. It was the small one, the one I usually use for whisking eggs, not the big ceramic beast that can handle a whole batch of banana bread. My hands were already sticky with mashed banana, the butter was melting in a puddle on the counter, and I could hear my toddler starting to stir from her nap. There was no way I was starting over. So I just kept going, cramming everything into that too-small bowl, praying nothing sloshed over the side. What came out of the oven was, honestly, the best banana bread I’d ever made. It was perfectly domed, incredibly moist, and had this tender, almost velvety crumb that I’d never managed to get before. I stood there, spatula in hand, staring at it like it had performed a magic trick. The whole thing was a happy accident born from a distracted moment and a stubborn refusal to wash another dish. And that, right there, is how this one-bowl, no-mixer banana bread was really born. Maybe you know that feeling when a recipe just works despite—or maybe because of—your best efforts to mess it up. That’s this bread. It’s the kind of simple, forgiving recipe that makes you feel like a baking genius, even when you’re just trying to use up those spotty bananas on the counter.
Why You’ll Love This Recipe
This isn’t just another banana bread recipe you’ll bookmark and forget. This is the one that will become your go-to, the one you’ll make on a Tuesday afternoon when the bananas are begging to be used and you need something that feels like a hug. I’ve tested this more times than I care to admit, tweaking the fat-to-flour ratio and playing with baking times until it was just right. Here’s what makes it so special:
- No Mixer Required: You don’t need a stand mixer, a hand mixer, or even a whisk if you’re in a pinch. A simple fork or spatula does all the work. It’s almost laughably easy.
- One Bowl, Minimal Mess: I mean it. One bowl for the wet ingredients, one bowl for the dry, and then you combine them. Okay, technically two bowls, but you can wash the dry-ingredient bowl while the bread bakes. The point is, the cleanup is a breeze.
- Perfectly Moist Every Time: The secret is using very ripe bananas and a touch of oil alongside the butter. It guarantees a crumb that stays tender for days, not hours.
- Made with Wholesome Ingredients: We’re using whole wheat pastry flour for a little fiber and nuttiness, and just enough coconut sugar to sweeten things up without a sugar crash. It feels good to eat, and it tastes even better.
- Incredibly Forgiving: Forgot the vanilla? It’ll still be good. Only have two bananas instead of three? I’ve done it. This recipe has a wide margin for error, which is exactly what a busy weeknight needs.
This banana bread is the kind of thing that makes you close your eyes after the first bite. It’s comfort food, reimagined—healthier, faster, but with the same soul-soothing satisfaction. Perfect for a lazy Sunday breakfast or a quick afternoon snack with a cup of coffee.
What Ingredients You Will Need
This recipe relies on simple, wholesome ingredients that you probably already have in your pantry. Each one plays a specific role in creating that perfect texture and flavor, without any fuss.
- Very Ripe Bananas (3 medium, about 1 ½ cups mashed): This is non-negotiable. The riper the banana, the sweeter and more flavorful your bread will be. Look for bananas that are heavily speckled with brown spots or even completely black on the outside. They should be soft to the touch. Mash them well with a fork until mostly smooth with a few small lumps for texture.
- Melted Coconut Oil or Unsalted Butter (⅓ cup / 75g): I use a mix of both for the best flavor and texture. The butter gives that classic rich taste, while the oil keeps the bread incredibly moist. If you only have one, either works fine. Just melt it and let it cool slightly before using.
- Coconut Sugar (½ cup / 80g): This unrefined sugar adds a subtle caramel-like sweetness that pairs beautifully with banana. You can substitute brown sugar or even regular granulated sugar if that’s what you have. The bread will still be delicious.
- Large Eggs (2, at room temperature): Eggs provide structure and richness. Make sure they are at room temperature so they emulsify properly with the fat, creating a smoother batter. If you forgot to take them out of the fridge, place them in a bowl of warm water for 5 minutes.
- Plain Greek Yogurt or Buttermilk (¼ cup / 60ml): This is my secret ingredient. The acidity in the yogurt or buttermilk reacts with the baking soda to create a super tender crumb. It also adds a lovely tang that balances the sweetness. Use dairy-free yogurt if needed.
- Vanilla Extract (1 teaspoon): Pure vanilla extract adds depth and warmth. It’s a small ingredient, but it makes a big difference in the overall flavor profile.
- Whole Wheat Pastry Flour (1 ¾ cups / 210g): I love using whole wheat pastry flour here. It has the nutritional benefits of whole wheat but a much lighter, finer texture than regular whole wheat flour, so the bread stays tender. You can substitute all-purpose flour 1:1.
- Baking Soda (1 teaspoon): This is our leavening agent. Make sure it’s fresh—if it doesn’t fizz when mixed with acid (like the yogurt), it’s time to buy a new box.
- Ground Cinnamon (1 teaspoon): Cinnamon is banana bread’s best friend. It adds a warm, aromatic note that makes the whole kitchen smell incredible. I recommend using Ceylon cinnamon for a milder, sweeter flavor.
- Salt (½ teaspoon): Salt isn’t just for savory food. A little salt enhances all the other flavors and balances the sweetness. Don’t skip it.
- Optional Mix-Ins (½ cup total): This is where you can make it your own. Chopped walnuts or pecans add a lovely crunch. Dark chocolate chips are always a crowd-pleaser. Dried cranberries or blueberries add a pop of tartness. I usually go for a mix of walnuts and dark chocolate chips.
Equipment Needed
The beauty of this recipe is that you don’t need any fancy equipment. A simple bowl and a fork will get the job done.
- Large Mixing Bowl: You’ll need one large bowl for the wet ingredients and one medium bowl for the dry ingredients. A glass or ceramic bowl works great.
- Fork or Whisk: A fork is perfect for mashing the bananas and mixing the batter. A whisk works too, but a fork is easier to clean.
- Spatula or Wooden Spoon: For folding the dry ingredients into the wet and scraping down the sides of the bowl.
- 9×5-Inch Loaf Pan: A standard loaf pan is what you need. If you use a smaller pan, your bread will take longer to bake and might have a denser center. If you use a larger pan, the bread will be shallower and bake faster.
- Parchment Paper (optional but recommended): Lining your loaf pan with parchment paper makes it incredibly easy to lift the bread out after baking. Just cut a strip that hangs over the long sides of the pan.
- Cooling Rack: A wire rack allows air to circulate around the bread, preventing the bottom from getting soggy as it cools.
Preparation Method
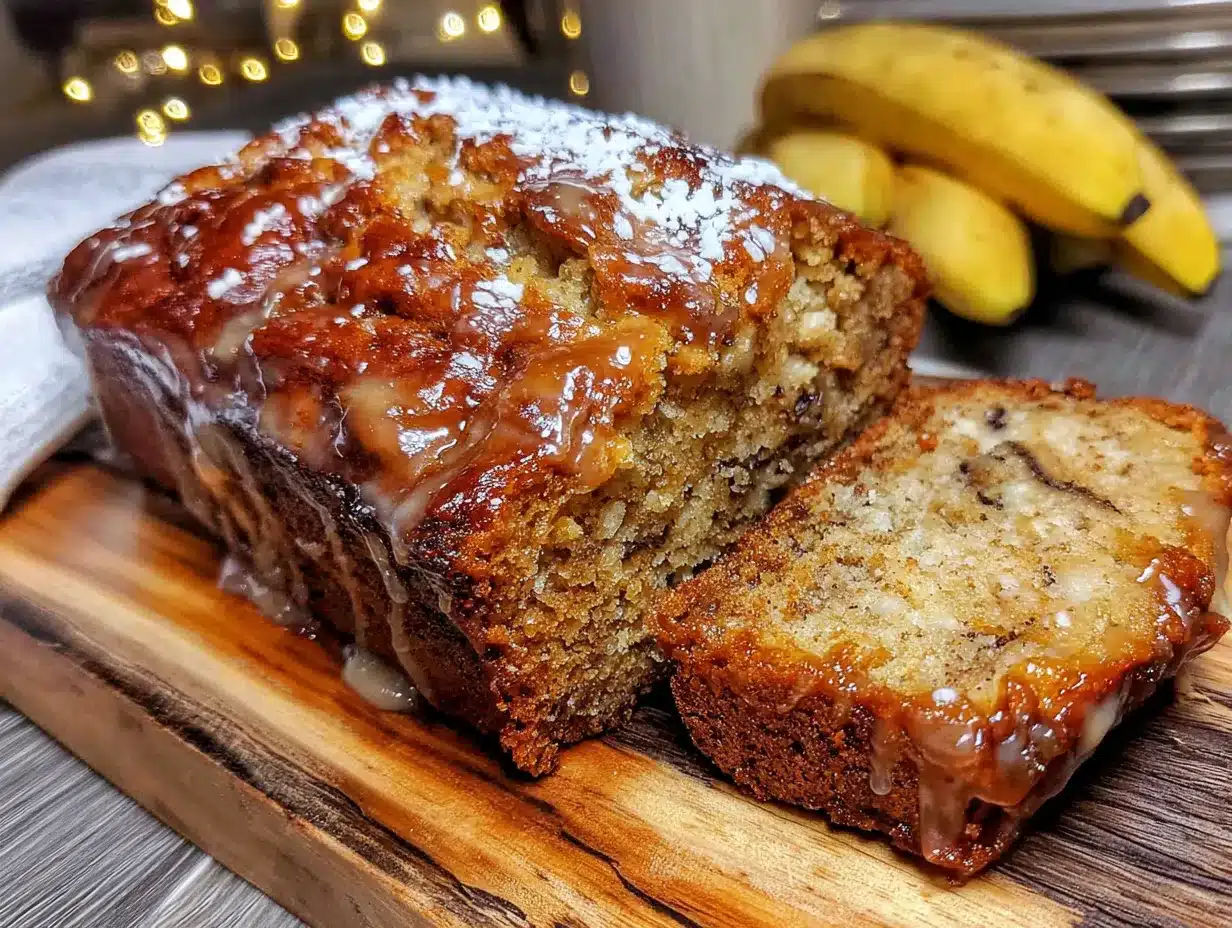
Let’s get baking. This whole process, from start to oven, takes about 10 minutes. I promise.
- Preheat and Prep (5 minutes): Preheat your oven to 350°F (175°C). Grease your 9×5-inch loaf pan with butter or cooking spray. If using parchment paper, place a strip in the bottom and up the two long sides. This is your insurance policy against sticking.
- Mash and Mix the Wet Ingredients (3 minutes): In your large mixing bowl, mash the ripe bananas with a fork until mostly smooth. You want a few small lumps for texture. Add the melted coconut oil (or butter), coconut sugar, eggs, Greek yogurt, and vanilla extract. Whisk or stir vigorously with your fork until everything is combined and smooth. The mixture will look a little glossy.
- Combine the Dry Ingredients (2 minutes): In a separate medium bowl, whisk together the whole wheat pastry flour, baking soda, cinnamon, and salt. Whisking aerates the flour and ensures the baking soda is evenly distributed, so you don’t get a bitter pocket in your bread.
- Combine Wet and Dry (2 minutes): Pour the dry ingredients into the bowl with the wet ingredients. Use your spatula to fold them together gently. Stir just until you no longer see streaks of flour. A few lumps are perfectly fine—overmixing will develop the gluten and make your bread tough. If you’re adding mix-ins like nuts or chocolate chips, fold them in now.
- Bake the Bread (50-60 minutes): Pour the batter into your prepared loaf pan and spread it into an even layer. Bake for 50-60 minutes, or until a toothpick inserted into the center comes out clean or with just a few moist crumbs attached. The top should be a deep golden brown and crackled beautifully. If the top is browning too quickly after 40 minutes, tent the pan loosely with aluminum foil.
- Cool and Enjoy (10 minutes + patience): Let the bread cool in the pan on a wire rack for 10 minutes. Then, using the parchment paper sling, lift it out and transfer it to the wire rack to cool completely. I know it’s tempting to slice into it right away, but letting it cool fully allows the crumb to set. The result is a cleaner slice and a better texture. Trust me on this one.
Cooking Tips & Techniques
I’ve made this banana bread more times than I can count, and I’ve learned a few things along the way. Here are my best tips for success.
- Don’t Overmix the Batter: This is the number one mistake people make with quick breads. Once you add the flour, stir gently and stop as soon as the flour disappears. Overmixing develops gluten, which makes the bread tough and dense instead of tender and fluffy.
- Use a Kitchen Scale for Flour: Measuring flour by volume (using a measuring cup) can be wildly inaccurate. If you have a kitchen scale, use it. For whole wheat pastry flour, 1 cup is about 120 grams. If you must use a measuring cup, spoon the flour into the cup and level it off with a knife. Don’t scoop directly from the bag—that packs the flour and you’ll end up with too much.
- Check for Doneness with a Thermometer: The toothpick test is good, but an instant-read thermometer is better. Your banana bread is done when the internal temperature reaches 200-205°F (93-96°C). This guarantees a perfectly baked center without a dry edge.
- Let It Cool Completely: I know I said this before, but it’s worth repeating. Slicing into warm banana bread is a rookie mistake. The steam inside needs to redistribute. If you cut it too soon, the slices will be gummy and fall apart. Give it at least an hour on the cooling rack.
- Toast Leftover Slices: This is my favorite trick. If your banana bread is a day or two old, slice it and toast it lightly. The edges get a little crispy while the center stays soft. It’s like a whole new dessert. A pat of butter on top is not optional.
Variations & Adaptations
This recipe is a fantastic blank canvas. Don’t be afraid to play around with it based on what you have in your pantry or what you’re craving.
- Gluten-Free Banana Bread: Substitute the whole wheat pastry flour with a good quality 1:1 gluten-free baking flour blend. I’ve had great success with brands like Bob’s Red Mill or King Arthur. Add an extra tablespoon of yogurt to help with moisture.
- Vegan Banana Bread: To make this vegan, use flax eggs (2 tablespoons ground flaxseed mixed with 6 tablespoons water, let sit for 5 minutes) instead of regular eggs. Use coconut oil or a vegan butter stick, and swap the Greek yogurt for a dairy-free yogurt or applesauce.
- Chocolate Chip Banana Bread: This is the classic for a reason. Fold in ½ cup of semi-sweet or dark chocolate chips. I like to reserve a few to press onto the top of the batter before baking for a pretty presentation.
- Spiced Banana Bread: Amp up the warm flavors by adding ½ teaspoon of ground nutmeg, ¼ teaspoon of ground ginger, and a pinch of ground cloves along with the cinnamon. It smells like the holidays.
- Banana Nut Bread: Toast ½ cup of chopped walnuts or pecans in a dry skillet over medium heat for 3-4 minutes until fragrant. Let them cool, then fold them into the batter. Toasting the nuts first really brings out their flavor.
Serving & Storage Suggestions
This banana bread is delicious in so many ways. Here’s how to enjoy it at its best.
Serving: Serve it warm or at room temperature. A slice on its own is perfect, but you can take it over the top with a pat of salted butter, a drizzle of honey or maple syrup, or a smear of creamy peanut or almond butter. For a real treat, toast a slice and top it with a scoop of vanilla ice cream for an impromptu dessert.
Storage: Store leftover banana bread tightly wrapped in plastic wrap or in an airtight container at room temperature for up to 4 days. The moisture from the bananas keeps it fresh longer than most baked goods. I actually think it tastes even better on the second day, as the flavors have had time to meld.
Freezing: This bread freezes beautifully. You can freeze the whole loaf, or slice it first for easy grab-and-go portions. Wrap it tightly in plastic wrap, then a layer of aluminum foil, and place it in a freezer-safe bag. It will keep for up to 3 months. To thaw, let a slice sit at room temperature for about 30 minutes, or pop it in the toaster or microwave for a quick warm-up.
Nutritional Information & Benefits
This banana bread is made with real, nourishing ingredients, making it a treat you can feel good about. Here’s a general idea of what’s in a slice (based on 10 slices, without mix-ins).
- Calories: Approximately 220-250 per slice
- Fat: 10-12g (mostly from healthy fats in coconut oil and eggs)
- Carbohydrates: 30-35g
- Fiber: 3-4g (thanks to the whole wheat pastry flour)
- Sugar: 14-16g (naturally occurring from bananas and coconut sugar)
- Protein: 5-6g
Health Benefits: Bananas are packed with potassium, which is great for heart health and muscle function. They also contain resistant starch, especially when they’re slightly less ripe, which acts as a prebiotic for gut health. Whole wheat pastry flour provides more fiber and nutrients than refined white flour, helping you feel fuller longer. Using coconut sugar instead of refined white sugar means you’re getting a sweetener that contains small amounts of inulin, a type of fiber that can help with blood sugar regulation. This recipe is a wonderful way to satisfy a sweet craving while still nourishing your body.
Conclusion
This one-bowl banana bread has become a staple in my kitchen for a reason. It’s the recipe I turn to when I need something reliable, something that feels like a warm hug on a busy day. It started as a happy accident in a too-small bowl, but it’s earned a permanent spot in my baking rotation. It’s proof that you don’t need fancy equipment or a ton of time to create something truly delicious. I hope you give it a try and make it your own. Maybe you’ll add a handful of chocolate chips, or a sprinkle of flaky sea salt on top. The best recipes are the ones that evolve with you. I’d love to hear how it turns out—drop a comment below and let me know what mix-ins you used or how you served it. Happy baking!
Frequently Asked Questions
Can I use frozen bananas for this recipe?
Absolutely! Frozen bananas are actually ideal for baking. Thaw them completely at room temperature or in the microwave. They will release a lot of liquid—don’t throw that away! That liquid is full of banana flavor. Just mash them with their liquid and proceed with the recipe. It might make the batter slightly thinner, but the bread will be incredibly moist.
Why did my banana bread sink in the middle?
A sunken center usually means the bread was underbaked. The outside sets and browns, but the middle hasn’t had enough time to cook through and collapses as it cools. Make sure your oven temperature is accurate (an oven thermometer is a cheap and helpful tool) and bake until a toothpick inserted in the center comes out clean. It can also happen if the batter is overmixed, which creates too much air that then deflates.
Can I make this into muffins instead of a loaf?
Yes, you can! This batter works wonderfully as muffins. Line a 12-cup muffin tin with paper liners and fill each cup about ¾ full. Bake at 350°F (175°C) for 18-22 minutes, or until a toothpick inserted into the center of a muffin comes out clean. You’ll get about 12 muffins.
How do I know if my baking soda is still good?
Baking soda loses its potency over time. To test it, place a teaspoon of baking soda in a small bowl and add a splash of vinegar or lemon juice. If it fizzes vigorously, it’s still good. If it just sits there with little to no reaction, it’s time to buy a new box. Using old baking soda is a common reason for flat, dense banana bread.
Can I reduce the sugar in this recipe?
Yes, you can. If your bananas are very ripe and spotty, they are naturally very sweet, and you can reduce the coconut sugar to ⅓ cup without a huge difference in taste. The bread will be a little less sweet, but the banana flavor will shine through even more. You can also try using a sugar substitute like monk fruit sweetener, but the texture might be slightly different.
Pin This Recipe!
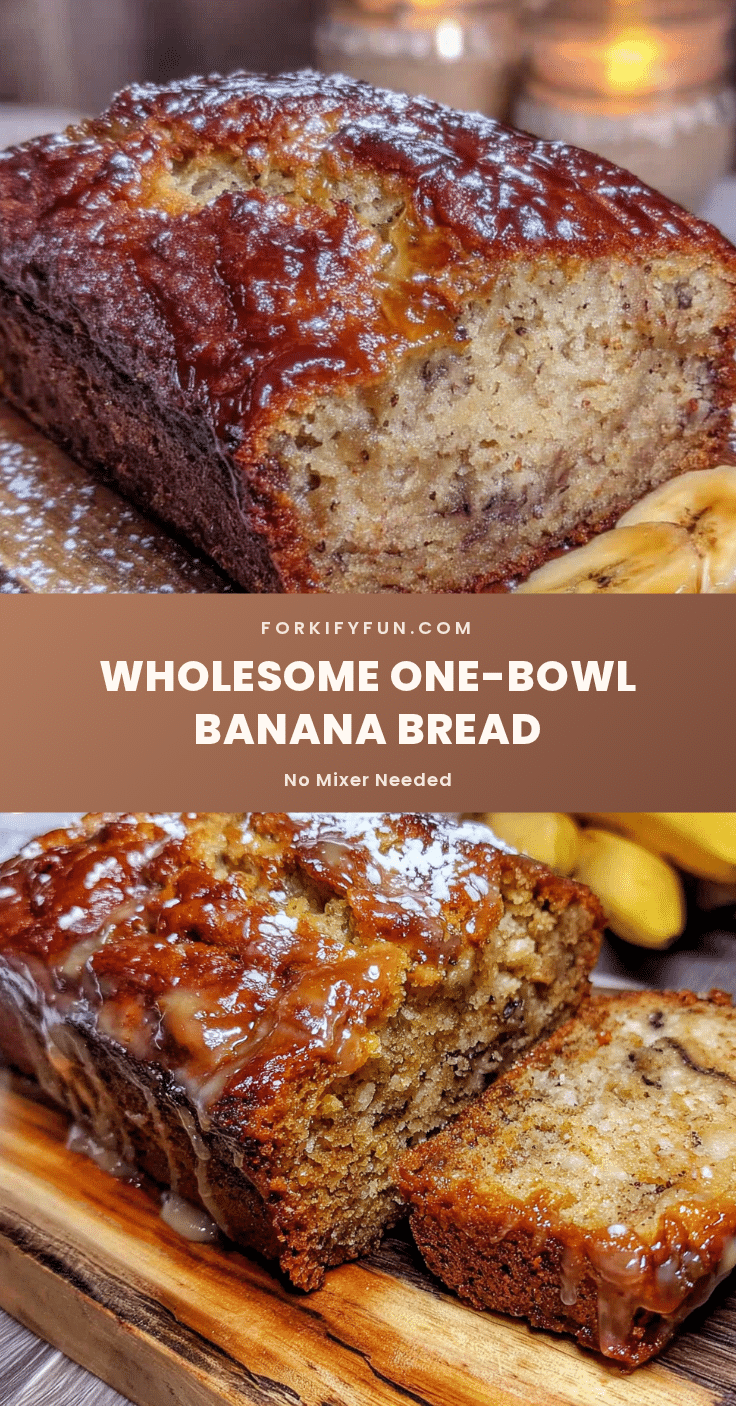
Wholesome One-Bowl Banana Bread – Easy No Mixer Recipe
This one-bowl banana bread is incredibly moist, tender, and made with wholesome ingredients. No mixer required, it’s a forgiving recipe that turns out perfectly every time.
- Prep Time: 10 minutes
- Cook Time: 55 minutes
- Total Time: 1 hour 5 minutes
- Yield: 10 servings 1x
- Category: Dessert
- Cuisine: American
Ingredients
- 3 medium very ripe bananas (about 1 ½ cups mashed)
- ⅓ cup (75g) melted coconut oil or unsalted butter
- ½ cup (80g) coconut sugar
- 2 large eggs, at room temperature
- ¼ cup (60ml) plain Greek yogurt or buttermilk
- 1 teaspoon vanilla extract
- 1 ¾ cups (210g) whole wheat pastry flour
- 1 teaspoon baking soda
- 1 teaspoon ground cinnamon
- ½ teaspoon salt
- ½ cup optional mix-ins (chopped walnuts, pecans, dark chocolate chips, dried cranberries, or blueberries)
Instructions
- Preheat oven to 350°F (175°C). Grease a 9×5-inch loaf pan with butter or cooking spray. Optionally, line with parchment paper.
- In a large mixing bowl, mash the ripe bananas with a fork until mostly smooth. Add melted coconut oil (or butter), coconut sugar, eggs, Greek yogurt, and vanilla extract. Whisk or stir until combined and smooth.
- In a separate medium bowl, whisk together whole wheat pastry flour, baking soda, cinnamon, and salt.
- Pour dry ingredients into wet ingredients. Fold gently with a spatula until just combined (a few lumps are fine). If using mix-ins, fold them in now.
- Pour batter into prepared loaf pan and spread evenly. Bake for 50-60 minutes, until a toothpick inserted in the center comes out clean or with a few moist crumbs. If top browns too quickly, tent with foil after 40 minutes.
- Let bread cool in pan on a wire rack for 10 minutes. Then lift out (using parchment sling if used) and transfer to rack to cool completely before slicing.
Notes
Use very ripe bananas for best sweetness and flavor. Don’t overmix the batter to avoid tough bread. Let bread cool completely before slicing for clean slices. Leftover slices can be toasted for a crispy edge.
Nutrition
- Serving Size: 1 slice
- Calories: 235
- Sugar: 15
- Sodium: 220
- Fat: 11
- Saturated Fat: 7
- Carbohydrates: 33
- Fiber: 3.5
- Protein: 5.5
Keywords: banana bread, one bowl, no mixer, whole wheat, healthy, easy, moist banana bread