I was standing in the middle of a hardware store last October—specifically in the lighting aisle, which is about the least magical place I can think of—when a woman walked past me carrying one of those giant, unnaturally orange pumpkin-scented candles. And just like that, I was seven years old again, sitting on the cold linoleum floor of my Aunt Lena’s farmhouse kitchen. She wasn’t really my aunt, just a family friend we all called Aunt Lena, and she had this way of making you feel like you were the only person in the room. The smell of that candle wasn’t quite right—too sweet, too fake—but it was close enough to trigger the memory of her hands, dusted with flour, pulling a loaf of pumpkin bread out of an oven that had seen better days. I honestly thought I’d forgotten that moment entirely, but there it was, as clear as if I’d just walked out of her kitchen. I forgot what I even came to the hardware store for that day. All I could think about was getting home and figuring out how to make that bread again—the one with the crumb topping that was so good you’d sneak pieces off the top before anyone noticed. Maybe you’ve had that experience, where a random smell just grabs you by the collar and drags you back to a specific moment you didn’t even know you were holding onto. That’s what this pumpkin bread is for me. It’s not just a recipe I developed—it’s the one I’ve been chasing for thirty years, and I finally got it right.
Why You’ll Love This Recipe
Look, I’ve tested a lot of pumpkin bread recipes over the years. Some were too dry, some were too dense, and some just didn’t have enough of that warm, spiced flavor you’re really after when October rolls around. This one is different. This is the one I bring to every Friendsgiving, every neighborhood potluck, and honestly, every Tuesday that feels like it needs a little extra joy.
- Perfect for a Crowd: This recipe makes two generous loaves, which means you can serve one and keep one for yourself—or bring both to a gathering and watch them disappear in minutes.
- Simple Ingredients: You probably have most of these in your pantry right now. No need to hunt down obscure spices or specialty flours.
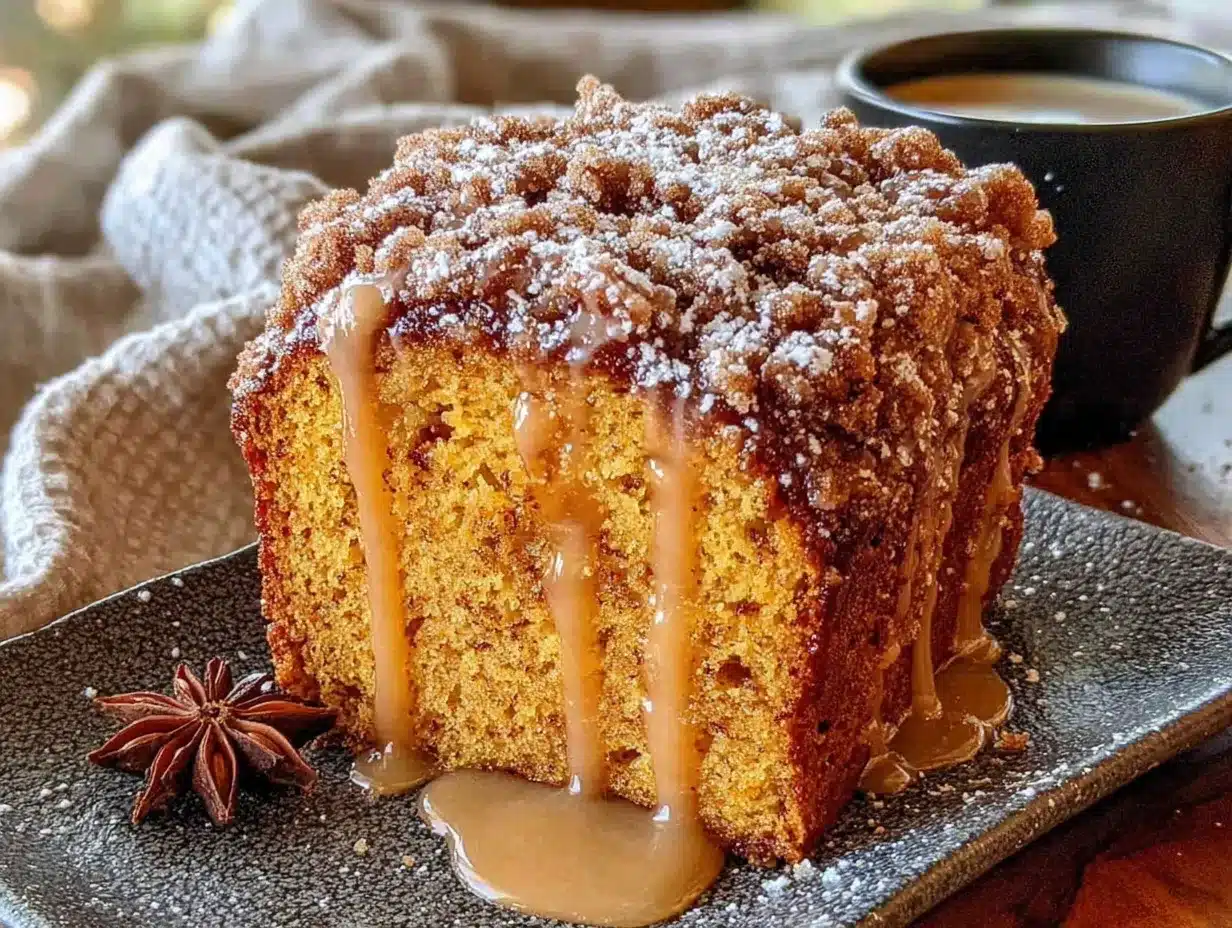
- Unbelievably Delicious: The crumb topping is the star here—buttery, slightly crunchy, and just sweet enough to complement the tender, spiced bread underneath.
- Make-Ahead Friendly: You can prep this the night before your party and bake it fresh in the morning. Your kitchen will smell incredible, and your guests will think you’ve been slaving away for hours.
- Crowd-Pleaser: I’ve served this to everyone from picky toddlers to my uncle who “doesn’t really like pumpkin,” and it gets rave reviews every single time.
What makes this version different from all the others? It’s the balance. The bread itself is incredibly moist without being gummy—thanks to a little trick I learned from a pastry chef friend about using oil instead of butter in the batter. And that crumb topping? It’s not an afterthought. It’s a thick, generous layer that stays crunchy even the next day. I’ve spent years tweaking the ratios, and this is the version that finally made me close my eyes after the first bite. It’s comfort food, reimagined for sharing.
What Ingredients You Will Need
This recipe uses simple, wholesome ingredients to deliver that deep, spiced pumpkin flavor and a texture that’s just right—moist but not heavy, tender but sturdy enough to hold that glorious crumb topping. Most of these are pantry staples, which makes this perfect for those spontaneous baking moods.
For the Pumpkin Bread
- All-purpose flour, 2 ½ cups (315g) – I prefer Gold Medal for consistent results, but any brand works fine here.
- Granulated sugar, 1 ½ cups (300g) – Adds sweetness and helps keep the bread tender.
- Brown sugar, packed, ½ cup (100g) – Light or dark works; dark gives a deeper molasses flavor.
- Baking soda, 1 ½ teaspoons – Don’t skip this; it’s what gives the bread its rise.
- Salt, 1 teaspoon – Balances the sweetness and enhances the spices.
- Ground cinnamon, 2 teaspoons – The backbone of the spice blend.
- Ground nutmeg, 1 teaspoon – Freshly grated if you have it, but pre-ground is totally fine.
- Ground ginger, ½ teaspoon – Adds a little warmth without being overpowering.
- Ground cloves, ¼ teaspoon – Just a pinch; a little goes a long way.
- Pumpkin puree, 1 can (15 oz or 425g) – Make sure it’s 100% pure pumpkin, not pumpkin pie filling. Libby’s is my go-to brand.
- Large eggs, 4, at room temperature – Room temperature eggs mix more evenly into the batter.
- Vegetable oil, 1 cup (240ml) – This is the secret to the moist texture. Canola or avocado oil also works.
- Vanilla extract, 2 teaspoons – Pure vanilla, not imitation, for the best flavor.
- Water, ¼ cup (60ml) – Helps thin the batter slightly for a better crumb.
For the Crumb Topping
- All-purpose flour, 1 ½ cups (190g)
- Brown sugar, packed, 1 cup (200g) – This gives the crumb its deep, caramel-like sweetness.
- Ground cinnamon, 1 teaspoon
- Salt, ¼ teaspoon
- Unsalted butter, melted, ½ cup (1 stick or 113g) – Melted butter makes the crumb easier to mix and clump together beautifully.
Equipment Needed
You don’t need a fancy kitchen to pull this off. Here’s what you’ll need:
- Two 9×5-inch loaf pans – I’ve used everything from nonstick to glass, and they all work. If you’re using glass, reduce the oven temperature by 25°F.
- Parchment paper – Lining the pans makes cleanup a breeze and prevents sticking.
- Large mixing bowls – You’ll need two: one for dry ingredients and one for wet.
- Medium mixing bowl – For the crumb topping.
- Whisk – For combining dry ingredients.
- Rubber spatula – For folding the batter together without overmixing.
- Cooling rack – Lets the loaves cool evenly so the crumb topping stays crisp.
If you don’t have two loaf pans, you can bake this as one large loaf in a 9×13-inch pan—just increase the baking time by about 10-15 minutes. I’ve done this more times than I can count when I’m short on pans, and it works beautifully.
Preparation Method
Alright, let’s get baking. Here’s how to make the ultimate pumpkin bread with crumb topping, step by step.
- Preheat your oven to 350°F (175°C). Position the rack in the center of the oven. While it’s heating, line your two 9×5-inch loaf pans with parchment paper, leaving a little overhang on the long sides—this makes lifting the loaves out so much easier later.
- Make the crumb topping first. In a medium bowl, whisk together the flour, brown sugar, cinnamon, and salt. Pour the melted butter over the mixture and stir with a fork until it forms clumps. Don’t overmix—you want some big, some small crumbs. Set this aside while you prepare the batter.
- Whisk the dry ingredients. In a large bowl, combine the flour, granulated sugar, brown sugar, baking soda, salt, cinnamon, nutmeg, ginger, and cloves. Whisk until everything is evenly distributed. This ensures you don’t end up with a pocket of baking soda in your finished bread—trust me, I learned that one the hard way.
- Mix the wet ingredients. In a separate large bowl, whisk together the pumpkin puree, eggs, vegetable oil, vanilla extract, and water until smooth. The mixture should be a deep, vibrant orange and smell amazing already.
- Combine wet and dry. Pour the wet ingredients into the bowl of dry ingredients. Use a rubber spatula to fold them together gently. Stop as soon as you no longer see streaks of flour—overmixing will make the bread tough. A few lumps are totally fine.
- Divide the batter. Pour the batter evenly into your two prepared loaf pans. It should come about two-thirds of the way up the sides.
- Add the crumb topping. Sprinkle the crumb mixture generously over the top of each loaf. Don’t press it into the batter—just let it sit on top. Use all of it; yes, it seems like a lot, and yes, that’s exactly what you want.
- Bake for 50-60 minutes. The loaves are done when a toothpick inserted into the center comes out clean or with just a few moist crumbs. If the crumb topping starts browning too quickly (around the 30-minute mark), tent the loaves loosely with aluminum foil.
- Cool in the pans. Let the loaves cool in the pans for about 15 minutes. Then use the parchment overhang to lift them out and transfer them to a cooling rack. Let them cool completely before slicing—I know it’s hard to wait, but the crumb topping needs time to set.
Cooking Tips & Techniques
I’ve made this pumpkin bread more times than I can count, and I’ve definitely made my share of mistakes along the way. Here’s what I’ve learned so you don’t have to repeat my errors.
Don’t overmix the batter. This is probably the most common mistake. When you overmix, you develop the gluten in the flour, which leads to a dense, tough bread instead of a tender, fluffy one. Fold just until the flour disappears, and you’ll be golden.
Room temperature eggs matter. I used to just crack cold eggs straight from the fridge into my batter, and I wondered why my bread sometimes turned out uneven. Room temperature eggs incorporate more evenly into the batter, creating a smoother texture. Take them out of the fridge about 30 minutes before you start, or if you’re in a hurry, place them in a bowl of warm water for 5 minutes.
The crumb topping is forgiving. If your crumb topping looks more like a paste than clumps, don’t panic. You probably added too much butter. Just stir in a tablespoon more flour until it looks crumbly again. If it’s too dry and powdery, drizzle in a little more melted butter. I’ve saved many a crumb topping this way.
Test for doneness carefully. Because of the crumb topping, it can be tricky to tell if the bread is done. The toothpick test is your friend here, but insert it through the side of the loaf rather than through the thick crumb layer on top. The crumbs can give you a false reading.
Let it cool completely. I get it—the smell is intoxicating, and you want to dig in immediately. But slicing into warm pumpkin bread will cause the crumb topping to slide right off. Patience pays off here. Give it at least an hour on the cooling rack before you even think about cutting.
Variations & Adaptations
One of the best things about this recipe is how adaptable it is. Here are some of my favorite variations:
- Gluten-Free Version: Substitute the all-purpose flour with a good gluten-free 1:1 baking flour blend. I’ve used Bob’s Red Mill with great results. The texture will be slightly more tender, but the crumb topping still works beautifully.
- Dairy-Free Option: Use a plant-based butter in the crumb topping. I’ve tried it with both Earth Balance and Miyoko’s, and both worked well. The rest of the recipe is naturally dairy-free since we’re using oil instead of butter in the batter.
- Add Mix-Ins: Fold in 1 cup of chocolate chips, chopped pecans, or dried cranberries along with the wet ingredients. Chocolate chips and pumpkin is a combination I didn’t believe in until I tried it, and now I can’t stop.
- Spice It Up: If you like things a little more intense, add a pinch of cardamom or allspice to the spice blend. I once added a teaspoon of pumpkin pie spice on top of the individual spices, and it was fantastic.
- Mini Loaves or Muffins: This batter works perfectly for mini loaf pans (bake for 25-30 minutes) or muffins (bake for 18-22 minutes). Just adjust the baking time and keep an eye on them.
My personal favorite variation? I add a handful of white chocolate chips to the batter and a sprinkle of flaky sea salt on top of the crumb topping before baking. The sweet-salty combo is absolutely irresistible.
Serving & Storage Suggestions
This pumpkin bread is at its absolute best served slightly warm, but room temperature is fantastic too. The crumb topping stays beautifully crunchy for about a day, so if you’re serving it at a gathering, I’d recommend baking it the day before and letting it cool completely overnight.
What to serve alongside: A cup of hot coffee or spiced chai is the perfect companion. For a dessert spread, serve it with a dollop of whipped cream or a scoop of vanilla ice cream. Honestly, it’s also incredible just on its own—no embellishments needed.
Storage: Wrap the cooled loaves tightly in plastic wrap or aluminum foil and store at room temperature for up to 4 days. The crumb topping will soften slightly over time, but the flavor only gets better. If you live in a humid climate (I feel your pain), store it in an airtight container instead.
Freezing: This bread freezes beautifully. Wrap the cooled, unfrosted loaves tightly in plastic wrap, then in a layer of foil, and freeze for up to 3 months. Thaw overnight in the refrigerator, then bring to room temperature before serving. You can also freeze individual slices for quick breakfasts or snacks.
Reheating: To revive that just-baked texture, pop a slice in the microwave for 15 seconds or in a 300°F oven for about 5 minutes. The crumb topping won’t be quite as crunchy as day one, but it’ll still be delicious.
Nutritional Information & Benefits
While I wouldn’t call this a health food, it does have some redeeming qualities. Here’s the approximate nutritional breakdown per slice (based on 12 slices per loaf):
| Nutrient | Amount per slice |
|---|---|
| Calories | 320 |
| Total Fat | 14g |
| Saturated Fat | 5g |
| Carbohydrates | 46g |
| Fiber | 2g |
| Sugar | 28g |
| Protein | 4g |
| Vitamin A | 80% DV |
Pumpkin is packed with vitamin A, which is great for eye health and immune function. It’s also a good source of fiber, which helps keep you full. The eggs add protein, and the spices—cinnamon, ginger, nutmeg—have anti-inflammatory properties. So while this is definitely a treat, it’s not entirely without benefits. I love knowing that I’m getting a little nutritional boost with every delicious bite.
Dietary considerations: This recipe contains gluten, eggs, and dairy (in the crumb topping). For a gluten-free or dairy-free version, see the variations section above.
Conclusion
This pumpkin bread with crumb topping has become my signature dish for fall gatherings, and I honestly can’t imagine the season without it. It’s the recipe that makes people close their eyes and smile, the one that prompts text messages the next day asking, “Can I get that recipe?” It’s forgiving enough for beginner bakers and impressive enough to steal the show at any holiday table.
I hope you’ll make it your own. Add your favorite mix-ins, adjust the spices to your taste, or double the crumb topping (I won’t tell). The best recipes are the ones that evolve with the people who make them. And if you try it, I’d love to hear how it turns out. Drop a comment below and let me know if your family loved it as much as mine does. Happy baking, friends—you’ve got this.
Frequently Asked Questions
Can I use fresh pumpkin instead of canned?
Absolutely, but you’ll need to roast and puree it first. Fresh pumpkin has more water content than canned, so you might want to strain the puree through a cheesecloth or paper towel to remove excess moisture. Otherwise, the bread could turn out too wet.
Why did my crumb topping sink into the batter?
This usually happens if the batter is too thin or if you press the crumb topping into the batter. Make sure your batter is thick enough (it should be scoopable, not runny) and gently sprinkle the crumb topping on top without pressing down.
Can I make this recipe into muffins instead?
Yes! The batter works perfectly for muffins. Fill greased muffin tins about two-thirds full, add the crumb topping, and bake at 350°F for 18-22 minutes. You’ll get about 18-20 muffins.
How do I know when the bread is fully baked?
Insert a toothpick into the center of the loaf, but go in from the side rather than through the crumb topping. The toothpick should come out clean or with just a few moist crumbs. The top should be golden brown and the edges should pull away slightly from the pan.
Can I reduce the sugar in this recipe?
You can reduce the granulated sugar by up to ¼ cup without significantly affecting the texture, but I wouldn’t recommend reducing the brown sugar since it contributes to both flavor and moisture in the crumb topping. The bread might be slightly less tender with less sugar overall.
Pin This Recipe!
Ultimate Pumpkin Bread with Crumb Topping
This incredibly moist and tender pumpkin bread is topped with a thick, buttery crumb topping that stays crunchy even the next day. It’s the perfect fall treat for gatherings, made with simple pantry ingredients and a secret trick for the best texture.
- Prep Time: 20 minutes
- Cook Time: 55 minutes
- Total Time: 1 hour 15 minutes
- Yield: 24 servings (2 loaves, 12 slices each) 1x
- Category: Dessert
- Cuisine: American
Ingredients
- 2 ½ cups (315g) all-purpose flour
- 1 ½ cups (300g) granulated sugar
- ½ cup (100g) packed brown sugar
- 1 ½ teaspoons baking soda
- 1 teaspoon salt
- 2 teaspoons ground cinnamon
- 1 teaspoon ground nutmeg
- ½ teaspoon ground ginger
- ¼ teaspoon ground cloves
- 1 can (15 oz or 425g) pumpkin puree (100% pure pumpkin)
- 4 large eggs, at room temperature
- 1 cup (240ml) vegetable oil
- 2 teaspoons vanilla extract
- ¼ cup (60ml) water
- 1 ½ cups (190g) all-purpose flour (for crumb topping)
- 1 cup (200g) packed brown sugar (for crumb topping)
- 1 teaspoon ground cinnamon (for crumb topping)
- ¼ teaspoon salt (for crumb topping)
- ½ cup (1 stick or 113g) unsalted butter, melted (for crumb topping)
Instructions
- Preheat your oven to 350°F (175°C). Position the rack in the center of the oven. Line two 9×5-inch loaf pans with parchment paper, leaving a little overhang on the long sides.
- Make the crumb topping first. In a medium bowl, whisk together the flour, brown sugar, cinnamon, and salt. Pour the melted butter over the mixture and stir with a fork until it forms clumps. Set aside.
- In a large bowl, whisk together the flour, granulated sugar, brown sugar, baking soda, salt, cinnamon, nutmeg, ginger, and cloves until evenly distributed.
- In a separate large bowl, whisk together the pumpkin puree, eggs, vegetable oil, vanilla extract, and water until smooth.
- Pour the wet ingredients into the bowl of dry ingredients. Use a rubber spatula to fold them together gently until no streaks of flour remain. Do not overmix.
- Divide the batter evenly between the two prepared loaf pans. It should come about two-thirds of the way up the sides.
- Sprinkle the crumb mixture generously over the top of each loaf. Do not press it into the batter.
- Bake for 50-60 minutes, until a toothpick inserted into the center (through the side, not the crumb topping) comes out clean or with a few moist crumbs. If the crumb topping browns too quickly, tent loosely with aluminum foil around the 30-minute mark.
- Let the loaves cool in the pans for 15 minutes. Then use the parchment overhang to lift them out and transfer to a cooling rack. Cool completely before slicing.
Notes
For a gluten-free version, substitute all-purpose flour with a 1:1 gluten-free baking flour blend. For a dairy-free option, use plant-based butter in the crumb topping. To add mix-ins, fold in 1 cup of chocolate chips, chopped pecans, or dried cranberries. For mini loaves, bake 25-30 minutes; for muffins, bake 18-22 minutes. Store wrapped at room temperature for up to 4 days, or freeze for up to 3 months.
Nutrition
- Serving Size: 1 slice (1/12 of one
- Calories: 320
- Sugar: 28
- Sodium: 320
- Fat: 14
- Saturated Fat: 5
- Carbohydrates: 46
- Fiber: 2
- Protein: 4
Keywords: pumpkin bread, crumb topping, fall recipe, easy pumpkin bread, moist pumpkin bread, pumpkin loaf, Thanksgiving dessert


