There used to be a tiny Japanese-Korean fusion place tucked behind a laundromat on the west side of Portland that made the most ridiculous sticky chicken I’ve ever had. When they shut down in 2020 — just quietly, with a handwritten sign taped to the door — I genuinely grieved for weeks. I mean, I actually called my sister to complain about it. After about twelve tries — some burnt, some too salty, one that my husband politely called “aggressively garlicky” — I finally got it. This sticky honey garlic chicken thighs recipe is that exact flavor memory, recreated in my own kitchen, and honestly, it’s better than the original.
The thing about recreating a restaurant dish is you never really know what you’re chasing until you get close. Is it the sweetness? The way the sauce clings to every fold of the chicken skin? That little punch of garlic that hits you after the first bite? For me, it was all of it — that perfect balance of sticky, savory, sweet, and sharp that made me close my eyes every single time. And let me tell you, the first time I nailed this version, I stood over the stove eating straight from the pan. No shame. Maybe you’ve been there too, chasing a flavor you just can’t let go of.
What I love about this recipe is how fast it comes together. We’re talking about sticky honey garlic chicken thighs in 30 minutes flat, from fridge to table. No marinating overnight, no complicated techniques, just honest cooking that delivers restaurant-quality results. The secret is in the layering — searing the chicken until the skin crisps up, then letting it finish cooking in that glossy honey garlic sauce until everything gets beautifully caramelized. It’s the kind of meal that makes a Tuesday night feel special without any of the stress. And honestly? I keep making it because it works every single time.
Why You’ll Love This Recipe
Let me be straight with you — I’ve tested this recipe more times than I care to admit. I’ve adjusted the honey-to-soy-sauce ratio, played with cooking times, and even tried it with different cuts of chicken. What I landed on is the version that delivers every single time, and here’s why it works:
- Quick & Easy: From start to finish, these sticky honey garlic chicken thighs are ready in under 30 minutes. Perfect for those nights when you want something amazing but don’t have hours to spend in the kitchen.
- Simple Ingredients: You probably have most of these in your pantry right now. Honey, soy sauce, garlic, chicken thighs — that’s really the heart of it. No fancy grocery store runs required.
- Perfect for Busy Weeknights: This is the kind of recipe that saves dinner when you’re tired, hungry, and out of ideas. It feels special but takes almost no effort.
- Crowd-Pleaser: I’ve served this to picky eaters, spice lovers, and even my mother-in-law who “doesn’t really like Asian flavors.” Every single plate came back clean.
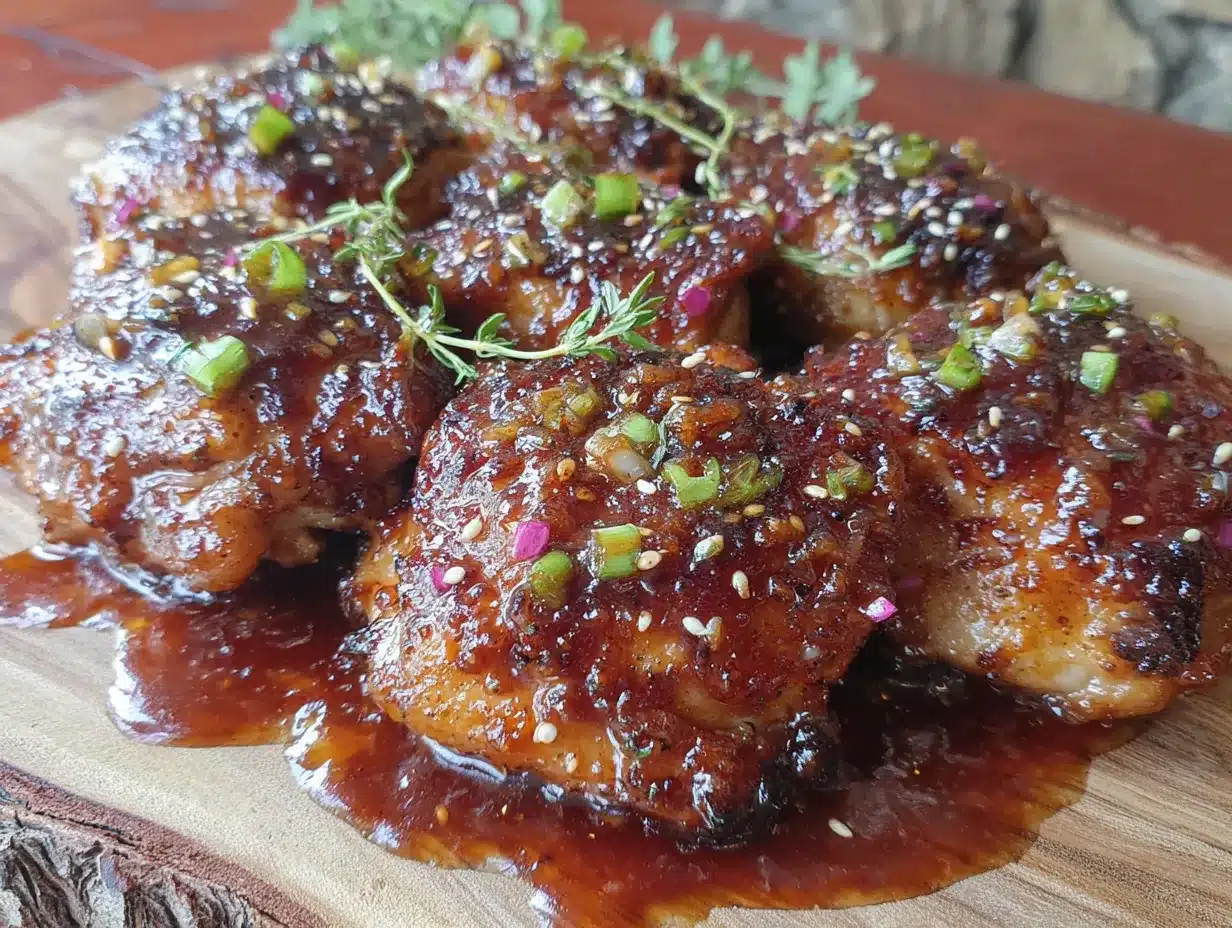
- Unbelievably Delicious: The sauce reduces into this thick, glossy coating that clings to the chicken like it was meant to be there. The balance of sweet honey, savory soy, and punchy garlic is absolutely next-level.
What makes this recipe different from all the other honey garlic chicken recipes out there? It’s the technique. Instead of just dumping sauce over chicken and hoping for the best, we sear the thighs first to get that crispy skin, then let them finish cooking in the sauce so they absorb all that flavor without getting soggy. It’s a small thing, but it makes a huge difference. The result is chicken that’s sticky on the outside, juicy on the inside, and absolutely packed with flavor.
This isn’t just good — it’s the kind of recipe that makes you close your eyes after the first bite. It’s comfort food reimagined for real life: faster, easier, but with the same soul-soothing satisfaction. Perfect for impressing guests without stress, or turning a simple Tuesday dinner into something you’ll actually look forward to.
What Ingredients You Will Need
This recipe uses simple, wholesome ingredients that work together to create that signature sticky, savory-sweet glaze. Most of these are pantry staples, which is exactly what you want in a 30-minute meal.
For the Chicken
- 6 bone-in, skin-on chicken thighs (about 2 pounds total) — I prefer thighs for their juiciness and flavor, but you can use boneless if you’re in a hurry (just reduce cooking time by about 5 minutes)
- 1 tablespoon olive oil — for searing; avocado oil works great too if you have it
- Salt and black pepper — to taste; don’t be shy with the seasoning
For the Sticky Honey Garlic Sauce
- 1/3 cup honey — use a good quality honey for the best flavor; I like the local stuff from the farmer’s market
- 1/4 cup low-sodium soy sauce — I recommend Kikkoman or San-J; tamari works if you’re gluten-free
- 4 cloves garlic, minced — fresh garlic is non-negotiable here; don’t even think about using the jarred stuff
- 1 tablespoon rice vinegar — this adds a subtle tang that balances the sweetness; apple cider vinegar works in a pinch
- 1 tablespoon brown sugar — packed; this helps create that sticky, caramelized coating
- 1 teaspoon sesame oil — optional but highly recommended for that toasty, nutty note
- 1/2 teaspoon red pepper flakes — optional; adds a tiny kick without making it spicy
- 1 tablespoon cornstarch mixed with 2 tablespoons water — this is your thickening agent; don’t skip it or your sauce won’t get that gorgeous glossy texture
For Garnish (Optional but Recommended)
- Sesame seeds — toasted white or black seeds add a nice visual touch
- Chopped green onions — for freshness and color
- Fresh cilantro — if you’re a cilantro person
One thing I’ve learned from testing this recipe over and over: the quality of your soy sauce and honey really matters. Cheap honey can taste watery, and low-quality soy sauce can be overwhelmingly salty. I use a medium-priced honey from a local apiary and Kikkoman soy sauce, and the results are consistently excellent. If you’re looking for a gluten-free option, tamari works beautifully — just make sure it’s low-sodium so you can control the salt level.
For the garlic, I cannot stress this enough: use fresh cloves and mince them yourself. Pre-minced garlic from a jar has a different flavor profile — it’s more mellow and slightly sour. Fresh garlic gives you that sharp, aromatic punch that makes this sauce so memorable. Trust me on this one.
Equipment Needed
You don’t need a lot of fancy equipment for this recipe, which is part of why I love it. Here’s what you’ll need:
- Large skillet or frying pan — a 12-inch skillet is ideal; cast iron works beautifully because it holds heat well and gives you that perfect sear. I use my trusty Lodge cast iron, and it’s never let me down. If you don’t have cast iron, any heavy-bottomed skillet will work.
- Tongs — for flipping the chicken without piercing the skin; silicone-tipped ones are great for not scratching your pan
- Small bowl — for mixing the sauce ingredients together before cooking
- Sharp knife and cutting board — for mincing garlic and prepping garnishes
- Measuring spoons and cups — accuracy matters, especially with the cornstarch slurry
- Whisk or fork — for mixing the cornstarch slurry until smooth
If you don’t have a cast iron skillet, don’t worry. A non-stick pan works perfectly fine — just be aware that you won’t get quite as deep of a sear on the chicken skin. A stainless steel pan is also great, but make sure it’s preheated properly to prevent sticking. And if you’re using a non-stick pan, skip the metal tongs and use silicone or wooden utensils to protect the surface.
One tip: if you have a splatter screen, use it. The chicken skin can pop and spatter while searing, and this keeps your stovetop (and you) clean. I learned this the hard way after a few oil burns on my arm.
Preparation Method
Alright, let’s get cooking. These sticky honey garlic chicken thighs come together fast, so I recommend reading through the entire method once before you start. Trust me — having everything ready makes this process smooth and stress-free.
- Pat the chicken dry — Use paper towels to thoroughly dry the chicken thighs on both sides. This is crucial for getting that crispy skin. Season generously with salt and pepper on both sides. Let them sit at room temperature for about 10 minutes while you prep the sauce.
- Make the sauce — In a small bowl, whisk together the honey, soy sauce, minced garlic, rice vinegar, brown sugar, sesame oil, and red pepper flakes (if using). Set aside. In a separate small bowl, mix the cornstarch with 2 tablespoons of water until smooth. Set that aside too — you’ll add it later.
- Preheat your skillet — Place your skillet over medium-high heat and add the olive oil. Let it heat until the oil shimmers — about 2 minutes. You want the pan hot enough that the chicken sizzles immediately when it hits the surface.
- Sear the chicken — Place the chicken thighs skin-side down in the hot skillet. Don’t crowd them — if your pan is too small, work in batches. Let them cook undisturbed for 5-6 minutes until the skin is golden brown and crispy. The skin should release easily from the pan when it’s ready; if it sticks, give it another minute.
- Flip and cook — Using tongs, flip the chicken thighs over. Cook for another 4-5 minutes on the second side. The chicken should be golden brown on both sides and almost cooked through. Remove the chicken from the skillet and set aside on a plate.
- Pour in the sauce — Carefully pour the honey garlic sauce into the hot skillet. It will bubble up immediately — that’s normal. Stir it around to scrape up any browned bits from the bottom of the pan (that’s where all the flavor is). Let it simmer for about 1 minute.
- Add the cornstarch slurry — Give the cornstarch mixture a quick stir (it settles fast), then pour it into the simmering sauce. Stir constantly for about 30 seconds to 1 minute until the sauce thickens and becomes glossy. You’ll see it transform from a thin liquid into a syrupy glaze.
- Return the chicken to the pan — Place the chicken thighs back into the skillet, skin-side up. Spoon the sauce over the tops of the chicken. Reduce the heat to medium-low and let everything simmer together for 5-7 minutes. The sauce will continue to thicken and caramelize around the edges.
- Check for doneness — The chicken is ready when it reaches an internal temperature of 165°F (74°C) at the thickest part. If you don’t have a meat thermometer, cut into one thigh — the juices should run clear and there should be no pink near the bone.
- Rest and serve — Remove the skillet from heat. Let the chicken rest for 2-3 minutes — this helps the sauce set and the juices redistribute. Sprinkle with sesame seeds and chopped green onions. Serve immediately over rice or with your favorite vegetables.
A few things I’ve learned the hard way: First, don’t rush the searing step. That crispy skin is what makes this dish special, and it takes a full 5-6 minutes to develop properly. Second, when you add the cornstarch slurry, stir constantly — it can clump up if you walk away. And third, the sauce will continue to thicken as it cools, so don’t worry if it looks a little thin when you first add the chicken back in. By the time you’re ready to serve, it’ll be perfectly sticky.
If the sauce starts looking too thick before the chicken is done, add a tablespoon of water at a time to thin it out. And if it’s not thick enough after 7 minutes, let it simmer a little longer — patience pays off here.
Cooking Tips & Techniques
After making this recipe more times than I can count, I’ve picked up a few tricks that make a real difference. Let me share what I’ve learned — including some mistakes I’ve made so you don’t have to.
Get the pan hot enough — This is the number one mistake I see people make. If your pan isn’t hot enough when you add the chicken, the skin won’t crisp up properly. You want that immediate sizzle when the chicken hits the pan. A good test: flick a drop of water into the oil — if it dances and evaporates immediately, you’re ready.
Don’t move the chicken too early — I know it’s tempting to peek, but let the chicken cook undisturbed for the full 5-6 minutes on the first side. The skin needs that time to develop a deep golden crust. If you try to flip it too early, the skin will stick to the pan and tear. Trust the process — it’ll release when it’s ready.
Watch the sauce carefully — Honey-based sauces can go from perfectly sticky to burnt in about 30 seconds. Keep an eye on it, especially in the final simmering stage. If you notice the edges of the sauce starting to darken too much, reduce the heat immediately.
Use low-sodium soy sauce — Regular soy sauce will make this dish overwhelmingly salty. Low-sodium gives you control over the seasoning, and you can always add more salt at the end if needed. I learned this lesson after one particularly salty batch that even my husband couldn’t finish.
Let the chicken rest — I know you’re hungry, but those 2-3 minutes of resting time are crucial. The sauce sets, the juices redistribute, and the chicken stays moist instead of drying out. Use that time to steam some rice or toss a salad.
Double the sauce if you’re a sauce person — I always make extra sauce because I love pouring it over rice. Just be aware that if you double the sauce, you’ll need to simmer it a bit longer to get it to the right consistency. And if you’re serving a crowd, definitely double everything — these thighs disappear fast.
Variations & Adaptations
One of the best things about this recipe is how adaptable it is. Here are some variations I’ve tried and loved:
Spicy Honey Garlic Chicken — If you like heat, add 1-2 teaspoons of sriracha or gochujang (Korean chili paste) to the sauce. I tried this version last month and it was incredible — the heat cuts through the sweetness beautifully. You can also add fresh sliced chili peppers as a garnish.
Garlic Lovers’ Version — Can’t get enough garlic? Use 6-8 cloves instead of 4. I’ve done this many times and it’s never too much. Just make sure you mince them finely so they distribute evenly through the sauce. Roasted garlic would also work here — just mash it into the sauce before adding the cornstarch slurry.
Baked Version — For a hands-off approach, sear the chicken as directed, then transfer everything to a baking dish and bake at 375°F (190°C) for 20-25 minutes. The sauce will caramelize beautifully in the oven. This is great when you’re making a larger batch.
Air Fryer Adaptation — I’ve tested this in the air fryer and it works surprisingly well. Cook the chicken at 380°F (193°C) for 12-15 minutes, flipping halfway through. Then toss the cooked chicken in the sauce (made separately on the stovetop) and return to the air fryer for 2-3 more minutes to get the sauce sticky.
Gluten-Free Option — Simply swap the soy sauce for tamari or coconut aminos. Everything else in the recipe is naturally gluten-free. I’ve made this for friends with celiac disease and they couldn’t tell the difference.
Vegetable Add-Ins — Throw in some broccoli florets, bell pepper strips, or snap peas during the last 5 minutes of cooking. They’ll soak up the sauce and become a delicious side dish. I often do this when I want a one-pan meal.
Serving & Storage Suggestions
These sticky honey garlic chicken thighs are incredibly versatile when it comes to serving. Here’s how I like to enjoy them:
Serving Temperature — Serve hot, straight from the skillet. The sauce is at its stickiest and most flavorful when it’s fresh. If you’re making these for a party, keep them warm in a low oven (200°F / 93°C) covered loosely with foil for up to 30 minutes.
What to Serve With — Steamed jasmine rice is my go-to — it soaks up all that extra sauce perfectly. For a low-carb option, try cauliflower rice or a simple green salad. I also love serving these with roasted broccoli or sautéed bok choy. The slight bitterness of the greens balances the sweetness of the sauce.
Beverage Pairings — A cold beer (something light like a lager or pilsner) is perfect with these. For wine drinkers, try a Riesling or a lightly oaked Chardonnay. The sweetness in the wine complements the honey glaze beautifully. And if you’re going non-alcoholic, iced green tea with a splash of lemon is refreshing and cleansing.
Storage Instructions — Store leftover chicken in an airtight container in the refrigerator for up to 4 days. The sauce will thicken as it cools, which is totally normal. When reheating, add a splash of water or chicken broth to loosen the sauce back up.
Freezing — These freeze beautifully. Place the cooled chicken and sauce in a freezer-safe container and freeze for up to 3 months. Thaw overnight in the refrigerator, then reheat in a skillet over medium heat, adding a little water to revive the sauce. I’ve done this multiple times and the flavor stays just as good.
Reheating Tips — The best way to reheat is in a skillet over medium heat, flipping occasionally, until the chicken is heated through and the sauce is bubbling. The microwave works in a pinch, but the skin won’t be as crispy. If you have an air fryer, that’s actually my favorite reheating method — 5 minutes at 350°F (177°C) and the skin gets almost as crispy as the first time.
One thing I’ve noticed: the flavors actually deepen and meld together even more after a day in the fridge. So if you can stand to wait, leftovers are sometimes even better than the fresh version. The honey and garlic really get a chance to marry together overnight.
Nutritional Information & Benefits
I’m not a nutritionist, but I do pay attention to what goes into my food. Here’s a rough breakdown of what you’re getting with these sticky honey garlic chicken thighs:
| Nutrient | Per Serving (1 thigh with sauce) |
|---|---|
| Calories | 320-350 |
| Protein | 28-32g |
| Total Fat | 15-18g |
| Saturated Fat | 4-5g |
| Carbohydrates | 18-22g |
| Sugar | 15-18g |
| Sodium | 600-700mg |
Note: These values are estimates and will vary based on specific ingredients and portion sizes.
Now, let’s talk about the health benefits. Chicken thighs are actually a great source of protein, iron, and B vitamins. They have more fat than chicken breasts, yes, but that fat is what keeps the meat juicy and flavorful — and it’s mostly unsaturated fat. The garlic in this recipe isn’t just for flavor; it’s known for its anti-inflammatory and immune-boosting properties. And honey? It’s a natural sweetener that contains antioxidants and has antibacterial properties. I’m not saying this is health food, but it’s certainly not junk food either.
For those watching their sodium, using low-sodium soy sauce is key. You can also reduce the honey slightly if you’re cutting back on sugar — just know that the sauce won’t be quite as sticky. And if you’re following a specific diet plan, this recipe can easily fit into a moderate-carb lifestyle when served with vegetables instead of rice.
I personally love that this recipe feels indulgent without actually being over-the-top. It’s the kind of meal that satisfies a craving without leaving you feeling heavy or guilty. That balance is exactly what I look for in my everyday cooking.
Conclusion
These sticky honey garlic chicken thighs are more than just a quick dinner — they’re a reminder that amazing food doesn’t have to be complicated. In less than 30 minutes, you can create something that tastes like it came from a restaurant kitchen, using ingredients you probably already have in your pantry.
What I love most about this recipe is how forgiving it is. The first time I made it, I forgot to add the cornstarch slurry and the sauce was a little thin — it was still delicious. The second time, I accidentally used too much garlic and my husband’s breath was potent for hours — still worth it. The point is, this recipe works even when you make mistakes. And when you get it right? It’s absolutely magical.
I’d love to hear how yours turns out. Did you add extra spice? Serve it with something unexpected? Burn the garlic and start over like I did that one time? Drop a comment below and let me know. And if you’re looking for another quick weeknight winner, you might want to check out my crispy garlic chicken recipe — it uses a similar technique but with a completely different flavor profile.
Until next time, happy cooking — and don’t forget to save some sauce for your rice. Trust me on that one.
Frequently Asked Questions
Can I use chicken breasts instead of thighs?
Absolutely, but you’ll need to adjust the cooking time. Boneless, skinless chicken breasts cook faster — about 4-5 minutes per side for searing, then 3-4 minutes simmering in the sauce. Just be careful not to overcook them, or they’ll dry out. Chicken thighs are more forgiving because of their higher fat content, which is why I prefer them for this recipe.
How do I prevent the sauce from burning?
This is a common issue with honey-based sauces because sugar caramelizes quickly. The key is to keep the heat at medium-low once you add the chicken back to the sauce, and stir occasionally. If you notice the edges of the sauce darkening too fast, reduce the heat immediately. Adding a splash of water can also help if things look too thick.
Can I make this recipe ahead of time?
Yes! These sticky honey garlic chicken thighs actually taste great as leftovers. Make the full recipe, let it cool, and store it in an airtight container in the refrigerator for up to 4 days. Reheat in a skillet with a splash of water to revive the sauce. The flavors deepen overnight, so some people actually prefer the leftovers.
Is this recipe gluten-free?
It can be! The only ingredient that contains gluten is the soy sauce. Simply swap it for tamari or coconut aminos, and the rest of the recipe is naturally gluten-free. Just double-check your specific brands of honey and rice vinegar to make sure they’re certified gluten-free if that’s a concern.
What can I use instead of honey to make it less sweet?
If you want to reduce the sweetness, you can replace half the honey with additional soy sauce or chicken broth. Maple syrup works as a substitute but has a different flavor profile. For a sugar-free option, try using monk fruit sweetener or a sugar-free honey substitute — just know that the texture might be slightly different since honey contributes to the stickiness of the sauce.
Pin This Recipe!
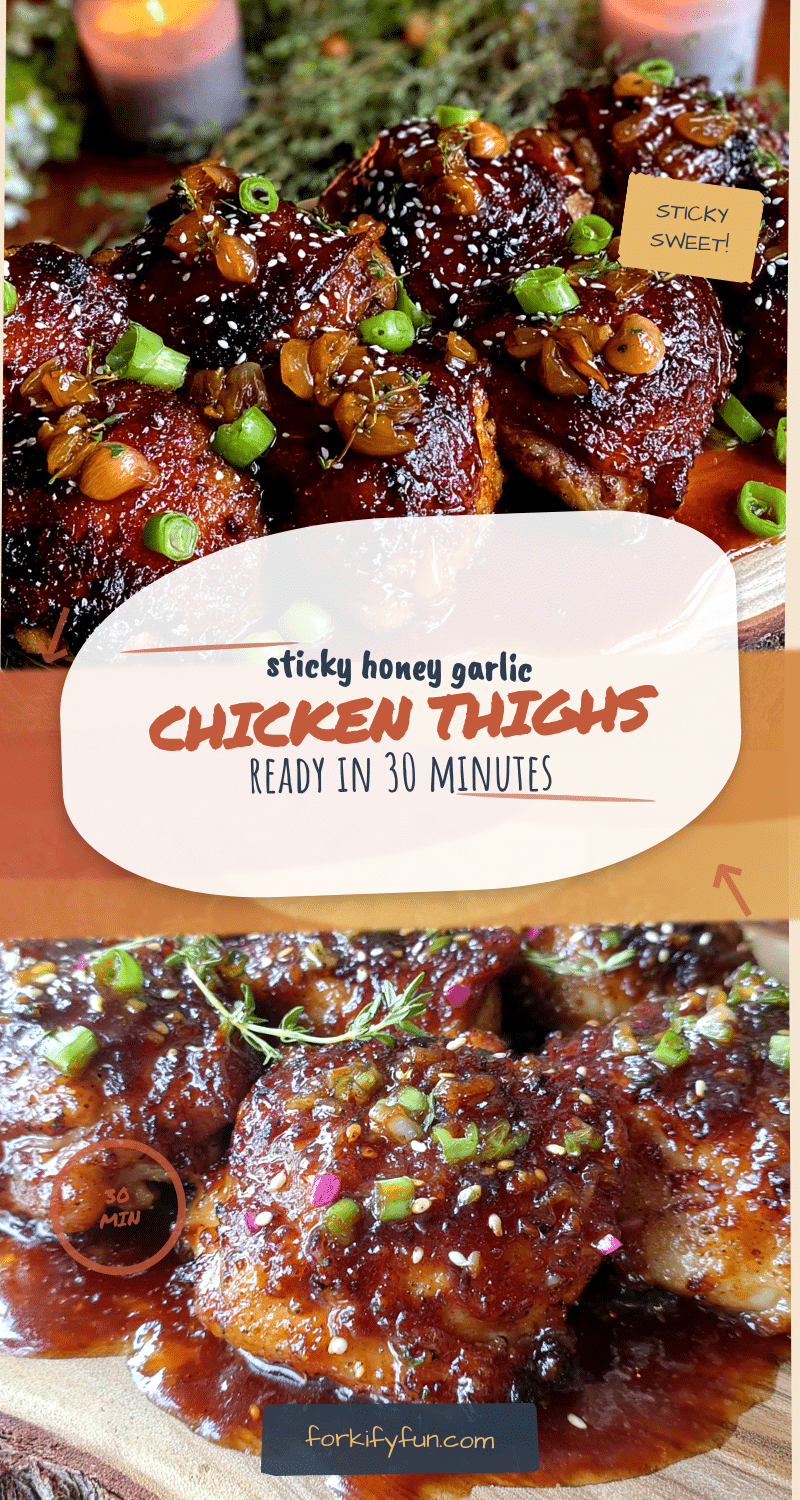
Sticky Honey Garlic Chicken Thighs in 30 Minutes
These sticky honey garlic chicken thighs are a quick and easy weeknight dinner, ready in just 30 minutes. With a perfect balance of sweet, savory, and garlicky flavors, this recipe delivers restaurant-quality results using simple pantry ingredients.
- Prep Time: 10 minutes
- Cook Time: 20 minutes
- Total Time: 30 minutes
- Yield: 6 servings 1x
- Category: Main Course
- Cuisine: Asian Fusion
Ingredients
- 6 bone-in, skin-on chicken thighs (about 2 pounds total)
- 1 tablespoon olive oil
- Salt and black pepper to taste
- 1/3 cup honey
- 1/4 cup low-sodium soy sauce
- 4 cloves garlic, minced
- 1 tablespoon rice vinegar
- 1 tablespoon brown sugar, packed
- 1 teaspoon sesame oil (optional)
- 1/2 teaspoon red pepper flakes (optional)
- 1 tablespoon cornstarch mixed with 2 tablespoons water
- Sesame seeds for garnish (optional)
- Chopped green onions for garnish (optional)
- Fresh cilantro for garnish (optional)
Instructions
- Pat the chicken dry with paper towels. Season generously with salt and pepper on both sides. Let sit at room temperature for about 10 minutes.
- In a small bowl, whisk together honey, soy sauce, minced garlic, rice vinegar, brown sugar, sesame oil, and red pepper flakes (if using). Set aside.
- In a separate small bowl, mix cornstarch with 2 tablespoons water until smooth. Set aside.
- Place a large skillet over medium-high heat and add olive oil. Heat until the oil shimmers, about 2 minutes.
- Place chicken thighs skin-side down in the hot skillet. Cook undisturbed for 5-6 minutes until the skin is golden brown and crispy.
- Flip the chicken using tongs and cook for another 4-5 minutes. Remove chicken from skillet and set aside on a plate.
- Pour the honey garlic sauce into the hot skillet. Stir to scrape up any browned bits. Let simmer for about 1 minute.
- Stir the cornstarch slurry, then pour it into the simmering sauce. Stir constantly for 30 seconds to 1 minute until the sauce thickens and becomes glossy.
- Return the chicken to the skillet, skin-side up. Spoon sauce over the tops. Reduce heat to medium-low and simmer for 5-7 minutes.
- Check for doneness: internal temperature should reach 165°F (74°C) at the thickest part, or juices run clear when cut.
- Remove from heat and let rest for 2-3 minutes. Sprinkle with sesame seeds and chopped green onions. Serve immediately over rice or with vegetables.
Notes
Don’t rush the searing step for crispy skin. Stir the cornstarch slurry constantly to avoid clumps. The sauce will continue to thicken as it cools. If the sauce becomes too thick before the chicken is done, add a tablespoon of water at a time. For extra sauce, double the sauce ingredients and simmer longer.
Nutrition
- Serving Size: 1 thigh with sauce
- Calories: 335
- Sugar: 16.5
- Sodium: 650
- Fat: 16.5
- Saturated Fat: 4.5
- Carbohydrates: 20
- Protein: 30
Keywords: sticky honey garlic chicken, honey garlic chicken thighs, 30 minute chicken, easy chicken dinner, weeknight chicken, Asian chicken thighs