I wasn’t expecting cooking advice from the quiet accountant who lives two doors down, but there I was, wrestling a tangled string of Halloween lights on my front porch last October, listening to him describe exactly how to make the best party dessert I’d ever served. His name is Greg, and for three years, I only knew him as the guy who leaves for work at 6:15 AM sharp and waters his petunias at dusk. But that evening, covered in spiderweb decorations and fighting with a ladder, Greg walked over, handed me a cup of coffee from his thermos, and said, “You know what always saves my wife’s Halloween party? Those little dirt cups with the gummy worms.” Honestly, I almost laughed. Greg the accountant? Recommending dessert? But there was something about the way he said it—like he’d seen the magic happen year after year.
So I tried his version of spooky easy Halloween dirt cups the next weekend. Let me tell you, I’ve made a lot of desserts in my time. I’ve burned cookies, I’ve had cheesecakes crack, and I once forgot the sugar in a batch of brownies (don’t ask). But these little cups of chocolate pudding, crushed cookies, and gummy worms? They worked on the first try. No fuss, no stress, and the kids at the party literally fought over who got the one with the most worms. I mean, that’s the kind of chaos you want at a Halloween gathering, right?
The thing about these dirt cups is that they look like you spent hours creating something spooky and elaborate. But between you and me, they come together in about fifteen minutes of actual work. The hardest part is not eating all the Oreos before you crush them. Maybe you’ve been there—staring at a bag of cookies and convincing yourself that “one more” won’t ruin the recipe. It will. Trust me on that one.
I’ve made these for three Halloween parties now, and every single time, someone asks for the recipe. That’s why I’m sharing it with you today. Because sometimes the best recipes come from the most unexpected places—like a quiet neighbor with a coffee thermos and a surprisingly good dessert tip.
Why You’ll Love This Recipe
Let me be straight with you: I’ve tested this recipe about a dozen times across different gatherings—birthday parties, family dinners, and even a work potluck. It passed every single test with flying colors. Here’s why this version of spooky easy Halloween dirt cups stands out from every other recipe you’ll find online.
- Quick & Easy: You can have these ready in under 20 minutes of active prep time. No baking, no complicated techniques, and no stress when guests are about to arrive.
- Simple Ingredients: Everything you need is probably already in your kitchen or at the nearest grocery store. No fancy imports or specialty baking sections required.
- Perfect for Halloween Parties: These are designed to impress a crowd. You can make them in individual cups for easy serving, and they look genuinely spooky on a dessert table.
- Crowd-Pleaser: Kids love the gummy worms. Adults love the creamy chocolate pudding and crunchy cookie texture. Honestly, I’ve never seen anyone turn one down.
- Make-Ahead Friendly: You can prepare these a full day before your party. The flavors actually get better as they sit, and you’ll have one less thing to worry about when guests arrive.
What makes this recipe different from the rest? It’s the texture. Most dirt cup recipes end up with soggy cookies or pudding that’s too runny. I’ve figured out the exact layering technique that keeps the cookie crumbs crunchy and the pudding perfectly thick. Plus, I add a tiny pinch of salt to the pudding mixture—trust me on this one—that makes the chocolate flavor pop in a way you won’t expect.
This is the kind of dessert that makes you close your eyes after the first bite. It’s comfort food with a spooky twist—faster, easier, and more fun than anything else you could make for a Halloween gathering. Perfect for impressing guests without breaking a sweat, or turning a simple get-together into something memorable.
What Ingredients You Will Need
This recipe uses simple, everyday ingredients to deliver that perfect combination of creamy, crunchy, and spooky. Most of these are pantry staples, so you probably won’t need a special trip to the store.
For the Pudding Layer
- 2 packages (3.9 ounces each) instant chocolate pudding mix (I recommend Jell-O brand for the best texture)
- 3 cups cold whole milk (2% works too, but whole milk gives a richer, creamier result)
- 1 teaspoon vanilla extract (pure, not imitation, if you have it)
- Pinch of sea salt (this is my secret trick—it deepens the chocolate flavor)
For the Dirt Crust
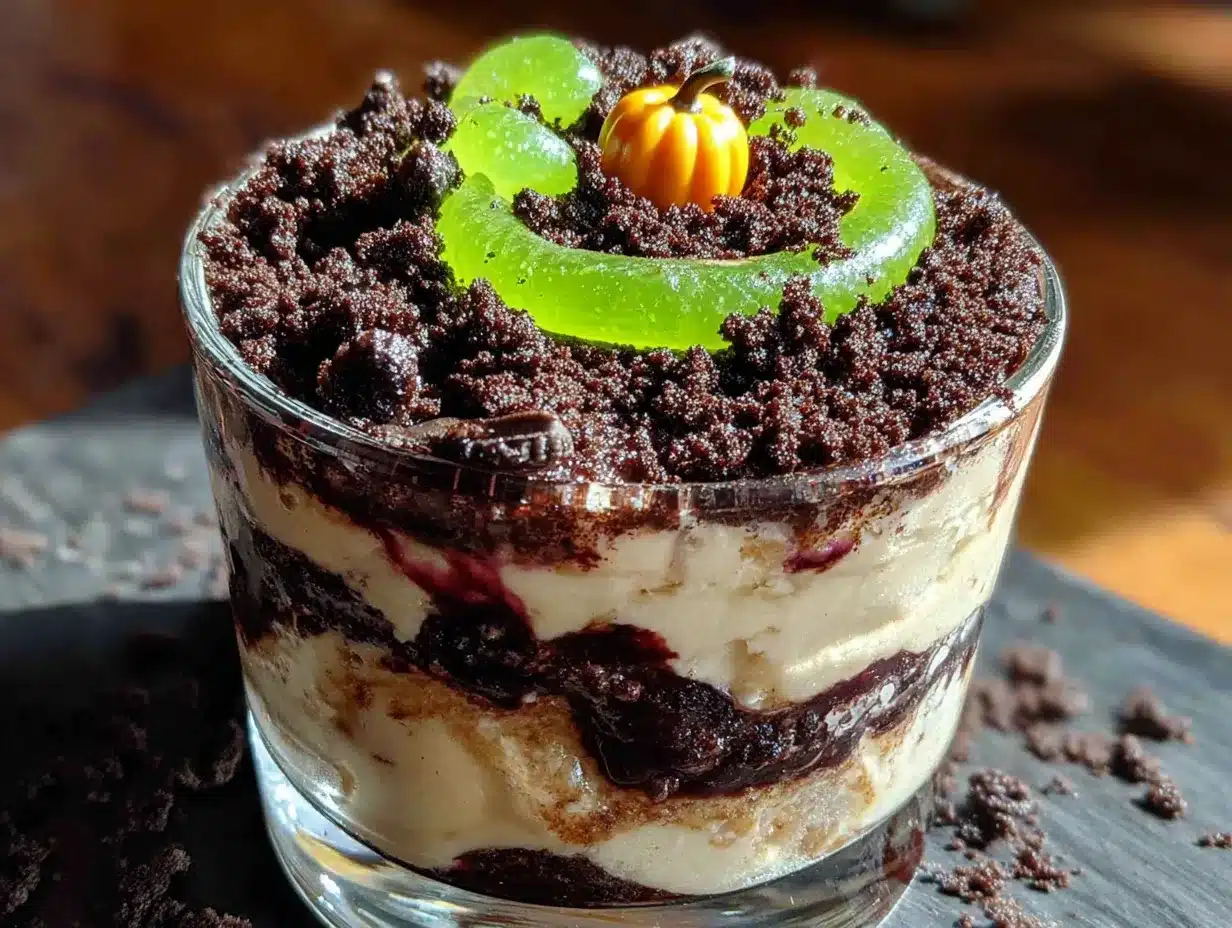
- 1 package (14.3 ounces) Oreo cookies (regular, not double-stuffed—you want the right cookie-to-cream ratio)
- 3 tablespoons unsalted butter, melted (adds richness and helps the crumbs stick together)
For the Spooky Decorations
- 1 package (4.5 ounces) gummy worms (I prefer the sour ones for extra flavor contrast)
- Optional: Halloween-themed sprinkles, candy eyeballs, or plastic spider rings for extra flair
- Optional: 1 cup whipped topping (Cool Whip or homemade—adds a light, creamy layer if you want extra height)
When selecting your pudding mix, look for the instant variety, not cook-and-serve. Instant pudding sets up much faster and gives you that perfect spoonable texture. For the Oreos, I’ve tried generic chocolate sandwich cookies, and honestly, they just don’t crush the same way. Stick with the real deal for that authentic dirt-like crumb.
If you’re dairy-free, you can substitute the whole milk with oat milk or full-fat coconut milk. The texture will be slightly different—coconut milk adds a subtle tropical note—but it still works beautifully. For a gluten-free version, use gluten-free chocolate sandwich cookies. They’re available at most major grocery stores now.
One last thing about the gummy worms: buy an extra bag. I’m not kidding. Between snacking and the inevitable “accidental” worm theft by little hands, you’ll want backup. Learn from my mistakes, friend.
Equipment Needed
You don’t need fancy equipment for these spooky easy Halloween dirt cups. That’s part of the beauty of this recipe. Here’s what you’ll need:
- 9 small cups or glasses: Clear plastic cups work best for showing off the layers. I use 8-ounce disposable cups from the party store—they’re cheap and make cleanup a breeze. Mason jars also look adorable if you want a more rustic vibe.
- Large mixing bowl: For the pudding. Any bowl works, but a glass or stainless steel bowl is easiest to clean.
- Whisk: For combining the pudding mix and milk. A balloon whisk works perfectly; no electric mixer needed.
- Food processor or zip-top bag: For crushing the Oreos. A food processor gives you the most consistent crumb, but a zip-top bag and a rolling pin work just as well. I’ve used both methods, and honestly, the bag method is more satisfying. There’s something therapeutic about smashing cookies after a long day.
- Measuring cups and spoons: For accuracy. Eyeballing works for some recipes, but pudding needs the right liquid-to-mix ratio.
- Spatula: For scraping every last bit of pudding into the cups. Waste not, want not.
If you don’t have a food processor, don’t worry. Place the Oreos in a sturdy zip-top bag, seal it, and go to town with a rolling pin or even a heavy skillet. My kids love this part—they take turns smashing the bag and giggling at the mess. It’s a great way to get little hands involved in the kitchen.
Preparation Method
Follow these steps carefully, and you’ll have a batch of spooky easy Halloween dirt cups that will steal the show at any party. I’ve included timing estimates and sensory cues so you know exactly what to look for at each stage.
- Crush the Oreos (5 minutes): Place all 36 Oreos in a food processor and pulse until you get fine crumbs that resemble potting soil. If using the bag method, place them in a zip-top bag, remove as much air as possible, and crush with a rolling pin until you have a mix of fine crumbs and small chunks. You want some texture, not powder. The crumbs should look like dark, rich dirt with tiny speckles of cream visible.
- Prepare the buttered crumbs (2 minutes): Transfer the crushed Oreos to a medium bowl. Pour the melted butter over the crumbs and stir with a fork until evenly distributed. The mixture should feel slightly damp and clump together when pressed between your fingers. Set aside about 3 tablespoons of this mixture for the final garnish on top.
- Make the pudding (5 minutes): In a large mixing bowl, whisk together both packages of instant chocolate pudding mix and the cold milk. Add the vanilla extract and the pinch of salt. Whisk vigorously for about 2 minutes until the mixture thickens. You’ll notice it going from thin and liquid to thick and creamy right before your eyes. It should be smooth, glossy, and hold soft peaks when you lift the whisk.
- Let the pudding set (5 minutes): Let the pudding sit at room temperature for 5 minutes. It will continue to thicken. Don’t skip this step—if you layer it too soon, the crumbs will sink into the pudding and you’ll lose that beautiful dirt-and-worm effect.
- Layer the cups (10 minutes): Spoon about 2 tablespoons of the buttered Oreo crumbs into the bottom of each cup. Press down gently with the back of a spoon to create an even base layer. Next, spoon or pipe the pudding on top, filling each cup about three-quarters full. If you want to add a layer of whipped topping, now’s the time—spoon it over the pudding and spread gently.
- Top with dirt (3 minutes): Sprinkle the reserved Oreo crumbs over the top of each cup. You want a thick, even layer that completely covers the pudding. This is the “dirt” that makes the dessert look so spooky and realistic.
- Add the worms (2 minutes): Gently press 2-3 gummy worms into each cup so they appear to be crawling out of the dirt. Some should be fully buried, some halfway out, and maybe one draped over the edge of the cup for maximum effect. This is where you can get creative—make it look like a worm invasion!
- Chill (at least 2 hours): Place the cups in the refrigerator for at least 2 hours, preferably 4 hours or overnight. This allows the flavors to meld and the texture to set properly. The pudding will firm up, and the cookie crumbs will soften slightly against the pudding, creating that perfect spoonful.
A quick note on timing: You can absolutely make these a day ahead. In fact, I prefer them that way. The pudding sets up beautifully overnight, and the flavors deepen. Just wait to add the gummy worms until right before serving, or they’ll get too soft and lose their cheerful wiggliness.
Cooking Tips & Techniques
After making these spooky easy Halloween dirt cups more times than I can count, I’ve collected a few tricks that make the process smoother and the results more impressive. Let me share what I’ve learned—sometimes the hard way.
The cold milk trick: Make sure your milk is ice-cold when you mix the pudding. Warm milk won’t thicken properly, and you’ll end up with soupy pudding that ruins your layers. I keep my milk in the fridge until the last possible second. If I’m in a hurry, I’ll pour it into a bowl and set it over an ice bath for a few minutes before mixing.
Don’t overmix the pudding: Whisk just until the powder dissolves and the mixture starts to thicken. Overmixing can break down the starches and prevent the pudding from setting correctly. You’ll see it go from thin to thick in about two minutes—stop there. I learned this the hard way when I made a batch that never set because I kept whisking “just to be sure.”
The piping shortcut: For cleaner layers and less mess, transfer the pudding to a piping bag or a zip-top bag with the corner snipped off. This lets you pipe the pudding neatly into each cup without dripping on the edges. It’s a small step that makes a big difference in presentation, especially if you’re serving these at a party where looks matter.
Texture troubleshooting: If your pudding turns out too thick, you probably used too little milk or let it set too long. Fix it by whisking in a tablespoon of cold milk at a time until it reaches the right consistency. If it’s too thin, you might have used warm milk or an old box of pudding mix. There’s no fixing thin pudding, unfortunately—just start over with fresh ingredients.
Make it a party activity: Here’s a pro tip for hosting: set up a “dirt cup bar” with all the components in separate bowls and let guests assemble their own. Kids especially love this. They get to choose how many worms go in, whether they want extra sprinkles, and how messy their “dirt” looks. It’s interactive, fun, and takes the pressure off you as the host.
Variations & Adaptations
One of the best things about this recipe is how easily it adapts to different tastes, dietary needs, and occasions. Here are some variations I’ve tried and loved.
Peanut Butter Chocolate Dirt Cups
Add 2 tablespoons of creamy peanut butter to the pudding mixture before whisking. The peanut butter adds a rich, nutty depth that pairs beautifully with the chocolate. I made this version for a friend’s birthday party, and it disappeared faster than the original. Just be sure to check for peanut allergies if you’re serving a crowd.
Vegan Halloween Dirt Cups
Use dairy-free chocolate pudding mix and substitute the milk with oat milk or full-fat coconut milk. For the Oreos, check the label—original Oreos are actually vegan! Use melted coconut oil instead of butter for the crumb layer. I tested this version for a vegan friend, and honestly, I couldn’t tell the difference. The coconut milk adds a subtle richness that works surprisingly well.
Mint Chocolate Dirt Cups
Add 1/2 teaspoon of peppermint extract to the pudding mixture and use mint-flavored Oreos if you can find them. Top with a few crushed candy canes or peppermint candies for extra crunch. This variation is perfect for Christmas parties or any winter gathering—just swap the gummy worms for festive sprinkles.
Gluten-Free Version
Use gluten-free chocolate sandwich cookies (many brands make them now) and double-check that your pudding mix is certified gluten-free. Most instant pudding mixes are gluten-free, but always read the label. The texture will be nearly identical to the original, so no one will know the difference.
Low-Sugar Option
Use sugar-free instant chocolate pudding mix and sugar-free Oreo-style cookies. You can also skip the butter in the crumb layer to reduce fat. The taste is slightly less indulgent, but it still satisfies that chocolate craving. I made this version for a friend who’s watching her sugar intake, and she asked for the recipe—so it passed the test.
Serving & Storage Suggestions
These spooky easy Halloween dirt cups are designed to impress, so let’s talk about how to serve them in style and keep them fresh.
Serving temperature: Serve these chilled, straight from the refrigerator. The cold pudding contrasts beautifully with the crunchy cookie crumbs, and the gummy worms stay firm and chewy. If you’ve made them ahead, give them about 5 minutes at room temperature before serving—this takes the edge off the chill without softening the texture too much.
Presentation tips: Arrange the cups on a large platter or tray lined with fake spiderwebs or orange and black napkins. For extra spooky effect, scatter a few loose gummy worms around the base of the cups, as if they’ve escaped. I once added a plastic spider to each cup, and the kids went wild. You can also label each cup with a small Halloween-themed flag or sticker if you’re feeling fancy.
What to serve alongside: These dirt cups pair beautifully with other Halloween treats like pumpkin-shaped cookies, caramel apples, or a warm apple cider bar. If you’re hosting a full party, consider serving them alongside something savory like spicy pumpkin soup to balance the sweetness. For drinks, try a creamy hot chocolate bar with marshmallows and candy toppings.
Storage instructions: Store the cups in the refrigerator, covered with plastic wrap or their original lids if you used cups with lids. They’ll stay fresh for up to 3 days. After that, the cookie crumbs start to get soggy, and the gummy worms lose their texture. I don’t recommend freezing these—the pudding becomes icy and the texture suffers.
Reheating (if needed): These are meant to be served cold, so no reheating is necessary. If you’ve refrigerated them for more than a day and the pudding seems too firm, let them sit at room temperature for 10 minutes before serving. The texture will soften up nicely.
One more thing: the flavors actually improve after a day in the fridge. The cookie crumbs meld with the pudding, creating a cake-like texture at the bottom that’s absolutely delicious. So don’t be shy about making these a day ahead—your future self will thank you.
Nutritional Information & Benefits
Let’s be honest—these spooky easy Halloween dirt cups are a treat, not a health food. But that doesn’t mean they can’t fit into a balanced lifestyle. Here’s what you need to know.
Estimated nutrition per serving (1 cup, without optional whipped topping):
- Calories: 320
- Total Fat: 14g
- Saturated Fat: 7g
- Cholesterol: 15mg
- Sodium: 420mg
- Total Carbohydrates: 48g
- Dietary Fiber: 2g
- Sugars: 33g
- Protein: 5g
Health highlights: The cocoa in chocolate pudding contains antioxidants called flavonoids, which can support heart health. Milk provides calcium and vitamin D for bone health. And yes, even the Oreos offer a small amount of iron from enriched flour. It’s not a superfood, but it’s not empty calories either.
Dietary considerations: This recipe contains dairy (milk, butter) and gluten (Oreos, pudding mix). It also contains soy (present in Oreos and some pudding mixes). For allergen-friendly versions, see the variations section above. If you’re serving a crowd, I recommend labeling the cups so guests with allergies can easily identify which ones are safe for them.
My personal take: I believe in enjoying treats in moderation. These dirt cups are a once-a-year Halloween indulgence, and that’s perfectly fine. Life is too short to skip dessert, especially when it’s this fun and delicious. Make them, share them, and savor every bite without guilt.
Conclusion
So there you have it—the spooky easy Halloween dirt cups that started with a conversation on my front porch and turned into my most-requested party dessert. They’re quick, they’re fun, and they never fail to get a reaction. Whether you’re hosting a big Halloween bash or just looking for a simple treat to make with the kids, these little cups deliver every single time.
I love this recipe because it reminds me that the best things often come from the most unexpected places. Greg the accountant probably has no idea that his offhand comment turned into a family tradition for me. But every October, when I’m crushing Oreos and arranging gummy worms, I think of him and smile. That’s the magic of sharing food, isn’t it? You never know whose life you’ll touch with a simple recipe.
Now it’s your turn. Make these dirt cups your own—add extra worms, pile on the sprinkles, or invent a new variation I haven’t thought of. I’d love to hear how they turn out. Drop a comment below and tell me about your Halloween party, your favorite gummy worm placement strategy, or your own unexpected recipe discovery. And if you share these on social media, tag me so I can see your spooky creations. Happy Halloween, friend—go make some delicious dirt!
Frequently Asked Questions
Can I make these dirt cups the night before a party?
Absolutely! In fact, I recommend it. The flavors meld together beautifully overnight, and the texture improves. Just wait to add the gummy worms until right before serving so they stay firm and chewy. Store the cups covered in the refrigerator.
What if I don’t have instant pudding mix?
You can use cook-and-serve pudding, but it requires more time and attention. You’ll need to cook it on the stovetop according to package directions, then let it cool completely before layering. The texture will be slightly different—thicker and more gelatinous—but it still works in a pinch.
Can I use a different type of cookie for the dirt?
Yes! Chocolate wafer cookies, graham crackers, or even chocolate cake crumbs work well. Each gives a slightly different texture and flavor. Chocolate wafers create a darker, more authentic “dirt” look, while graham crackers add a hint of honey sweetness. Just avoid anything with cream filling, as it can make the crumbs greasy.
How do I keep the gummy worms from getting soggy?
Add the gummy worms right before serving, not during the chilling process. If you add them too early, they’ll absorb moisture from the pudding and lose their chewy texture. For the best visual effect, press them in just deep enough to stay upright, leaving most of the worm exposed above the “dirt.”
Can I make these in a large dish instead of individual cups?
Yes, but the presentation won’t be as dramatic. Use a 9×13-inch baking dish and layer the ingredients the same way—crumbs, pudding, more crumbs, then worms. Let it chill for at least 4 hours, then scoop into bowls to serve. It’s less portable but works well for a family-style dessert table.
Pin This Recipe!
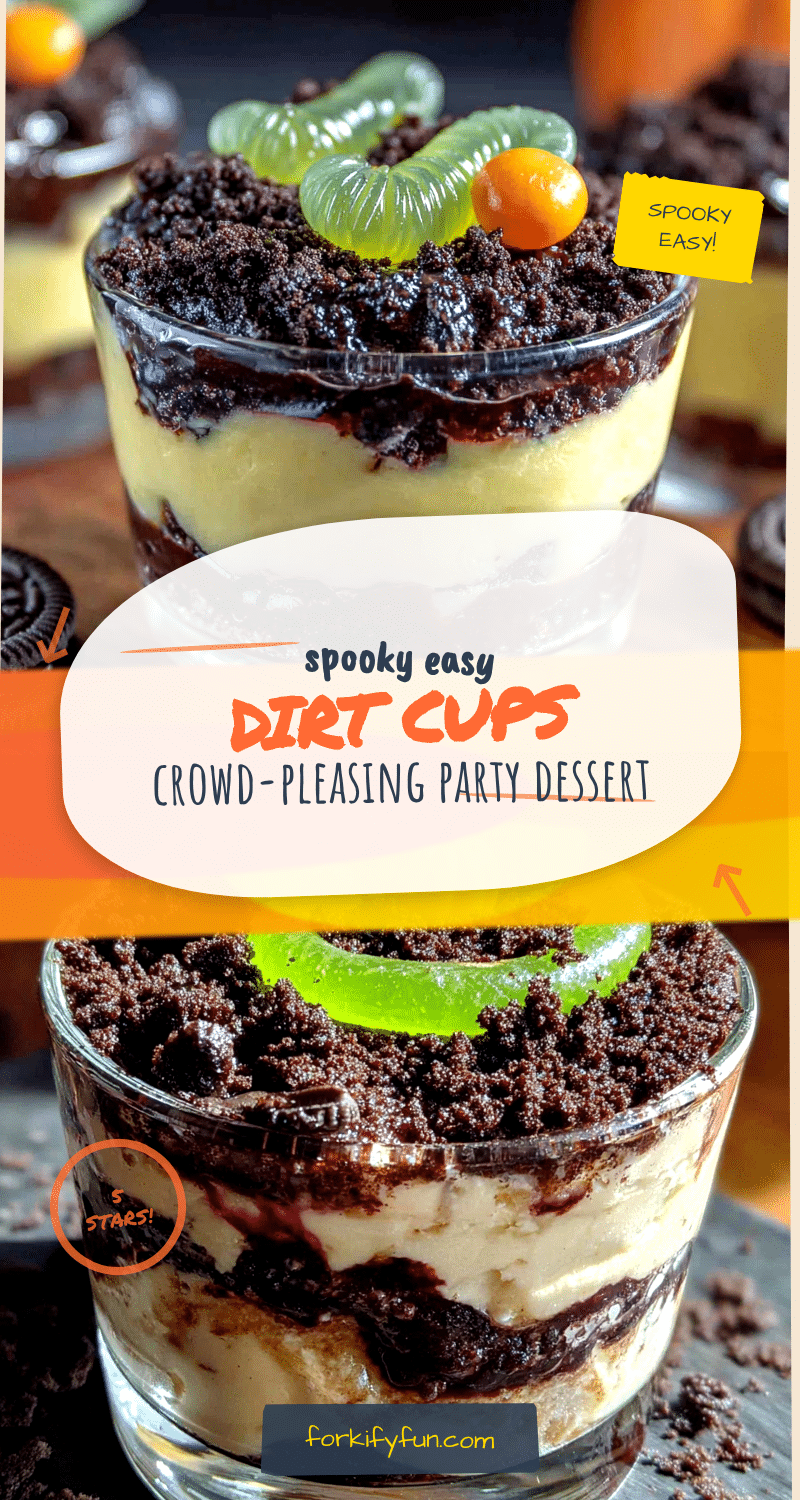
Spooky Easy Halloween Dirt Cups: Best Party Dessert

These spooky easy Halloween dirt cups are a quick, no-bake dessert featuring layers of creamy chocolate pudding, crushed Oreo cookies, and gummy worms. Perfect for Halloween parties, they come together in under 20 minutes and are a guaranteed crowd-pleaser.
- Prep Time: 20 minutes
- Cook Time: 0 minutes
- Total Time: 2 hours 20 minutes (includes chilling)
- Yield: 9 servings 1x
- Category: Dessert
- Cuisine: American
Ingredients
- 2 packages (3.9 ounces each) instant chocolate pudding mix
- 3 cups cold whole milk
- 1 teaspoon vanilla extract
- Pinch of sea salt
- 1 package (14.3 ounces) Oreo cookies
- 3 tablespoons unsalted butter, melted
- 1 package (4.5 ounces) gummy worms
- Optional: Halloween-themed sprinkles, candy eyeballs, or plastic spider rings
- Optional: 1 cup whipped topping
Instructions
- Crush the Oreos: Place all 36 Oreos in a food processor and pulse until you get fine crumbs that resemble potting soil. Alternatively, place them in a zip-top bag and crush with a rolling pin until you have a mix of fine crumbs and small chunks.
- Prepare the buttered crumbs: Transfer the crushed Oreos to a medium bowl. Pour the melted butter over the crumbs and stir with a fork until evenly distributed. Set aside about 3 tablespoons of this mixture for the final garnish.
- Make the pudding: In a large mixing bowl, whisk together both packages of instant chocolate pudding mix and the cold milk. Add the vanilla extract and the pinch of salt. Whisk vigorously for about 2 minutes until the mixture thickens and holds soft peaks.
- Let the pudding set: Let the pudding sit at room temperature for 5 minutes to continue thickening.
- Layer the cups: Spoon about 2 tablespoons of the buttered Oreo crumbs into the bottom of each cup. Press down gently. Spoon or pipe the pudding on top, filling each cup about three-quarters full. If using whipped topping, spoon it over the pudding.
- Top with dirt: Sprinkle the reserved Oreo crumbs over the top of each cup to completely cover the pudding.
- Add the worms: Gently press 2-3 gummy worms into each cup so they appear to be crawling out of the dirt.
- Chill: Place the cups in the refrigerator for at least 2 hours, preferably 4 hours or overnight. Add gummy worms just before serving if making ahead.
Notes
For best results, use cold milk and instant pudding mix. Add gummy worms just before serving to prevent sogginess. The flavors improve after a day in the fridge. For a dairy-free version, use oat milk or full-fat coconut milk and dairy-free pudding mix. For gluten-free, use gluten-free chocolate sandwich cookies.
Nutrition
- Serving Size: 1 cup
- Calories: 320
- Sugar: 33
- Sodium: 420
- Fat: 14
- Saturated Fat: 7
- Carbohydrates: 48
- Fiber: 2
- Protein: 5
Keywords: Halloween dirt cups, easy Halloween dessert, no-bake dessert, chocolate pudding cups, gummy worms, spooky dessert, party dessert


