This was supposed to be a pumpkin pie. I mean, that was the plan. It was the Wednesday before Thanksgiving a few years back, and I had grand visions of a from-scratch, flaky-crusted, perfectly spiced pie that would make my mother-in-law proud. I’d even bought the expensive butter and a fancy pie dish. Then life happened. The power flickered off around 2 p.m., and my oven decided that was the perfect time to stop holding a steady temperature. I stood there, staring at a bowl of pumpkin puree, cream cheese, and a bag of gingersnaps, feeling that familiar knot of panic tighten in my chest. I mean, what was I supposed to do? Serve a bowl of pumpkin-flavored goo?
Honestly, I almost gave up. I thought about running to the store for a frozen crust, but the thought of fighting holiday traffic made me cringe. So, I took a breath and did something I rarely do—I improvised. I crushed the gingersnaps with a rolling pin (and maybe a little frustration), mixed them with melted butter, and pressed them into a springform pan. Then I whipped the cream cheese and pumpkin together, folded in some whipped cream, and poured it over the crust. I stuck the whole thing in the fridge and prayed. When I pulled it out the next day, it was better than any pie I’d ever made. The crust was perfectly spiced and crunchy, the filling was light and silky, and it didn’t even need an oven. I couldn’t believe it.
Maybe you’ve been there—staring at a half-baked plan, wondering how you’re going to pull dinner (or dessert) out of thin air. That’s exactly where this quick no-bake pumpkin cheesecake with gingersnap crust was born. It came from a moment of failure that turned into a happy accident, and honestly, I’ve never looked back. It’s the dessert I bring to every potluck, the one my family requests for birthdays, and the one that proves you don’t need an oven to make something unforgettable. Let’s get started—you’re going to love how easy this is.
Why You’ll Love This Recipe
Let me tell you why this quick no-bake pumpkin cheesecake with gingersnap crust has become my secret weapon for busy weeknights and holiday chaos. I’ve tested this recipe more times than I can count, tweaking the ratios until the texture was just right—not too dense, not too airy. Trust me, I’ve learned a thing or two from my failures.
- Quick & Easy: This comes together in about 20 minutes of active work. No oven, no water bath, no stress. Perfect for those nights when you need dessert on the table fast.
- Simple Ingredients: You probably have most of these in your pantry right now. Cream cheese, pumpkin puree, gingersnaps—no fancy grocery trips required.
- Perfect for Weeknights: Whether it’s a Tuesday dinner or a last-minute gathering, this cheesecake is ready when you are. Just chill and serve.
- Crowd-Pleaser: I’ve served this to kids, adults, and even my picky aunt—everyone goes back for seconds. The gingersnap crust is a total game-changer.
- Unbelievably Delicious: The combination of creamy pumpkin filling and spicy, crunchy crust is next-level comfort food. You’ll close your eyes after the first bite.
What makes this recipe different from all the others? It’s the texture. Most no-bake cheesecakes can be a little heavy or gelatinous, but this one uses a simple trick—whipped cream folded in at the end—to keep it light and mousse-like. It’s not just another version; it’s my best version. And honestly, it’s the kind of dessert that makes you feel like a hero without breaking a sweat. Perfect for impressing guests or turning a simple weeknight into something special.
What Ingredients You Will Need
This recipe uses simple, wholesome ingredients to deliver bold flavor and satisfying texture without the fuss. Most of these are pantry staples, which is exactly what you need when you’re short on time.
For the Gingersnap Crust
- 2 cups gingersnap crumbs (about 8 ounces of cookies, crushed finely—I prefer Nabisco or a store brand with a strong ginger kick)
- 6 tablespoons unsalted butter, melted (adds richness and helps the crust hold together)
- 2 tablespoons granulated sugar (optional, if your gingersnaps aren’t very sweet)
- Pinch of salt (balances the sweetness)
For the Pumpkin Filling
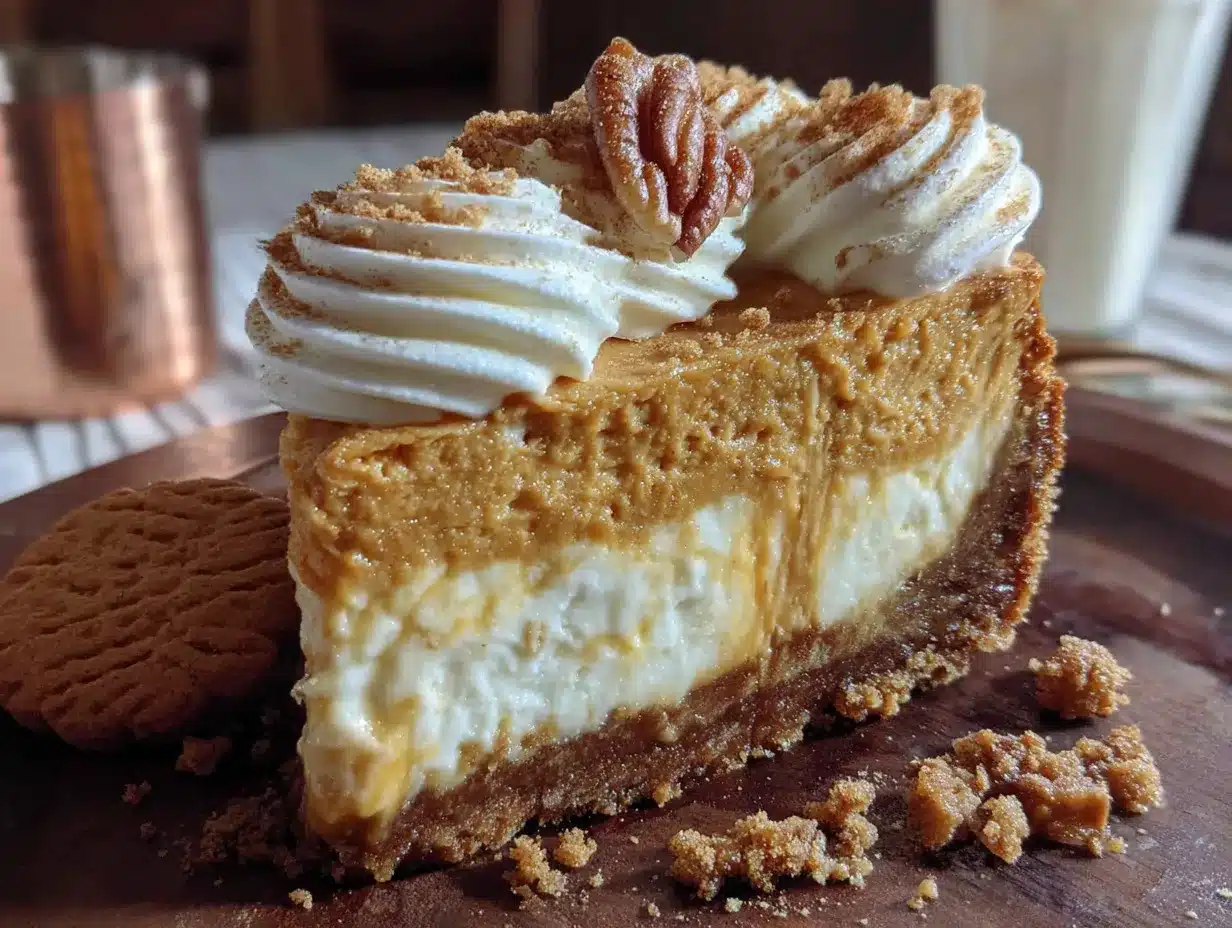
- 16 ounces cream cheese, softened (full-fat works best for a creamy texture; let it sit out for 30 minutes)
- 1 cup canned pumpkin puree (not pumpkin pie filling—look for 100% pure pumpkin, like Libby’s)
- 3/4 cup packed light brown sugar (adds depth and moisture)
- 1 teaspoon vanilla extract (pure vanilla, if you have it)
- 1 teaspoon ground cinnamon
- 1/2 teaspoon ground ginger
- 1/4 teaspoon ground nutmeg
- 1/4 teaspoon ground cloves
- Pinch of salt
- 1 1/2 cups heavy cream, cold (this is what makes the filling light and fluffy—don’t substitute with milk)
- 2 tablespoons powdered sugar (for stabilizing the whipped cream)
For the Topping (Optional)
- Extra whipped cream (for serving)
- Crushed gingersnaps or candied pecans (for garnish)
Ingredient Selection Tips: For the best texture, use full-fat cream cheese—low-fat versions can make the filling grainy. I’ve tried it, and it’s just not the same. Also, make sure your pumpkin puree is well-drained. Sometimes it has excess water that can make the cheesecake runny. If you’re feeling adventurous, you can swap the heavy cream for coconut cream for a dairy-free version, but the texture will be slightly denser.
Equipment Needed
- 9-inch springform pan (or a deep-dish pie plate—I’ve used both, and the springform is easier for slicing)
- Food processor or rolling pin (for crushing the gingersnaps—a zip-top bag and a heavy pan work in a pinch)
- Electric mixer (handheld or stand mixer—trust me, your arm will thank you)
- Large mixing bowls (at least two)
- Rubber spatula (for folding the whipped cream)
- Measuring cups and spoons
- Plastic wrap (for covering the cheesecake while it chills)
If you don’t have a springform pan, don’t stress. A regular 9-inch pie plate works perfectly—just press the crust up the sides and fill. For the mixer, even a hand whisk will do the job, but you’ll need some serious arm strength. I’ve been there, and it’s doable, just not fun.
Preparation Method
- Make the crust: In a food processor, pulse the gingersnaps until they become fine crumbs. You should have about 2 cups. If you don’t have a processor, put the cookies in a zip-top bag and smash them with a rolling pin—it’s a great stress reliever! Transfer the crumbs to a medium bowl, add the melted butter, sugar (if using), and a pinch of salt. Stir until the mixture looks like wet sand. Press the mixture firmly into the bottom and about 1 inch up the sides of your springform pan. Use the bottom of a measuring cup to really pack it down—this prevents crumbling later. Place the crust in the fridge to set while you make the filling. (About 15 minutes is fine.)
- Whip the cream: In a large mixing bowl, combine the cold heavy cream and powdered sugar. Using an electric mixer on medium-high speed, beat until stiff peaks form. This takes about 3-4 minutes. You’ll know it’s ready when you lift the beaters and the cream stands up straight. Be careful not to over-whip, or you’ll end up with butter! Set the bowl aside.
- Make the pumpkin filling: In another large bowl, beat the softened cream cheese with an electric mixer on medium speed until smooth and creamy—about 2 minutes. Scrape down the sides of the bowl. Add the pumpkin puree, brown sugar, vanilla extract, cinnamon, ginger, nutmeg, cloves, and a pinch of salt. Beat on medium speed until everything is well combined and smooth, about 2-3 minutes. The mixture should be thick and slightly glossy. Taste it—yes, raw eggs aren’t an issue here, so go ahead. Adjust the spices if you like it more pumpkin-pie-like.
- Fold in the whipped cream: This is the most important step. Take about one-third of the whipped cream and stir it into the pumpkin mixture with a rubber spatula. This lightens the mixture and makes it easier to fold in the rest. Then, gently fold in the remaining whipped cream. Use a cut-and-fold motion—cut through the center, scrape along the bottom, and fold over the top. Do this until no white streaks remain. Be gentle; you want to keep the air in the whipped cream so the cheesecake stays light and mousse-like.
- Assemble the cheesecake: Pour the filling into the chilled crust. Use your spatula to spread it evenly, smoothing the top. Give the pan a gentle tap on the counter to release any air bubbles. Cover the pan with plastic wrap and refrigerate for at least 6 hours, but overnight is best. I know it’s hard to wait, but the longer it chills, the cleaner your slices will be. The filling needs time to set up properly.
- Serve: When you’re ready to serve, run a thin knife around the edge of the pan to loosen the cheesecake. Release the springform latch and remove the ring. Slice with a sharp knife, wiping it clean between cuts for neat pieces. Top with extra whipped cream and a sprinkle of crushed gingersnaps if you’re feeling fancy. Enjoy!
Pro tip: If you’re in a hurry, you can speed up the chilling process by placing the cheesecake in the freezer for 2-3 hours. Just make sure to let it sit at room temperature for 10 minutes before slicing to avoid cracking.
Cooking Tips & Techniques
I’ve made this quick no-bake pumpkin cheesecake with gingersnap crust at least twenty times, and I’ve learned a few things the hard way. First, make sure your cream cheese is truly softened. I once tried to rush it by microwaving it, and it turned into a lumpy mess. Just let it sit on the counter for 30 minutes—it’s worth the wait. If you’re in a real bind, cut the cream cheese into small cubes and let them sit for 15 minutes.
Another common mistake is over-mixing the filling after adding the whipped cream. You want to fold gently, not stir vigorously. I remember one time I got distracted and beat the mixture too hard—the cheesecake came out dense and almost deflated. It still tasted good, but it wasn’t that light, airy texture we’re after. So take your time with the folding.
For the crust, don’t skip the chilling step. I once pressed the crust and immediately poured the filling in, thinking it would be fine. The crust got soggy and fell apart when I tried to slice it. Let it chill for at least 15 minutes to firm up. Also, if you’re using a store-bought gingersnap, check the sweetness level. Some brands are very sweet, so you might want to skip the extra sugar in the crust. I’ve used both sweet and spicy varieties, and I prefer a spicy one for balance.
Finally, timing is everything. Make this the night before you plan to serve it. That way, you can relax and enjoy the meal without rushing. It’s a great multitasking strategy—make the cheesecake, clean up, and then go about your evening. The next day, dessert is ready with zero effort.
Variations & Adaptations
One of the best things about this recipe is how easy it is to tweak. Here are a few variations I’ve tried and loved:
- Gluten-Free Version: Use gluten-free gingersnaps or even gluten-free graham crackers. I’ve done this for friends with celiac disease, and it works perfectly. Just make sure to check the labels on your spices too.
- Dairy-Free Version: Swap the cream cheese for a dairy-free alternative (I like Kite Hill or Miyoko’s) and use coconut cream instead of heavy cream. The texture will be a bit denser, but it’s still delicious. I’ve also used cashew cream, which adds a lovely richness.
- Spice It Up: If you love a stronger ginger flavor, add 1/2 teaspoon of fresh grated ginger to the filling. It gives a little kick that pairs beautifully with the crust. I tried this last fall, and it was a hit at a Halloween party.
- Chocolate Twist: Melt 4 ounces of dark chocolate and swirl it into the filling before pouring it into the crust. The chocolate and pumpkin combo is surprisingly good—think pumpkin-chocolate mousse.
- Individual Servings: Instead of a springform pan, use 8-10 small mason jars or ramekins. Layer the crust and filling, and chill. These are perfect for parties or grab-and-go desserts. I’ve done this for picnics, and they’re always a crowd-pleaser.
Feel free to experiment with the spices based on what you have. If you don’t have cloves, just add a bit more cinnamon and nutmeg. The recipe is forgiving, which is exactly what you need on a busy weeknight.
Serving & Storage Suggestions
This quick no-bake pumpkin cheesecake with gingersnap crust is best served cold, straight from the fridge. The texture is firm but creamy, and the flavors are more pronounced after a good chill. I like to let it sit at room temperature for about 5-10 minutes before slicing—it makes cutting through the crust easier without it cracking.
For presentation, I top each slice with a generous dollop of whipped cream, a sprinkle of crushed gingersnaps, and a light dusting of cinnamon. If you’re feeling extra festive, add a few candied pecans or a drizzle of caramel sauce. It pairs beautifully with a cup of hot coffee or a glass of cold milk—honestly, it’s perfect after any meal.
Storage: Cover the cheesecake tightly with plastic wrap or transfer slices to an airtight container. It will keep in the refrigerator for up to 5 days. The flavors actually deepen after a day or two, so leftovers are a treat. You can also freeze it for up to 3 months. Wrap the whole cheesecake (or individual slices) in plastic wrap, then foil, and freeze. To thaw, transfer to the fridge overnight. The texture remains surprisingly good—I’ve done this for holiday prep, and no one could tell it was frozen.
Reheating? Honestly, I don’t recommend it. This is a cold dessert, and warming it up will make the filling runny. If you want a warm element, serve it with a hot caramel sauce or a warm apple compote on the side.
Nutritional Information & Benefits
While this is definitely a treat, there are a few nutritional perks worth noting. Pumpkin is packed with vitamin A (from beta-carotene), which is great for eye health and immune function. It’s also a good source of fiber, which helps with digestion. The cream cheese and heavy cream add calcium and protein, though they’re also higher in fat—so enjoy in moderation!
Here’s an approximate nutritional breakdown per slice (based on 12 servings):
- Calories: 380
- Fat: 26g
- Carbohydrates: 33g
- Protein: 5g
- Fiber: 1g
- Sugar: 22g
Dietary Considerations: This recipe contains dairy, gluten (from the gingersnaps), and eggs (in the cookies). For a gluten-free option, use gluten-free gingersnaps. For a dairy-free option, see the variations above. It’s naturally nut-free if you skip the pecan garnish. As always, check your ingredient labels if you have specific allergies—especially the gingersnaps, which may contain traces of nuts.
I personally love that this dessert feels indulgent but uses real, whole-food ingredients. It’s not health food, but it’s a homemade treat made with love—and that counts for something.
Conclusion
So there you have it—my favorite quick no-bake pumpkin cheesecake with gingersnap crust. It started as a disaster, but honestly, I’m so glad it did. This recipe has saved me more times than I can count, whether it’s a busy weeknight, a last-minute dinner party, or just a Tuesday when I need something sweet. The best part? It’s so simple that you’ll find yourself making it on repeat, and no one will ever guess it didn’t come from an oven.
I’d love to hear how yours turns out! Did you add a twist? Did you serve it at a holiday gathering? Drop a comment below and share your experience—I read every single one. And if you loved this recipe, share it with a friend who needs a no-fuss dessert in their life. Until next time, happy cooking—and remember, sometimes the best recipes come from the biggest mistakes.
Frequently Asked Questions
Can I use fresh pumpkin instead of canned?
Yes, you can! Just make sure to cook and puree the pumpkin, then drain it well to remove excess water. Fresh pumpkin can be more watery than canned, so you might need to let it sit in a cheesecloth-lined strainer for 30 minutes. Otherwise, the filling could be too loose.
How long does this cheesecake need to chill?
At least 6 hours in the fridge, but overnight is best. The longer it chills, the firmer and cleaner the slices will be. If you’re in a hurry, you can freeze it for 2-3 hours, but let it sit at room temperature for 10 minutes before slicing.
Can I use a different crust?
Absolutely! Graham crackers, vanilla wafers, or even shortbread cookies work well. Just keep the butter-to-crumb ratio the same (about 6 tablespoons butter per 2 cups crumbs). If you use a sweeter cookie, you can skip the extra sugar.
Why is my filling runny?
This usually happens if the cream cheese wasn’t fully softened, the pumpkin puree had too much water, or the whipped cream wasn’t whipped to stiff peaks. Make sure to drain any excess liquid from the pumpkin and whip the cream until it’s very firm. Also, don’t over-mix when folding—it can deflate the cream.
Can I make this ahead of time?
Yes, it’s perfect for making ahead! You can prepare it up to 2 days in advance and keep it covered in the fridge. You can also freeze it for up to 3 months. Just thaw in the fridge overnight before serving.
Pin This Recipe!
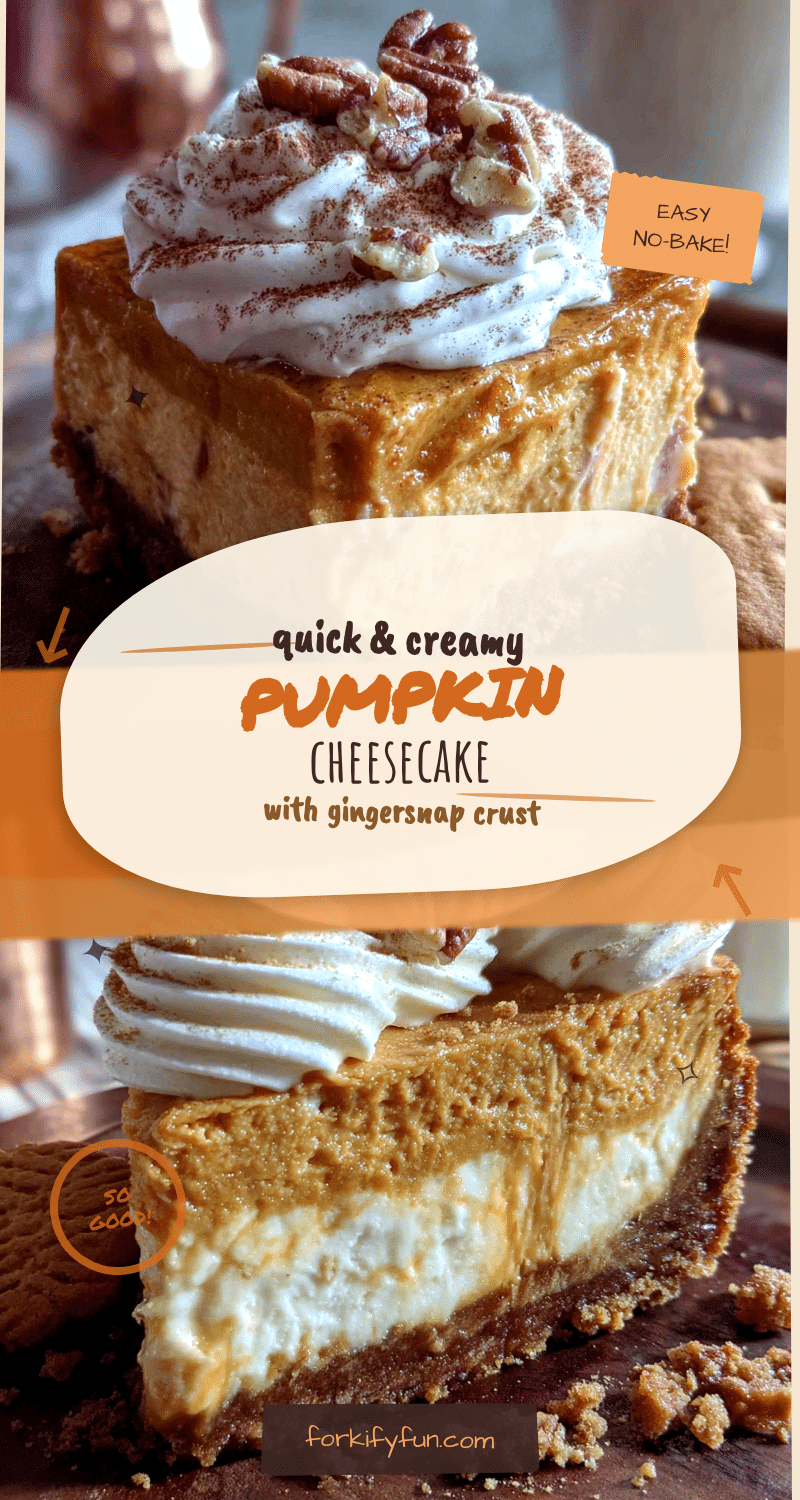
Quick No-Bake Pumpkin Cheesecake: Best Easy Dessert
This quick no-bake pumpkin cheesecake with gingersnap crust is a creamy, light, and spiced dessert that comes together in just 20 minutes of active work. Perfect for busy weeknights or holiday gatherings, it requires no oven and uses simple pantry ingredients.
- Prep Time: 20 minutes
- Cook Time: 0 minutes
- Total Time: 6 hours 20 minutes (includes chilling time)
- Yield: 12 servings 1x
- Category: Dessert
- Cuisine: American
Ingredients
- 2 cups gingersnap crumbs (about 8 ounces of cookies, crushed finely)
- 6 tablespoons unsalted butter, melted
- 2 tablespoons granulated sugar (optional, if gingersnaps aren’t very sweet)
- Pinch of salt
- 16 ounces cream cheese, softened (full-fat, let sit out for 30 minutes)
- 1 cup canned pumpkin puree (100% pure pumpkin, not pumpkin pie filling)
- 3/4 cup packed light brown sugar
- 1 teaspoon vanilla extract (pure vanilla)
- 1 teaspoon ground cinnamon
- 1/2 teaspoon ground ginger
- 1/4 teaspoon ground nutmeg
- 1/4 teaspoon ground cloves
- Pinch of salt
- 1 1/2 cups heavy cream, cold
- 2 tablespoons powdered sugar
- Extra whipped cream (for serving, optional)
- Crushed gingersnaps or candied pecans (for garnish, optional)
Instructions
- Make the crust: In a food processor, pulse the gingersnaps until they become fine crumbs (about 2 cups). If you don’t have a processor, put the cookies in a zip-top bag and smash them with a rolling pin. Transfer the crumbs to a medium bowl, add the melted butter, sugar (if using), and a pinch of salt. Stir until the mixture looks like wet sand. Press the mixture firmly into the bottom and about 1 inch up the sides of a 9-inch springform pan. Use the bottom of a measuring cup to pack it down. Pl…
- Whip the cream: In a large mixing bowl, combine the cold heavy cream and powdered sugar. Using an electric mixer on medium-high speed, beat until stiff peaks form (about 3-4 minutes). Set aside.
- Make the pumpkin filling: In another large bowl, beat the softened cream cheese with an electric mixer on medium speed until smooth and creamy (about 2 minutes). Scrape down the sides of the bowl. Add the pumpkin puree, brown sugar, vanilla extract, cinnamon, ginger, nutmeg, cloves, and a pinch of salt. Beat on medium speed until well combined and smooth (about 2-3 minutes).
- Fold in the whipped cream: Take about one-third of the whipped cream and stir it into the pumpkin mixture with a rubber spatula to lighten it. Then, gently fold in the remaining whipped cream using a cut-and-fold motion until no white streaks remain. Be gentle to keep the air in the whipped cream.
- Assemble the cheesecake: Pour the filling into the chilled crust. Use a spatula to spread it evenly, smoothing the top. Give the pan a gentle tap on the counter to release any air bubbles. Cover the pan with plastic wrap and refrigerate for at least 6 hours, but overnight is best.
- Serve: When ready to serve, run a thin knife around the edge of the pan to loosen the cheesecake. Release the springform latch and remove the ring. Slice with a sharp knife, wiping it clean between cuts. Top with extra whipped cream and a sprinkle of crushed gingersnaps if desired.
Notes
For best texture, use full-fat cream cheese and ensure it is truly softened. Do not over-mix the filling after adding whipped cream. Chill the crust for at least 15 minutes before adding filling to prevent sogginess. For a quicker chill, freeze for 2-3 hours, then let sit at room temperature for 10 minutes before slicing. The cheesecake can be made up to 2 days ahead and stored in the fridge, or frozen for up to 3 months.
Nutrition
- Serving Size: 1 slice
- Calories: 380
- Sugar: 22
- Sodium: 320
- Fat: 26
- Saturated Fat: 15
- Carbohydrates: 33
- Fiber: 1
- Protein: 5
Keywords: no-bake pumpkin cheesecake, quick pumpkin dessert, gingersnap crust, easy cheesecake, pumpkin cheesecake, no-bake dessert, fall dessert, Thanksgiving dessert