The office holiday party was in twelve hours and I’d completely forgotten. Everyone else would be bringing those elaborate, multi-day creations—the kind with handmade fondant and layers that took a whole Saturday to assemble. I had a block of cream cheese, a carton of eggnog, and a bag of gingersnaps that were honestly more of a snack than a plan. It was 10 PM on a Tuesday and I was standing in my kitchen in pajamas, staring at these ingredients like they were going to magically assemble themselves.
Let me tell you, I was not feeling like a winner. I was feeling like the person who’d be showing up with store-bought cookies and a sheepish grin. But then I remembered a no-bake cheesecake trick my neighbor had mentioned months ago, and I thought—well, what if I just go for it? I mean, cream cheese and eggnog are practically holiday soulmates, right? And gingersnaps make a crust that’s way more interesting than plain graham crackers.
I crushed those cookies with a rolling pin (very therapeutic, honestly), mixed everything in one bowl, and prayed to the dessert gods. The next day, I walked into that party with my slightly lopsided cheesecake, fully expecting it to be the sad little cousin to the fancy desserts. But here’s the thing—it disappeared. People kept coming back for slices, asking for the recipe, and I’m standing there like, “Oh, this old thing? I just threw it together.”
Maybe you’ve been there—the panic of needing something impressive with zero time to spare. That’s exactly why this Quick Eggnog Cheesecake with Gingersnap Crust became my holiday hero. It’s the recipe that proves you don’t need all day to make something that tastes like you did. And honestly? I’ve never gone back to the complicated stuff since.
Why You’ll Love This Recipe
This isn’t just another cheesecake recipe—it’s the one that saves your holiday sanity. I’ve tested this exact method at least a dozen times, tweaking the ratios and timing until it was absolutely foolproof. Here’s why it works so well for busy people like us:
- Quick & Easy: Comes together in under 20 minutes of active prep time. No water baths, no complicated techniques, no stress. The hardest part is waiting for it to chill.
- Simple Ingredients: You probably already have most of these in your kitchen right now. No hunting down specialty stores or weird ingredients you’ll never use again.
- Perfect for Holiday Gatherings: Whether it’s a work party, family dinner, or cookie swap, this cheesecake fits right in. It’s festive without being fussy.
- Crowd-Pleaser: I’ve served this to kids, grandparents, and picky eaters—every single person goes back for seconds. The eggnog flavor is familiar but not overwhelming.
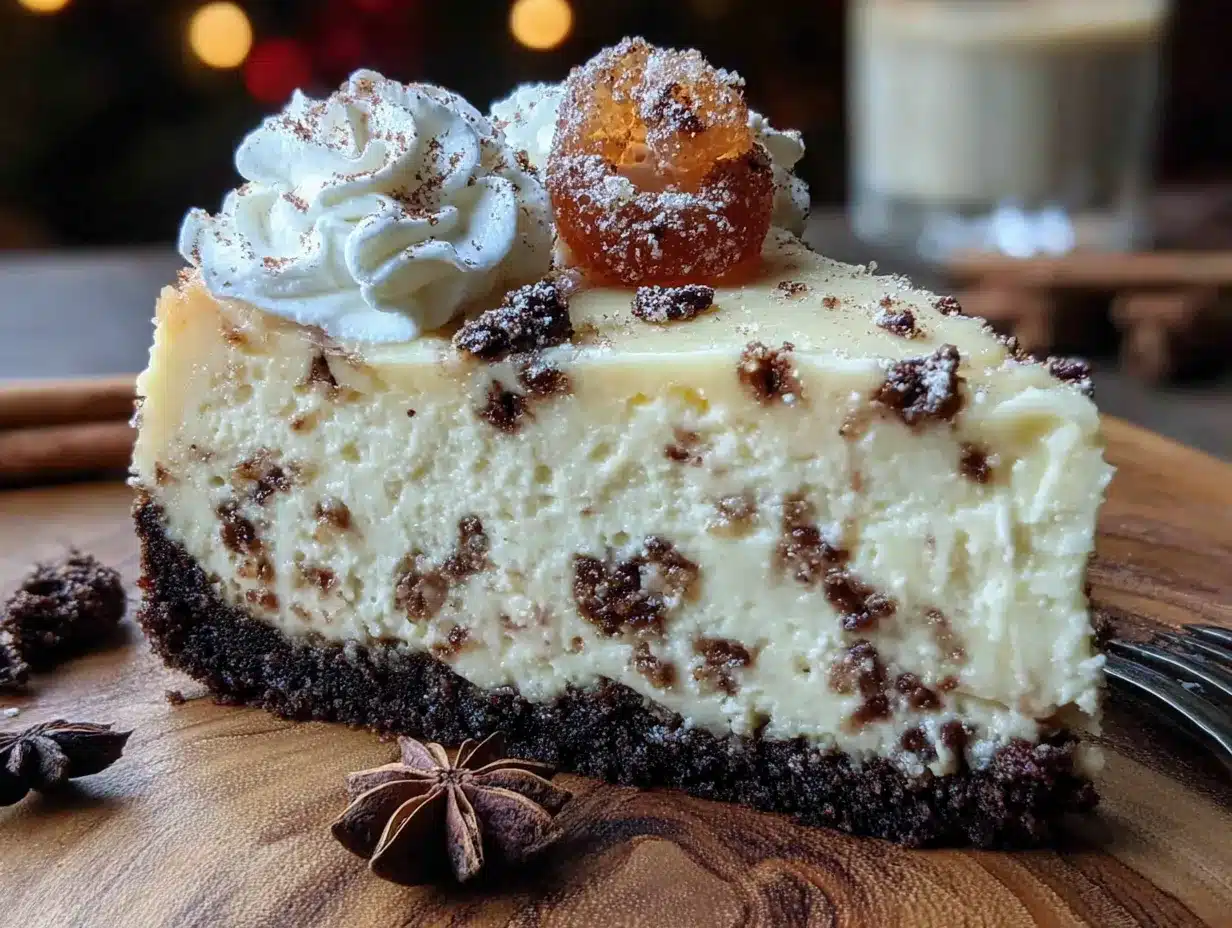
- Unbelievably Delicious: The creamy, spiced filling against that crunchy, buttery gingersnap crust? It’s the kind of combo that makes you close your eyes after the first bite.
What makes this recipe different from all the other eggnog cheesecakes out there? It’s the texture. Most no-bake cheesecakes can be a little… sad. Too soft, too heavy, or just not quite right. I figured out that using a specific ratio of cream cheese to whipped topping, plus a tiny bit of cornstarch, gives you that perfect sliceable consistency without any baking. It’s creamy, it’s firm, and it holds its shape beautifully.
This is comfort food reimagined—faster, easier, but with the same soul-soothing satisfaction that makes you feel like you’re wrapped in a cozy blanket with a mug of something warm. Perfect for impressing guests without stress, or turning a regular weeknight into something a little more special.
What Ingredients You Will Need
This recipe uses simple, wholesome ingredients to deliver that classic holiday flavor without any fuss. Most of these are pantry staples during the holiday season, and you can find everything at your regular grocery store.
For the Gingersnap Crust
- 2 cups gingersnap cookie crumbs (about 40 cookies, crushed)—I prefer Nabisco or a store brand with strong ginger flavor
- 6 tablespoons unsalted butter, melted (adds richness and helps the crust hold together)
- 2 tablespoons granulated sugar (just a touch to balance the spice)
- Pinch of salt (trust me on this—it makes the flavors pop)
For the Eggnog Cheesecake Filling
- 16 ounces cream cheese, softened to room temperature (full-fat is best for texture, but Neufchâtel works too)
- 1 cup powdered sugar (dissolves more smoothly than granulated)
- 1 cup eggnog (use the thick, refrigerated kind—not the shelf-stable carton)
- 1 teaspoon vanilla extract (pure, not imitation, if you have it)
- 1/2 teaspoon ground nutmeg, plus more for garnish (freshly grated is amazing if you have a whole nutmeg)
- 1/2 teaspoon ground cinnamon
- 1/4 teaspoon ground cloves
- 1 tablespoon cornstarch (the secret to that perfect sliceable texture)
- 2 cups frozen whipped topping, thawed (like Cool Whip, or make your own stabilized whipped cream)
For the Optional Topping
- 1/2 cup heavy whipping cream
- 1 tablespoon powdered sugar
- Extra ground nutmeg or cinnamon for dusting
- Optional: caramel sauce or crushed gingersnaps for garnish
I recommend using a good-quality eggnog here—the flavor really shines through. If you’re feeling adventurous, try a seasonal eggnog like peppermint or pumpkin spice for a fun twist. For the cream cheese, let it sit on the counter for about 30 minutes before you start. Cold cream cheese makes lumpy filling, and nobody wants that.
Equipment Needed
- 9-inch springform pan (my go-to is a non-stick one from Williams Sonoma, but any brand works)
- Food processor or zip-top bag with rolling pin (for crushing cookies—I’ve used both, and honestly the bag method is more satisfying)
- Large mixing bowls (at least two)
- Electric hand mixer or stand mixer (you can do this by hand, but your arm will thank you for the mixer)
- Rubber spatula (for scraping every last bit of filling)
- Measuring cups and spoons
- Plastic wrap or aluminum foil (for covering while it chills)
- Piping bag with star tip (optional, for fancy whipped cream topping)
If you don’t have a springform pan, you can use a deep-dish pie plate—just know your slices will be a little different shape. And if you’re really in a pinch, a 9×9 square pan works too; you’ll just have square cheesecake bars instead of round slices. Budget tip: thrift stores almost always have springform pans for a few dollars.
Preparation Method
Step 1: Make the Crust (10 minutes)
Start by crushing your gingersnap cookies into fine crumbs. If you’re using a food processor, pulse until they look like sand. If you’re using the bag method (my personal favorite—it’s great stress relief), put the cookies in a zip-top bag and go to town with a rolling pin. You want a consistent crumb, no big chunks.
In a medium bowl, combine the cookie crumbs, melted butter, sugar, and salt. Stir until every crumb is coated and the mixture looks like wet sand. Press this firmly into the bottom of your springform pan. I use the bottom of a measuring cup to really pack it down—this is crucial for a crust that doesn’t crumble when you slice. Pop it in the fridge while you make the filling.
Step 2: Make the Filling (10 minutes)
In a large bowl, beat the softened cream cheese with an electric mixer until it’s smooth and fluffy—about 2 minutes. Scrape down the sides of the bowl with your spatula. Add the powdered sugar and beat again until combined, another minute.
Now, here’s the important part: in a small separate bowl, whisk together the eggnog, vanilla, nutmeg, cinnamon, cloves, and cornstarch until the cornstarch is completely dissolved. No lumps allowed! Slowly pour this mixture into the cream cheese while mixing on low speed. Once it’s all in, increase to medium and beat for about 2 minutes until everything is silky smooth.
Fold in the thawed whipped topping gently with your spatula. Don’t overmix—you want to keep that light, airy texture. The mixture should be thick and creamy, like a mousse.
Step 3: Assemble and Chill (6+ hours)
Pour the filling over your chilled crust and spread it evenly. Give the pan a gentle tap on the counter to release any air bubbles. Cover with plastic wrap and refrigerate for at least 6 hours, but overnight is better. I know it’s hard to wait, but this is where the magic happens—the cornstarch needs time to set and give you that perfect slice.
Step 4: Add the Topping (5 minutes)
When you’re ready to serve, make the whipped cream. Beat the heavy cream and powdered sugar until stiff peaks form. You can spread this over the top of the cheesecake, or pipe it in rosettes for a prettier presentation. A dusting of nutmeg and maybe some crushed gingersnaps on top, and you’re done.
Sensory cue: The crust should be firm but give slightly when you press it. The filling should be set—when you jiggle the pan, the center should barely move. If it still looks wobbly, give it another hour in the fridge.
Cooking Tips & Techniques
Let me save you from the mistakes I made the first few times. My very first attempt at this recipe was a disaster—I used cold cream cheese and ended up with lumpy filling that never set properly. It was still tasty, but it looked like a crime scene. Here’s what I learned:
- Room temperature ingredients are non-negotiable. Set your cream cheese out for at least 30 minutes. If you’re in a rush, cut it into cubes and microwave for 10-second intervals until soft but not melted.
- Don’t skip the cornstarch. I tried making this without it once, thinking it would be fine. It was not fine. The cheesecake was too soft and wouldn’t slice cleanly. That one tablespoon makes all the difference.
- Press that crust firmly. I cannot stress this enough. A loosely packed crust will fall apart when you try to serve it. Use the bottom of a glass or measuring cup and really lean into it.
- Patience with chilling. I know you want to eat it now. But if you cut into it too early, you’ll have a mess. The texture needs time to set properly. Overnight is ideal, but 6 hours is the absolute minimum.
- Use a hot knife for clean slices. Run your knife under hot water, dry it off, then slice. Clean the blade between each cut. This gives you those beautiful, Instagram-worthy slices.
One more thing—if your kitchen is warm, the cheesecake might soften faster when you’re serving it. Pop it back in the fridge between rounds of seconds. Trust me, there will be seconds.
Variations & Adaptations
This recipe is incredibly flexible, and I’ve tried several variations over the years. Here are my favorites:
Gluten-Free Version
Use gluten-free gingersnap cookies for the crust. Most major brands now offer a gluten-free option, and they taste just as good. Everything else in the recipe is naturally gluten-free, so you’re good to go.
Dairy-Free Adaptation
Substitute the cream cheese with a dairy-free version (I like Kite Hill or Violife), use coconut cream instead of whipped topping, and swap the butter in the crust with coconut oil. For the eggnog, look for a dairy-free eggnog—Califia Farms makes a great one. The texture will be slightly different, but still delicious.
Spiced Variation
Add a tablespoon of dark rum or bourbon to the filling for an adult twist. You can also swap the eggnog for a chai-spiced version or add a teaspoon of pumpkin pie spice for extra warmth. I made this once with a splash of amaretto, and it was incredible.
Mini Cheesecake Version
Use a muffin tin with liners instead of a springform pan. Press the crust into the bottom of each liner, then fill with the cheesecake mixture. Chill for 4 hours instead of 6. These are perfect for parties—no slicing required!
Serving & Storage Suggestions
This cheesecake is best served cold, straight from the fridge. Let it sit at room temperature for about 10 minutes before slicing to take the chill off—it makes the flavors more pronounced. I love serving it with a drizzle of caramel sauce and a sprinkle of toasted pecans for extra crunch.
For drinks, it pairs beautifully with coffee, hot cider, or a glass of—you guessed it—eggnog. If you’re feeling fancy, a dessert wine like a late-harvest Riesling or a tawny port is a wonderful match.
Storage: Keep the cheesecake covered in the refrigerator for up to 5 days. The flavors actually develop and get better after the first day—the spices mellow and blend together beautifully. To freeze, wrap the entire cheesecake (or individual slices) tightly in plastic wrap, then foil, and freeze for up to 3 months. Thaw overnight in the fridge before serving.
Reheating: Don’t. This is a cold dessert. But if you absolutely must, let a slice sit out for 20 minutes to take the chill off. That’s as warm as it should get.
Nutritional Information & Benefits
Per slice (based on 12 servings): approximately 320 calories, 22g fat, 28g carbohydrates, 5g protein, 15g sugar. These are estimates and will vary based on your specific ingredients.
This cheesecake does have some redeeming qualities—eggnog is a good source of calcium and vitamin D, and the spices (nutmeg, cinnamon, cloves) are packed with antioxidants. The cream cheese provides a decent amount of protein, and let’s be real, a little indulgence during the holidays is good for the soul.
If you’re watching your sugar intake, you can reduce the powdered sugar to 3/4 cup and use a sugar-free whipped topping. The crust is harder to modify, but you could try a sugar-free gingersnap if you can find one. For a lower-fat option, use Neufchâtel cream cheese and light eggnog—the texture will be slightly less rich, but still satisfying.
Allergen note: This recipe contains dairy and gluten. For dairy-free and gluten-free options, see the variations section above.
Conclusion
Look, I’m not going to tell you this cheesecake will change your life. But it might just save your holiday season. It’s the recipe I turn to when I need something impressive without the stress, the one that always gets asked for, and the one I actually enjoy making—not just the eating part, but the whole process.
What I love most about this Quick Eggnog Cheesecake with Gingersnap Crust is that it feels special without being complicated. It’s the kind of dessert that makes people think you spent hours in the kitchen, when really you were just smart about your shortcuts. And honestly, isn’t that the best kind of recipe?
I’d love to hear how yours turns out! Did you try any fun variations? Did it save your holiday party like it saved mine? Drop a comment below and share your experience—your twist might inspire someone else. And if you’re looking for more quick and easy holiday desserts, check out our no-bake pumpkin cheesecake bars or these 5-minute holiday truffles that are perfect for last-minute gift-giving.
Happy holidays, and happy no-baking!
Frequently Asked Questions
Can I use homemade whipped cream instead of Cool Whip?
Absolutely! To make stabilized whipped cream, beat 1 cup of heavy cream with 2 tablespoons of powdered sugar and 1/2 teaspoon of vanilla until stiff peaks form. You’ll need about 2 cups total. The texture might be slightly less stable than Cool Whip, but it tastes amazing.
How do I know when the cheesecake is fully set?
After 6 hours of chilling, gently jiggle the pan. The center should barely move—just a slight wobble. If it still looks liquidy, give it another hour or two. The top should feel firm to the touch, and when you press gently, it should spring back slightly.
Can I use a different cookie for the crust?
Yes! Graham crackers, shortbread cookies, or even vanilla wafers work great. Just adjust the sugar slightly—if your cookies are already sweet, reduce the sugar to 1 tablespoon. For a chocolate twist, try chocolate wafer cookies with a pinch of cinnamon.
My cheesecake turned out too soft. What went wrong?
Most likely one of three things: the cream cheese wasn’t fully softened, the cornstarch wasn’t dissolved properly, or you didn’t chill it long enough. Next time, make sure your cream cheese is truly room temperature, whisk the cornstarch into the eggnog until completely smooth, and be patient with the chilling time.
Can I make this ahead of time for a party?
Definitely! This cheesecake actually gets better after a day in the fridge. Make it up to 2 days ahead, cover it tightly, and keep it refrigerated. Add the whipped cream topping just before serving for the prettiest presentation.
Pin This Recipe!
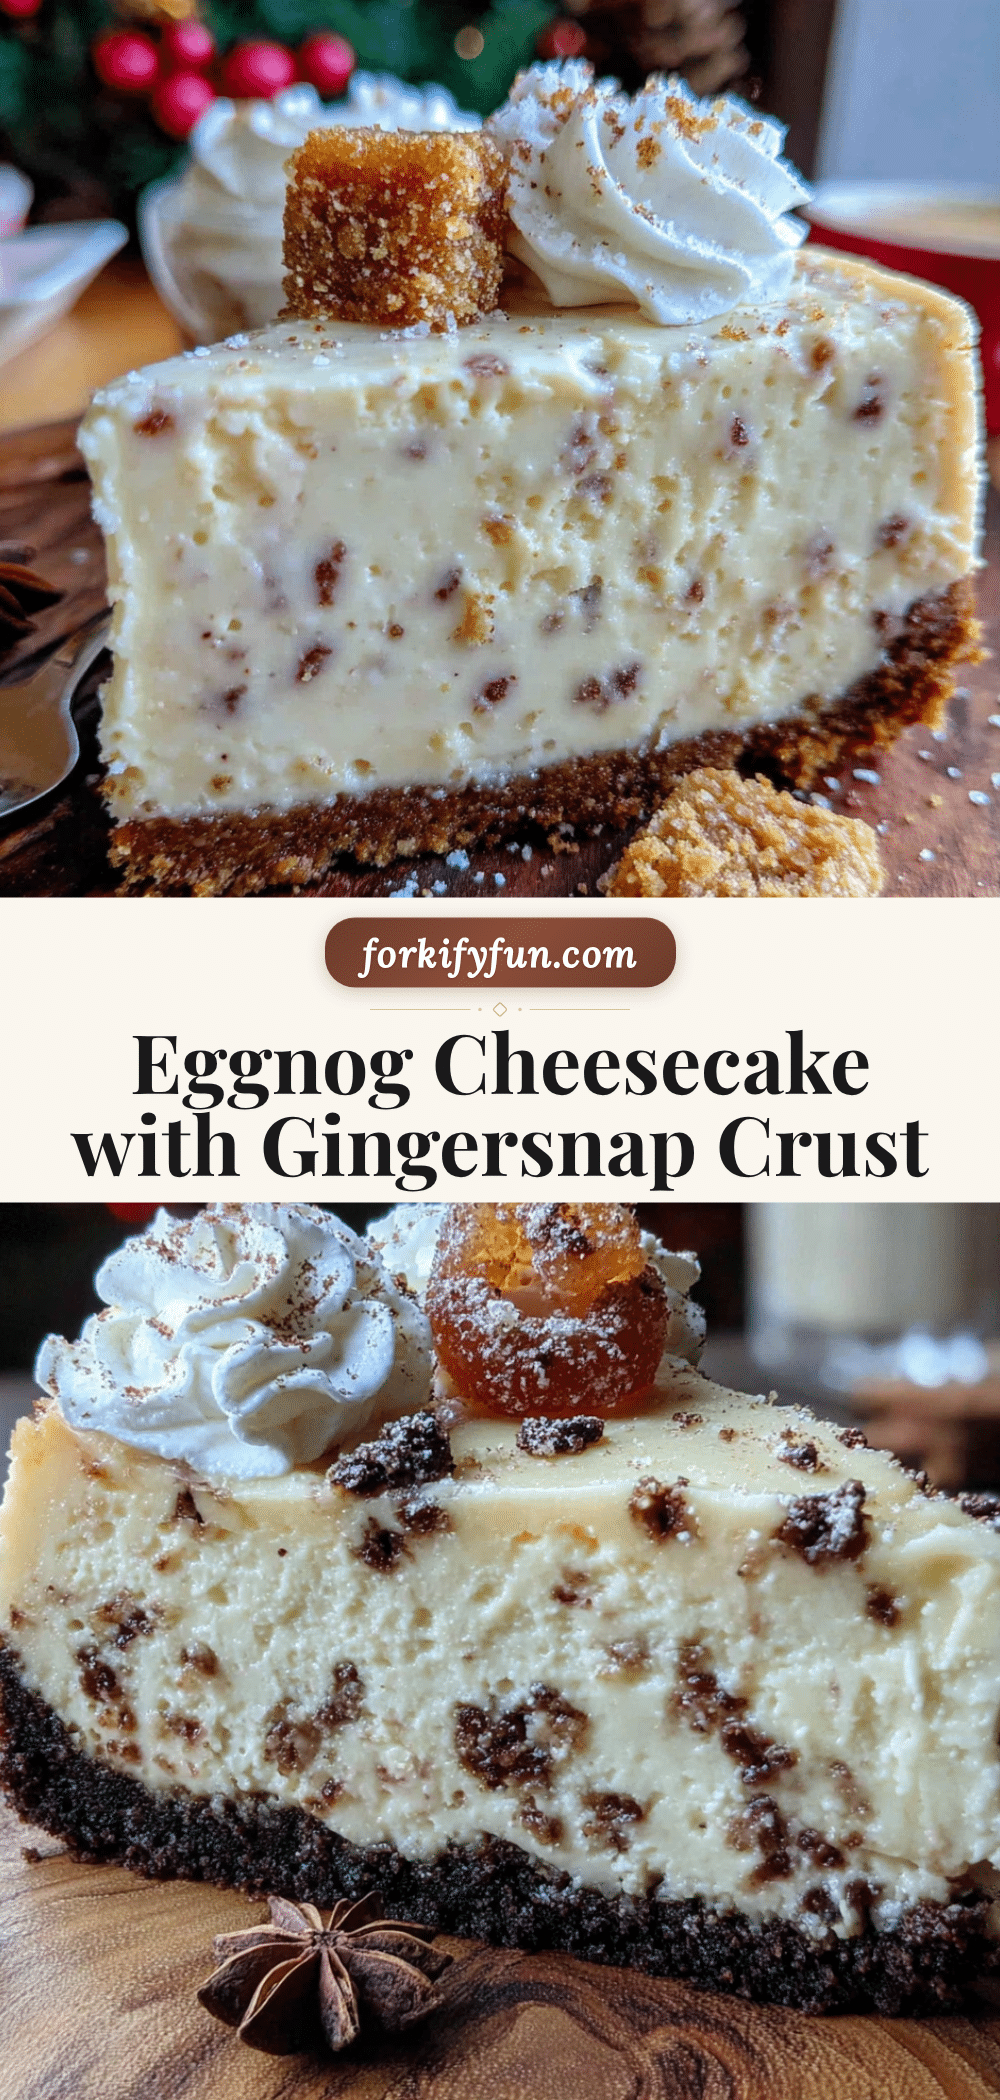
Quick Eggnog Cheesecake with Gingersnap Crust
A no-bake eggnog cheesecake with a crunchy gingersnap crust that comes together in under 20 minutes of active prep time. Perfect for holiday gatherings when you need an impressive dessert without the stress.
- Prep Time: 20 minutes
- Cook Time: 0 minutes
- Total Time: 6 hours 20 minutes (includes chilling)
- Yield: 12 servings 1x
- Category: Dessert
- Cuisine: American
Ingredients
- 2 cups gingersnap cookie crumbs (about 40 cookies)
- 6 tablespoons unsalted butter, melted
- 2 tablespoons granulated sugar
- Pinch of salt
- 16 ounces cream cheese, softened to room temperature
- 1 cup powdered sugar
- 1 cup eggnog (thick, refrigerated kind)
- 1 teaspoon vanilla extract
- 1/2 teaspoon ground nutmeg, plus more for garnish
- 1/2 teaspoon ground cinnamon
- 1/4 teaspoon ground cloves
- 1 tablespoon cornstarch
- 2 cups frozen whipped topping, thawed
- 1/2 cup heavy whipping cream (for optional topping)
- 1 tablespoon powdered sugar (for optional topping)
- Extra ground nutmeg or cinnamon for dusting (optional)
- Caramel sauce or crushed gingersnaps for garnish (optional)
Instructions
- Crush gingersnap cookies into fine crumbs using a food processor or a zip-top bag and rolling pin.
- In a medium bowl, combine cookie crumbs, melted butter, sugar, and salt. Stir until every crumb is coated and the mixture looks like wet sand.
- Press the crust mixture firmly into the bottom of a 9-inch springform pan using the bottom of a measuring cup. Refrigerate while making the filling.
- In a large bowl, beat softened cream cheese with an electric mixer until smooth and fluffy, about 2 minutes. Scrape down the sides of the bowl.
- Add powdered sugar and beat again until combined, about 1 minute.
- In a small separate bowl, whisk together eggnog, vanilla, nutmeg, cinnamon, cloves, and cornstarch until the cornstarch is completely dissolved.
- Slowly pour the eggnog mixture into the cream cheese while mixing on low speed. Once combined, increase to medium and beat for about 2 minutes until silky smooth.
- Gently fold in the thawed whipped topping with a rubber spatula until just combined. Do not overmix.
- Pour the filling over the chilled crust and spread evenly. Tap the pan gently on the counter to release air bubbles.
- Cover with plastic wrap and refrigerate for at least 6 hours, preferably overnight.
- When ready to serve, make the whipped cream topping: beat heavy cream and powdered sugar until stiff peaks form. Spread or pipe over the cheesecake.
- Dust with nutmeg and garnish with crushed gingersnaps or caramel sauce if desired.
Notes
Room temperature ingredients are essential for a smooth filling. Don’t skip the cornstarch—it ensures a sliceable texture. Press the crust firmly to prevent crumbling. Chill for at least 6 hours, but overnight is best. Use a hot knife for clean slices. Store covered in the refrigerator for up to 5 days. Can be frozen for up to 3 months.
Nutrition
- Serving Size: 1 slice
- Calories: 320
- Sugar: 15
- Sodium: 220
- Fat: 22
- Saturated Fat: 12
- Carbohydrates: 28
- Fiber: 1
- Protein: 5
Keywords: eggnog cheesecake, no-bake cheesecake, holiday dessert, gingersnap crust, quick dessert, easy cheesecake


