“You need to make this banana bread again.” My husband didn’t ask. He just stated it, like it was an obvious fact, while standing in the kitchen doorway holding the last slice from a loaf I’d baked two days earlier. And honestly, he wasn’t wrong.
I’d been on a quest for years. You know the one—chasing that perfect banana bread that’s impossibly moist, tender, and packed with flavor without being a science project. I’d tried versions with sour cream, with yogurt, with melted butter and browned butter. Some were good. Some were dry. Some required three bowls and a stand mixer, and let’s face it, by the time your bananas are that speckled and sad, you don’t have the energy for a complicated cleanup.
This one-bowl banana bread with walnuts came from a very specific moment of desperation. I had three overripe bananas on the counter, a hungry family, and exactly zero patience for washing extra dishes. I threw everything into one bowl, crossed my fingers, and hoped for the best. What came out of the oven was the kind of banana bread that makes people close their eyes after the first bite. It’s not fancy. It’s not fussy. It’s just exactly what banana bread should be—and that’s why it stuck.
This is the recipe I make when I want something reliable, something that fills the house with that warm, sweet smell that says everything’s going to be okay. And it all starts with one bowl and a spoon. No mixer required.
Why You’ll Love This Recipe
I’ve tested this recipe more times than I can count, tweaking the flour ratio, the sugar amount, the baking time. I’ve handed it to friends who swear they can’t bake, and they’ve sent me photos of perfect loaves. It’s been approved by picky toddlers, my dad who claims he doesn’t like banana bread, and a friend who’s a pastry chef. That last one was the real test.
- One Bowl, No Mixer: Seriously. One bowl, a whisk, and a spatula. You don’t even need to pull out the hand mixer. Less cleanup means more time eating.
- Perfectly Moist Every Time: The secret is using really ripe bananas and the right amount of oil. This bread stays moist for days—if it lasts that long.
- Simple Pantry Ingredients: Chances are you already have everything you need. No fancy flours, no obscure extracts. Just real, simple stuff.
- Walnuts Add the Best Crunch: The toasted walnuts give this bread a little texture and a nutty flavor that pairs perfectly with the sweet banana. Plus, they look pretty on top.
- Completely Customizable: Don’t have walnuts? Use pecans or chocolate chips. Want it healthier? Swap half the flour for whole wheat. This recipe is forgiving like that.
What makes this one different from all the other banana bread recipes out there? It’s the texture, honestly. It’s not too dense and not too cakey. It’s that perfect in-between where each slice is tender and moist but sturdy enough to hold up to a generous smear of butter. And the walnuts? They toast right on top as the bread bakes, creating this little crunchy crown that’s absolutely irresistible. This isn’t just another banana bread—it’s the one you’ll make again and again.
What Ingredients You Will Need
This recipe uses simple, wholesome ingredients to deliver that classic banana bread flavor without any fuss. Everything comes together quickly, and most of these items are probably already in your kitchen.
For the Banana Bread Batter
- 3 large ripe bananas, mashed (about 1 ½ cups) — The riper the better. Those spotty, almost-black bananas are perfect. They’re sweeter and mash more easily.
- ½ cup (113g) unsalted butter, melted — I prefer unsalted so I can control the salt level. Let it cool slightly before mixing so it doesn’t cook the eggs.
- ¾ cup (150g) granulated sugar — Regular white sugar works great. You could also use coconut sugar for a deeper flavor, but the texture will be slightly different.
- 2 large eggs, room temperature — Cold eggs can seize the butter. If you forgot to take them out, place them in a bowl of warm water for 5 minutes.
- 1 teaspoon vanilla extract — Pure vanilla is best, but imitation works in a pinch.
- 1 ½ cups (190g) all-purpose flour — Spoon and level your flour. Scooping directly from the bag packs it down and leads to dry bread.
- 1 teaspoon baking soda — This is our leavener. Make sure it’s fresh. Test it by dropping a bit into vinegar—if it fizzes, it’s good.
- ½ teaspoon salt — Don’t skip this. It balances the sweetness and brings out the banana flavor.
- ½ teaspoon ground cinnamon — Optional but highly recommended. It adds warmth and depth.
For the Walnut Topping
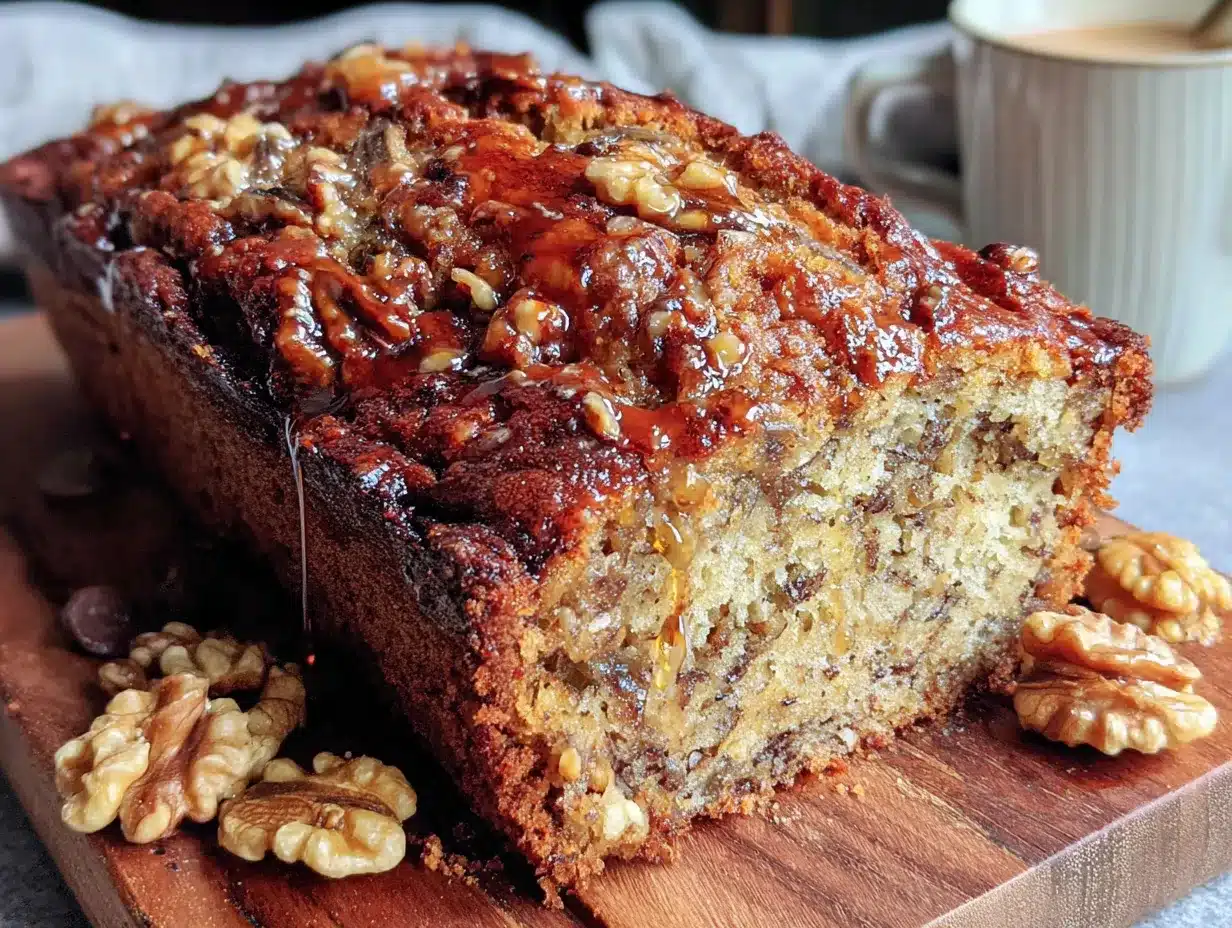
- ¾ cup (90g) chopped walnuts — I like to leave some pieces a bit larger for texture. Toast them lightly before adding for extra flavor. I recommend buying raw walnuts and toasting them yourself—it makes a huge difference.
Ingredient Selection Tips: For the best banana bread, use bananas that are heavily speckled with brown spots. If your bananas aren’t ripe enough, you can place them on a baking sheet in a 300°F oven for 15-20 minutes until the skins turn black. Let them cool before mashing. For the walnuts, I prefer buying them from the bulk section so I can get exactly what I need, and I always give them a quick smell test—they should smell nutty and sweet, not bitter or like paint.
Substitution Guidance: You can swap the all-purpose flour with a gluten-free 1:1 baking blend. For a dairy-free version, use melted coconut oil or a neutral vegetable oil instead of butter. If you don’t have walnuts, pecans or even chopped almonds work beautifully. And if you’re feeling adventurous, fold in ½ cup of chocolate chips along with the walnuts for a double treat.
Equipment Needed
You don’t need a fancy kitchen to make this bread. Here’s what you’ll need:
- Large Mixing Bowl: Any big bowl will do. I use a glass one so I can see if everything is combined.
- Whisk or Wooden Spoon: A whisk works great for the wet ingredients, and a spatula or wooden spoon is perfect for folding in the flour and walnuts.
- 9×5-inch Loaf Pan: This is the standard size. If you use an 8×4-inch pan, you’ll need to increase the baking time by 5-10 minutes.
- Parchment Paper: Not strictly necessary, but it makes lifting the bread out of the pan so much easier. I don’t bother greasing the pan when I use parchment.
- Cooling Rack: A wire rack lets air circulate around the bread so it cools evenly. If you don’t have one, you can use the inverted loaf pan to prop it up.
- Measuring Cups and Spoons: For accuracy. I use dry measuring cups for the flour and sugar and a liquid measuring cup for the melted butter.
Budget-Friendly Option: You can absolutely use a metal loaf pan from the dollar store. It might not be non-stick, but with parchment paper, it works perfectly. I’ve also made this in a disposable aluminum loaf pan when I was traveling—it worked great, just watch the baking time as it may cook faster.
Preparation Method
Let’s get to the good part. This is where the magic happens. Follow these steps, and you’ll have a perfect loaf every time.
- Preheat your oven to 350°F (175°C). Position the rack in the center of the oven. Line a 9×5-inch loaf pan with parchment paper, leaving some overhang on the long sides—this makes it easy to lift the bread out later. If you don’t have parchment, grease the pan well with butter or non-stick spray.
- Mash the bananas. In your large mixing bowl, add the three ripe bananas. Use a fork or a potato masher to mash them until they’re mostly smooth with a few small lumps. You want some texture, not baby food. It should take about 30 seconds. Set them aside.
- Add the melted butter and sugar. Pour the slightly cooled melted butter over the bananas. Add the granulated sugar. Whisk everything together until it’s well combined and slightly glossy. The mixture will look a bit grainy from the sugar—that’s normal and okay.
- Mix in the eggs and vanilla. Crack the two eggs into the bowl. Add the vanilla extract. Whisk vigorously until the eggs are fully incorporated and the mixture is smooth and pale yellow. This takes about 30 seconds of good whisking. Don’t rush this step—you want the eggs to be fully emulsified.
- Add the dry ingredients. Sprinkle the flour, baking soda, salt, and cinnamon over the wet mixture. Use a spatula or wooden spoon to fold everything together gently. Stir just until you no longer see streaks of flour. A few lumps are fine. Overmixing will make your bread tough, so stop as soon as it comes together.
- Fold in the walnuts. Reserve about 2 tablespoons of the chopped walnuts for the top. Gently fold the remaining walnuts into the batter with a few quick strokes. The batter will be thick and slightly lumpy—that’s exactly right.
- Pour the batter into the pan. Scrape the batter into your prepared loaf pan. Use the spatula to spread it evenly. Sprinkle the reserved walnuts on top, pressing them in gently so they stick.
- Bake for 50-60 minutes. Place the pan in the preheated oven. Bake until the top is deep golden brown and a toothpick inserted into the center comes out clean or with just a few moist crumbs. If the top is browning too quickly after 40 minutes, tent the pan loosely with aluminum foil.
- Cool in the pan. Place the loaf pan on a wire rack and let it cool for 15 minutes. This allows the bread to set and makes it easier to remove from the pan.
- Transfer to the rack. Use the parchment paper overhang to lift the bread out of the pan. Place it directly on the wire rack to cool completely before slicing. This is important—slicing while it’s warm will result in crumbly, messy slices. I know it’s tempting, but wait at least 30 minutes.
Sensory Cues: When you take the bread out of the oven, it should smell deeply of banana and toasted nuts. The top should be a rich golden brown and feel springy when you gently press the center. If it feels soft and jiggly, it needs more time. If it feels firm and the toothpick comes out clean, it’s done.
Troubleshooting Tip: If your bread sinks in the middle after baking, it might have been underbaked or the oven temperature was too low. Make sure your oven is properly calibrated. An oven thermometer is a cheap investment that makes a huge difference.
Cooking Tips & Techniques
I’ve made this banana bread more times than I can count, and I’ve learned a few things along the way. Here are my best tips for getting it right every time.
Don’t overmix the batter. This is the number one mistake people make. Once you add the flour, mix only until it disappears. Overmixing develops the gluten, and that leads to tough, dense bread. You want tender, not tough.
Use a kitchen scale for accuracy. I know, I know—it’s more dishes. But weighing your flour is the most reliable way to get consistent results. If you don’t have a scale, spoon the flour into your measuring cup and level it off with a knife. Never scoop directly from the bag.
Toast the walnuts first. This is a game-changer. Spread the chopped walnuts on a baking sheet and toast them in the 350°F oven for 5-7 minutes, until they’re fragrant and slightly darker. Let them cool before adding to the batter. Toasting brings out their natural oils and makes them crunchier. I once skipped this step when I was in a hurry, and the difference was noticeable—the bread was good, but it wasn’t great.
Let the bananas get really ripe. I mean really, really ripe. The kind of ripe where you wonder if they’re still safe to eat. They’re perfect. The darker the skin, the sweeter and more flavorful the banana. If your bananas aren’t ripe enough, your bread will be less flavorful and might need more sugar.
Check for doneness with a thermometer. If you have an instant-read thermometer, the internal temperature of the bread should be around 200-205°F when it’s done. This takes the guesswork out of the toothpick test.
Let it cool completely. I know it’s hard to wait, but slicing into warm banana bread is a recipe for crumbs. The bread needs time to set, and the flavors continue to develop as it cools. If you can wait until the next day, it’s even better.
Variations & Adaptations
This recipe is a wonderful blank canvas. Here are some of my favorite ways to change it up.
Chocolate Chip Banana Bread: Fold in ½ cup of semi-sweet or dark chocolate chips along with the walnuts. The combination of banana and chocolate is classic for a reason. I’ve also used white chocolate chips for a sweeter, creamier version.
Whole Wheat Banana Bread: Swap half the all-purpose flour for whole wheat flour. The bread will be slightly denser and nuttier in flavor. Add an extra tablespoon of milk or yogurt to keep it moist. This is my go-to when I want to feel a little healthier.
Vegan Banana Bread: Replace the butter with melted coconut oil or a neutral vegetable oil. Use two flax eggs (2 tablespoons ground flaxseed mixed with 5 tablespoons water, let sit for 5 minutes) instead of the regular eggs. It works surprisingly well—the texture is a bit more rustic, but it’s still delicious.
Spiced Banana Bread: Add ½ teaspoon of ground nutmeg, ¼ teaspoon of ground ginger, and a pinch of ground cloves along with the cinnamon. It gives the bread a warm, cozy flavor that’s perfect for fall. I make this version when the weather turns cool.
Nut-Free Banana Bread: Simply omit the walnuts. You can replace them with an equal amount of chocolate chips, dried cranberries, or even shredded coconut. The bread will still be moist and delicious—just without the crunch.
Gluten-Free Banana Bread: Use a 1:1 gluten-free baking flour blend that contains xanthan gum. I’ve tried this with King Arthur’s Measure for Measure blend, and it works perfectly. The texture is slightly more delicate, but it’s still a winner.
Serving & Storage Suggestions
This banana bread is wonderful in so many ways. Here’s how to enjoy it and keep it fresh.
Serving: Serve the bread at room temperature or slightly warm. A slice with a pat of salted butter is heaven. For a special treat, toast a slice and spread it with honey or a dollop of Greek yogurt. It’s also fantastic with a cup of coffee or a tall glass of cold milk.
Presentation: For a pretty presentation, slice the bread with a serrated knife using a gentle sawing motion. Arrange the slices on a wooden board or a simple plate. A dusting of powdered sugar or a drizzle of honey makes it look extra special.
Storage: Store the banana bread wrapped tightly in plastic wrap or in an airtight container at room temperature for up to 4 days. The moisture from the bananas keeps it soft, but the walnuts will lose some of their crunch over time. If you live in a humid climate, you might want to store it in the refrigerator to prevent mold.
Freezing: This bread freezes beautifully. Wrap the cooled loaf (or individual slices) tightly in plastic wrap, then in aluminum foil, and place in a freezer-safe bag. It will keep for up to 3 months. To thaw, leave it on the counter for a few hours or pop a slice in the toaster straight from the freezer.
Reheating: For that fresh-from-the-oven taste, warm a slice in the microwave for 15-20 seconds or in a 300°F oven for 5-7 minutes. The toaster is also a great option—it crisps up the edges while keeping the center soft.
Flavor Development: Honestly, this banana bread tastes even better the next day. The flavors meld together, and the texture becomes even more moist. If you can resist eating it all on day one, you’re in for a treat on day two.
Nutritional Information & Benefits
While banana bread is definitely a treat, it does have some redeeming qualities. Here’s a rough breakdown per slice (based on 10 slices).
| Nutrient | Amount Per Slice |
|---|---|
| Calories | ~290 |
| Total Fat | 16g |
| Saturated Fat | 7g |
| Carbohydrates | 34g |
| Fiber | 2g |
| Sugar | 18g |
| Protein | 5g |
Health Benefits: Bananas are a good source of potassium, which is important for heart health and muscle function. Walnuts provide healthy omega-3 fatty acids and antioxidants. The eggs add protein, and the butter provides a little vitamin A. It’s not health food, but it’s not junk either—it’s a balanced indulgence.
Dietary Considerations: This recipe is vegetarian. For a dairy-free version, use coconut oil. For a gluten-free version, use a 1:1 gluten-free flour blend. For a lower-sugar version, you can reduce the sugar to ½ cup, but the bread will be less sweet and slightly less tender.
Potential Allergens: This recipe contains gluten, dairy, eggs, and tree nuts (walnuts). If you’re serving it to a crowd, it’s always a good idea to ask about allergies first.
From a personal perspective, I love that this recipe lets me enjoy a classic comfort food without feeling like I’m eating something completely empty. It’s made with real ingredients, and that makes me feel good about sharing it with my family.
FAQs
Can I use frozen bananas for this recipe?
Absolutely! Frozen bananas are actually perfect for banana bread. Thaw them completely, then drain off any excess liquid before mashing. The texture might be slightly softer, but the flavor is concentrated and wonderful.
Why did my banana bread turn out dry?
Dry banana bread usually means either too much flour or it was overbaked. Make sure you’re measuring your flour correctly (spoon and level) and check the bread a few minutes before the suggested baking time. An oven thermometer can also help ensure your oven temperature is accurate.
Can I make this recipe into muffins?
Yes! This batter makes about 12 standard muffins. Line a muffin tin with paper liners and fill each cup about ¾ full. Bake at 350°F for 18-22 minutes, or until a toothpick inserted into the center comes out clean. The baking time will be much shorter, so keep an eye on them.
How do I know when the banana bread is done?
Insert a toothpick or a thin knife into the center of the loaf. If it comes out clean or with just a few moist crumbs, it’s done. You can also use an instant-read thermometer—the internal temperature should be around 200-205°F. The top should be golden brown and feel springy to the touch.
Can I add other mix-ins besides walnuts?
Of course! This recipe is very versatile. Try chocolate chips, dried cranberries, shredded coconut, chopped pecans, or even a swirl of peanut butter. You can add up to 1 cup of mix-ins without changing the baking time significantly. Just fold them in gently at the end.
Conclusion
This one-bowl banana bread with walnuts is the kind of recipe that becomes a staple. It’s simple enough for a weekday afternoon, but special enough to bring to a brunch or potluck. The walnuts add that perfect crunch, the banana flavor is front and center, and the one-bowl cleanup means you spend less time washing dishes and more time enjoying that first warm slice.
I love this recipe because it’s reliable. It works every single time, no matter how chaotic the kitchen is. It’s the bread I make when I need something comforting, something that fills the house with a smell that says “home.” And honestly, it’s the bread my husband asks for by name.
I’d love to hear how yours turns out. Did you add chocolate chips? Swap the walnuts for pecans? Forget to add the sugar and have to start over? (I’ve done that, too.) Leave a comment below and let me know. And if you’re looking for more simple, delicious recipes, you might also enjoy this moist double chocolate zucchini muffins or these fluffy buttermilk pancakes. Happy baking!
Pin This Recipe!
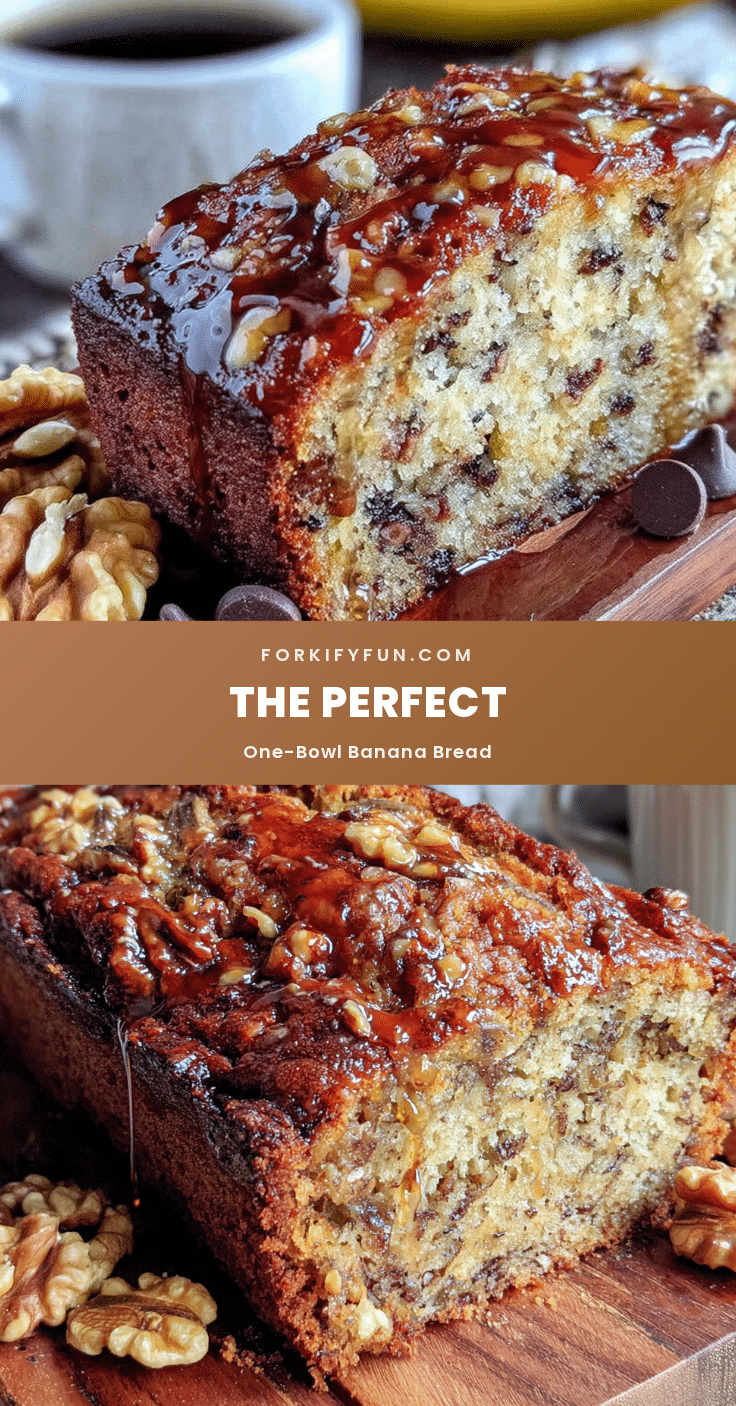
Perfect One-Bowl Banana Bread with Walnuts
This impossibly moist, tender banana bread with crunchy walnuts comes together in one bowl with no mixer required. It’s the reliable, comforting loaf you’ll make again and again.
- Prep Time: 15 minutes
- Cook Time: 55 minutes
- Total Time: 1 hour 10 minutes
- Yield: 10 servings 1x
- Category: Dessert
- Cuisine: American
Ingredients
- 3 large ripe bananas, mashed (about 1 ½ cups)
- ½ cup (113g) unsalted butter, melted
- ¾ cup (150g) granulated sugar
- 2 large eggs, room temperature
- 1 teaspoon vanilla extract
- 1 ½ cups (190g) all-purpose flour
- 1 teaspoon baking soda
- ½ teaspoon salt
- ½ teaspoon ground cinnamon
- ¾ cup (90g) chopped walnuts
Instructions
- Preheat your oven to 350°F (175°C). Position the rack in the center of the oven. Line a 9×5-inch loaf pan with parchment paper, leaving some overhang on the long sides. If you don’t have parchment, grease the pan well with butter or non-stick spray.
- In your large mixing bowl, add the three ripe bananas. Use a fork or a potato masher to mash them until they’re mostly smooth with a few small lumps.
- Pour the slightly cooled melted butter over the bananas. Add the granulated sugar. Whisk everything together until well combined and slightly glossy.
- Crack the two eggs into the bowl. Add the vanilla extract. Whisk vigorously until the eggs are fully incorporated and the mixture is smooth and pale yellow.
- Sprinkle the flour, baking soda, salt, and cinnamon over the wet mixture. Use a spatula or wooden spoon to fold everything together gently. Stir just until you no longer see streaks of flour. A few lumps are fine.
- Reserve about 2 tablespoons of the chopped walnuts for the top. Gently fold the remaining walnuts into the batter with a few quick strokes.
- Scrape the batter into your prepared loaf pan. Use the spatula to spread it evenly. Sprinkle the reserved walnuts on top, pressing them in gently so they stick.
- Bake for 50-60 minutes, until the top is deep golden brown and a toothpick inserted into the center comes out clean or with just a few moist crumbs. If the top is browning too quickly after 40 minutes, tent the pan loosely with aluminum foil.
- Place the loaf pan on a wire rack and let it cool for 15 minutes.
- Use the parchment paper overhang to lift the bread out of the pan. Place it directly on the wire rack to cool completely before slicing (at least 30 minutes).
Notes
For best results, use very ripe bananas (heavily speckled with brown spots). Toast the walnuts before adding for extra flavor. Do not overmix the batter. Let the bread cool completely before slicing to avoid crumbling. The bread tastes even better the next day.
Nutrition
- Serving Size: 1 slice
- Calories: 290
- Sugar: 18
- Sodium: 220
- Fat: 16
- Saturated Fat: 7
- Carbohydrates: 34
- Fiber: 2
- Protein: 5
Keywords: banana bread, one-bowl banana bread, banana bread with walnuts, easy banana bread, moist banana bread