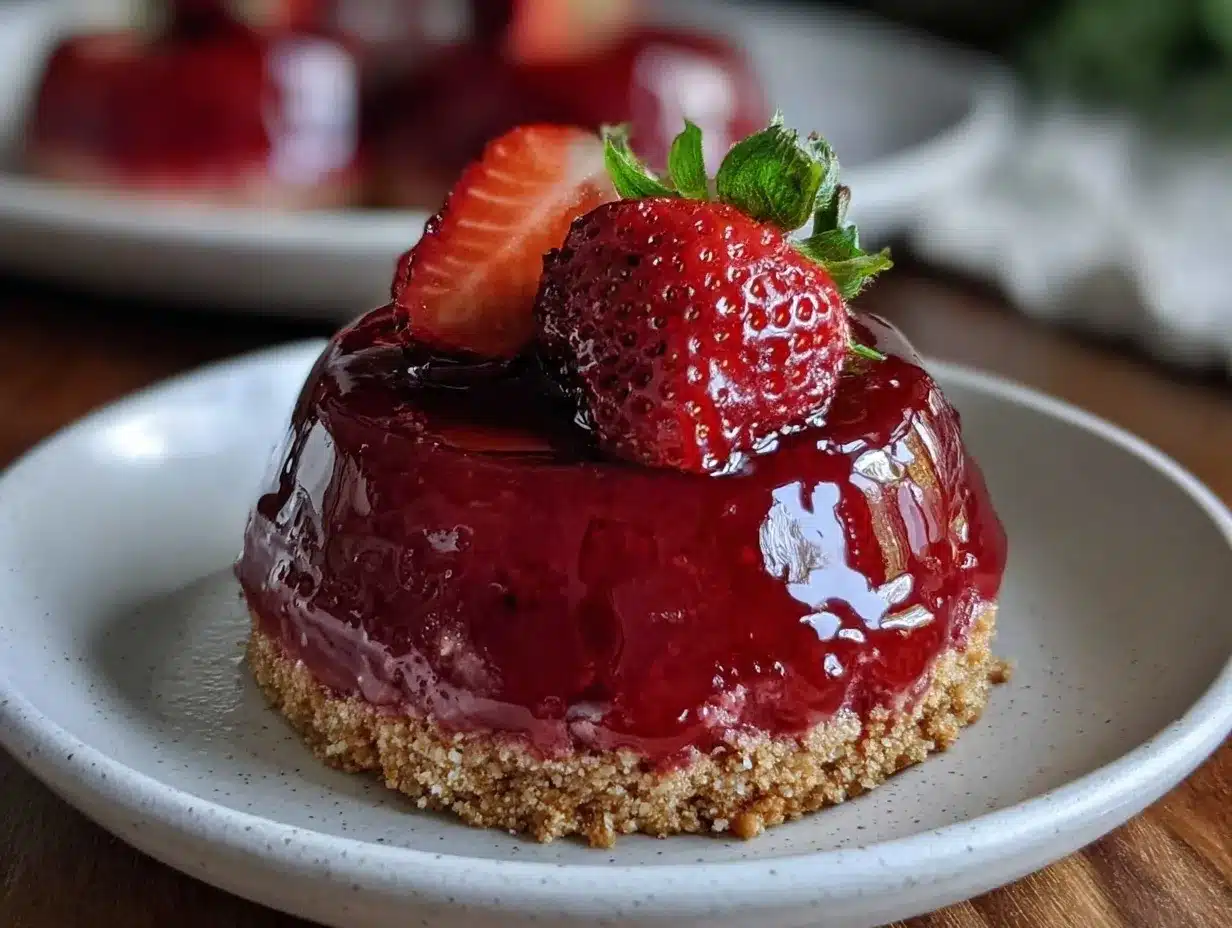
“You really have to try this,” my friend texted me late one evening, attaching a photo of a gleaming strawberry cheesecake dome that looked almost too perfect to eat. Honestly, I was skeptical—no-bake cheesecakes always seemed a bit too soft or, well, “meh” to me. But something about that glossy mirror glaze and those delicate strawberry hues pulled me in. So, I gave it a shot one weekend when I had a bit of downtime and, let me tell you, this Perfect No-Bake Strawberry Cheesecake Dome with Mirror Glaze turned out to be the kind of dessert that makes you pause mid-bite and just smile.
It wasn’t one of those rushed, last-minute recipes I usually reach for during the chaos of a busy week. This one demanded a little patience, but the process felt more like a relaxing creative project than a chore. The smooth, creamy cheesecake filling layered inside that dome shape made me think of the classic desserts I grew up loving, but without the oven hassle. And that mirror glaze—oh, that glaze! It reflects light so beautifully it almost looks like glass.
Since then, this strawberry cheesecake dome has popped up on my table more times than I can count. It’s become my go-to when I want to impress guests or just treat myself to something a little special but without a ton of fuss. If you’ve been hesitant about no-bake cheesecakes or feel like they don’t quite hit the mark, this recipe might quietly change your mind. It’s that rare dessert that feels fancy, tastes fresh, and actually holds together well—perfect for those moments when you want to show off a bit but not get stressed out.
What stuck with me most was how this cheesecake dome manages to feel both indulgent and light—a real keeper for strawberry lovers and anyone who appreciates a dessert you don’t have to bake to perfection. So, here’s my step-by-step guide to making the Perfect No-Bake Strawberry Cheesecake Dome with Mirror Glaze, a recipe that’s as much about the journey as the sweet, creamy reward.
Why You’ll Love This Recipe
After testing this Perfect No-Bake Strawberry Cheesecake Dome recipe multiple times, I’ve come to trust it as one of the most rewarding no-bake desserts out there. Here’s why it deserves a spot in your recipe collection:
- Quick & Easy: It comes together in under 3 hours (including chilling time), which is fantastic when you want an elegant dessert without spending all day in the kitchen.
- Simple Ingredients: No fancy or hard-to-find items here—mostly pantry staples and fresh strawberries, so you won’t need a special grocery run.
- Perfect for Special Occasions: Whether it’s a birthday, a dinner party, or just a weekend treat, this dome is a showstopper that’s surprisingly easy to make.
- Crowd-Pleaser: Kids and adults alike rave about the creamy texture and the glossy, fruity finish.
- Unbelievably Delicious: The contrast between the smooth cheesecake filling, the crunchy biscuit base, and the shiny mirror glaze creates a multi-textured experience that’s just next-level.
What makes this recipe different? Honestly, it’s the mirror glaze technique and the dome mold that make it stand out. Instead of a traditional flat cheesecake, this dome shape feels special, almost like a dessert jewel. Plus, I’ve found using a blend of cream cheese and whipped cream makes the filling ultra-smooth and light, avoiding that dense, heavy feel you sometimes get with no-bake cheesecakes.
This strawberry cheesecake dome isn’t just a dessert; it’s a little moment of joy—something that makes you pause to appreciate the smoothness, the subtle sweetness, and the fresh strawberry flavor wrapped in that shiny glaze. It’s a fun twist on classic cheesecake, perfect for anyone who loves a bit of elegance with minimal effort.
What Ingredients You Will Need
This recipe uses simple, wholesome ingredients that come together beautifully to deliver a bold strawberry flavor and a satisfying creamy texture without the fuss. Most are pantry staples, and you can easily find fresh strawberries year-round or use frozen in a pinch.
- For the Crust:
- 200g (7 oz) digestive biscuits or graham crackers, crushed (I like using McVitie’s for consistent crunch)
- 100g (7 tbsp) unsalted butter, melted (adds richness and holds the crust together)
- 2 tbsp granulated sugar (optional, depending on biscuit sweetness)
- For the Cheesecake Filling:
- 400g (14 oz) cream cheese, softened (Philadelphia brand is reliable)
- 200ml (¾ cup + 1 tbsp) heavy whipping cream, chilled
- 100g (½ cup) powdered sugar, sifted
- 1 tsp pure vanilla extract
- 2 tsp powdered gelatin (or agar-agar for vegetarian option), dissolved in 3 tbsp warm water
- 150g (1 cup) fresh strawberries, chopped (choose ripe, firm berries for best texture)
- For the Mirror Glaze:
- 150g (¾ cup) granulated sugar
- 100ml (⅓ cup + 1 tbsp) water
- 100g (⅓ cup + 1 tbsp) sweetened condensed milk
- 150g (5 oz) white chocolate, chopped (good quality like Lindt)
- 8g (2 tsp) powdered gelatin, bloomed in 40ml cold water
- Red food coloring or strawberry powder (optional, for vivid color)
Substitutions: You can swap cream cheese for mascarpone for a silkier texture or use a dairy-free cream cheese and coconut cream to make it vegan-friendly (just check your gelatin substitute). If you don’t have digestive biscuits, graham crackers or even a nut-based crust work well. For a twist, try adding a splash of lemon juice to the filling for brightness.
Equipment Needed
- Dome-shaped silicone mold (around 6-inch diameter) – silicone makes unmolding a breeze; if you don’t have one, a small bowl lined with plastic wrap can work as a substitute.
- Mixing bowls – preferably one large for the filling and one small for gelatin blooming.
- Electric mixer or stand mixer – for whipping the cream and mixing cream cheese smoothly.
- Spatula – to fold ingredients gently and scrape bowls.
- Measuring cups and spoons – accuracy matters for the gelatin and sugar.
- Small saucepan – to prepare the mirror glaze syrup.
- Fine mesh strainer – useful for smoothing the glaze before pouring.
- Cooling rack – to place the dome on while glazing, allowing excess to drip off.
If you’re on a budget, I recommend checking out affordable silicone molds online—they’re versatile and well worth investing in for desserts like this. I’ve tried a few brands, but simple, food-grade silicone molds with flexible sides really save the day when it comes to the perfect dome shape. Also, keeping your mixer beaters cold helps achieve that fluffy cream texture faster.
Preparation Method
- Prepare the Crust (10 minutes): Crush the digestive biscuits into fine crumbs using a food processor or a rolling pin inside a sealed bag. Mix the crumbs with melted butter and sugar until evenly combined. Press this mixture firmly into the base of your silicone dome mold. Use the bottom of a glass to smooth and compact it. Place the mold in the fridge to chill for at least 30 minutes, so it firms up nicely.
- Bloom the Gelatin for Filling (5 minutes): Sprinkle 2 tsp powdered gelatin over 3 tbsp warm water. Let it sit while you prepare the filling—this softens it so it dissolves smoothly.
- Make the Cheesecake Filling (15 minutes): In a large bowl, beat the softened cream cheese with powdered sugar and vanilla extract until smooth and creamy. Gradually add the bloomed gelatin, mixing well to incorporate. In a separate bowl, whip the heavy cream until stiff peaks form. Gently fold the whipped cream into the cream cheese mixture, careful not to deflate it.
- Add Strawberries (2 minutes): Fold in the chopped fresh strawberries to the cheesecake filling, distributing them evenly but gently.
- Assemble the Dome (5 minutes): Spoon the filling into the chilled crust-lined dome mold, smoothing the top with a spatula. Cover with plastic wrap and refrigerate for at least 4 hours or overnight for best results.
- Prepare the Mirror Glaze (20 minutes): In a small saucepan, combine sugar, water, and sweetened condensed milk. Heat just until sugar dissolves, then remove from heat and add chopped white chocolate, stirring until melted. Add the bloomed gelatin and mix well. Strain the glaze through a fine mesh to remove lumps. If desired, add red food coloring or strawberry powder for a vibrant finish. Let the glaze cool to about 30-35°C (86-95°F), the perfect temperature for pouring.
- Glazing the Dome (10 minutes): Carefully unmold the cheesecake dome onto a cooling rack set over a tray to catch drips. Pour the mirror glaze evenly over the dome, ensuring full coverage. The glaze should run smoothly and create that shiny, reflective surface. Place the glazed dome back in the fridge to set for at least 1 hour before serving.
Tip: If your glaze cools too much and thickens, warm it gently over a double boiler or in short bursts in the microwave to reach the right pouring consistency. Avoid stirring vigorously once cooled to keep it smooth.
Warning: Don’t skip chilling the cheesecake before glazing—if it’s too soft, the glaze will slide off or mix with the filling instead of creating that perfect mirror finish.
Cooking Tips & Techniques
Getting that mirror glaze just right can feel intimidating at first, but a few key techniques make all the difference. First, blooming gelatin properly is essential—it ensures your glaze sets with a perfect shine and doesn’t break or get grainy. Always sprinkle gelatin over cold or warm water and give it 5 minutes to absorb before adding it to hot mixtures.
Temperature control is your best friend. The ideal pouring temperature for mirror glaze is between 86°F and 95°F (30-35°C). If it’s too hot, it’ll be runny and lose its shine; too cool, it won’t spread evenly. Using a candy or instant-read thermometer helps hit the sweet spot.
When mixing the cheesecake filling, be gentle folding in the whipped cream to keep it airy. Overmixing deflates the texture, making the cheesecake dense instead of light and creamy. I’ve learned that whipping the cream to stiff peaks while keeping it cold yields the best volume and stability.
Unmolding from a silicone dome mold is easier when the cheesecake is well chilled (ideally overnight). To help the release, gently pull the edges of the mold away from the cheesecake before pushing the base up.
One mistake I made early on was glazing directly onto a warm cheesecake—the glaze slipped off in places. Patience is key! Waiting for the cheesecake to chill fully gives you that flawless coating every time.
Variations & Adaptations
The Perfect No-Bake Strawberry Cheesecake Dome is wonderfully versatile. Here are a few ways to switch it up:
- Flavor Variations: Swap strawberries for raspberries or blueberries for a different berry twist. Adding a teaspoon of lemon zest to the filling brightens the flavor beautifully.
- Gluten-Free Option: Use gluten-free digestive biscuits or almond flour mixed with melted butter for the crust.
- Vegan Adaptation: Replace cream cheese with a plant-based alternative and use coconut cream whipped to stiff peaks. Agar-agar can substitute gelatin for the filling and glaze, but it sets firmer, so adjust quantities carefully.
- Chocolate Lover’s Twist: Add melted dark chocolate to the filling or swirl in a rich chocolate ganache before setting for a decadent surprise inside.
- Seasonal Flair: In summer, fresh local strawberries shine best, but in winter, try using frozen berries thawed and drained to avoid excess moisture.
One time, I tried a quick mango glaze instead of strawberry for a tropical vibe, and it was a hit at a brunch party. If you want to experiment with different crust bases, even a thin layer of crushed pistachios mixed with butter adds a lovely crunch and color contrast.
Serving & Storage Suggestions
The Perfect No-Bake Strawberry Cheesecake Dome tastes best chilled, so serve it straight from the refrigerator. Slice carefully with a hot, dry knife for clean cuts that show off the dome’s layers.
This dessert pairs wonderfully with a light cup of coffee or a sparkling rosé for celebrations. If you’re serving it for brunch, try alongside a fresh fruit salad or a batch of cozy French onion soup for a surprising yet delightful contrast.
Store any leftovers covered in the fridge for up to 3 days. The mirror glaze may dull slightly over time but the flavor deepens, making it just as enjoyable. For longer storage, you can freeze the cheesecake dome (without glaze) wrapped tightly in plastic wrap and foil for up to 1 month. Thaw overnight in the fridge before glazing and serving.
Reheating isn’t recommended as it can spoil the texture, but taking it out 15 minutes before serving helps soften it just enough to release those creamy flavors.
Nutritional Information & Benefits
This no-bake strawberry cheesecake dome offers an indulgent treat with a few noteworthy nutritional perks. Fresh strawberries provide vitamin C and antioxidants, supporting immune health and adding natural sweetness. The cream cheese and whipped cream deliver calcium and protein, though the dessert is rich and best enjoyed in moderation.
Per serving (based on 8 slices), this cheesecake dome contains approximately 350 calories, 25g fat, 20g carbohydrates, and 5g protein. For those watching carb intake, swapping the biscuit crust for almond flour can lower sugars and increase healthy fats.
Keep in mind this dessert contains dairy and gluten (unless substitutions are made), so it’s not suitable for those with corresponding allergies. If you want a lighter option, try the healthy no-bake protein balls recipe on the site for a snack that’s more on the wholesome side.
Conclusion
The Perfect No-Bake Strawberry Cheesecake Dome with Mirror Glaze has truly become one of my favorite desserts to make and share. It’s the kind of recipe that feels special without being complicated, and that glossy, jewel-like finish never fails to impress. Whether you’re new to no-bake cheesecakes or looking for a fresh way to present strawberries, this dome offers a beautiful balance of creamy texture and vibrant flavor.
Feel free to tweak the fruit, crust, or glaze to suit your taste, making it uniquely yours. I love how this recipe invites creativity while still delivering consistent, reliable results. If you try it, I’d love to hear how your cheesecake dome turns out and what variations you explore—sharing those little kitchen adventures is what makes cooking so fun.
Go ahead and give it a whirl—you might just find your next signature dessert.
FAQs About the Perfect No-Bake Strawberry Cheesecake Dome
How long does the cheesecake dome need to chill before glazing?
At least 4 hours in the fridge is recommended, but overnight chilling works best to ensure it’s firm enough for glazing.
Can I use frozen strawberries in the filling?
Yes, but thaw and drain them well to avoid excess moisture that can affect the cheesecake’s texture.
What if I don’t have a dome mold?
You can line a small bowl with plastic wrap and use that as a mold, pressing the crust and filling inside, then carefully unmolding once set.
How do I store leftover mirror glaze cheesecake?
Keep it covered in the fridge for up to 3 days. The glaze may lose some shine but the flavor remains delicious.
Is there a way to make this cheesecake dome dairy-free?
Yes! Use dairy-free cream cheese and coconut cream, and substitute gelatin with agar-agar. Adjust quantities and chilling times as agar sets firmer and faster.
Pin This Recipe!
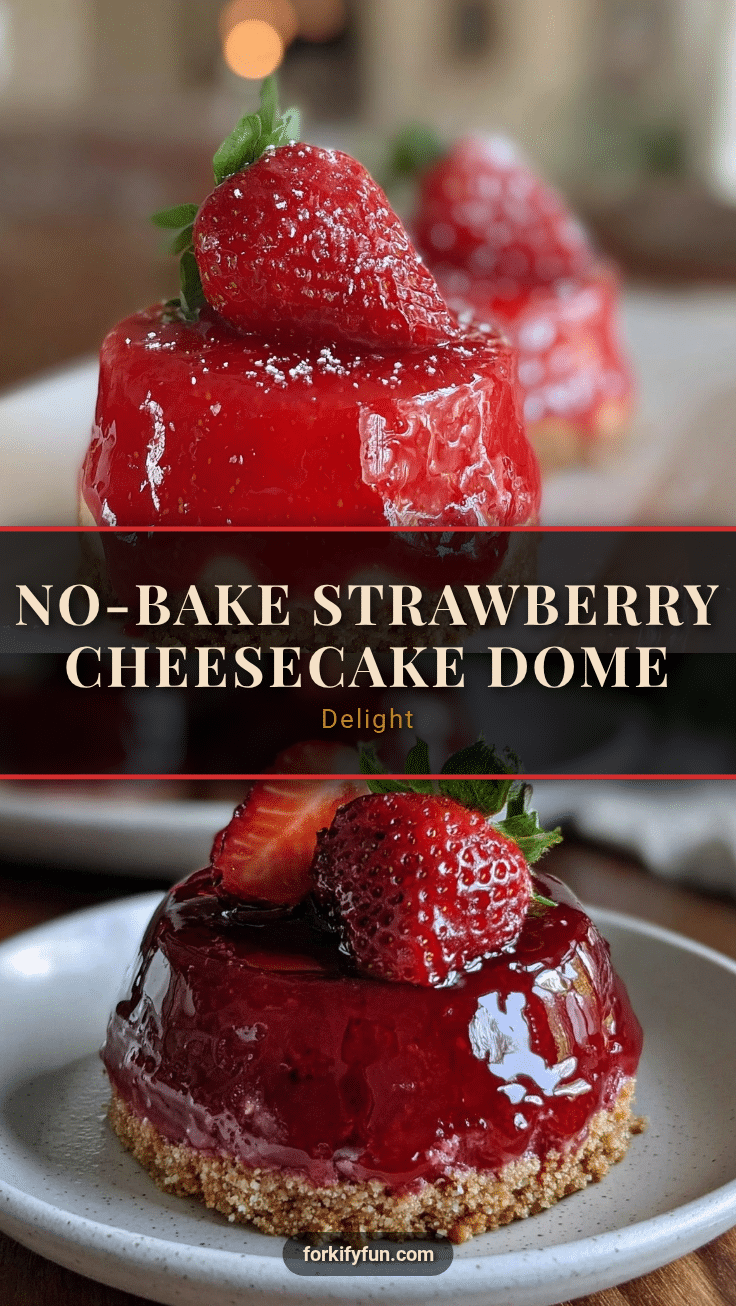
Perfect No-Bake Strawberry Cheesecake Dome

A creamy, no-bake strawberry cheesecake dome with a glossy mirror glaze that is elegant, light, and perfect for special occasions.
- Prep Time: 30 minutes
- Cook Time: 0 minutes
- Total Time: 4 hours 30 minutes
- Yield: 8 servings 1x
- Category: Dessert
- Cuisine: American
Ingredients
- 200g (7 oz) digestive biscuits or graham crackers, crushed
- 100g (7 tbsp) unsalted butter, melted
- 2 tbsp granulated sugar (optional)
- 400g (14 oz) cream cheese, softened
- 200ml (¾ cup + 1 tbsp) heavy whipping cream, chilled
- 100g (½ cup) powdered sugar, sifted
- 1 tsp pure vanilla extract
- 2 tsp powdered gelatin (or agar-agar for vegetarian option), dissolved in 3 tbsp warm water
- 150g (1 cup) fresh strawberries, chopped
- 150g (¾ cup) granulated sugar
- 100ml (⅓ cup + 1 tbsp) water
- 100g (⅓ cup + 1 tbsp) sweetened condensed milk
- 150g (5 oz) white chocolate, chopped
- 8g (2 tsp) powdered gelatin, bloomed in 40ml cold water
- Red food coloring or strawberry powder (optional)
Instructions
- Prepare the crust: Crush digestive biscuits into fine crumbs. Mix with melted butter and sugar. Press firmly into the base of a 6-inch dome silicone mold. Chill in fridge for at least 30 minutes.
- Bloom gelatin for filling: Sprinkle 2 tsp powdered gelatin over 3 tbsp warm water and let sit.
- Make cheesecake filling: Beat cream cheese with powdered sugar and vanilla until smooth. Add bloomed gelatin and mix well. Whip heavy cream to stiff peaks and gently fold into cream cheese mixture.
- Fold in chopped strawberries gently.
- Assemble dome: Spoon filling into chilled crust-lined mold, smooth top, cover with plastic wrap, and refrigerate for at least 4 hours or overnight.
- Prepare mirror glaze: In a saucepan, combine sugar, water, and sweetened condensed milk. Heat until sugar dissolves. Remove from heat, add white chocolate and stir until melted. Add bloomed gelatin and mix well. Strain glaze and add red food coloring or strawberry powder if desired. Cool to 86-95°F (30-35°C).
- Glaze dome: Unmold cheesecake onto cooling rack over a tray. Pour glaze evenly over dome. Refrigerate for at least 1 hour before serving.
Notes
Bloom gelatin properly for best texture. Keep glaze temperature between 86-95°F for perfect shine. Chill cheesecake fully before glazing to prevent glaze from sliding off. Use a hot, dry knife for clean slices. Vegan and gluten-free substitutions are possible with ingredient swaps.
Nutrition
- Serving Size: 1 slice (1/8 of dome
- Calories: 350
- Fat: 25
- Carbohydrates: 20
- Protein: 5
Keywords: no-bake cheesecake, strawberry cheesecake, mirror glaze, no-bake dessert, cheesecake dome, easy cheesecake, summer dessert