“Wait—brown butter AND pumpkin AND cheesecake in one bar?” My sister-in-law texted me that exact question last October, and I honestly haven’t stopped thinking about these bars since. She’d sent me a blurry photo from some bakery in Portland, and I spent the next three days obsessively trying to recreate what I saw.
The first batch? Let’s just say it was a learning experience. The brown butter burned, the cheesecake layer cracked, and the pumpkin layer somehow tasted like sadness. But that second batch—the one where I finally figured out the timing and the temperature and the whole rhythm of it—that one made my sister-in-law cry. Not dramatic crying, but that quiet “oh, this is really good” kind of tear that means you’ve actually nailed something.
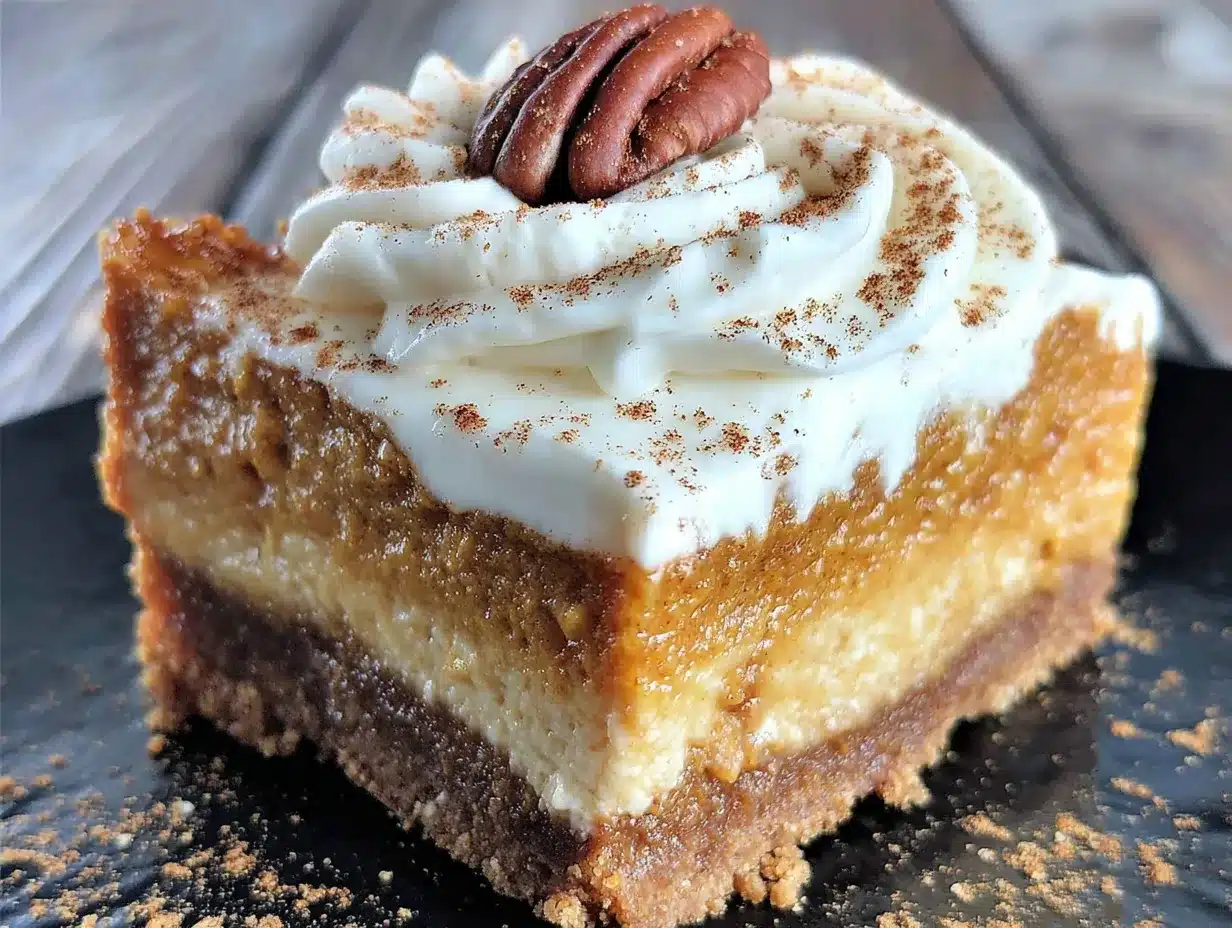
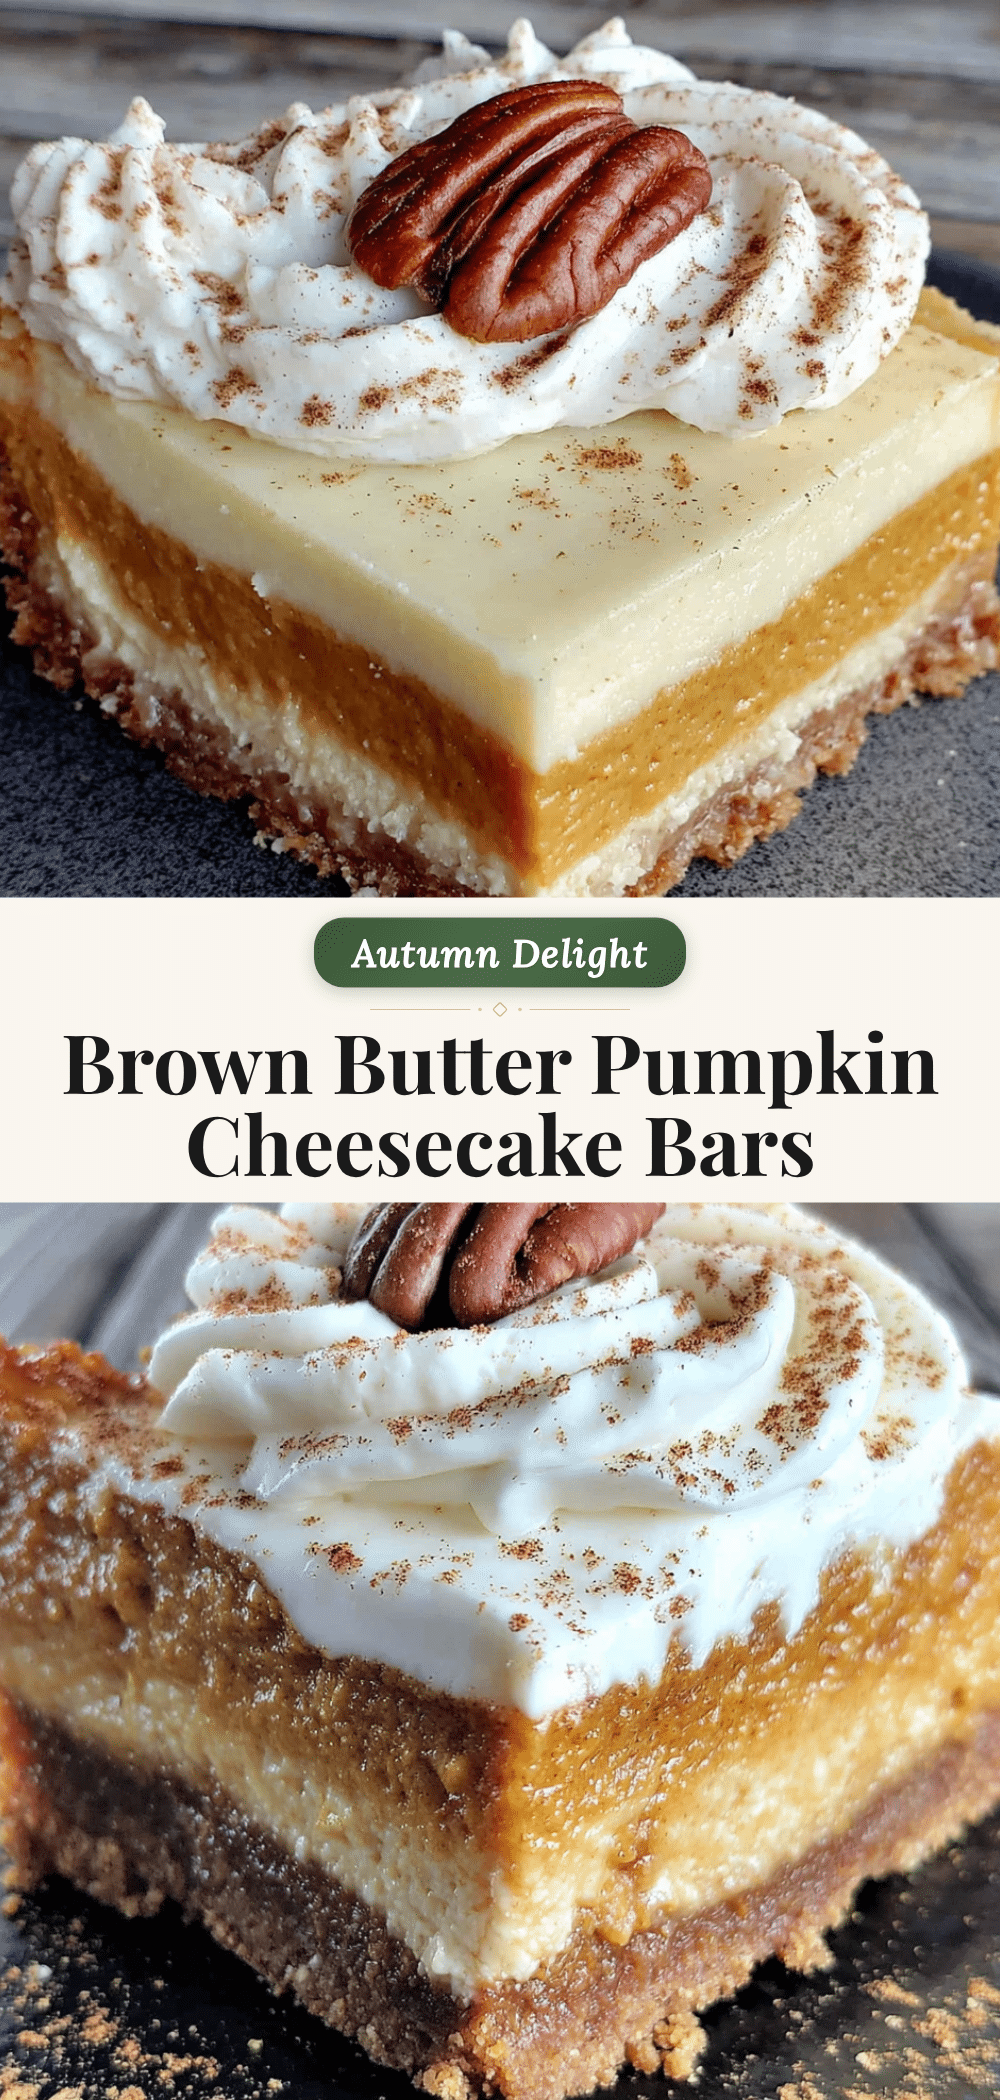
These Perfect Brown Butter Pumpkin Cheesecake Bars are what happen when three iconic desserts walk into a kitchen and decide to cooperate. You get the nutty, toasty depth of brown butter, the silky richness of cheesecake, and that familiar spiced pumpkin pie filling we all crave when the leaves start turning. All stacked on a buttery shortbread crust that holds everything together without getting soggy.
I’ve made these bars for Thanksgiving, for random Tuesday cravings, and for that one friend who “doesn’t really like pumpkin desserts” (she ate three). They’re the kind of recipe that makes people close their eyes after the first bite, and honestly? That never gets old.
Why You’ll Love This Recipe
These aren’t your average pumpkin bars. After testing this recipe six times (yes, six), I can confidently say every detail serves a purpose. Here’s what makes them special:
- Three Layers, One Bar: You get a buttery shortbread crust, a creamy cheesecake layer, and a spiced pumpkin pie topping. Each bite hits different textures and flavors without any single one overpowering the others.
- Brown Butter Magic: That nutty, caramelized butter flavor weaves through the entire bar. It’s subtle enough to complement the pumpkin and cream cheese but bold enough to make you wonder why you haven’t been browning butter your whole life.
- Make-Ahead Friendly: These bars actually taste better the next day. The flavors meld together overnight, and the texture firms up perfectly. You can prep them a full 48 hours ahead of your event.
- No Water Bath Needed: Traditional cheesecake recipes often require a fussy water bath. This one doesn’t. The bars bake evenly without cracking because of the shorter baking time and the stabilizing effect of the pumpkin layer.
- Crowd-Pleasing Size: Bars are way easier to serve than a whole pie or cheesecake. No awkward slicing, no crumbling edges. Just clean, beautiful squares that everyone can grab.
I’ve brought these to potlucks, family dinners, and even a casual book club meeting where we were supposed to be discussing the book but mostly just ate these bars. Every single time, someone asks for the recipe. And every single time, I watch them scroll through the ingredients and realize—these are actually pretty simple to pull together.
What Ingredients You Will Need
This recipe uses straightforward ingredients, but a few key choices make the difference between good bars and unforgettable ones. Here’s what you need and why each ingredient matters.
For the Shortbread Crust
- 1 ½ cups all-purpose flour (spooned and leveled—don’t scoop directly from the bag or you’ll pack in too much)
- ½ cup granulated sugar
- ½ cup unsalted butter, cold and cut into small cubes (cold butter creates a flakier, more tender crust)
- ¼ teaspoon salt (I use fine sea salt here)
For the Brown Butter
- ½ cup unsalted butter (you’ll brown this first, then use it in both the cheesecake and pumpkin layers)
For the Cheesecake Layer
- 8 ounces cream cheese, softened to room temperature (full-fat brick cream cheese, not the spreadable kind in a tub)
- ¼ cup granulated sugar
- 1 large egg, room temperature
- 1 teaspoon vanilla extract
- 2 tablespoons of your browned butter (reserved from the browning process)
For the Pumpkin Layer
- 1 cup pumpkin puree (not pumpkin pie filling—they’re different, and using the wrong one changes everything)
- ½ cup packed light brown sugar
- 2 large eggs, room temperature
- ½ cup heavy cream (adds richness that milk just can’t replicate)
- 1 teaspoon pumpkin pie spice (or make your own with ½ teaspoon cinnamon, ¼ teaspoon ginger, ¼ teaspoon nutmeg, and a pinch of cloves)
- ½ teaspoon vanilla extract
- Remaining browned butter (about 4-5 tablespoons)
I recommend using Libby’s pumpkin puree if you can find it—it’s consistently thick and not watery, which means your pumpkin layer won’t turn into soup. For the cream cheese, Philadelphia is my go-to. It blends smoothly without lumps, and that matters when you’re layering delicate fillings.
One note on the brown butter: you’ll brown a full stick (½ cup) but only use about 2 tablespoons in the cheesecake and the rest in the pumpkin layer. Don’t skip this step—it’s the secret weapon that makes these bars taste like you spent hours in the kitchen when really, you just browned some butter.
Equipment Needed
You don’t need a professional pastry kitchen for these bars, but a few tools make the process smoother:
- 8×8-inch baking pan (metal works best for even baking; glass can work but may need a few extra minutes)
- Parchment paper (for lining the pan—makes lifting the bars out effortless)
- Light-colored saucepan (crucial for browning butter—dark pans make it hard to see when the butter changes color)
- Electric hand mixer or stand mixer (you can mix by hand, but the cheesecake layer gets much smoother with a mixer)
- Mixing bowls (at least two medium-sized ones)
- Whisk
- Rubber spatula
- Sharp knife (for clean cuts after chilling)
If you don’t have a light-colored saucepan, you can use any small pot—just watch the butter extra carefully. I’ve burned more batches than I’d like to admit because I got distracted by my phone. The butter goes from golden to burnt in about 30 seconds, so stay focused.
A good offset spatula helps if you have one, but a regular butter knife works fine for spreading the layers evenly.
Preparation Method
Let’s break this down step by step. Trust me, if you follow these instructions, you’ll end up with bars that look and taste like they came from a fancy bakery.
Step 1: Brown the Butter
Place the ½ cup unsalted butter in your light-colored saucepan over medium heat. Stir occasionally with a rubber spatula. The butter will melt, foam up, and then start to turn golden. Watch for small brown specks forming at the bottom—that’s the milk solids toasting. Once the butter smells nutty and turns a warm amber color (about 5-7 minutes), remove it from the heat immediately. Pour it into a heat-safe bowl and let it cool for 10 minutes. Don’t skip the cooling step—hot butter will cook your eggs later.
Step 2: Make the Crust
Preheat your oven to 350°F (175°C). Line your 8×8 pan with parchment paper, leaving overhang on two sides. In a medium bowl, combine the flour, sugar, and salt. Add the cold butter cubes and use a pastry cutter or your fingers to work the butter into the flour until the mixture looks like coarse sand with some pea-sized butter bits. Press this mixture firmly into the bottom of your prepared pan. Bake for 15-18 minutes until lightly golden. Let it cool completely on a wire rack.
Step 3: Make the Cheesecake Layer
In a medium bowl, beat the softened cream cheese with an electric mixer until smooth and creamy (about 2 minutes). Add the sugar and beat until combined. Add the egg and vanilla, mixing on low speed just until incorporated. Stir in 2 tablespoons of your cooled browned butter. Be careful not to overmix—too much air creates cracks later. Spread this mixture evenly over your cooled crust.
Step 4: Make the Pumpkin Layer
In another bowl, whisk together the pumpkin puree, brown sugar, eggs, heavy cream, pumpkin pie spice, and vanilla until smooth. Pour in the remaining browned butter (about 4-5 tablespoons) and whisk until fully combined. The mixture should be thick but pourable, like a milkshake consistency.
Step 5: Layer and Swirl
Gently pour the pumpkin mixture over the cheesecake layer. Use a spatula to spread it evenly. Here’s the fun part—take a butter knife and gently swirl it through both layers in a figure-eight pattern. Just three or four swirls is enough. You want distinct layers with a subtle marble effect, not a completely mixed mess.
Step 6: Bake
Place the pan in the preheated oven and bake for 40-45 minutes. The edges should look set and slightly puffed, but the center will still jiggle slightly when you gently shake the pan. That’s perfect—it’ll continue setting as it cools. If the top starts browning too quickly around minute 30, tent loosely with foil.
Step 7: Cool and Chill
Let the bars cool on the counter for 1 hour. Then transfer to the refrigerator and chill for at least 4 hours, preferably overnight. This is non-negotiable—warm bars will fall apart when you try to cut them. Patience pays off here.
Step 8: Slice and Serve
Once fully chilled, use the parchment overhang to lift the entire block out of the pan. Place on a cutting board and use a sharp knife to slice into 16 squares. Wipe the knife clean between cuts for the cleanest edges.
Cooking Tips & Techniques
After making these bars more times than I care to count, I’ve collected some hard-won wisdom. Here’s what I wish someone had told me:
Room temperature ingredients matter. Cold cream cheese creates lumps that no amount of mixing can fix. Cold eggs can cause the cheesecake layer to separate. Set everything out on the counter 30 minutes before you start. Your future self will thank you.
Don’t overbake. I know it’s tempting to leave them in until the center is completely firm, but that’s how you get dry, cracked bars. The center should wobble like jello when you pull them out. They’ll firm up beautifully in the fridge.
Use a sharp knife for cutting. I once used a dull knife and ended up with bars that looked like they’d been through a blender. Run your knife under hot water, dry it, then slice. Repeat between cuts for the cleanest edges.
Let the brown butter cool completely. I rushed this step once and ended up with scrambled eggs in my cheesecake layer. Not cute. Let that butter sit for a full 10-15 minutes before you add it to anything with eggs.
If your pumpkin puree seems watery, blot it. Some brands are thinner than others. Spread the puree on a paper towel-lined plate, top with another paper towel, and press gently. Let it sit for 5 minutes before using. This prevents a soggy pumpkin layer.
Variations & Adaptations
One of the best things about this recipe is how adaptable it is. Here are some variations I’ve tried and loved:
Gluten-Free Version: Swap the all-purpose flour in the crust with a 1:1 gluten-free baking flour blend. I’ve used Bob’s Red Mill with great results—the crust stays buttery and crisp without any weird texture.
Dairy-Free Adaptation: Use vegan butter for both the crust and the brown butter. Substitute the cream cheese with a high-quality dairy-free version (Miyoko’s works well) and use coconut cream instead of heavy cream. The texture will be slightly less rich but still delicious.
Maple Pecan Twist: Add ½ cup finely chopped pecans to the crust mixture and replace the brown sugar in the pumpkin layer with maple sugar. Drizzle a little maple syrup over the top before serving. This version is dangerously good.
Spiced Chai Variation: Add 1 teaspoon chai spice blend (or a mix of cardamom, ginger, cinnamon, and black pepper) to the pumpkin layer. The warm spices complement the brown butter beautifully.
Individual Mini Bars: Press the crust mixture into a lined muffin tin instead of an 8×8 pan. Fill each cup with the cheesecake and pumpkin layers, then bake for 18-20 minutes. Perfect for parties or portion control.
I once made a chocolate version by adding 2 tablespoons of cocoa powder to the crust and swirling melted dark chocolate into the pumpkin layer. It was… honestly, it was a little extra. But in the best way.
Serving & Storage Suggestions
These bars are versatile when it comes to serving. Here’s how to make the most of them:
Serving Temperature: I prefer these bars cold, straight from the fridge. The cheesecake layer is firm and creamy, and the pumpkin layer holds its shape beautifully. If you prefer a softer texture, let them sit at room temperature for 10-15 minutes before serving.
Presentation Ideas: Dust the tops with a light sprinkle of cinnamon or nutmeg before serving. A dollop of whipped cream and a drizzle of caramel sauce takes these from “homemade bars” to “dessert that looks like it belongs on a magazine cover.” For a fall-themed presentation, garnish with a few candied pecans or a small cinnamon stick.
What to Serve With Them: A hot cup of coffee or chai latte is the perfect companion. For a full dessert spread, pair these with a spiced apple cider donut or a slice of brown butter zucchini bread for a cozy autumn dessert table.
Storage: Store the bars in an airtight container in the refrigerator for up to 5 days. Layer them with parchment paper between each row to prevent sticking. I’ve found they actually taste better on day two after the flavors have had time to meld.
Freezing Instructions: These bars freeze beautifully. Wrap individual slices tightly in plastic wrap, then place in a freezer-safe bag or container. They’ll keep for up to 3 months. To thaw, transfer to the refrigerator overnight. Don’t microwave them—it ruins the texture.
Reheating: If you want a warm bar (which I sometimes do for breakfast—no judgment), pop one in a 300°F oven for 5-7 minutes. The edges get slightly crisp while the center stays creamy.
Nutritional Information & Benefits
Let’s be real—these are dessert bars, not health food. But knowing what’s in them helps you enjoy them mindfully. Here’s the estimated nutrition per bar (based on 16 servings):
| Nutrient | Amount Per Bar |
|---|---|
| Calories | 285 |
| Total Fat | 18g |
| Saturated Fat | 11g |
| Cholesterol | 85mg |
| Sodium | 180mg |
| Total Carbohydrates | 28g |
| Dietary Fiber | 1g |
| Sugars | 18g |
| Protein | 4g |
| Vitamin A | 45% DV |
| Calcium | 4% DV |
| Iron | 6% DV |
Pumpkin is actually a nutritional powerhouse—it’s loaded with vitamin A for eye health and immune support, plus fiber that helps with digestion. The cream cheese and butter provide calcium and healthy fats that keep you satisfied. Are these bars good for you? They’re good for your soul, and sometimes that counts for a lot.
If you’re watching your sugar intake, you can reduce the sugar in the pumpkin layer by 2 tablespoons without compromising the texture too much. The brown butter and spices provide so much flavor that you won’t miss the sweetness.
Conclusion
These Perfect Brown Butter Pumpkin Cheesecake Bars are exactly what fall baking should be—warm, comforting, and just a little bit extra. The brown butter adds a nutty depth that makes every bite feel special, while the layers of cheesecake and pumpkin create a texture that’s both creamy and satisfying.
I’ve made these for every autumn gathering since that first successful batch, and they never fail to impress. There’s something about pulling a pan of these out of the fridge, slicing them into perfect squares, and watching people’s faces light up when they take that first bite. It’s the kind of recipe that becomes tradition without you even trying.
If you make these bars, I’d love to hear how they turn out. Leave a comment below and let me know if you tried any variations—I’m always looking for new ideas. And if you’re looking for more fall dessert inspiration, check out my one-pot pumpkin pasta with sausage or these maple pecan snickerdoodles for more cozy autumn flavors.
Happy baking, friends. May your brown butter never burn and your layers always be distinct.
Frequently Asked Questions
Can I use pumpkin pie filling instead of pumpkin puree?
No, please don’t. Pumpkin pie filling is pre-sweetened and spiced, which will throw off the entire recipe. The sugar and spice levels are carefully balanced here, and using pie filling will make the bars overly sweet and mushy. Stick with 100% pure pumpkin puree.
Why did my cheesecake layer crack?
Cracking usually happens for one of three reasons: overmixing the cheesecake batter (which incorporates too much air), overbaking (the center should still jiggle), or drastic temperature changes. Make sure your ingredients are room temperature and let the bars cool gradually on the counter before refrigerating.
Can I make these bars in a 9×9 pan instead?
Yes, but the bars will be thinner and bake faster. Check for doneness around 30-35 minutes instead of 40-45. The layers won’t be as tall, but they’ll still taste fantastic. You might want to reduce the crust ingredients by about 20% to keep the proportions balanced.
How far in advance can I make these bars?
You can make them up to 3 days ahead and store them in the refrigerator. In fact, they taste better after a day or two because the flavors have time to meld together. If you’re making them for a holiday, bake them two days before and chill overnight—your future self will thank you.
Can I skip the brown butter step?
Technically yes, but you’ll lose the signature nutty flavor that makes these bars special. If you’re really short on time, use melted butter instead—but honestly, browning butter takes less than 10 minutes and transforms the entire dessert. It’s worth every second.
Pin This Recipe!
Perfect Brown Butter Pumpkin Cheesecake Bar Recipe
Three layers of fall perfection: a buttery shortbread crust, creamy cheesecake, and spiced pumpkin pie filling, all elevated with nutty brown butter. These bars are make-ahead friendly, require no water bath, and deliver bakery-quality results every time.
- Prep Time: 30 minutes
- Cook Time: 45 minutes
- Total Time: 5 hours 15 minutes (includes chilling)
- Yield: 16 servings 1x
- Category: Dessert
- Cuisine: American
Ingredients
- 1 ½ cups all-purpose flour (spooned and leveled)
- ½ cup granulated sugar
- ½ cup unsalted butter, cold and cut into small cubes
- ¼ teaspoon fine sea salt
- ½ cup unsalted butter (for browning)
- 8 ounces cream cheese, softened to room temperature (full-fat brick)
- ¼ cup granulated sugar
- 1 large egg, room temperature
- 1 teaspoon vanilla extract
- 2 tablespoons browned butter (reserved from browning)
- 1 cup pumpkin puree (not pumpkin pie filling)
- ½ cup packed light brown sugar
- 2 large eggs, room temperature
- ½ cup heavy cream
- 1 teaspoon pumpkin pie spice (or ½ tsp cinnamon, ¼ tsp ginger, ¼ tsp nutmeg, pinch cloves)
- ½ teaspoon vanilla extract
- Remaining browned butter (about 4-5 tablespoons)
Instructions
- Brown the butter: Place ½ cup unsalted butter in a light-colored saucepan over medium heat. Stir occasionally with a rubber spatula. The butter will melt, foam, and turn golden with brown specks. Once it smells nutty and turns warm amber (5-7 minutes), remove from heat. Pour into a heat-safe bowl and cool for 10 minutes.
- Make the crust: Preheat oven to 350°F (175°C). Line an 8×8-inch baking pan with parchment paper, leaving overhang on two sides. In a medium bowl, combine flour, ½ cup sugar, and salt. Add cold butter cubes and work into flour with a pastry cutter or fingers until mixture resembles coarse sand with some pea-sized butter bits. Press firmly into the bottom of the prepared pan. Bake for 15-18 minutes until lightly golden. Cool completely on a wire rack.
- Make the cheesecake layer: In a medium bowl, beat softened cream cheese with an electric mixer until smooth and creamy (about 2 minutes). Add ¼ cup sugar and beat until combined. Add 1 egg and 1 teaspoon vanilla, mixing on low just until incorporated. Stir in 2 tablespoons cooled browned butter. Do not overmix. Spread evenly over cooled crust.
- Make the pumpkin layer: In another bowl, whisk together pumpkin puree, brown sugar, 2 eggs, heavy cream, pumpkin pie spice, and ½ teaspoon vanilla until smooth. Pour in remaining browned butter (about 4-5 tablespoons) and whisk until fully combined. Mixture should be thick but pourable.
- Layer and swirl: Gently pour pumpkin mixture over cheesecake layer. Use a spatula to spread evenly. Take a butter knife and gently swirl through both layers in a figure-eight pattern (3-4 swirls only).
- Bake: Place pan in preheated oven and bake for 40-45 minutes. Edges should look set and slightly puffed, but center will still jiggle slightly. If top browns too quickly around minute 30, tent loosely with foil.
- Cool and chill: Let bars cool on counter for 1 hour. Transfer to refrigerator and chill for at least 4 hours, preferably overnight.
- Slice and serve: Once fully chilled, use parchment overhang to lift entire block out of pan. Place on cutting board and slice into 16 squares with a sharp knife. Wipe knife clean between cuts for cleanest edges.
Notes
Room temperature ingredients are crucial—set cream cheese, eggs, and other dairy out 30 minutes before starting. Don’t overbake; the center should wobble like jello when removed. Let brown butter cool completely before adding to egg mixtures to avoid scrambling. If pumpkin puree seems watery, blot with paper towels. Bars taste better the next day after flavors meld. Store in airtight container in refrigerator for up to 5 days. Freeze individual slices wrapped in plastic wrap for up to 3 months.
Nutrition
- Serving Size: 1 bar
- Calories: 285
- Sugar: 18
- Sodium: 180
- Fat: 18
- Saturated Fat: 11
- Carbohydrates: 28
- Fiber: 1
- Protein: 4
Keywords: pumpkin cheesecake bars, brown butter, fall dessert, Thanksgiving dessert, cheesecake bars, pumpkin bars, shortbread crust, no water bath cheesecake