I was standing in the baking aisle of the grocery store last October when a woman walked past me carrying a paper bag of fresh pecans, and the smell hit me — warm, toasty, almost like caramel — and suddenly I was eight years old in my Aunt Lena’s tiny kitchen, watching her swirl a stick of butter in a hot pan until it turned the color of a new penny. She never told me what she was doing. She just hummed along to the radio and let that butter bubble and foam, and I stood there on my tiptoes, mesmerized by the magic of it.
Aunt Lena passed away a few years ago, and I never got her recipe for those pumpkin bars she brought to every Thanksgiving. Honestly, I don’t think she even wrote it down. She was the kind of cook who measured everything with her heart and a handful of this and a pinch of that. I’ve spent the last three autumns trying to recreate that exact flavor — that nutty, almost-but-not-quite-caramel taste that made her pumpkin bars the first thing to disappear from the dessert table. And let me tell you, it took some trial and error. There was a batch that came out so dry I could have used it as a doorstop. Another one where the frosting slid off like it was trying to escape. But I finally cracked it, and the secret, as it turns out, was right there in front of me the whole time.
It’s the brown butter. That simple step of browning the butter before mixing it into the batter changes everything. It adds this deep, almost toasty richness that regular melted butter just can’t touch. And paired with the warm spices in the pumpkin and that tangy cream cheese frosting? Honestly, it’s the kind of dessert that makes people close their eyes when they take a bite. You know that feeling when something tastes so familiar and so new at the same time? That’s what these bars are. They’re Aunt Lena’s memory, but they’re also mine now. And I’m so excited to share them with you.
Why You’ll Love This Recipe
These Perfect Brown Butter Pumpkin Bars with Cream Cheese Frosting aren’t just another pumpkin dessert. They’re the one you’ll reach for year after year, the one people will ask you to bring to every fall gathering. Here’s why they’re different:
- Rich, Nutty Flavor: The brown butter adds a layer of warmth and depth that regular butter just can’t provide. It makes the pumpkin and spice flavors sing.
- Incredibly Moist Texture: Thanks to the right balance of pumpkin puree and eggs, these bars stay soft and tender for days. No dry, crumbly edges here.
- Perfect for Entertaining: These bars are a host’s dream. They’re easy to cut into neat squares, they travel well, and they look stunning on a platter. Your guests will think you spent hours on them.
- Make-Ahead Friendly: You can bake the bars a day or two in advance and frost them just before serving. It takes the stress out of party prep.
- Crowd-Pleasing Flavor: The combination of brown butter, pumpkin, and warm spices topped with tangy cream cheese frosting is a guaranteed hit with both kids and adults. I’ve never seen a platter come back with leftovers.
- Simple, Everyday Ingredients: Nothing fancy here. You probably have most of these items in your pantry right now. No need for a special trip to a gourmet store.
This recipe is the result of many, many tests. I’ve tweaked the baking time, adjusted the spice blend, and perfected the frosting consistency so you get a perfect bar every single time. It’s not just another pumpkin bar — it’s the best version of itself. The kind that makes you want to save the last piece for yourself, even if you know you shouldn’t.
What Ingredients You Will Need
This recipe uses simple, wholesome ingredients that come together to create something truly special. Most of these are pantry staples, but a few key players make all the difference. I’ve tested this with different brands and substitutions, so I’ll share what works best.
For the Pumpkin Bars:
- 1 cup (2 sticks) unsalted butter: This is the star of the show. You’ll be browning it, so make sure it’s unsalted to control the salt level. I prefer using a high-fat European-style butter like Kerrygold for an even richer flavor, but any good unsalted butter works.
- 1 ¾ cups (350g) granulated sugar: Adds sweetness and helps create that tender crumb. You can reduce this to 1 ½ cups if you prefer a less sweet bar, but I find the sweetness balances the tangy frosting perfectly.
- ½ cup (100g) packed light brown sugar: This adds a hint of molasses flavor that pairs beautifully with the brown butter and pumpkin. Don’t skip it — it adds depth.
- 2 large eggs, room temperature: Room temperature eggs emulsify better into the batter, creating a smoother texture. Take them out of the fridge about 30 minutes before you start.
- 1 teaspoon vanilla extract: Use pure vanilla extract if you can. It makes a noticeable difference in the overall flavor profile.
- 1 can (15 oz) pumpkin puree: Make sure you’re using 100% pumpkin puree, not pumpkin pie filling. Libby’s is my go-to brand for consistent results. The puree adds moisture and that classic pumpkin flavor without any added spices.
- 2 cups (250g) all-purpose flour: Spoon and level your flour for the most accurate measurement. Scooping directly from the bag can pack in too much flour, leading to dry bars.
- 2 teaspoons baking powder: This gives the bars their lift. Make sure your baking powder is fresh — test it by dropping a little in hot water; it should bubble vigorously.
- ½ teaspoon baking soda: Works with the baking powder for the perfect texture.
- ½ teaspoon salt: Balances the sweetness and enhances all the other flavors. I use fine sea salt for baking.
- 2 teaspoons ground cinnamon: The backbone of the warm spice blend. I prefer Saigon cinnamon for its bolder, sweeter flavor.
- 1 teaspoon ground ginger: Adds a little warmth and bite.
- ½ teaspoon ground nutmeg: Freshly grated is best if you have it, but pre-ground works perfectly fine.
- ½ teaspoon ground cloves: A little goes a long way. It adds that classic “pumpkin pie” aroma.
For the Cream Cheese Frosting:
- 8 oz (1 block) cream cheese, softened: Full-fat cream cheese is non-negotiable here. It provides the best flavor and structure for the frosting. Low-fat versions can make the frosting runny. Let it sit out for at least an hour to soften properly.
- ½ cup (1 stick) unsalted butter, softened: This should also be at room temperature so it creams smoothly with the cream cheese. I use the same brand as for the bars.
- 3 cups (360g) powdered sugar: Sift it if it’s lumpy. This ensures a silky-smooth frosting.
- 1 teaspoon vanilla extract: Again, pure vanilla is preferred.
- Pinch of salt: Just a tiny pinch to cut the sweetness and bring out the tangy flavor of the cream cheese.
Equipment Needed
You don’t need a professional bakery setup to make these bars. Most of these tools are standard kitchen equipment. Here’s what you’ll need:
- 9×13-inch baking pan: This is the perfect size for these bars. A metal pan will give you slightly crisper edges, while a glass pan will yield a softer bar all around. I prefer metal for this recipe.
- Parchment paper: Line your pan with parchment paper, leaving an overhang on two opposite sides. This creates “handles” that make it incredibly easy to lift the entire block of bars out of the pan for clean cutting.
- Light-colored saucepan or skillet: A light-colored pan is crucial for browning butter because it lets you see the color change clearly. A dark pan can hide the browning process and lead to burnt butter. A heavy-bottomed pan is best to prevent scorching.
- Large mixing bowls (2): One for the dry ingredients and one for the wet ingredients. I like using stainless steel or glass bowls.
- Whisk: For combining the dry ingredients and for mixing the wet ingredients.
- Rubber spatula: For folding the batter together and scraping every last bit of frosting out of the bowl. A high-heat silicone spatula is great for scraping the brown butter pan.
- Electric hand mixer or stand mixer: You can make the frosting by hand with a lot of elbow grease, but an electric mixer makes it much easier and ensures a smooth, fluffy texture. A hand mixer is perfectly sufficient.
- Cooling rack: Essential for letting the bars cool completely before frosting. If you frost them while they’re still warm, the frosting will melt into a puddle.
- Offset spatula: This makes spreading the frosting evenly a breeze. A butter knife works in a pinch, but an offset spatula is worth the small investment.
Preparation Method
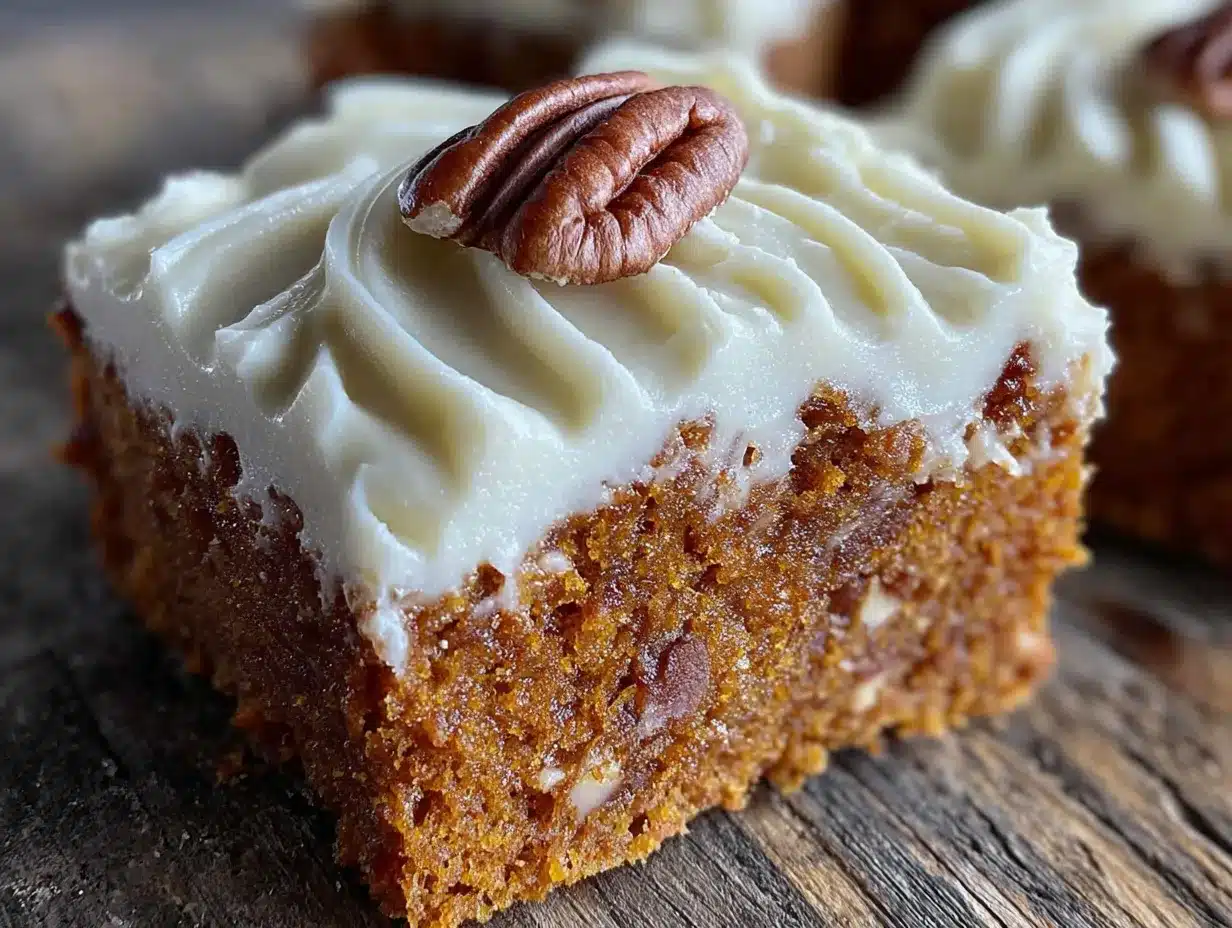
Let’s get to the fun part. Follow these steps carefully, and you’ll have a pan of the most incredible pumpkin bars you’ve ever tasted. I’ve included all the little details I wish someone had told me when I was first learning.
- Preheat and Prep: Preheat your oven to 350°F (175°C). Line your 9×13-inch baking pan with parchment paper, leaving a 2-inch overhang on the long sides. This is your secret weapon for clean bars. Lightly grease the parchment paper with a little butter or non-stick spray.
- Brown the Butter: Place the 1 cup (2 sticks) of unsalted butter in your light-colored saucepan or skillet. Melt it over medium heat, stirring frequently with a rubber spatula or whisk. As it melts, it will start to foam and bubble. Keep stirring. After about 5-7 minutes, the foam will subside, and you’ll see little brown specks forming at the bottom of the pan. The butter will smell nutty and amazing. This is the moment! As soon as it turns a golden-amber color and smells like toasted nuts, remove it from the heat immediately. Pour it into a heat-safe bowl to stop the cooking process. Let it cool for about 10-15 minutes. Don’t skip this cooling step, or the hot butter will cook your eggs when you mix them in.
- Mix the Wet Ingredients: In a large bowl, whisk together the cooled brown butter, 1 ¾ cups granulated sugar, and ½ cup packed light brown sugar until well combined. It will look a little grainy, and that’s okay. Add the 2 large room-temperature eggs, one at a time, whisking well after each addition. Stir in the 1 teaspoon vanilla extract and the entire 15-ounce can of pumpkin puree. Mix until everything is smooth and beautifully orange. Take a moment to smell it — that brown butter and pumpkin aroma is incredible.
- Whisk the Dry Ingredients: In a separate medium bowl, whisk together the 2 cups all-purpose flour, 2 teaspoons baking powder, ½ teaspoon baking soda, ½ teaspoon salt, 2 teaspoons ground cinnamon, 1 teaspoon ground ginger, ½ teaspoon ground nutmeg, and ½ teaspoon ground cloves. Whisking ensures the baking powder, baking soda, and spices are evenly distributed throughout the flour.
- Combine Wet and Dry: Gradually add the dry ingredients to the wet ingredients. Use a rubber spatula to gently fold everything together. Mix just until you no longer see streaks of flour. Do not overmix! Overmixing develops the gluten in the flour and will make your pumpkin bars tough and dense. A few small lumps are perfectly fine.
- Bake the Bars: Pour the batter into your prepared pan and spread it into an even layer with your spatula. The batter will be thick — that’s normal. Bake for 25-30 minutes, or until a toothpick inserted into the center comes out clean or with just a few moist crumbs attached. The edges will be slightly pulling away from the pan. My oven runs a little hot, so I start checking at 22 minutes. Every oven is different, so trust your toothpick test over the timer.
- Cool Completely: Place the pan on a wire cooling rack and let the bars cool completely in the pan. This is the hardest part, I know. It takes about 1.5 to 2 hours. Don’t rush it. If the bars are even slightly warm when you add the frosting, it will melt and turn into a mess. Patience is key here.
- Make the Frosting: While the bars are cooling, make the cream cheese frosting. In a large bowl with an electric hand mixer (or in the bowl of a stand mixer with the paddle attachment), beat the 8 oz of softened cream cheese and ½ cup of softened unsalted butter together on medium speed until smooth, creamy, and completely combined. This takes about 2-3 minutes. Scrape down the sides of the bowl with your spatula. Add the 1 teaspoon vanilla extract and a pinch of salt, and beat again. Gradually add the 3 cups of powdered sugar, about 1 cup at a time, beating on low speed to prevent a sugar cloud. Once all the sugar is added, increase the speed to medium-high and beat for another 2-3 minutes until the frosting is light, fluffy, and spreadable.
- Frost and Cut: Once the bars are completely cool, spread the cream cheese frosting evenly over the top using your offset spatula. Use the parchment paper handles to lift the entire block of bars out of the pan and onto a cutting board. Use a sharp knife to cut them into squares. For the cleanest cuts, wipe the knife clean between each slice.
Cooking Tips & Techniques
Over the years, I’ve made every mistake you can imagine with pumpkin bars. I’ve had them sink in the middle, turn out gummy, or just taste flat. Here are the lessons I learned so you don’t have to make them yourself.
The Brown Butter Trap: The most common mistake is burning the butter. It happens so fast. You look away for ten seconds, and suddenly you have black specks and a bitter smell. Keep your eyes on that pan. The moment you see the foam subside and the color turn a rich amber, pull it off the heat. I also recommend using a light-colored pan so you can actually see the color change. I once used a dark non-stick skillet and ended up with charcoal butter. Not my finest moment.
Room Temperature Ingredients Matter: I know it’s tempting to use cold eggs straight from the fridge, but trust me on this one. Cold ingredients don’t emulsify properly, which can lead to a denser, less tender bar. The same goes for the cream cheese and butter for the frosting. Cold cream cheese will give you a lumpy frosting no matter how long you beat it. Set everything out on the counter an hour before you start.
Don’t Overmix the Batter: This is probably the most common baking mistake. You want to mix the dry ingredients into the wet ingredients just until they’re combined. A few streaks of flour are okay. Overmixing develops gluten, which makes the bars tough and chewy instead of soft and tender. I use a rubber spatula and fold by hand for this reason — it’s much harder to overmix with a spatula than with an electric mixer.
The Toothpick Test: Start checking your bars a few minutes before the suggested baking time. Insert a toothpick into the center of the pan. If it comes out clean or with just a few moist crumbs, they’re done. If there’s wet batter on the toothpick, give them another 2-3 minutes. Every oven runs a little differently, so the toothpick is your most reliable tool.
Patience with Cooling: I cannot stress this enough. Let the bars cool completely before frosting. I once tried to speed things up by putting the pan in the refrigerator, and the frosting still melted because the bars held residual heat. It was a sad, soupy mess. Give them the full 2 hours on the counter. It’s worth the wait.
Variations & Adaptations
One of the best things about this recipe is how adaptable it is. Here are a few ways I’ve changed it up depending on the occasion or what I have on hand.
Gluten-Free Version: I’ve made these with a 1:1 gluten-free baking flour blend (like Bob’s Red Mill) with excellent results. Use the same amount as the all-purpose flour. The texture is slightly more delicate, but the flavor is just as good. Just be extra gentle when folding the batter.
Add Some Crunch: Fold in ½ cup of chopped pecans or walnuts into the batter before baking for a lovely textural contrast. I’ve also sprinkled a handful of toasted pecans on top of the frosting for a beautiful presentation. It adds a little something extra that guests always notice.
Spice It Up or Down: Not a fan of cloves? Leave it out and increase the cinnamon to 2 ½ teaspoons. Want a little heat? Add ¼ teaspoon of cayenne pepper or a pinch of black pepper. I once made a batch with a teaspoon of pumpkin pie spice instead of the individual spices, and it was perfectly fine in a pinch.
Dairy-Free Adaptation: You can use a high-quality vegan butter stick for both the bars and the frosting. For the cream cheese frosting, use a vegan cream cheese block (like Tofutti or Kite Hill). The texture will be slightly softer, so you might want to chill the frosted bars for 30 minutes before cutting. I’ve tested this with Miyoko’s vegan butter, and it works beautifully.
Mini Pumpkin Bars: For a party, I’ve baked the batter in a lined 8×8-inch pan and cut them into tiny two-bite squares. Just adjust the baking time down to about 20-22 minutes. They’re adorable on a dessert platter and perfect for guests who want just a little taste.
Serving & Storage Suggestions
These Perfect Brown Butter Pumpkin Bars with Cream Cheese Frosting are wonderful at room temperature. That’s how I always serve them. The frosting stays creamy, and the bars are perfectly soft. If you’ve chilled them, let them sit out for about 20-30 minutes before serving to take the chill off.
For a dinner party, I like to arrange them on a large wooden board or a white platter. A light dusting of cinnamon or a few fresh rosemary sprigs on the side makes them look incredibly elegant. They pair beautifully with a cup of hot coffee or a glass of cold milk. Honestly, they’re also amazing with a scoop of vanilla ice cream if you want to turn them into a full dessert.
Storage Instructions: Store any leftover bars in an airtight container in the refrigerator. They will keep well for up to 5 days. The cream cheese frosting needs to be refrigerated, so don’t leave them out on the counter for more than 2 hours. I like to layer them between sheets of parchment paper so the frosting doesn’t stick to the lid.
Freezing Instructions: These bars freeze beautifully. You can freeze the unfrosted bars for up to 3 months. Wrap the entire block tightly in plastic wrap, then in a layer of foil. When you’re ready to serve, thaw them in the refrigerator overnight, then make the frosting and spread it on. You can also freeze the frosted bars. Place them on a baking sheet in the freezer until the frosting is firm, then wrap each bar individually in plastic wrap and store them in a freezer bag. Thaw in the refrigerator overnight. I’ve done this for holiday prep, and it’s a lifesaver.
Flavor Development: Here’s a little secret — these bars actually taste even better the next day. The flavors have time to meld together, and the brown butter flavor becomes even more pronounced. So don’t hesitate to make them a day ahead. Your future self will thank you.
Nutritional Information & Benefits
While these are definitely a treat, there are a few nutritional highlights worth noting. Please remember these are estimates and can vary based on specific ingredients and portion sizes.
| Nutrient | Per Serving (1 bar, based on 24 servings) |
|---|---|
| Calories | ~310 |
| Total Fat | 18g |
| Saturated Fat | 11g |
| Cholesterol | 65mg |
| Sodium | 210mg |
| Total Carbohydrates | 37g |
| Dietary Fiber | 1g |
| Sugars | 27g |
| Protein | 3g |
| Vitamin A | 45% DV |
Pumpkin is a fantastic source of Vitamin A, which is great for eye health and immune function. It’s also packed with fiber and antioxidants. The cream cheese and butter do add fat and calories, but this is a dessert meant to be enjoyed in moderation. I always say, a little bit of something delicious is better than a lot of something mediocre. These bars are worth every single bite.
This recipe contains gluten, dairy, and eggs. It is not suitable for those with celiac disease or dairy allergies without the substitutions mentioned in the variations section.
Conclusion
These Perfect Brown Butter Pumpkin Bars with Cream Cheese Frosting are more than just a recipe to me. They’re a connection to a memory, a way to capture a feeling that I thought was lost. Every time I make them, I think of Aunt Lena and her humming and that tiny kitchen. And every time I take a bite, I’m eight years old again, standing on my tiptoes, watching magic happen in a pan.
I hope you’ll make these bars and create your own memories with them. Maybe you’ll serve them at a Thanksgiving dinner, or bring them to a potluck, or just bake them on a rainy Sunday afternoon because you deserve something wonderful. Don’t be afraid to make them your own — add your favorite nuts, adjust the spices, or double the frosting (I won’t tell). The best recipes are the ones that become part of your story.
If you make these Perfect Brown Butter Pumpkin Bars with Cream Cheese Frosting, I’d love to hear about it. Leave a comment below and tell me how they turned out. Did you make any changes? Did they disappear as fast as mine always do? And if you have a memory tied to a recipe, I’d love to hear that too. Happy baking, friend.
Frequently Asked Questions
Can I use salted butter for browning?
You can, but I recommend unsalted so you can control the salt level in the recipe. If you only have salted butter, just reduce the added salt in the recipe to ¼ teaspoon.
Why did my cream cheese frosting turn out runny?
This usually happens for one of two reasons: your cream cheese or butter was too soft (almost melted), or you added the powdered sugar too quickly. Make sure your ingredients are softened but still cool to the touch, and add the powdered sugar gradually.
Can I use pumpkin pie filling instead of pumpkin puree?
I don’t recommend it. Pumpkin pie filling is already sweetened and spiced, which will throw off the balance of this recipe. Stick with 100% pure pumpkin puree for the best results.
How do I know when the brown butter is done?
Look for a golden-amber color and a nutty, toasty aroma. You’ll see little brown specks forming at the bottom of the pan. As soon as you see and smell that, take it off the heat immediately. It goes from perfect to burnt very quickly.
Can I make these into a layer cake instead of bars?
Absolutely. You can bake the batter in two 9-inch round cake pans for about 22-25 minutes. Let them cool completely, then frost with the cream cheese frosting as a filling and on top. It’s a stunning fall dessert.
Pin This Recipe!
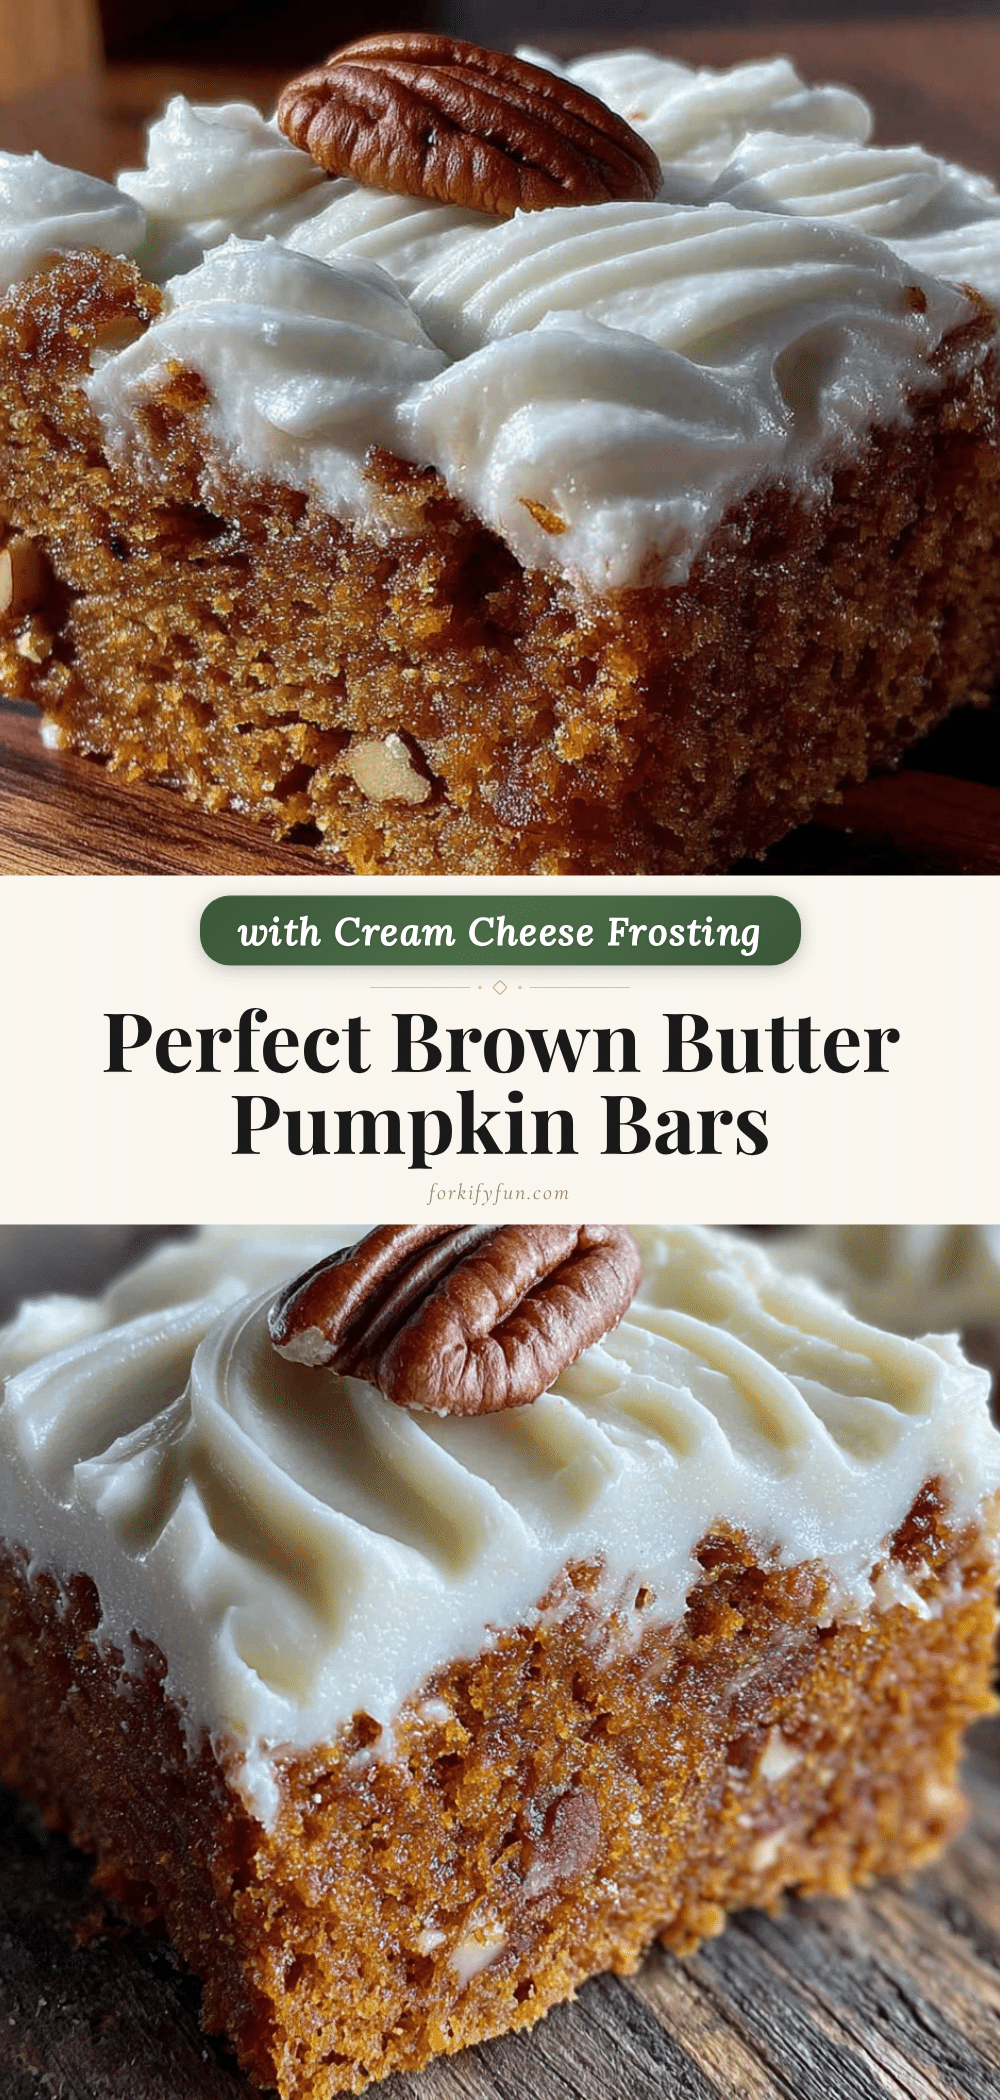
Perfect Brown Butter Pumpkin Bars with Cream Cheese Frosting
These Perfect Brown Butter Pumpkin Bars with Cream Cheese Frosting are incredibly moist and flavorful, thanks to the nutty richness of brown butter. Topped with a tangy cream cheese frosting, they’re the ultimate fall dessert that will disappear from any table.
- Prep Time: 20 minutes
- Cook Time: 30 minutes
- Total Time: 2 hours 50 minutes (including cooling)
- Yield: 24 servings 1x
- Category: Dessert
- Cuisine: American
Ingredients
- 1 cup (2 sticks) unsalted butter
- 1 ¾ cups (350g) granulated sugar
- ½ cup (100g) packed light brown sugar
- 2 large eggs, room temperature
- 1 teaspoon vanilla extract
- 1 can (15 oz) pumpkin puree
- 2 cups (250g) all-purpose flour
- 2 teaspoons baking powder
- ½ teaspoon baking soda
- ½ teaspoon salt
- 2 teaspoons ground cinnamon
- 1 teaspoon ground ginger
- ½ teaspoon ground nutmeg
- ½ teaspoon ground cloves
- 8 oz (1 block) cream cheese, softened
- ½ cup (1 stick) unsalted butter, softened
- 3 cups (360g) powdered sugar
- 1 teaspoon vanilla extract
- Pinch of salt
Instructions
- Preheat your oven to 350°F (175°C). Line a 9×13-inch baking pan with parchment paper, leaving a 2-inch overhang on the long sides. Lightly grease the parchment paper.
- Place the 1 cup of unsalted butter in a light-colored saucepan or skillet. Melt over medium heat, stirring frequently. After about 5-7 minutes, the butter will foam, then subside, and brown specks will form. When it turns golden-amber and smells nutty, remove from heat immediately. Pour into a heat-safe bowl and let cool for 10-15 minutes.
- In a large bowl, whisk together the cooled brown butter, granulated sugar, and brown sugar until combined. Add the eggs one at a time, whisking well after each. Stir in the vanilla extract and pumpkin puree until smooth.
- In a separate medium bowl, whisk together the flour, baking powder, baking soda, salt, cinnamon, ginger, nutmeg, and cloves.
- Gradually add the dry ingredients to the wet ingredients, folding gently with a rubber spatula until just combined. Do not overmix.
- Pour the batter into the prepared pan and spread evenly. Bake for 25-30 minutes, or until a toothpick inserted into the center comes out clean or with a few moist crumbs. Cool completely in the pan on a wire rack, about 1.5 to 2 hours.
- While the bars cool, make the frosting: In a large bowl, beat the softened cream cheese and softened butter together on medium speed until smooth and creamy, about 2-3 minutes. Add the vanilla extract and a pinch of salt, then beat again. Gradually add the powdered sugar, 1 cup at a time, beating on low speed. Once all sugar is added, increase speed to medium-high and beat for 2-3 minutes until light and fluffy.
- Once the bars are completely cool, spread the frosting evenly over the top. Use the parchment paper handles to lift the bars out of the pan. Cut into squares with a sharp knife, wiping the knife clean between cuts.
Notes
For the best results, use room temperature eggs and cream cheese. Do not overmix the batter. Let the bars cool completely before frosting to prevent the frosting from melting. The bars taste even better the next day. Store in an airtight container in the refrigerator for up to 5 days. Freeze unfrosted bars for up to 3 months.
Nutrition
- Serving Size: 1 bar
- Calories: 310
- Sugar: 27
- Sodium: 210
- Fat: 18
- Saturated Fat: 11
- Carbohydrates: 37
- Fiber: 1
- Protein: 3
Keywords: pumpkin bars, brown butter, cream cheese frosting, fall dessert, Thanksgiving dessert, pumpkin dessert