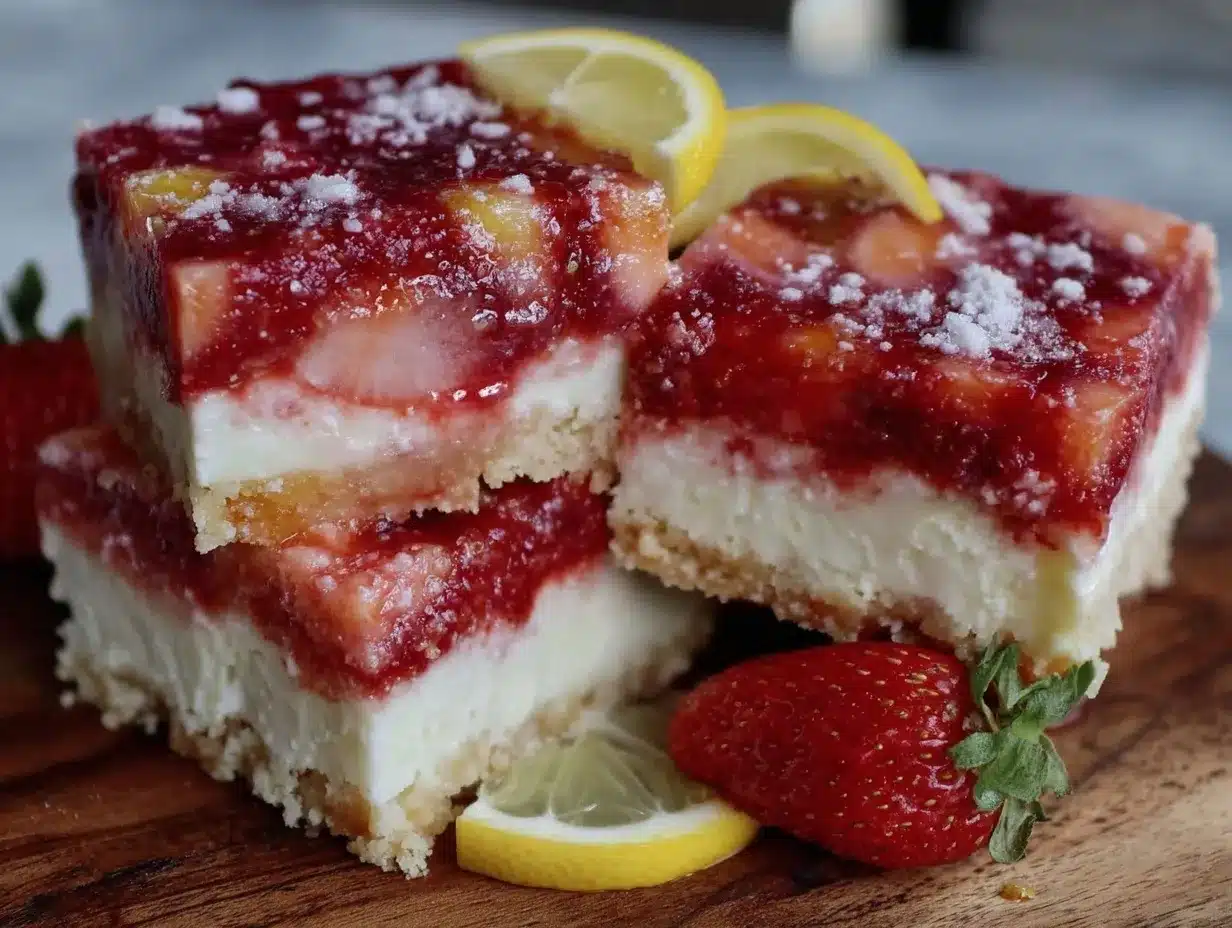
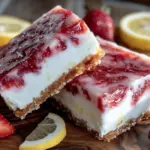
“You’ve got to try these bars,” my neighbor said over the fence one sweltering July afternoon, holding up a plastic container filled with something that looked like a cross between a frozen cheesecake and a slice of summer itself. Honestly, I was skeptical at first—no-bake desserts can sometimes be a total flop, all soggy crusts and bland fillings. But these Refreshing No-Bake Frozen Patriotic Strawberry Lemonade Bars caught my eye with their bright red and white layers and a zingy lemon glow. I grabbed a fork and figured, why not?
That first bite? Like a mini fireworks show right on my tongue. Tart but sweet, icy yet creamy, and somehow so light that I found myself going back for more, even as the sun beat down mercilessly. Over the next week, these bars became my go-to treat, whether for a quick afternoon pick-me-up or a spontaneous backyard gathering. I even brought them along to a friend’s Fourth of July barbecue, where they vanished faster than the sparklers.
What really stuck with me was how easy they were—no oven, no stress, just pure, refreshing flavor that felt like summer bottled up in a bite. It’s funny how some of the best recipes come from casual moments, a neighbor’s recommendation, or just the need to cool off without a complicated mess. These bars have quietly become my secret to winning over friends and family, a recipe that delivers bright, patriotic vibes and a cooling pop that’s perfect for those hot days when you just want your dessert fuss-free and fabulous.
So here’s the story behind my favorite frozen treat that’s brightened many summer afternoons and will probably do the same for you: simple, fun, and made to share. No bells, no whistles—just strawberry, lemon, and a little bit of magic frozen into every bite.
Why You’ll Love This Recipe
After testing this recipe multiple times (and yes, eating way more than I should admit), I can say it’s one of those rare desserts that hits all the right notes. Whether you’re a kitchen pro or just someone who wants to whip up something fast and delicious, these bars deliver.
- Quick & Easy: Ready in under 30 minutes and then just chill time—perfect for last-minute celebrations or when summer hits hard.
- Simple Ingredients: No need for fancy or hard-to-find items. You probably have most of these staples in your pantry and fridge already.
- Perfect for Summer Gatherings: These bars scream summer and shine at barbecues, picnics, or casual get-togethers, making them a natural for any festive occasion.
- Crowd-Pleaser: Kids and adults alike keep asking for seconds. The balance of tart and sweet flavors alongside the creamy texture is a winner.
- Unbelievably Delicious: The lemon layer adds a refreshing zing that cuts through the sweetness, and the strawberry topping adds a burst of natural color and flavor that looks as good as it tastes.
What sets this recipe apart from others is the no-bake, frozen approach—perfect when you don’t want to heat up your kitchen. Plus, the layering technique creates a stunning, patriotic look that’s hard to resist. I like to think of it as a nostalgic twist on classic lemonade, frozen into a bar that’s just begging for a hot day and good company.
Honestly, these bars have become my go-to for impressing guests without breaking a sweat. And if you’re a fan of quick-to-make treats like the creamy copycat Dunkaroos dip, you’ll appreciate how this recipe keeps it simple but never boring.
What Ingredients You Will Need
This recipe uses simple, wholesome ingredients to deliver bold flavor and satisfying texture without the fuss. Most of the ingredients are pantry staples or fresh produce, so no need for special trips.
- For the crust:
- 1 ½ cups graham cracker crumbs (about 150g) – I recommend using finely crushed for a better hold
- 6 tablespoons unsalted butter, melted (85g) – brings richness and helps bind the crust
- 2 tablespoons granulated sugar – balances the tart layers
- For the lemon layer:
- 1 ½ cups cream cheese, softened (340g) – for creamy texture, use full-fat for best results
- 1 cup powdered sugar (120g) – to sweeten without grittiness
- ½ cup fresh lemon juice (120ml) – freshly squeezed adds the best zing
- 1 tablespoon lemon zest – intensifies the flavor
- 1 teaspoon vanilla extract – rounds out the tartness
- 1 ½ cups heavy cream, cold (360ml) – whipped to add lightness
- For the strawberry topping:
- 2 cups fresh strawberries, hulled and sliced (about 300g) – ripe and sweet for natural flavor
- 2 tablespoons granulated sugar – to macerate the berries
- 1 teaspoon lemon juice – brightens the fruit topping
Substitution tip: Use coconut cream instead of heavy cream for a dairy-free option, and almond flour crust works well for gluten-free needs. If fresh strawberries aren’t in season, frozen (thawed and drained) will do just fine.
Equipment Needed
- 8×8 inch (20×20 cm) square baking pan – I prefer glass for even freezing but metal works too
- Mixing bowls – at least two, one for crust and one for lemon layer
- Electric mixer or stand mixer – essential for whipping cream and mixing the lemon layer smoothly
- Spatula – for folding cream into the lemon mixture gently
- Measuring cups and spoons – accuracy helps with texture and flavor balance
- Plastic wrap or airtight container – for covering during freezing
If you don’t have a mixer, a sturdy whisk and some elbow grease can do the job, but it’ll take longer. For those on a budget, handheld mixers are a great investment and easy to store.
Preparation Method
- Prepare the crust: In a medium bowl, mix the graham cracker crumbs, melted butter, and sugar until the mixture looks like wet sand. Press firmly and evenly into the bottom of your 8×8 inch pan (about 20×20 cm). Use the back of a spoon or a flat measuring cup to compact it well. Chill in the freezer for 10 minutes to set.
- Make the lemon layer: Beat the softened cream cheese and powdered sugar in a large bowl until smooth and creamy (about 2-3 minutes). Add the lemon juice, lemon zest, and vanilla extract, mixing until fully combined.
- Whip the cream: In a separate chilled bowl, whip the heavy cream until stiff peaks form. This usually takes 3-4 minutes with an electric mixer.
- Fold the whipped cream into the lemon mixture: Gently fold about a third of the whipped cream into the lemon mixture to lighten it, then fold in the rest carefully to keep it airy.
- Assemble the bars: Pour the lemon layer over the chilled crust, spreading evenly with a spatula. Smooth the top as best as you can.
- Prepare the strawberry topping: Combine sliced strawberries, sugar, and lemon juice in a small bowl. Let sit for 10 minutes to macerate, which enhances flavor and softens the berries.
- Top the bars: Spoon the strawberry mixture evenly over the lemon layer. Don’t worry if some juice seeps down—that’s part of the charm.
- Freeze: Cover the pan with plastic wrap or a lid and freeze for at least 4 hours, preferably overnight, until firm.
- Serve: Before serving, let bars sit at room temperature for 5-10 minutes to soften slightly for easier slicing. Cut into 9 or 12 squares and enjoy.
Pro tip: If the crust is too soft, give it an extra 5 minutes in the freezer before adding the lemon layer. And don’t skip chilling your mixing bowl for whipping cream—it really makes a difference in getting those stiff peaks.
Cooking Tips & Techniques
One thing I learned early on is that whipping the cream too little or too much can wreck the texture. You want stiff peaks, but not dry or grainy cream. It takes a bit of practice—sometimes I’ve ended up with a curdled mess by rushing it.
Also, folding is an art. Stirring vigorously kills all the air you just whipped in. Think gentle, slow folds, like you’re tucking in a delicate letter.
When it comes to the crust, pressing firmly is vital. I once skipped this step and ended up with a crumbly bottom that fell apart the moment I cut the bars. Lesson learned! Using a flat-bottomed cup to press it really helps get a solid base.
Timing-wise, don’t rush the freezing. These bars need a good 4+ hours to set properly. I usually make them the night before a gathering and keep them covered in the freezer. This also helps the flavors meld beautifully.
Lastly, if you want to prep ahead, you can make the crust and lemon layers a day before, then add the strawberry topping and freeze on the day of your event. That way, you spread out the work and still get fresh berries on top.
Variations & Adaptations
- Berry Mix-Up: Instead of strawberries, try a mix of blueberries and raspberries for a slightly different patriotic look and flavor. Blackberries also add a nice tart contrast.
- Herbal Twist: Add finely chopped fresh basil or mint to the strawberry topping for a surprising fresh note that pairs wonderfully with lemon.
- Dairy-Free Version: Use coconut cream to whip instead of heavy cream and swap cream cheese for a plant-based alternative. The texture changes slightly but stays delicious.
- Keto-Friendly: Swap graham crackers for almond flour crust and use powdered erythritol instead of sugar to keep it low-carb.
- Layered Popsicles: Pour the lemon and strawberry layers into popsicle molds for a portable frozen treat perfect for kids’ parties.
Personally, I tried adding a thin layer of crushed pistachios between the crust and lemon layer once, which added an unexpected crunch and a lovely nutty flavor—definitely a fun variation to try when you want to switch things up.
Serving & Storage Suggestions
For the best experience, serve these bars chilled but not rock solid—letting them sit out for 5 to 10 minutes before slicing helps soften the lemon layer just enough for creamy bites. They’re perfect plated with a few fresh mint leaves for a pop of green and an extra fresh kick.
Pair these bars with light, summery drinks like iced tea, lemonade, or even a sparkling rosé. If you’re planning a full outdoor meal, they complement dishes like blackened shrimp tacos with zesty mango slaw beautifully—both bring bright, bold flavors that feel right for summer.
Store any leftovers tightly covered in the freezer for up to 5 days. When reheating, just let them thaw in the fridge for a few hours or leave at room temperature for 15-20 minutes. Flavors tend to deepen after a day, making the bars even tastier.
Nutritional Information & Benefits
These bars are a refreshing summer treat that provides a nice balance of indulgence and nutrition. Each serving (assuming 9 bars) contains approximately:
| Calories | 280 kcal |
|---|---|
| Fat | 18g |
| Carbohydrates | 25g |
| Sugar | 18g |
| Protein | 4g |
The fresh lemon juice adds a boost of vitamin C and antioxidants, while strawberries provide fiber and natural sweetness. Using real fruit and fresh ingredients means you avoid the artificial additives common in many store-bought treats.
For those watching carbs or sugar intake, swapping sugars for natural sweeteners or using keto-friendly crust options can make this dessert fit a wider range of dietary needs.
Conclusion
These Refreshing No-Bake Frozen Patriotic Strawberry Lemonade Bars have become one of my favorite easy summer recipes for good reason. They’re bright, tangy, and sweet without being overwhelming, and the no-bake method means less heat in the kitchen and more time enjoying the sunshine.
Feel free to make them your own—add herbs, change the berries, or try different crusts. I love how versatile and forgiving this recipe is, while still delivering that wow factor every single time.
Whether you’re making them for a holiday, a casual weekend hangout, or just because the weather demands something cool and tasty, these bars will quickly become a trusted staple. I hope you find as much joy in making and sharing them as I have.
Don’t be shy—drop a comment below to share your tweaks or favorite moments enjoying these bars. And if you like easy, fresh recipes, you might also appreciate my healthy no-bake protein balls for a quick snack that keeps you fueled all day.
Here’s to sweet, simple, and seriously refreshing summer treats!
FAQs About No-Bake Frozen Patriotic Strawberry Lemonade Bars
Can I make these bars ahead of time?
Absolutely! They actually taste better after sitting in the freezer overnight, which helps the flavors meld and the bars to fully set.
What if I don’t have fresh lemons?
Fresh lemon juice is best for the bright flavor, but bottled lemon juice can work in a pinch. Just avoid anything with added sugar or preservatives.
Can I use frozen strawberries?
Yes, just thaw and drain them well before using to avoid excess liquid making the bars soggy.
How do I cut the bars cleanly?
Use a sharp knife warmed under hot water and wiped dry before slicing. Letting the bars soften at room temperature for a few minutes also helps.
Is this recipe kid-friendly?
Definitely! The flavors are fresh and sweet, and the fun red and white layers make them especially appealing to kids during summer holidays.
Pin This Recipe!
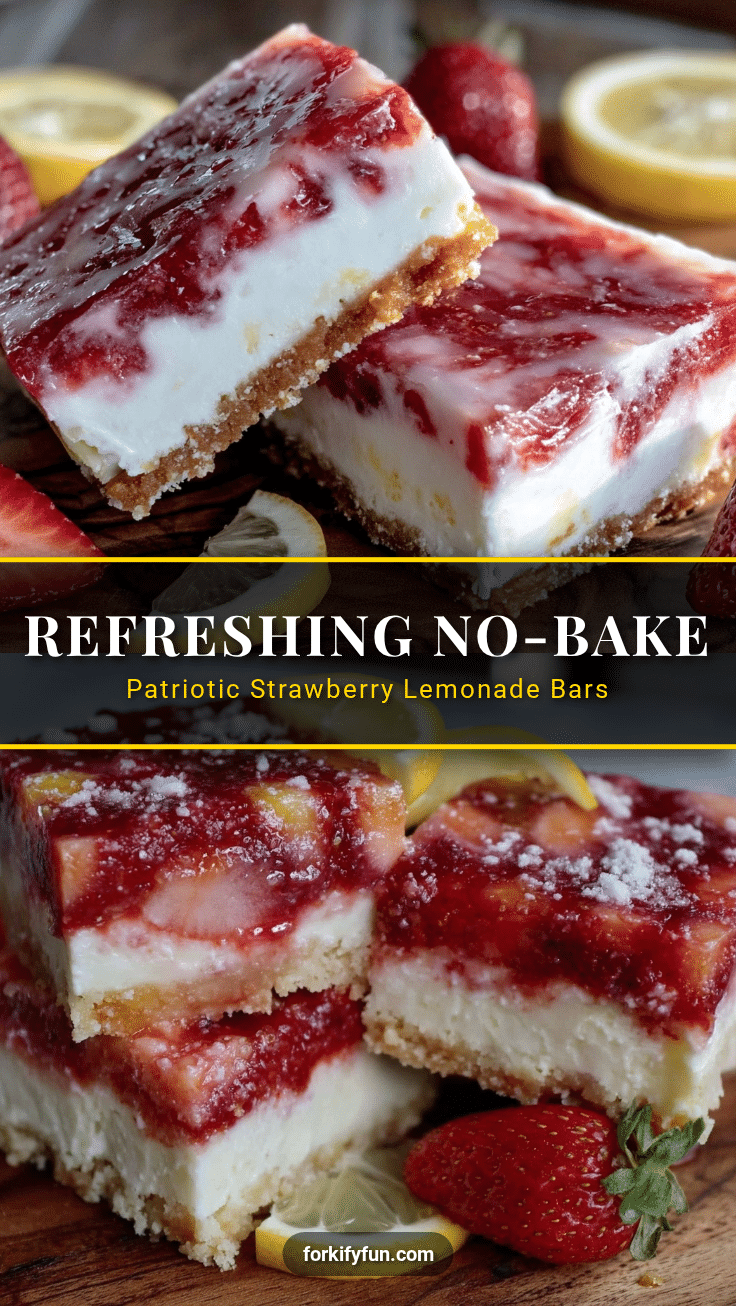
No-Bake Frozen Patriotic Strawberry Lemonade Bars
Refreshing no-bake frozen bars with bright strawberry and tangy lemon layers, perfect for summer gatherings and easy to make without an oven.
- Prep Time: 15 minutes
- Cook Time: 0 minutes
- Total Time: 4 hours 15 minutes
- Yield: 9-12 bars 1x
- Category: Dessert
- Cuisine: American
Ingredients
- 1 ½ cups graham cracker crumbs (about 150g)
- 6 tablespoons unsalted butter, melted (85g)
- 2 tablespoons granulated sugar
- 1 ½ cups cream cheese, softened (340g)
- 1 cup powdered sugar (120g)
- ½ cup fresh lemon juice (120ml)
- 1 tablespoon lemon zest
- 1 teaspoon vanilla extract
- 1 ½ cups heavy cream, cold (360ml)
- 2 cups fresh strawberries, hulled and sliced (about 300g)
- 2 tablespoons granulated sugar
- 1 teaspoon lemon juice
Instructions
- Prepare the crust: In a medium bowl, mix the graham cracker crumbs, melted butter, and sugar until the mixture looks like wet sand. Press firmly and evenly into the bottom of your 8×8 inch pan (about 20×20 cm). Use the back of a spoon or a flat measuring cup to compact it well. Chill in the freezer for 10 minutes to set.
- Make the lemon layer: Beat the softened cream cheese and powdered sugar in a large bowl until smooth and creamy (about 2-3 minutes). Add the lemon juice, lemon zest, and vanilla extract, mixing until fully combined.
- Whip the cream: In a separate chilled bowl, whip the heavy cream until stiff peaks form. This usually takes 3-4 minutes with an electric mixer.
- Fold the whipped cream into the lemon mixture: Gently fold about a third of the whipped cream into the lemon mixture to lighten it, then fold in the rest carefully to keep it airy.
- Assemble the bars: Pour the lemon layer over the chilled crust, spreading evenly with a spatula. Smooth the top as best as you can.
- Prepare the strawberry topping: Combine sliced strawberries, sugar, and lemon juice in a small bowl. Let sit for 10 minutes to macerate, which enhances flavor and softens the berries.
- Top the bars: Spoon the strawberry mixture evenly over the lemon layer. Don’t worry if some juice seeps down—that’s part of the charm.
- Freeze: Cover the pan with plastic wrap or a lid and freeze for at least 4 hours, preferably overnight, until firm.
- Serve: Before serving, let bars sit at room temperature for 5-10 minutes to soften slightly for easier slicing. Cut into 9 or 12 squares and enjoy.
Notes
If the crust is too soft, chill it an extra 5 minutes before adding the lemon layer. Chill mixing bowl before whipping cream for best results. Use a sharp knife warmed under hot water for clean slicing. Bars are best after freezing overnight. Coconut cream can substitute heavy cream for dairy-free option. Almond flour crust and erythritol can be used for keto-friendly version.
Nutrition
- Serving Size: 1 bar (if cut into 9
- Calories: 280
- Sugar: 18
- Fat: 18
- Carbohydrates: 25
- Protein: 4
Keywords: no-bake, frozen bars, strawberry lemonade, summer dessert, patriotic dessert, easy recipe, quick dessert