My niece asked why I couldn’t just use light cream cheese and sugar-free pudding mix instead of the full-fat stuff in my Oreo truffle cookies. I started to explain why that wouldn’t work — then stopped. Honestly, I had no good reason other than “that’s how I’ve always done it.” She’s twelve and has never met a recipe she didn’t want to tweak. So I let her take over the mixing bowl, fully expecting a sad, dry crumble.
Twenty minutes later, I was eating one of the best cookies I’d had in months. They were rich, fudgy, and somehow lighter than the original. Not light in flavor — light in that post-cookie guilt feeling, you know? The texture was spot on, and the chocolate hit was just as intense. I stood there in my messy kitchen, Oreo dust on my apron, completely humbled by a seventh grader.
That’s the thing about these Lighter Black Cat Oreo Truffle Cookies. They prove you don’t need a mountain of butter and sugar to get that deep, decadent truffle-cookie experience. They come together with just three ingredients, and they’re perfect for Halloween parties, after-school treats, or those evenings when you want something sweet but don’t want to undo a week of eating well. Maybe you’ve been there — standing in front of the pantry, craving cookies but not wanting the whole production?
These cookies became my go-to for exactly that reason. They deliver everything you love about the classic truffle cookie — that soft, fudgy center, that crackly top, that Oreo crunch — but with a fraction of the calories and fat. And the best part? They’re almost embarrassingly easy. I keep coming back to them because they feel indulgent without the heaviness. Let me tell you, that’s a rare combination worth holding onto.
Why You’ll Love This Recipe
I tested this recipe six times before I got it exactly right. The first batch was too soft, the second too crumbly, and the third — well, let’s just say I learned that not all cream cheese is created equal. But after those trials, I landed on a version that even my nutritionist friend approved of. She actually asked for the recipe, which felt like winning a small award.
- Quick & Easy: These come together in under 20 minutes of active time. No chilling, no complicated steps, no stand mixer required. Just a bowl, a spoon, and ten minutes of your attention.
- Simple Ingredients: You need exactly three things: Oreos (or any chocolate sandwich cookie), light cream cheese, and sugar-free instant chocolate pudding mix. That’s it. No eggs, no butter, no flour.
- Perfect for Halloween: With their dark, crackly tops and truffle-like texture, these look right at home on any spooky dessert table. I’ve brought them to three Halloween parties now, and they disappear before the cupcakes.
- Crowd-Pleaser: I’ve served these to kids, adults, and even my picky mother-in-law. Everyone loves them. No one guesses they’re lighter until I tell them.
- Unbelievably Delicious: The texture is the real star here. They’re dense and fudgy like a truffle, but with that slight chew of a cookie. The Oreo pieces add crunch throughout, and the chocolate flavor is deep and satisfying.
What makes this recipe different from every other Oreo truffle cookie out there is the sugar-free pudding mix. It’s the secret weapon that gives structure without extra sugar and keeps the cookies from spreading into flat puddles. Plus, the light cream cheese cuts the fat by more than half compared to the original. This isn’t just another version — it’s the version I make when I want cookies that taste like a splurge but fit into my everyday eating habits.
These cookies have that quality where you close your eyes after the first bite. They’re comfort food reimagined — lighter, faster, but with the same soul-soothing satisfaction. Perfect for impressing guests without stress, or turning a simple Tuesday into something a little special.
What Ingredients You Will Need
This recipe relies on three simple ingredients to create something that tastes far more complicated than it is. Each one plays a specific role, so choosing the right versions matters.
- Oreos (or chocolate sandwich cookies): You’ll need one standard 14.3-ounce package. I recommend using regular Oreos, not Double Stuf, because the filling ratio affects the texture. The chocolate wafers provide structure and that iconic crunch, while the creme filling adds sweetness and helps bind everything together. For best results, crush them finely — you want some sandy crumbs mixed with small chunks for texture. I’ve tried this with generic store-brand cookies, and while they work, Oreos give the most consistent results.
- Light cream cheese: Use 8 ounces, softened to room temperature. This is crucial — cold cream cheese won’t blend smoothly, and you’ll end up with white streaks throughout your dough. I prefer Philadelphia brand for its creamy texture, but any block-style light cream cheese works. Do not use whipped cream cheese or cream cheese spread from a tub; they have too much air and water, which makes the dough sticky and the cookies flat. Let it sit on the counter for about 30 minutes before you start.
- Sugar-free instant chocolate pudding mix: One 1-ounce packet. This is the ingredient that makes these cookies “lighter” without sacrificing texture. The pudding mix absorbs moisture and helps the cookies hold their shape while adding deep chocolate flavor without extra sugar. I use Jell-O brand because it’s widely available and reliable. Do not use cook-and-serve pudding — it won’t work the same way. The instant kind is essential for the right texture.
- Optional: Powdered sugar for rolling: If you want that classic truffle cookie look with a crackly, snowy top, roll the dough balls in powdered sugar before baking. It’s not necessary for flavor, but it does make them look more polished. About 2 tablespoons is plenty.
That’s genuinely it. Three ingredients, plus an optional garnish. You probably already have the cream cheese and pudding mix in your fridge and pantry if you’re someone who keeps basics on hand. The Oreos are the only thing you might need to grab, and honestly, when is buying Oreos ever a hardship?
Equipment Needed
You don’t need a fancy kitchen for these cookies. Here’s what you’ll actually use:
- Food processor or zip-top bag and rolling pin: For crushing the Oreos into fine crumbs. A food processor gives the most consistent texture in about 30 seconds. If you don’t have one, put the cookies in a sturdy zip-top bag, squeeze out the air, and go to town with a rolling pin. It’s a great arm workout, honestly.
- Large mixing bowl: Any medium-to-large bowl works. I use my favorite ceramic one because it’s wide enough to mix without flinging crumbs everywhere.
- Hand mixer or sturdy spoon: A hand mixer makes quick work of combining the cream cheese and pudding mix, but a wooden spoon and some elbow grease work fine too. The dough is thick, so be prepared to put a little muscle into it.
- Baking sheet: A standard half-sheet pan works perfectly. Line it with parchment paper or a silicone baking mat for easy cleanup.
- Cookie scoop or tablespoon: For portioning the dough into uniform balls. I use a 1.5-tablespoon scoop, which gives me about 24 cookies. A regular spoon works, but the cookies won’t be as even.
- Cooling rack: Optional but helpful. Letting the cookies cool on a rack prevents the bottoms from getting soggy.
If you’re on a budget, skip the food processor and cookie scoop. A rolling pin and a regular spoon will get the job done just fine. I’ve made these in my tiny college apartment kitchen with nothing but a bowl and a fork, and they turned out great.
Preparation Method
- Preheat your oven to 350°F (175°C). Line a baking sheet with parchment paper or a silicone mat. This prevents sticking and makes cleanup almost effortless.
- Crush the Oreos. Place all 36 cookies (creme filling included) in your food processor. Pulse until you have fine crumbs with a few small chunks remaining. You want the texture of wet sand — not powder, not gravel. If using a bag method, seal the bag and crush with a rolling pin until consistent. This should take about 2 minutes by hand, 30 seconds with a machine.
- Soften the cream cheese. If you forgot to take it out of the fridge, microwave it for 10-15 seconds. It should be soft but not melted. Cut it into cubes for faster softening.
- Mix the cream cheese and pudding mix. In your large bowl, beat the softened cream cheese with the sugar-free pudding mix using a hand mixer on medium speed. Beat for about 2 minutes until smooth, light, and fluffy. Scrape down the sides once or twice. The mixture should look like a thick, creamy frosting.
- Add the Oreo crumbs. Pour the crushed Oreos into the cream cheese mixture. Stir with a spatula or wooden spoon until fully combined. The dough will be thick and slightly sticky. Don’t overmix — you want some texture from the cookie pieces. If the dough seems too dry, add a teaspoon of milk. If too wet, add another tablespoon of Oreo crumbs.
- Shape the cookies. Scoop out rounded tablespoons of dough (about 1.5 tablespoons each) and roll into balls. If you want that crackly, snowy look, roll each ball in powdered sugar before placing on the baking sheet. Space them about 2 inches apart — they spread slightly.
- Bake. Place the baking sheet in the preheated oven and bake for 8-10 minutes. The cookies will look puffed and slightly cracked on top. They will be very soft when you take them out — that’s normal. Don’t overbake, or they’ll lose that fudgy texture. The edges should be set but the centers should still look slightly underdone.
- Cool completely. Let the cookies cool on the baking sheet for 5 minutes. They will continue to set as they cool. Then transfer to a wire rack to cool completely. This step is important — moving them too early will cause them to fall apart. They firm up significantly as they cool, so be patient.
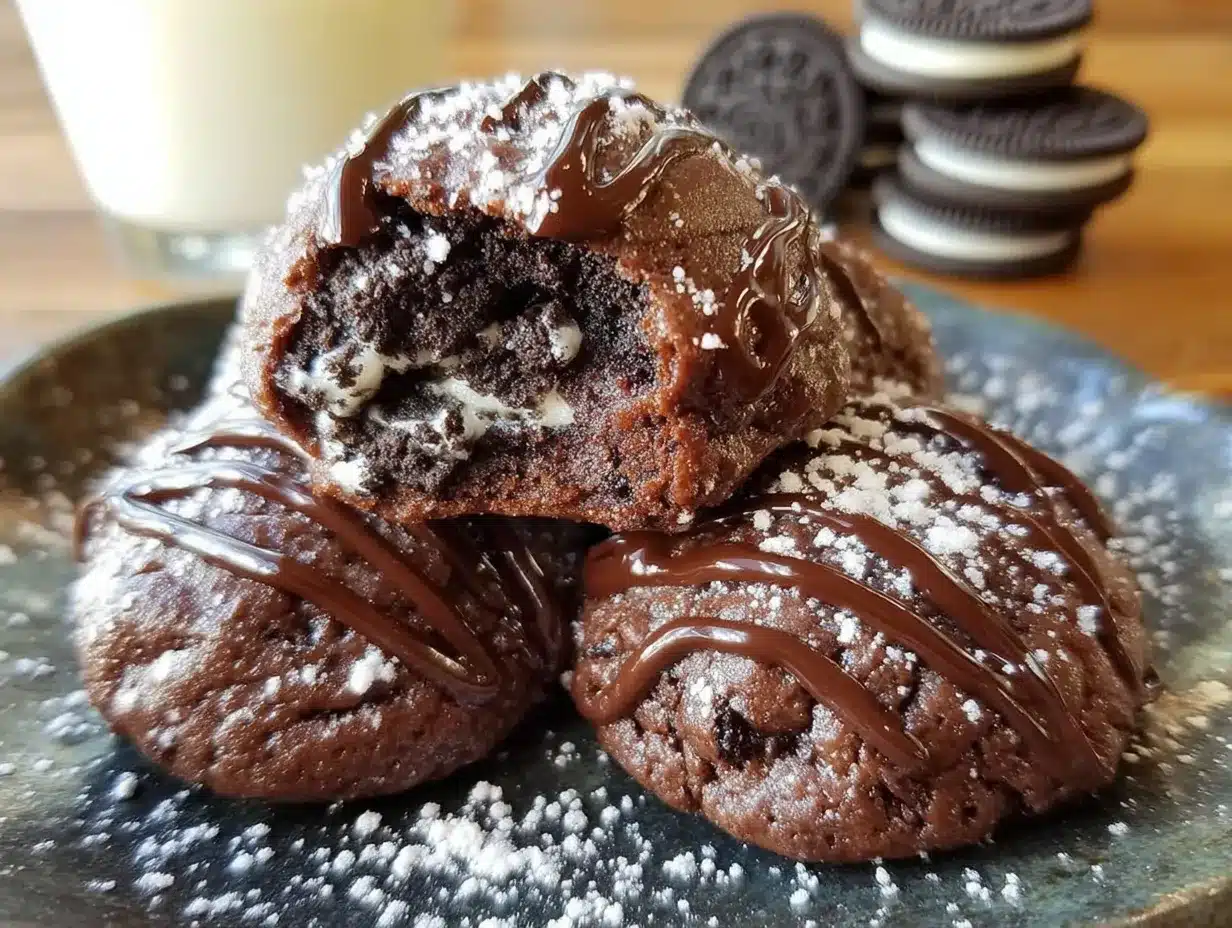
A quick note: your kitchen will smell incredible. The chocolate and vanilla from the Oreos fills the air, and the cookies develop that glossy, crackly top that makes them look bakery-worthy. When they’re done, the tops will be matte with a few cracks, and the bottoms will be lightly golden. Perfection.
Cooking Tips & Techniques
I learned most of these the hard way — through batches that didn’t quite work. Here’s what I wish I’d known from the start.
Don’t overprocess the Oreos. I made this mistake twice. If you blitz them into a fine powder, the cookies turn out dense and almost dusty. You want some texture — small chunks of cookie and creme that create those lovely pockets of crunch. Pulse the food processor in short bursts and check frequently.
Room temperature cream cheese isn’t optional. I know, it’s annoying to wait. But cold cream cheese creates lumpy dough that doesn’t come together properly. You’ll end up with white streaks in your dark cookies, and the texture will be uneven. Set it out 30 minutes ahead, or microwave it in 10-second bursts until it’s soft to the touch.
Measure your dough balls for even baking. This is one of those tips that sounds fussy but makes a real difference. Uniform cookies bake evenly — no burnt edges on some while others are underdone. A cookie scoop is worth the few dollars it costs.
Watch the bake time like a hawk. These cookies go from perfectly fudgy to dry in about 90 seconds. Start checking at 8 minutes. The tops should be set and cracked, but the centers should still look slightly soft. They’ll continue cooking from residual heat after you pull them out.
Let them cool completely. I know it’s tempting to grab one warm from the oven. But these cookies need that cooling time to set up properly. Warm, they’re fragile and almost cake-like. After 30 minutes on the rack, they develop that perfect truffle texture — dense, fudgy, and satisfying.
If your dough is too sticky to roll, pop it in the fridge for 15 minutes. That usually firms it up enough to handle easily. If it’s too dry, add a teaspoon of milk and mix again.
Variations & Adaptations
This recipe is surprisingly flexible. Here are some ways I’ve adapted it over the years.
Gluten-Free Version: Use gluten-free chocolate sandwich cookies. I’ve tested this with both Glutino and Kinnikinnick brands, and both work well. The texture is slightly crumblier, but the flavor is still fantastic. Everything else stays the same.
Peppermint Twist: Around the holidays, I crush up Oreo Mint Creme cookies instead of regular ones. The chocolate-mint combination is incredible, and the green filling adds a festive touch. You can also add 1/4 teaspoon of peppermint extract to the cream cheese mixture for extra punch.
Peanut Butter Dream: Swirl in 2 tablespoons of creamy peanut butter before adding the Oreo crumbs. The peanut butter adds richness and a savory note that balances the chocolate beautifully. Use natural peanut butter for a less sweet result.
Vegan Option: Use vegan cream cheese (I like Miyoko’s or Kite Hill) and vegan chocolate sandwich cookies. The texture will be slightly softer, so refrigerate the dough balls for 20 minutes before baking. This version works surprisingly well — my vegan friend couldn’t tell the difference.
Double Chocolate: Add 1/4 cup of mini chocolate chips to the dough before shaping. They melt into little pools of chocolate as the cookies bake, creating an even richer experience. I do this when I want something extra decadent.
My personal favorite variation is the peanut butter one. I stumbled onto it by accident when I was out of regular cream cheese and used a peanut butter-flavored alternative. It was a happy mistake that became a regular in my rotation.
Serving & Storage Suggestions
These cookies are best served at room temperature or slightly warm. The texture is most fudgy and satisfying when they’ve had time to cool completely but haven’t been refrigerated. If you want that fresh-from-the-oven experience, pop them in the microwave for 8-10 seconds before serving.
They’re wonderful on their own, but they also pair beautifully with a cold glass of milk, a cup of hot coffee, or — my personal favorite — a scoop of vanilla ice cream sandwiched between two cookies. For Halloween parties, arrange them on a black platter with some candy corn scattered around. They look striking against a dark surface.
Storage: Keep these in an airtight container at room temperature for up to 5 days. Place a sheet of parchment paper between layers to prevent sticking. They actually improve after a day — the flavors meld and the texture becomes even more truffle-like.
Freezing: These freeze beautifully. Place the baked, cooled cookies in a single layer in a freezer-safe container, with parchment between layers. They’ll keep for up to 3 months. Thaw at room temperature for about 30 minutes before serving. You can also freeze the unbaked dough balls — just place them on a baking sheet, freeze until solid, then transfer to a freezer bag. Bake straight from frozen, adding 2-3 minutes to the baking time.
Reheating: If you prefer them warm, microwave individual cookies for 8-10 seconds. For a crowd, warm them in a 300°F oven for 5 minutes. Don’t overheat, or they’ll lose that fudgy center.
One thing I’ve noticed: the cookies are actually better on day two. The texture firms up perfectly, and the chocolate flavor deepens. So don’t worry about making them ahead — they’re designed to improve with a little patience.
Nutritional Information & Benefits
Per cookie (based on 24 cookies): approximately 95 calories, 4g fat, 14g carbohydrates, 1g fiber, 8g sugar, 2g protein. These numbers are estimates and will vary based on the exact brands you use.
Compared to traditional Oreo truffle cookies, these have about 40% fewer calories and half the fat. The light cream cheese and sugar-free pudding mix make a significant difference without sacrificing taste or texture. For anyone watching their sugar intake, the sugar-free pudding keeps the sweetness in check while still delivering that satisfying dessert experience.
The Oreos themselves provide a small amount of iron and calcium (surprising, I know), and the cream cheese adds a bit of protein and calcium. These aren’t health food by any stretch, but they’re a smarter choice when a cookie craving strikes. I love that I can enjoy two or three without the heavy, sluggish feeling that comes with traditional versions.
For those with dietary concerns: these contain wheat, dairy, and soy. They are not suitable for vegans (unless using the substitutions mentioned above) or those with celiac disease (unless using gluten-free cookies). The sugar-free pudding contains artificial sweeteners, so if you prefer natural options, look for a brand sweetened with stevia or monk fruit.
Conclusion
These Lighter Black Cat Oreo Truffle Cookies are proof that you don’t have to choose between eating well and eating something truly delicious. They’re rich, fudgy, and deeply satisfying — everything you want from a cookie, without the heavy aftermath. Three ingredients, one bowl, and about 20 minutes of your time. That’s all it takes.
I love that this recipe came from a moment of being wrong. My niece taught me that sometimes the simple, lighter version isn’t a compromise — it’s an improvement. These cookies have become my go-to for Halloween parties, weeknight cravings, and anytime I want something that feels like a treat without derailing my week.
I’d love to hear how these turn out for you. Try them with different Oreo flavors, experiment with mix-ins, or keep them exactly as written. Leave a comment below and let me know your favorite variation — or if you have a kitchen story about being proven wrong by a simpler approach. Share this recipe with someone who needs a lighter cookie in their life. Happy baking, friends!
Frequently Asked Questions
Can I use regular cream cheese instead of light?
Yes, you can. The cookies will be richer and slightly more tender, but they’ll still work. Just note that the calorie and fat content will be higher. If using full-fat cream cheese, you might need an extra tablespoon of Oreo crumbs to balance the moisture.
Why did my cookies turn out flat?
Flat cookies usually mean the cream cheese was too soft or the dough was overmixed. Make sure your cream cheese is softened but not melted, and stop mixing as soon as the ingredients come together. Chilling the dough balls for 15 minutes before baking can also help.
Can I make these without a food processor?
Absolutely. Place the Oreos in a sturdy zip-top bag, seal it, and crush them with a rolling pin or even a heavy pan. It takes a few minutes and some arm strength, but it works perfectly. You’ll get a more uneven crumb, which some people actually prefer for extra texture.
How do I get that crackly top?
The crackly top comes from rolling the dough balls in powdered sugar before baking. As the cookies bake, the sugar expands and cracks, creating that beautiful finish. Make sure to roll them generously — the sugar should coat the entire surface. If you skip this step, the cookies will still be delicious, just without the crackly look.
Can I use Double Stuf Oreos?
You can, but the texture will be different. Double Stuf Oreos have more creme filling, which adds extra moisture and sweetness. The cookies may spread more and be slightly softer. If you use them, reduce the cream cheese by 1-2 tablespoons to compensate. Regular Oreos give the most consistent results.
Pin This Recipe!
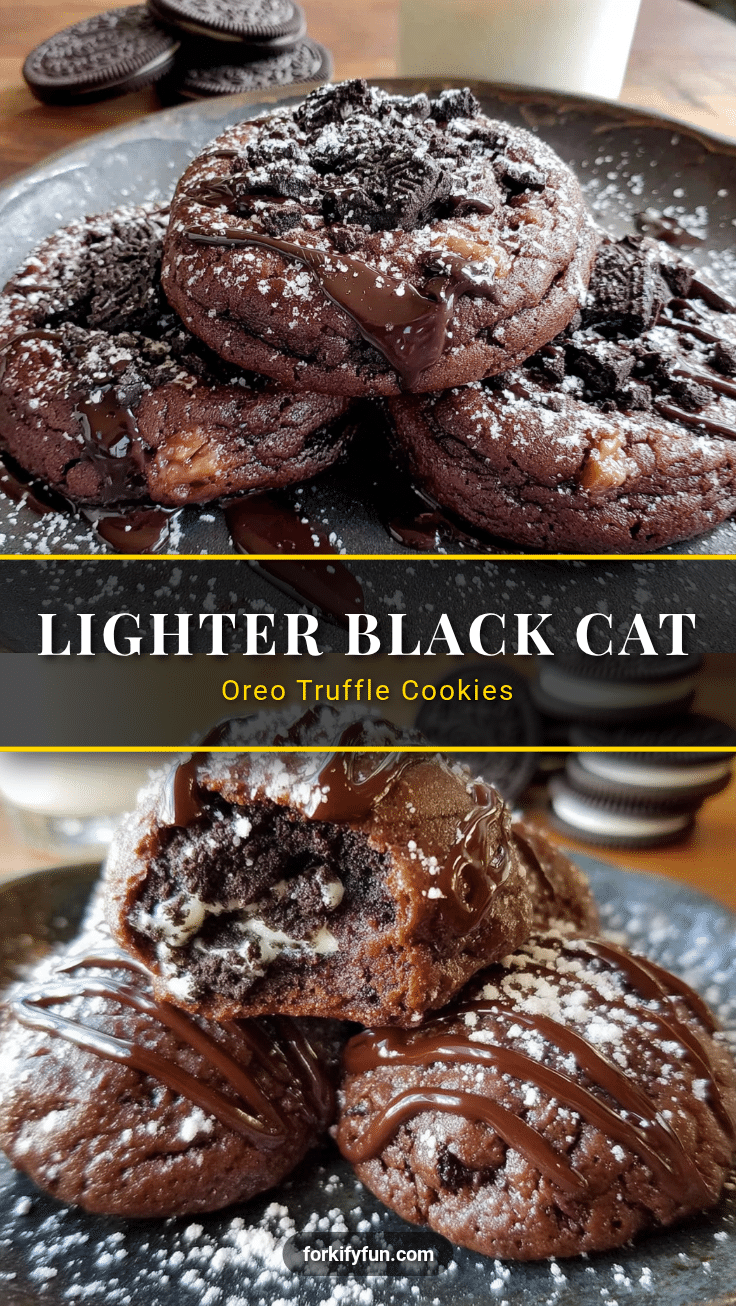
Lighter Black Cat Oreo Truffle Cookies

These rich, fudgy cookies come together with just three ingredients and are perfect for Halloween parties, after-school treats, or when you want something sweet without the guilt. They deliver the classic truffle cookie experience with a fraction of the calories and fat.
- Prep Time: 15 minutes
- Cook Time: 10 minutes
- Total Time: 25 minutes
- Yield: 24 cookies 1x
- Category: Dessert
- Cuisine: American
Ingredients
- 1 (14.3-ounce) package Oreos (or chocolate sandwich cookies), crushed
- 8 ounces light cream cheese, softened
- 1 (1-ounce) packet sugar-free instant chocolate pudding mix
- 2 tablespoons powdered sugar (optional, for rolling)
Instructions
- Preheat your oven to 350°F (175°C). Line a baking sheet with parchment paper or a silicone mat.
- Crush the Oreos in a food processor until you have fine crumbs with a few small chunks remaining. Alternatively, place them in a zip-top bag and crush with a rolling pin.
- If the cream cheese is not at room temperature, microwave it for 10-15 seconds until soft but not melted.
- In a large bowl, beat the softened cream cheese with the sugar-free pudding mix using a hand mixer on medium speed for about 2 minutes until smooth, light, and fluffy.
- Add the crushed Oreos to the cream cheese mixture and stir with a spatula or wooden spoon until fully combined. The dough will be thick and slightly sticky.
- Scoop rounded tablespoons of dough (about 1.5 tablespoons each) and roll into balls. If desired, roll each ball in powdered sugar for a crackly top.
- Place the dough balls on the prepared baking sheet, spacing them about 2 inches apart.
- Bake for 8-10 minutes. The cookies will look puffed and slightly cracked on top; they will be very soft when removed from the oven.
- Let the cookies cool on the baking sheet for 5 minutes, then transfer to a wire rack to cool completely.
Notes
For best results, use regular Oreos (not Double Stuf) and block-style light cream cheese (not whipped or spread). The cookies are better on day two as the texture firms up and the flavor deepens. Store in an airtight container at room temperature for up to 5 days, or freeze for up to 3 months.
Nutrition
- Serving Size: 1 cookie
- Calories: 95
- Sugar: 8
- Sodium: 120
- Fat: 4
- Saturated Fat: 2
- Carbohydrates: 14
- Fiber: 1
- Protein: 2
Keywords: Oreo truffle cookies, light cookies, 3-ingredient cookies, Halloween cookies, easy cookies, fudgy cookies