The Halloween party was in six hours and I’d completely forgotten. Everyone else on the block would be bringing elaborate carved pumpkins, bubbling cauldron dips, and those creepy skeleton cookies that take three days to decorate. I had a bag of baby carrots, some cream cheese, and a vague sense of panic. Not exactly the stuff of holiday legend, you know?
I stood in my kitchen staring at the vegetable drawer like it might magically transform into something spooky. And honestly, that’s when it hit me — why not lean into the healthy thing? Everyone else would be serving sugar and processed snacks. Maybe a fresh, crunchy option would stand out. Maybe it would even be a relief for the other parents who’d been sneaking their kids’ candy all afternoon.
I grabbed a few bell peppers, some cucumber, and that block of cream cheese. Twenty minutes later, I had a tray of little mummy veggie wraps that looked ridiculous and adorable. I tossed a packet of ranch seasoning into the cream cheese, wrapped each one in a strip of cucumber peel, and stuck tiny eyes on them. They looked like little green ghosts holding vegetables. I mean, it was silly. But I brought them anyway.
Here’s the part I still can’t believe — those little mummy wraps disappeared first. The kids loved them. The adults loved them. Someone asked me for the recipe. Someone else asked if I could bring them to the next party. I just stood there holding an empty tray, feeling like I’d accidentally won Halloween.
That’s how this Light & Spooky Mummy Veggie Tray with Ranch became my go-to for every fall gathering. Maybe you’ve been there — scrambling for something to bring, wishing you had more time, settling for whatever’s in the fridge. This recipe is for those moments. It’s simple, it’s fresh, and somehow it steals the show every single time.
Why You’ll Love This Recipe
Let me tell you why this veggie tray has earned a permanent spot in my Halloween rotation. I’ve tested it at three different parties now, and the results are always the same — people cannot stop eating it.
- Quick & Easy : Comes together in under 20 minutes, perfect for last-minute party panic or lazy Sunday afternoon prep.
- Simple Ingredients : No fancy grocery trips needed. You likely already have cream cheese, ranch seasoning, and basic vegetables in your kitchen right now.
- Perfect for Halloween : Great for school parties, office potlucks, neighborhood gatherings, or just making your kids laugh at dinner.
- Crowd-Pleaser : Always gets rave reviews from kids and adults alike. Even the picky eaters go for these little guys.
- Unbelievably Delicious : The creamy ranch filling paired with crunchy fresh vegetables is next-level comfort food that somehow feels light.
What makes this recipe different from every other veggie tray out there? It’s the presentation, honestly. Those little mummy faces make people smile before they even take a bite. And the cream cheese ranch dip? It’s thicker, tangier, and way more satisfying than the bottled stuff. I’ve had people ask me if there’s a secret ingredient — nope, just good proportions and the right technique.
This isn’t just another vegetable platter. It’s the kind that makes you close your eyes after the first bite. It’s comfort food reimagined — healthier, faster, but with the same soul-soothing satisfaction. Perfect for impressing guests without stress, or turning a simple snack into something memorable.
What Ingredients You Will Need
This recipe uses simple, wholesome ingredients to deliver bold flavor and satisfying crunch without the fuss. Most of these are pantry staples or easy to find at any grocery store.
For the Ranch Dip
- 8 ounces cream cheese, softened to room temperature (I recommend Philadelphia for smoothest texture)
- 1 packet (1 ounce) dry ranch seasoning mix (Hidden Valley is my go-to)
- 1/4 cup sour cream (adds tanginess and helps with spreading consistency)
- 2 tablespoons milk (use dairy-free milk if needed — unsweetened almond works fine)
For the Mummy Veggies

- 1 large cucumber, sliced into thin rounds (English cucumber works best — fewer seeds)
- 1 bell pepper (any color — red gives the best contrast against the white dip)
- 1 cup cherry tomatoes, halved
- 1 cup baby carrots
- 1 cup snap peas or snow peas
- Candy eyes (the little edible ones from the baking aisle — they’re optional but essential for the spooky factor)
For the Mummy Wraps
- Additional cucumber, peeled into long thin strips (use a vegetable peeler)
- Small pretzel sticks (for arms, if you want to get fancy)
I’ve made this recipe with different cream cheese brands, and honestly, the full-fat version gives the best texture. The low-fat version works but it’s a little looser — you might need to refrigerate it longer before serving. For the ranch seasoning, I’ve tried homemade blends and they’re fine, but the packet mix has that specific flavor people recognize and love.
If you’re serving this to someone with dietary restrictions, swap the cream cheese for a dairy-free version. I’ve used Kite Hill’s plant-based cream cheese and it worked beautifully — just add an extra tablespoon of milk to get the right consistency.
Equipment Needed
You don’t need much for this recipe, which is part of the beauty. Here’s what you’ll want to have on hand:
- Medium mixing bowl (for the ranch dip)
- Hand mixer or stand mixer (makes the cream cheese smooth in about 30 seconds — a wooden spoon works too, but your arm will thank you for the mixer)
- Vegetable peeler (for making those cucumber strips — a Y-shaped peeler is easiest)
- Cutting board
- Sharp knife
- Serving platter or large plate
- Small bowl (for the extra dip, if you want to serve it on the side)
I’ve made this with just a fork and a bowl before, and it works fine. The cream cheese just takes a little longer to soften. If you don’t have a vegetable peeler, you can use a mandoline on the thinnest setting, or just skip the cucumber wraps entirely and arrange the veggies in mummy shapes directly on the platter.
Preparation Method
Let me walk you through this step by step. It’s simpler than you think, and I’ve included all the little tricks I learned from making this about a dozen times.
- Soften the cream cheese. Take it out of the fridge about 30 minutes before you start. If you forgot (I always forget), unwrap it and microwave it for 10 seconds on 50% power. Check it, then do another 5 seconds if needed. You want it soft but not melted — warm cream cheese makes the dip too runny.
- Make the ranch dip. In your medium bowl, combine the softened cream cheese, ranch seasoning packet, sour cream, and milk. Beat with your hand mixer on medium speed until smooth and fluffy — about 1 minute. Scrape down the sides halfway through. Taste it. Add a pinch of black pepper if you want a little kick. Cover and refrigerate while you prep the veggies.
- Prep the vegetables. Wash everything well. Slice your cucumber into thin rounds — about 1/4 inch thick. Cut the bell pepper into strips. Halve the cherry tomatoes. Leave the baby carrots and snap peas whole. Set everything aside in separate piles on your cutting board.
- Make the cucumber wraps. Using your vegetable peeler, peel long strips from the remaining cucumber. You want them thin enough to wrap but thick enough not to tear — about 1/8 inch. You’ll need about 2 strips per mummy. Set them on a paper towel to absorb excess moisture.
- Assemble the mummies. Take a cucumber round and spread a small dollop of ranch dip on top — about 1 teaspoon. Place a piece of bell pepper, a tomato half, a baby carrot, or a snap pea on top of the dip. Then take a cucumber strip and wrap it around the vegetable like a mummy bandage, leaving the top exposed so you can see the vegetable “face.” Press gently so it sticks to the dip.
- Add the eyes. Using a tiny bit of ranch dip as glue, attach two candy eyes to the exposed part of each vegetable. If you don’t have candy eyes, you can use little dots of black olive or even black sesame seeds. I’ve done both — the candy eyes are cuter, but the olive dots look more authentically spooky.
- Arrange on the platter. Place your mummy veggies on the serving platter in a crowd — they look best grouped together, like a little mummy gathering. If you have extra ranch dip, put it in a small bowl in the center of the platter for dipping.
- Chill before serving. Pop the platter in the fridge for at least 15 minutes before serving. This helps the dip firm up and the cucumber wraps stay in place. You can make this up to 4 hours ahead — just cover with plastic wrap and refrigerate.
Here’s a tip I learned the hard way — don’t overstuff the mummies. If the vegetable is too big, the cucumber wrap won’t stay on. Stick with smaller pieces, about bite-sized. Your guests will thank you.
Cooking Tips & Techniques
I’ve made plenty of mistakes with this recipe so you don’t have to. Here’s what I’ve learned:
The cream cheese must be softened. I cannot stress this enough. The first time I made this, I used cold cream cheese straight from the fridge. The dip was lumpy, hard to spread, and just not pleasant. Trust me on the 30-minute rule.
Pat your cucumber strips dry. Cucumbers are basically water wrapped in green skin. If you don’t blot them, they’ll make the dip watery and the mummies will slide apart. A paper towel is your friend here.
Make extra dip. Seriously, double the dip recipe. People will want to dip everything in it — the mummies, the extra veggies, maybe even their fingers. I always make a double batch and put half in a separate bowl for dipping.
Don’t assemble too far ahead. The cucumber wraps will start to release moisture after about 6 hours. If you’re making this for a party, assemble it no more than 4 hours before serving. The dip itself can be made 2 days ahead and stored in the fridge.
Use a variety of vegetables. The more colors you have, the cuter the platter looks. Red bell pepper, orange carrot, green cucumber, yellow tomato — it’s like a rainbow of spooky snacks. Kids especially love the variety.
I once made these for a Halloween party and forgot the candy eyes. I used black beans instead, cut in half. They looked like tiny angry mummies. Everyone thought it was intentional. Sometimes mistakes turn into happy accidents, you know?
Variations & Adaptations
This recipe is endlessly adaptable. Here are some of my favorite variations:
Dairy-Free Version : Use plant-based cream cheese and dairy-free sour cream. I’ve tried this with Kite Hill and Miyoko’s — both work great. The texture is slightly less firm, so refrigerate for an extra 30 minutes before serving.
Gluten-Free Option : This recipe is naturally gluten-free as written. Just double-check your ranch seasoning packet — most are gluten-free, but some brands use wheat starch. I use Hidden Valley, which is certified gluten-free.
Spicy Ranch Version : Add 1/2 teaspoon of cayenne pepper or a minced jalapeño to the ranch dip. It gives the mummies a little kick that adults love. I made this version for a game night and it was gone in 10 minutes.
Halloween Appetizer Platter : Turn this into a full party platter by adding ghost-shaped cheese slices (use a cookie cutter), spiderweb crackers, and pumpkin-shaped bell pepper pieces. Arrange everything around the mummy veggies for a complete spread.
Kid-Friendly Activity : Set up a mummy-making station at your Halloween party. Put out bowls of prepped veggies, the ranch dip, cucumber strips, and candy eyes. Let kids assemble their own mummies. It’s messy, it’s fun, and they actually eat the vegetables they make.
I tried a version with hummus instead of ranch dip once. It was good, but it didn’t have the same creamy texture that makes these mummies so satisfying. Stick with the cream cheese base — it’s worth it.
Serving & Storage Suggestions
These mummy veggie wraps are best served cold, straight from the fridge. The dip firms up nicely, the cucumber wraps stay crisp, and the candy eyes stay put. Here’s how to serve and store them:
Serving Temperature : Serve chilled. Take the platter out of the fridge about 10 minutes before serving — this takes the edge off the cold without making the dip runny.
Presentation Ideas : Arrange the mummies on a black platter for maximum spooky effect. Add some edible googly eyes scattered around. I like to put a small bowl of extra ranch dip in the center with a sign that says “Mummy Dip.”
Complementary Dishes : These pair beautifully with other light appetizers. Try serving them alongside a spooky Halloween popcorn mix for a sweet-and-savory combo. They also go great with creamy pumpkin hummus for a double-dip situation.
Storage Instructions : Store leftovers in an airtight container in the refrigerator for up to 2 days. The cucumber wraps will soften overnight, so they won’t look as pretty the next day, but they’ll still taste great.
Reheating : Don’t reheat these — they’re meant to be served cold. If you want to freshen them up, just make a new batch of cucumber wraps and reassemble.
The flavors actually develop over time. The ranch dip gets more flavorful after a few hours in the fridge. I’ve made the dip a day ahead and it tasted even better the next day. The veggies stay crunchy for about 24 hours before they start to soften.
Nutritional Information & Benefits
Here’s the approximate nutritional breakdown for one serving (about 4 mummy veggies with dip):
- Calories: 180
- Protein: 4g
- Carbohydrates: 12g
- Fiber: 3g
- Fat: 14g
- Saturated Fat: 8g
- Sodium: 320mg
This recipe packs some serious nutritional benefits. The vegetables provide fiber, vitamins A and C, and antioxidants. Cucumbers are hydrating and low in calories. Bell peppers are loaded with vitamin C — one serving gives you more than your daily needs. The cream cheese provides calcium and protein, though it’s higher in saturated fat, so enjoy in moderation.
For those watching their carb intake, this recipe fits well into a low-carb or keto lifestyle. Each serving has about 12g of carbs, most of which come from the vegetables. You can reduce it further by using fewer carrots and more cucumber and bell pepper.
Potential allergens include dairy (cream cheese, sour cream) and gluten (check your ranch seasoning). The candy eyes may contain wheat or soy, so read the label if you’re serving someone with allergies.
I love that this recipe lets me enjoy Halloween treats without the sugar crash. It’s satisfying, it’s festive, and I don’t feel guilty about going back for seconds. That’s my kind of balance.
Conclusion
This Light & Spooky Mummy Veggie Tray with Ranch has saved me more times than I can count. It’s the recipe I bring when I have no time, no energy, and no idea what to make. And somehow, it always ends up being the star of the party.
I love that it’s flexible. You can make it exactly as written, or you can throw in whatever vegetables you have on hand. You can use different dips, different veggies, different eyes. The basic idea — cute mummy shapes + creamy ranch dip + fresh vegetables — is foolproof.
Give it a try for your next Halloween gathering. Customize it to your taste. Make it with your kids. Bring it to a party and watch people smile. And if you come up with a fun variation, I’d love to hear about it. Drop a comment below and tell me how your mummy turn out. Happy Halloween, friends!
Frequently Asked Questions
Can I make this recipe ahead of time?
Yes! You can make the ranch dip up to 2 days ahead and store it in the refrigerator. Prep the vegetables up to 24 hours in advance and store them in separate bags in the fridge. Assemble the mummies no more than 4 hours before serving for the best texture.
What if I can’t find candy eyes?
No problem! You can use halved black olives, black beans, or even dots of black gel food coloring. I’ve also used black sesame seeds for a more subtle look. The mummies are still adorable without eyes — they just look like sleepy little ghosts.
Can I use a different dip?
Absolutely! Hummus, guacamole, or a yogurt-based dip all work well. The cream cheese ranch is my favorite because it’s thick enough to hold the cucumber wraps in place, but feel free to experiment. Just keep in mind that thinner dips won’t hold the wraps as well.
How do I keep the cucumber wraps from sliding off?
The key is using enough ranch dip as “glue.” Spread a generous dollop on the cucumber round before adding the vegetable. Then press the cucumber strip firmly into the dip. Refrigerating for 15 minutes before serving also helps everything set.
Can I make this recipe vegan?
Yes! Use plant-based cream cheese and dairy-free sour cream. I recommend Kite Hill or Miyoko’s for the best texture. Use a vegan ranch seasoning mix or make your own with dried herbs, garlic powder, onion powder, and a pinch of dill. The vegan version is slightly less firm, so chill it for an extra 30 minutes before serving.
Pin This Recipe!
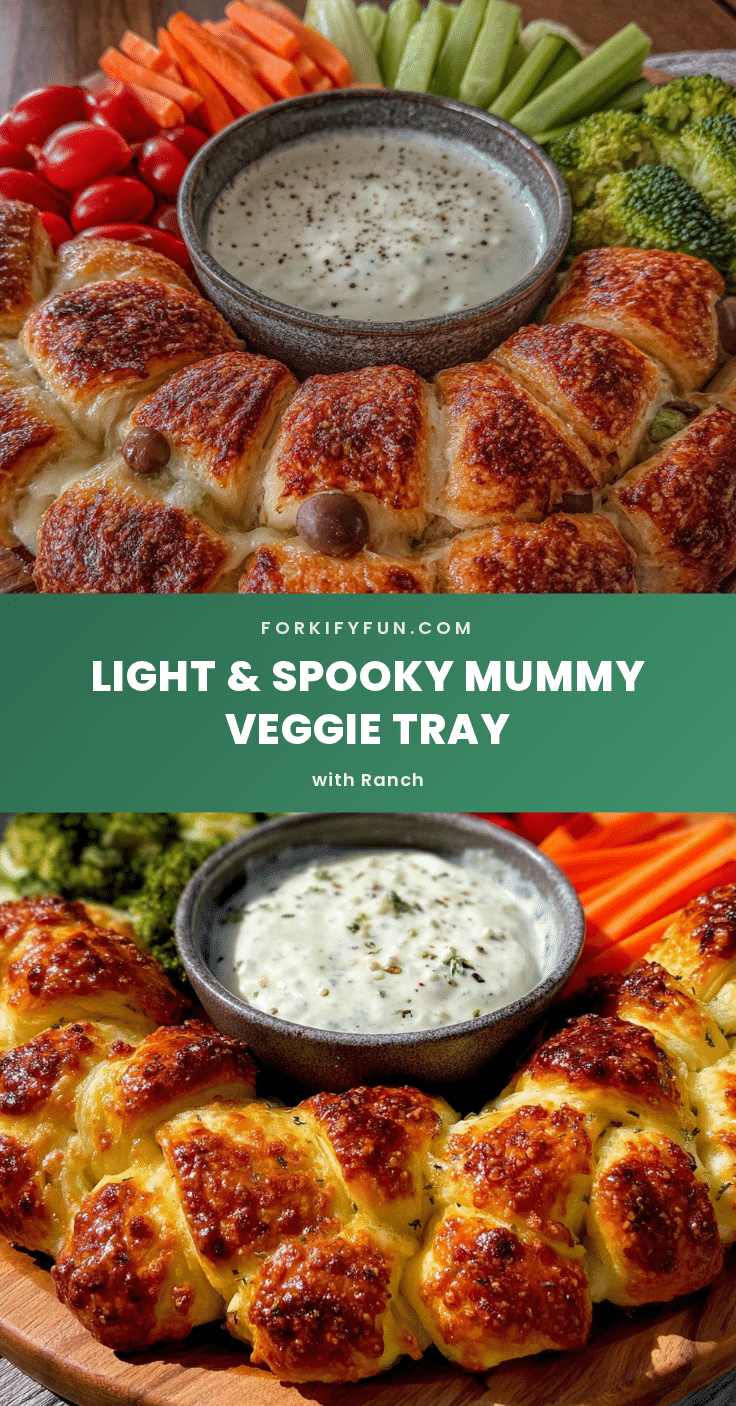
Light & Spooky Mummy Veggie Tray with Easy Ranch

A quick and easy Halloween appetizer featuring fresh vegetables wrapped in cucumber strips with a creamy ranch dip, topped with candy eyes for a spooky, fun presentation.
- Prep Time: 20 minutes
- Cook Time: 0 minutes
- Total Time: 20 minutes
- Yield: 4 servings 1x
- Category: Appetizer
- Cuisine: American
Ingredients
- 8 ounces cream cheese, softened to room temperature
- 1 packet (1 ounce) dry ranch seasoning mix
- 1/4 cup sour cream
- 2 tablespoons milk
- 1 large cucumber, sliced into thin rounds
- 1 bell pepper (any color), cut into strips
- 1 cup cherry tomatoes, halved
- 1 cup baby carrots
- 1 cup snap peas or snow peas
- Candy eyes (optional)
- Additional cucumber, peeled into long thin strips
- Small pretzel sticks (optional, for arms)
Instructions
- Soften the cream cheese by letting it sit at room temperature for 30 minutes, or microwave on 50% power for 10 seconds, then 5 seconds if needed.
- In a medium bowl, combine softened cream cheese, ranch seasoning, sour cream, and milk. Beat with a hand mixer on medium speed until smooth and fluffy, about 1 minute. Cover and refrigerate.
- Wash and prepare vegetables: slice cucumber into 1/4-inch rounds, cut bell pepper into strips, halve cherry tomatoes, leave baby carrots and snap peas whole.
- Using a vegetable peeler, peel long thin strips from the remaining cucumber. Pat dry with a paper towel.
- To assemble mummies: Place a cucumber round, spread about 1 teaspoon of ranch dip on top, add a piece of bell pepper, tomato half, baby carrot, or snap pea. Wrap a cucumber strip around the vegetable like a bandage, leaving the top exposed.
- Attach two candy eyes to the exposed part of each vegetable using a tiny bit of ranch dip as glue.
- Arrange mummy veggies on a serving platter, grouping them together. Place extra ranch dip in a small bowl in the center if desired.
- Refrigerate for at least 15 minutes before serving. Can be made up to 4 hours ahead.
Notes
Cream cheese must be softened for smooth dip. Pat cucumber strips dry to prevent watery dip. Don’t overstuff mummies. Assemble no more than 4 hours before serving. Double the dip recipe for extra. For dairy-free, use plant-based cream cheese and sour cream. For spicy version, add 1/2 teaspoon cayenne pepper.
Nutrition
- Serving Size: 4 mummy veggies with
- Calories: 180
- Sugar: 4
- Sodium: 320
- Fat: 14
- Saturated Fat: 8
- Carbohydrates: 12
- Fiber: 3
- Protein: 4
Keywords: Halloween, mummy, veggie tray, ranch dip, appetizer, party, healthy, spooky, vegetables