My neighbor, Mrs. Gable, watched me struggle with a wobbly platter of fruit at our building’s Halloween potluck last year. She didn’t say anything at first. Then she quietly reached over, rearranged three slices of apple, and turned my sad pile of grapes into the beginning of a spider web. “There,” she said, with a tiny smile. “Now the kids will actually eat it.” She was right. Her grandkids had taught her that trick years ago, and she’d been using it ever since to get them to reach for fruit instead of candy at parties. I stood there, honestly a little amazed at how such a simple shift in presentation could change everything.
That’s the thing about this kid-approved spider web fruit tray. It’s not about fancy carving skills or expensive ingredients. It’s about using what you have—apples, grapes, maybe some blueberries—and arranging them in a way that makes kids stop and look. I mean, let’s face it, getting a group of excited little goblins to choose a grape over a chocolate bar is no small feat. But when that grape is part of a web? That’s a different story. Maybe you’ve been there, staring at a table full of untouched fruit while the candy bowl gets emptied in minutes. This tray changes that dynamic completely.
I’ve made this spider web fruit tray for three Halloweens now, and every single time, it’s the first thing to disappear. The kids love the fun design, and honestly, the parents love that their kids are eating something healthy before the sugar rush hits. It’s become my go-to contribution for any fall gathering, from classroom parties to family dinners. The best part? It takes less than ten minutes to put together. No stress, no mess, just a clever little trick that makes everyone happy. And I keep making it because it works—every single time.
Why You’ll Love This Recipe
Let me tell you why this spider web fruit tray has earned a permanent spot in my Halloween rotation. It’s not just about the cute factor, though that certainly helps. This recipe solves a real problem: how to get kids to eat fruit at a party where candy is the main attraction. I’ve tested it at multiple gatherings, and the results are always the same. The kids are drawn to the web design, and once they start picking at the grapes, they don’t stop.
- Quick & Easy: This tray comes together in under 10 minutes. Seriously, that’s it. No baking, no cooking, no complicated steps. Just slicing and arranging.
- Simple Ingredients: You probably already have everything you need in your fridge. Green grapes, red grapes, apples, and maybe some blueberries or blackberries. No fancy grocery trips required.
- Perfect for Halloween Parties: Whether it’s a school celebration, a neighborhood gathering, or a family dinner, this tray fits right in. It’s festive without being fussy.
- Crowd-Pleaser: I’ve watched toddlers, teenagers, and even adults pick at this tray. The design is just that appealing. It sparks curiosity and then delivers on taste.
- Unbelievably Delicious: Okay, it’s fruit, so it’s naturally delicious. But the combination of sweet grapes and tart apples, arranged in a fun pattern, somehow tastes even better than fruit thrown on a plate. Maybe it’s the presentation, maybe it’s the excitement. Either way, it works.
What makes this tray different from every other fruit platter out there? It’s the specific technique of creating the web pattern using apple slices as the spokes and grapes as the concentric circles. It’s not just a random arrangement—it’s a deliberate design that mimics a real spider web. And that little detail is what captures a child’s imagination. I’ve seen kids who normally refuse fruit stop and ask, “Can I eat one of the web lines?” And then they’re hooked. This isn’t just another fruit tray; it’s an experience. It’s the kind of snack that makes you smile before you even take a bite. Perfect for impressing without stress, and turning a simple snack into something truly memorable.
What Ingredients You Will Need
This spider web fruit tray uses simple, fresh ingredients to create a stunning visual effect. The key is choosing fruit that contrasts well in color and holds up well to being arranged. Here is everything you will need, along with a few tips I have picked up along the way.
- Green grapes: About 2 cups, washed and dried. These form the outer circles of the web. Look for firm grapes that are still attached to small clusters, as they are easier to arrange. I prefer seedless green grapes for their crisp texture and mild sweetness.
- Red grapes: About 1 cup, washed and dried. These add a pop of color and a slightly different flavor. They work well for the inner circles of the web. Try to find grapes that are similar in size to the green ones for a uniform look.
- Apple (1 large): I recommend a firm variety like Granny Smith or Fuji. The apple slices form the spokes of the web. Granny Smith apples offer a nice tart contrast to the sweet grapes, while Fuji apples add extra sweetness. Either works beautifully.
- Blueberries or blackberries (optional): About ½ cup. These can be used to create a center “spider” or to add visual interest at the center of the web. Blackberries look particularly striking because of their dark, almost black color.
- Lemon juice (optional): A small squeeze to toss with the apple slices. This prevents browning and keeps your web looking fresh for hours. I always use this if I am making the tray ahead of time.
- Small bowl or ramekin: For the center of the web. This will hold a dip or simply act as a placeholder for the “spider” design. A small white ramekin works best as it contrasts with the fruit.
- Dip of choice (optional): Yogurt dip, caramel sauce, or chocolate hummus. This is completely optional but adds a fun element for dipping. I often use a simple Greek yogurt mixed with a touch of honey.
When selecting your fruit, freshness is key. Grapes should be firm and plump, not wrinkled or soft. Apples should be crisp with no bruises. I always wash and thoroughly dry the fruit before starting, as excess moisture can make the arrangement slide around. For the best visual impact, choose grapes that are roughly the same size. This creates a more uniform and professional-looking web. If you are making this for a classroom party, consider using organic fruit if your budget allows, as kids will be eating it directly. But honestly, regular fruit works just fine. The magic is in the arrangement, not the price tag.
Equipment Needed
You do not need any special tools to create this spider web fruit tray. In fact, you probably have everything you need in your kitchen right now. Here is what I use, along with a few alternatives if you are missing something.
- Large round platter or serving board: A round platter works best to emphasize the circular web design. I use a white ceramic platter because it contrasts nicely with the fruit. A wooden cutting board or even a large dinner plate will work in a pinch.
- Sharp knife: For slicing the apples. A chef’s knife or a paring knife both work well. Make sure it is sharp to get clean, thin slices. Dull knives can crush the apple rather than slice it cleanly.
- Cutting board: Any standard cutting board will do. I prefer using a separate board for fruit to avoid any cross-contamination from other foods.
- Small bowl or ramekin: For the center of the web. This can be a small dipping bowl, a ramekin, or even a small glass. The size should be about 2-3 inches in diameter.
- Paper towels: For drying the fruit thoroughly after washing. This step is more important than you might think—dry fruit stays in place much better than wet fruit.
- Lemon juice container (optional): If you are using lemon juice to prevent apple browning, have a small bowl ready to toss the slices.
I have made this tray using nothing but a dinner plate and a butter knife when I was at a friend’s house and forgot my supplies. It still worked, though the apple slices were a bit thicker than I would have liked. If you are buying a platter specifically for this purpose, look for one with a slight lip to keep the fruit from rolling off. Budget-friendly options from discount stores work perfectly fine. You do not need to spend a lot of money on equipment for this recipe.
Preparation Method
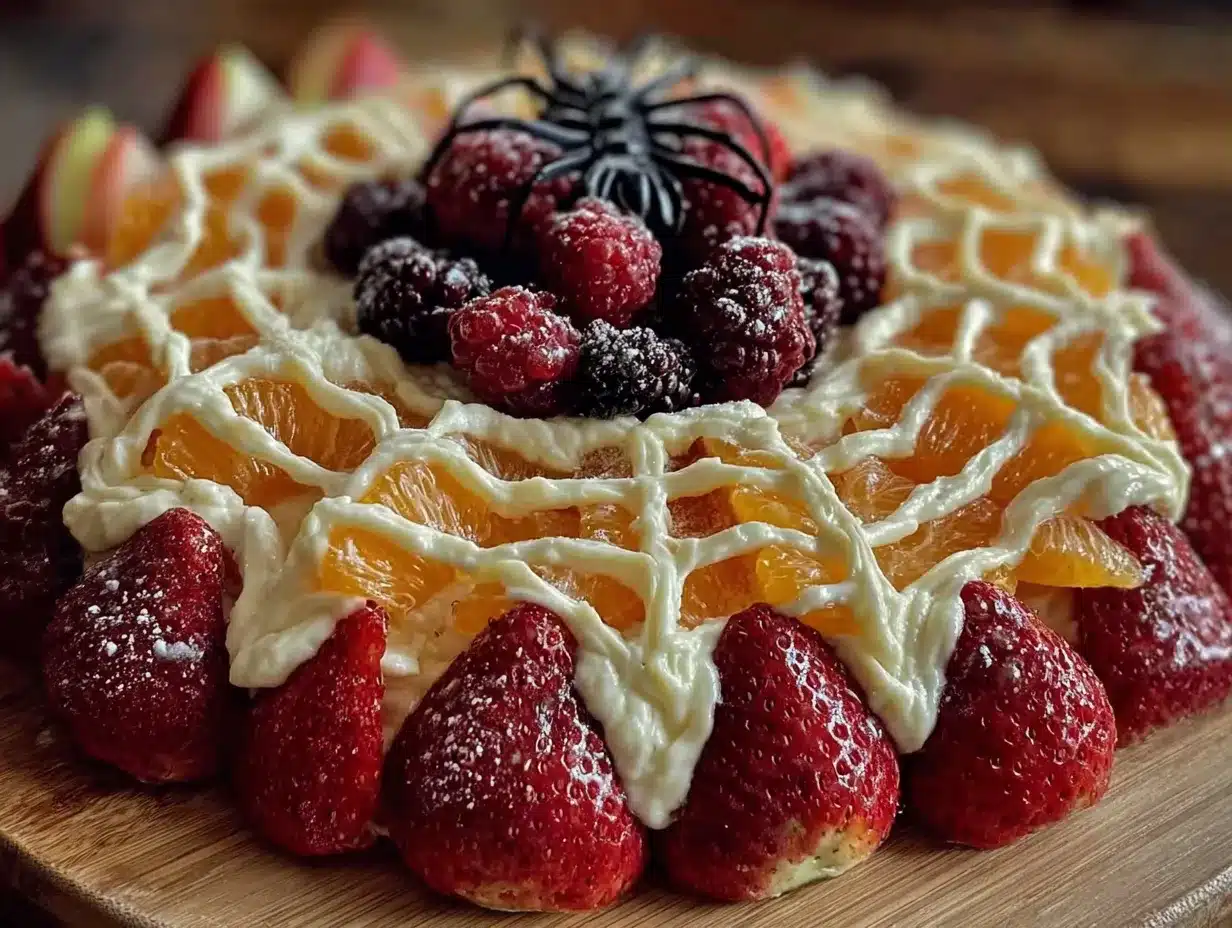
Creating this spider web fruit tray is surprisingly simple. The key is to work methodically and take your time with the arrangement. Here is exactly how I do it, step by step.
- Wash and dry all fruit thoroughly. This is the most important step. Wet fruit will slide around and ruin your design. I wash the grapes and apples under cool running water, then pat them completely dry with paper towels. For the grapes, I let them air dry on a clean kitchen towel for a few minutes while I prepare the apples. Moisture is the enemy of a good arrangement, so do not skip this step.
- Slice the apple. Cut the apple in half through the core. Place each half cut-side down on the cutting board and slice into thin wedges, about ¼ inch thick at the widest part. You will need 8 to 12 slices total, depending on the size of your platter. Discard the core pieces. If you are using lemon juice, toss the apple slices in a bowl with a squeeze of lemon juice to prevent browning. This step is optional but highly recommended if you are making the tray more than 30 minutes ahead of time.
- Place the small bowl or ramekin in the center of your platter. This will serve as the anchor point for your web design. Make sure it is centered. The bowl can be empty, or you can fill it with a dip like yogurt or caramel. I often use a small white ramekin filled with a honey yogurt dip. The contrast against the fruit is lovely.
- Create the spokes of the web using apple slices. Arrange the apple slices around the center bowl like the rays of the sun. Space them evenly, about 8 to 12 spokes depending on the size of your platter. Each slice should point outward from the center bowl to the edge of the platter. Press the narrow end of each slice slightly under the edge of the bowl to hold it in place. The apple slices should be evenly spaced, creating a star-like pattern. Take a step back and check the spacing before moving on.
- Build the first circle of grapes. Start with the green grapes. Place them in a circle around the center bowl, about 1 to 2 inches from the bowl. Use the apple spokes as a guide. Place one grape between each pair of apple slices, creating a ring. The grapes should touch each other slightly to form a continuous circle. This is the innermost ring of the web.
- Add the second circle of grapes. Move outward about 1 to 2 inches from the first circle. Use the red grapes for this ring to create color contrast. Again, place one grape between each pair of apple slices. The grapes should form a complete ring. The alternating colors create the classic spider web look.
- Continue building outward. Alternate between green and red grapes as you move toward the edge of the platter. Each new ring should be about 1 to 2 inches from the previous one. The rings will naturally get larger as you move outward. You may need to adjust the spacing slightly to keep the rings even. For a standard 12-inch platter, you will typically create 4 to 5 rings of grapes.
- Finish the outer edge. The final ring should extend to the edge of the platter, with the apple spokes visible between the grape rings. If you have extra grapes, you can add a few scattered around the outer edge for a more organic look. The apple spokes should extend slightly beyond the outermost grape ring.
- Add the finishing touches. If you are using blueberries or blackberries, place a few in the center of the web, either inside the small bowl or arranged around it to create a “spider” shape. I like to arrange three blackberries in a triangle on top of the dip in the center bowl to look like a spider’s body. You can also add small pretzel sticks for spider legs if you want to get really creative.
- Serve immediately or refrigerate. This tray is best served within an hour of assembly. If you need to make it ahead, cover it loosely with plastic wrap and refrigerate for up to 2 hours. The apple slices may brown slightly, but the lemon juice will help delay this. Bring the tray to room temperature for about 15 minutes before serving for the best flavor.
A few troubleshooting tips I have learned the hard way: If your grapes keep rolling away, try placing them cut-side down if you have halved any. For a more secure arrangement, you can use a small amount of cream cheese or peanut butter as “glue” to hold the apple slices in place. And if you run out of apple slices, simply cut a few more from a second apple. It is better to have extra than to be short.
Cooking Tips & Techniques
Over the years, I have learned a few tricks that make this spider web fruit tray even better. Some came from my own mistakes, others from watching Mrs. Gable work her magic. Here are my best tips for success.
Choose the right apple. Not all apples are created equal for this recipe. Granny Smith apples are my top choice because they are firm, tart, and resist browning better than many other varieties. Honeycrisp and Fuji are also excellent options. Avoid softer apples like Red Delicious, which can become mushy and brown quickly. The apple slices need to hold their shape to create clean, visible spokes.
Dry your fruit like it matters. I cannot stress this enough. Wet fruit is slippery fruit. After washing, I spread the grapes out on a clean kitchen towel and let them air dry for at least 10 minutes. For the apples, I pat them dry with paper towels after slicing. This extra step makes arranging the grapes so much easier. They stay where you put them instead of sliding around the platter.
Use a template if you are nervous. If you are worried about getting the spokes evenly spaced, use a small plate or bowl as a guide. Place the center bowl, then use a smaller plate to mark where the apple slices should go. You can also lightly mark the platter with a toothpick to indicate where each spoke should be. I did this the first few times until I got the hang of eyeballing it.
Work from the center outward. Always start with the center bowl and work your way to the edge. This ensures that the web pattern is centered and symmetrical. If you try to work from the outside in, you may end up with uneven spacing. I learned this the hard way when I made a lopsided web that looked more like a squashed spider than a neat web.
Embrace imperfection. The grapes do not have to be perfectly aligned. In fact, a slightly organic look can be more appealing. Kids do not notice if one grape is a little off-center. They just see the fun design. So do not stress about perfection. The goal is to create something that looks inviting and fun, not a museum piece.
Variations & Adaptations
One of the best things about this spider web fruit tray is how easy it is to adapt. I have tried several variations over the years, and each one has been a hit. Here are a few ideas to make this recipe your own.
Seasonal fruit swap: While grapes and apples are perfect for fall, you can adapt this tray for any season. In the summer, use sliced strawberries and kiwi for the spokes, and blueberries and raspberries for the web circles. In the winter, try using slices of pear and pomegranate seeds. The key is to choose fruits that contrast in color and hold their shape well. I made a spring version using sliced starfruit and green grapes that was absolutely stunning.
Dietary adaptations: This recipe is naturally gluten-free, dairy-free, and vegan, making it perfect for almost any dietary need. If you are serving a dip, simply choose one that fits your guests’ requirements. A simple fruit salsa or a dairy-free yogurt dip works beautifully. For a lower-sugar option, skip the dip altogether and let the natural sweetness of the fruit shine.
Add a protein boost: For a more filling snack, add small cubes of cheese between the grape rings. Mild cheddar or Monterey Jack work well and do not overpower the fruit. You can also add small slices of turkey or ham rolled into pinwheels for a savory option. This turns the tray from a simple snack into a more substantial appetizer that can double as a light meal for hungry little ones.
Create a spooky centerpiece: Instead of a simple bowl of dip, create a more elaborate centerpiece. Use a small plastic spider ring placed on top of the dip, or arrange black olives to form a spider shape. I once used a small toy spider that I cleaned thoroughly and placed in the center. The kids absolutely loved it. Just make sure any non-food items are large enough not to be a choking hazard.
Individual servings: For a classroom party or a larger gathering, consider making individual spider web fruit cups. Use small clear cups, place an apple slice as the spoke, and arrange a few grapes in a circular pattern around a small dollop of dip. This is mess-free and easy for little hands to manage. I did this for my daughter’s preschool party, and it was a huge success.
Serving & Storage Suggestions
This spider web fruit tray is best served fresh, but there are a few tricks to keep it looking its best. Here is what I have learned about serving and storing this festive snack.
Serving temperature: Serve the tray at room temperature for the best flavor. Cold fruit can taste less sweet, so let it sit out for about 15 minutes after removing it from the refrigerator. If you are serving it outdoors at a fall party, keep it in a shaded spot to prevent the fruit from warming up too much. The tray should be consumed within 2 hours of assembly for food safety reasons, especially if you are using a dairy-based dip.
Presentation tips: Place the tray at eye level for kids so they can see the web design clearly. I like to set it on a low table or at the front of a buffet line. You can also add a small sign that says “Spider Web Fruit Tray” to draw attention. For an extra touch, scatter a few fake spider webs around the base of the platter. This reinforces the theme and makes the tray even more enticing.
Complementary dishes: This fruit tray pairs beautifully with other Halloween snacks. Serve it alongside a platter of veggie “fingers” (carrot sticks with almond “nails”) or a bowl of popcorn “spider eggs.” For a full party spread, add some cheese cubes shaped like tombstones and a bowl of “witches’ brew” punch. The fruit tray provides a refreshing contrast to richer, heavier party foods.
Storage instructions: If you have leftovers, remove any dip and store the fruit in an airtight container in the refrigerator. The grapes will keep for 1-2 days, but the apple slices will brown and soften. I usually only make as much as I think will be eaten, as the tray does not store well once assembled. If you must store it, separate the apple slices from the grapes and store them in separate containers. The apple slices can be kept in water with a splash of lemon juice to prevent browning.
Reheating: This is a cold dish, so no reheating is needed. If you have refrigerated the fruit, simply let it come to room temperature before serving. The texture of the grapes will be best if they are not ice-cold. I have found that the flavors actually meld together a bit after sitting for an hour, making the fruit taste even sweeter.
Nutritional Information & Benefits
This spider web fruit tray is not just fun—it is also a healthy choice for any Halloween celebration. Here is a breakdown of the nutritional value and health benefits of this simple snack.
Estimated nutritional values (per serving, approximately 1 cup of mixed fruit):
- Calories: 85-100
- Carbohydrates: 22-25g
- Fiber: 2-3g
- Sugar: 18-20g (natural fruit sugars)
- Vitamin C: 15-20% of daily value
- Potassium: 200-250mg
Health benefits of key ingredients: Grapes are packed with antioxidants, particularly resveratrol, which supports heart health. They are also hydrating, as they contain over 80% water. Apples are an excellent source of fiber, especially pectin, which aids digestion and helps keep kids feeling full. The fiber in apples also helps balance blood sugar levels, making this a smarter choice than candy. Blueberries, if you choose to add them, are loaded with vitamin C and antioxidants that support the immune system—always a bonus during cold and flu season.
Dietary considerations: This fruit tray is naturally gluten-free, dairy-free, vegan, and nut-free, making it safe for most common food allergies. The only potential allergen is if you serve it with a dip that contains dairy or nuts. Always check with party hosts about any known allergies before serving. This tray is also low in fat and sodium, making it a heart-healthy option for adults watching their intake.
Personal wellness perspective: I love that this recipe allows kids to enjoy a treat that is actually good for them without feeling deprived. The fun presentation makes fruit feel like a special occasion food, which is a win for parents everywhere. It is a small way to balance out the inevitable sugar overload that comes with Halloween. I always feel good about bringing this tray to a party because I know it offers a healthy option that kids will actually eat.
Conclusion
This kid-approved spider web fruit tray has become a Halloween tradition in my home, and I hope it becomes one in yours too. It is proof that a little creativity can transform simple ingredients into something truly special. The best part? It takes almost no time, costs very little, and delivers a huge payoff in smiles and happy tummies. I have yet to bring this tray to a gathering without someone asking for the “recipe,” and I always love sharing it.
I encourage you to make this recipe your own. Swap in your family’s favorite fruits, experiment with different dips, or create a spooky centerpiece that reflects your personality. The beauty of this tray is that it is endlessly adaptable. Whether you are making it for a classroom party, a family dinner, or a neighborhood gathering, it is sure to be a hit. And honestly, the look on a child’s face when they see the spider web for the first time is worth every minute of effort.
I would love to hear how your spider web fruit tray turns out! Leave a comment below and let me know what variations you tried. Did your kids help arrange the grapes? Did you add a special dip? Share your photos and stories—I read every single comment and love seeing your creations. Until next time, happy Halloween and happy snacking!
Frequently Asked Questions
Can I make this spider web fruit tray the night before?
I do not recommend assembling the tray more than 2-3 hours before serving. The apple slices will begin to brown, and the grapes may release moisture that makes the arrangement slide around. However, you can wash and dry all the fruit the night before and store it in airtight containers in the refrigerator. Then simply slice the apples and assemble the tray on the day of your event. This saves time without sacrificing freshness.
What is the best dip to serve with this fruit tray?
I personally love a simple honey Greek yogurt dip—just mix plain Greek yogurt with a tablespoon of honey and a splash of vanilla extract. It is creamy, slightly sweet, and pairs beautifully with the fruit. For a more indulgent option, caramel sauce or chocolate hummus are always hits with kids. If you want to keep it lighter, a fruit salsa made with chopped mango, kiwi, and a squeeze of lime is refreshing and festive.
How do I keep the apple slices from turning brown?
The easiest method is to toss the apple slices in a bowl with a tablespoon of lemon juice or lime juice. The citric acid slows down the oxidation process that causes browning. Alternatively, you can soak the slices in a bowl of cold water with a pinch of salt for 5 minutes, then rinse and pat dry. This works just as well without the citrus flavor. For best results, slice the apples as close to serving time as possible.
Can I use other fruits besides grapes and apples?
Absolutely! This design works with many different fruits. For the spokes, try using slices of pear, mango, or even star fruit for a tropical twist. For the web circles, blueberries, raspberries, blackberries, or even small chunks of melon work beautifully. Just make sure the fruits are similar in size to create a uniform pattern. I have made a summer version using sliced peaches and raspberries that was absolutely gorgeous.
How many people does this spider web fruit tray serve?
This depends on the size of your platter and the appetites of your guests. A standard 12-inch platter with 4-5 rings of grapes will serve about 8-10 kids as a snack, or 6-8 adults as part of a larger spread. If you are serving this as a standalone snack at a party with other food options, it will go further. For a classroom party of 20-25 kids, I recommend making two trays or using a larger platter to ensure there is enough for everyone.
Pin This Recipe!
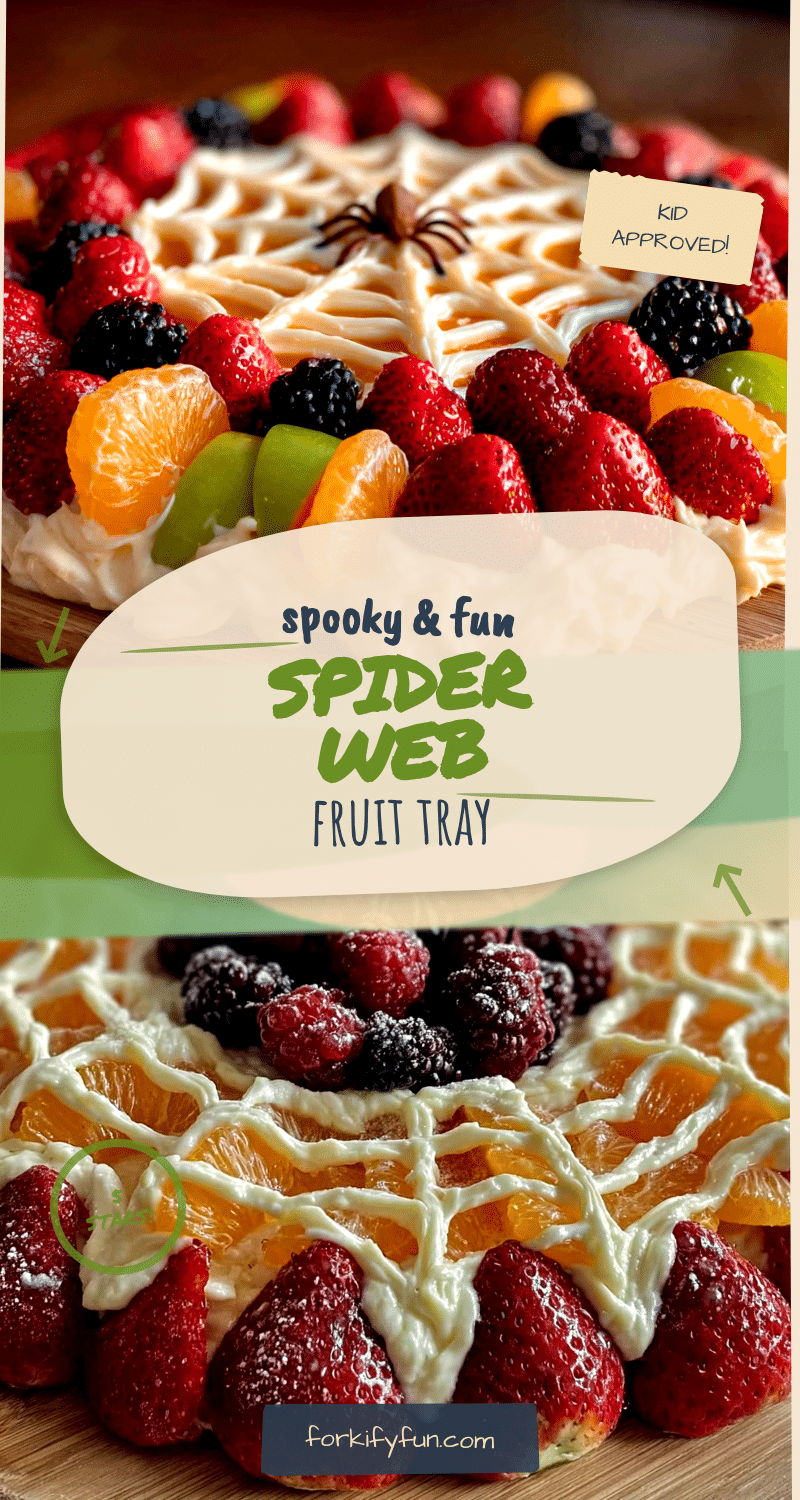
Kid-Approved Spider Web Fruit Tray: Easy Halloween Snack
A fun and healthy Halloween snack that transforms simple fruit into a spider web design, perfect for getting kids to choose fruit over candy at parties.
- Prep Time: 10 minutes
- Cook Time: 0 minutes
- Total Time: 10 minutes
- Yield: 8-10 servings 1x
- Category: Snack
- Cuisine: American
Ingredients
- 2 cups green grapes, washed and dried
- 1 cup red grapes, washed and dried
- 1 large apple (Granny Smith or Fuji), sliced into thin wedges
- ½ cup blueberries or blackberries (optional)
- 1 tablespoon lemon juice (optional, to prevent apple browning)
- Small bowl or ramekin for center
- Dip of choice (optional): yogurt dip, caramel sauce, or chocolate hummus
Instructions
- Wash and dry all fruit thoroughly. Wet fruit will slide around and ruin the design.
- Slice the apple in half through the core, then cut into thin wedges about ¼ inch thick. Toss with lemon juice if using to prevent browning.
- Place the small bowl or ramekin in the center of a large round platter.
- Arrange apple slices around the center bowl like spokes of a web, spacing them evenly (8 to 12 slices). Press the narrow end under the bowl to hold in place.
- Build the first circle of grapes using green grapes, placing one grape between each pair of apple slices about 1 to 2 inches from the bowl.
- Add a second circle of grapes using red grapes, about 1 to 2 inches outward from the first circle, again placing one grape between each pair of apple slices.
- Continue building outward, alternating between green and red grapes, creating 4 to 5 rings total for a standard 12-inch platter.
- Finish with the outer edge, ensuring apple spokes extend slightly beyond the outermost grape ring.
- Add finishing touches: place blueberries or blackberries in the center to create a ‘spider’ shape, or arrange them on top of dip in the center bowl.
- Serve immediately or refrigerate for up to 2 hours. Bring to room temperature for 15 minutes before serving.
Notes
Dry fruit thoroughly to prevent sliding. Use Granny Smith apples for best results. For a more secure arrangement, use a small amount of cream cheese or peanut butter as ‘glue’ for apple slices. The tray is best served within an hour of assembly.
Nutrition
- Serving Size: 1 cup of mixed fruit
- Calories: 85100
- Sugar: 1820
- Sodium: 5
- Carbohydrates: 2225
- Fiber: 23
- Protein: 1
Keywords: Halloween snack, fruit tray, spider web, kid-friendly, healthy Halloween, easy appetizer