My nephew asked why I couldn’t just use the mixer to cream the butter and sugar together for peanut butter cookies. I started to explain why that wouldn’t work—that you needed to do it by hand to avoid over-mixing and ending up with hockey pucks. Then I stopped. He was seven, and he wanted to help. Honestly, I was tired, and the idea of not having to scrub the hand mixer looked pretty good. So I let him do it his way. The cookies came out of the oven, and they were the softest, most tender peanut butter blossoms I had ever made. I had been wrong. All those years of carefully creaming by hand, and the mixer did a better job. It was a humbling moment, standing in my own kitchen, learning a lesson from a kid who just wanted to press the button. That day, these cookies became a family staple, not just for the taste, but for the reminder that sometimes the best tricks come from the most unexpected places.
Why You’ll Love This Recipe
This isn’t just another cookie recipe. This is the one that disappears from the cooling rack before you can even count them. I’ve tested this version more times than I can count, tweaking the flour and sugar ratios until I got that perfect balance of a soft, chewy center and a slightly crisp edge. It’s the kind of cookie that makes you close your eyes after the first bite.
- Quick & Easy: From start to finish, these cookies are ready in under 30 minutes. No chilling the dough, no complicated steps. Perfect for a last-minute school bake sale or a sudden cookie craving on a Tuesday night.
- Simple Ingredients: You probably have everything you need in your pantry right now. Peanut butter, sugar, butter, an egg, flour—that’s it. No fancy trips to a specialty grocery store.
- Perfect for Family Baking: This is a fantastic recipe to make with kids. The dough is forgiving, and rolling it into balls is a job even little hands can handle. It’s a great way to spend a rainy afternoon.
- Crowd-Pleaser: Honestly, I have never met a person who doesn’t love a peanut butter blossom. The combination of salty peanut butter and sweet chocolate is a classic for a reason. They get rave reviews every single time.
- Unbelievably Soft: The secret is in the technique. Using a mixer for the creaming step (thanks, nephew!) and a specific ratio of brown to white sugar gives these cookies a texture that stays soft for days. Not that they last that long.
This recipe is comfort food at its finest. It’s the kind of cookie that reminds you of being a kid, coming home from school to a warm kitchen. It’s simple, it’s satisfying, and it’s guaranteed to make everyone smile.
What Ingredients You Will Need
This recipe uses simple, everyday ingredients to create something truly special. The magic is in how they work together, not in a long list of exotic items. Here’s what you’ll need to grab from your pantry.
- 1/2 cup (1 stick) unsalted butter, softened – Make sure it’s truly soft, almost like a thick lotion. This is key for a smooth dough. I use Land O’Lakes, but any brand works fine.
- 1/2 cup creamy peanut butter – Do not use natural or “no-stir” peanut butter here. The oil separation will make the cookies greasy and they will spread too much. Stick with classic brands like Jif or Skippy for the perfect texture.
- 1/2 cup granulated sugar – This adds sweetness and helps with that slight crispness on the edges.
- 1/2 cup packed light brown sugar – The brown sugar is the secret to the soft, chewy center. It adds moisture and a deeper, almost caramel-like flavor. Pack it firmly into the measuring cup.
- 1 large egg – Bring it to room temperature if you can. A cold egg can seize the butter and make the dough harder to mix.
- 1 teaspoon vanilla extract – Pure vanilla extract makes a difference, but imitation works in a pinch. It just boosts all the other flavors.
- 1 1/2 cups all-purpose flour – Spoon and level your flour. Scooping directly with the measuring cup packs it down and can lead to dry cookies.
- 1 teaspoon baking soda – This is the leavening agent that gives the cookies their lift. Make sure it’s not expired.
- 1/2 teaspoon salt – Salt balances the sweetness and enhances the peanut butter flavor. If you use salted butter, you can reduce this to 1/4 teaspoon.
- 1/4 cup granulated sugar (for rolling) – This extra sugar gives the cookies that beautiful, sparkly finish and a tiny bit of extra crunch.
- 24-36 milk chocolate candy kisses, unwrapped – The classic Hershey’s Kiss is the standard, but you can use dark chocolate or even caramel-filled ones for a twist. You’ll need one per cookie.
Equipment Needed
You don’t need a professional bakery setup to make these cookies. Most of these tools you probably already have in your kitchen. Here’s the short list.
- Electric Mixer – A stand mixer with the paddle attachment is ideal, but a hand mixer works perfectly too. As I learned, this is actually the secret to the soft texture.
- Large Mixing Bowls – You’ll need one for the wet ingredients and one for the dry. I prefer glass or stainless steel.
- Measuring Cups and Spoons – Dry measuring cups for the flour and sugars, and a liquid measuring cup for the vanilla (though a teaspoon works fine).
- Baking Sheets – Two standard half-sheet pans are perfect. I like using light-colored aluminum pans for even browning. Dark pans can cause the bottoms to burn.
- Parchment Paper or Silicone Baking Mat – This is non-negotiable for me. It prevents sticking and makes cleanup a breeze. Plus, it helps the cookies bake more evenly.
- Wire Cooling Rack – Essential for cooling the cookies properly. If you leave them on the hot baking sheet, they will continue to cook and can become overdone.
- Small Cookie Scoop (about 1.5 tablespoons) – This is a nice-to-have, not a must. It helps ensure all your cookies are the same size, so they bake evenly. A regular spoon works fine too.
Preparation Method
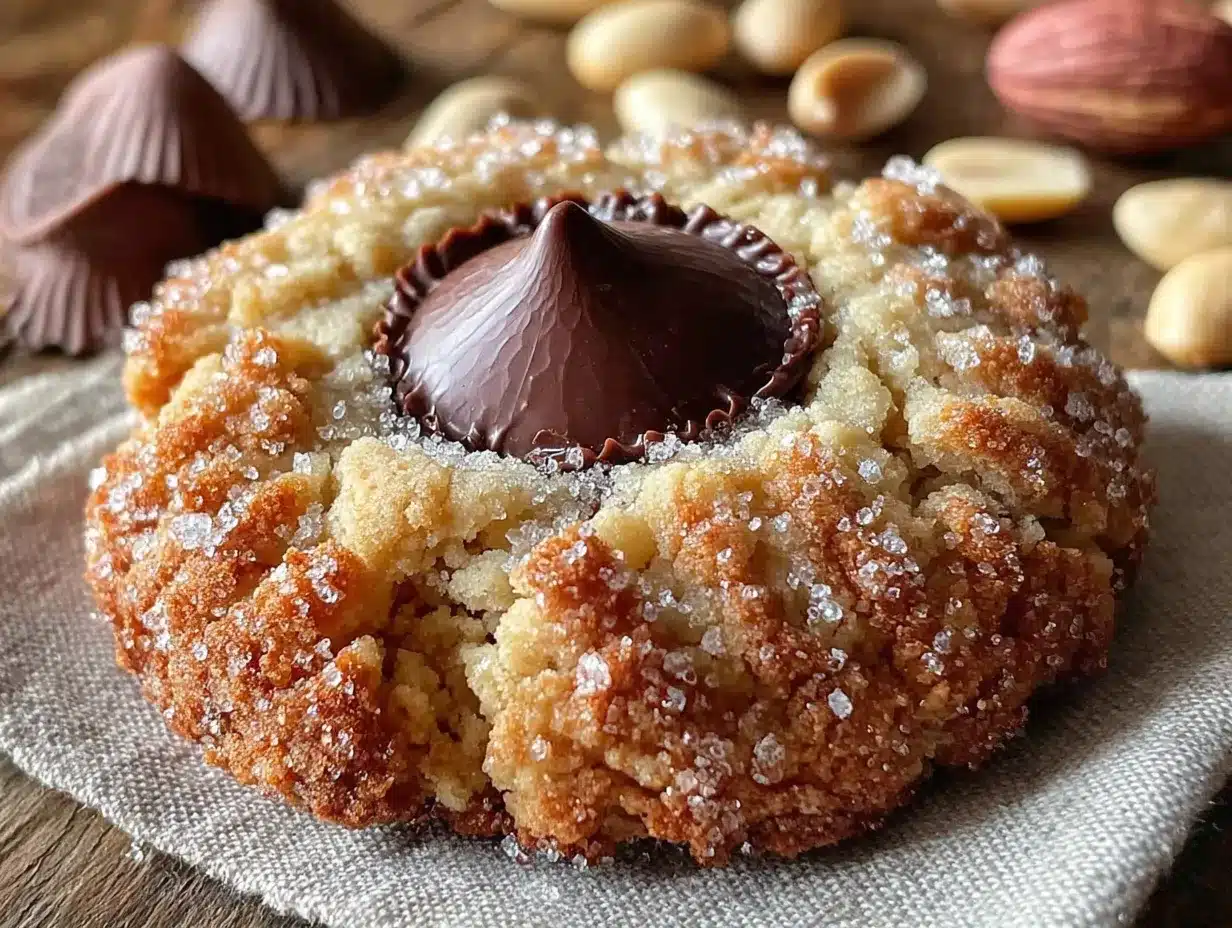
Follow these steps carefully, and you will have a perfect batch of soft peanut butter blossom cookies. The key is to not over-bake them. They will look slightly underdone when you take them out, and that’s exactly what you want.
- Preheat and Prep: Preheat your oven to 375°F (190°C). Line two baking sheets with parchment paper or silicone baking mats. This step is crucial for easy cleanup and even baking.
- Cream the Butter and Sugars: In a large bowl, combine the softened butter, creamy peanut butter, 1/2 cup granulated sugar, and the packed brown sugar. Using your electric mixer, beat them together on medium speed until the mixture is light, fluffy, and well-combined. This takes about 2-3 minutes. Scrape down the sides of the bowl with a rubber spatula to make sure everything is incorporated.
- Add the Wet Ingredients: Add the room-temperature egg and the vanilla extract to the butter mixture. Beat on low speed until just combined. Don’t over-mix here, or you’ll incorporate too much air. You just want the egg to disappear into the dough.
- Combine the Dry Ingredients: In a separate, medium-sized bowl, whisk together the all-purpose flour, baking soda, and salt. Whisking ensures the baking soda and salt are evenly distributed throughout the flour.
- Mix the Dough: Gradually add the dry ingredients to the wet ingredients, mixing on low speed. Add it in two or three additions, mixing just until the flour disappears after each. Stop the mixer and scrape the bowl once more. The dough should be soft but not sticky. If it feels a little sticky, you can chill it for 15 minutes, but I usually find it’s perfect right away.
- Shape the Cookies: Place the 1/4 cup of granulated sugar for rolling in a small, shallow bowl. Using a cookie scoop or your hands, roll the dough into 1-inch balls (about 1.5 tablespoons of dough each). Roll each ball between your palms until it’s smooth, then roll it in the bowl of sugar to coat evenly.
- Bake the Cookies: Place the sugar-coated dough balls on the prepared baking sheets, spacing them about 2 inches apart. They will spread a bit. Bake for 8-10 minutes. The cookies should look puffed and set around the edges, but the centers will still look soft and slightly underdone. This is the perfect moment to remove them.
- Add the Kisses: This step needs to happen immediately. As soon as the baking sheet comes out of the oven, working quickly, press one unwrapped chocolate kiss into the center of each cookie. Press it down gently until the cookie cracks slightly around the edges. The heat from the cookie will soften the chocolate perfectly.
- Cool Completely: Let the cookies cool on the baking sheet for about 5 minutes. This allows the chocolate to set slightly and the cookies to firm up. Then, transfer them to a wire cooling rack to cool completely. If you try to move them too soon, the chocolate might slide right off!
Cooking Tips & Techniques
I’ve made a lot of mistakes in the kitchen, and I’m happy to share them so you don’t have to repeat them. Here are the things I wish I had known from the beginning.
- Don’t Over-Bake: This is the single most important tip. Peanut butter blossom cookies are best when they are soft. The residual heat on the baking sheet will continue to cook them for a few minutes after they come out of the oven. If they look “done” in the oven, they will be overdone and hard when they cool. Take them out when the edges are set but the center is still pale and puffy.
- Use Room Temperature Ingredients: A cold egg can cause the butter to seize up, making the dough lumpy and hard to mix. Let your butter and egg sit on the counter for about 30 minutes before you start. It makes a real difference in the texture of the final dough.
- The Kiss Placement: Don’t press the chocolate kiss all the way down to the baking sheet. You want it to sit on top of the cookie, creating that classic “blossom” look. Press it just until the cookie begins to crack. If you push too hard, the chocolate will sink into the cookie and disappear.
- Chill if Needed: If your kitchen is very warm or your dough feels too soft to roll, don’t be afraid to pop the bowl in the fridge for 15-20 minutes. Chilled dough is much easier to handle and will spread less in the oven. This is a great trick for a hot summer day.
- Make Them All the Same Size: Using a cookie scoop is the easiest way to ensure every cookie is the same size. This means they will all bake at the same rate. You won’t end up with some burnt and some underdone.
Variations & Adaptations
One of the best things about this recipe is how easy it is to change it up. Don’t be afraid to experiment and make it your own. Here are a few of my favorite variations.
- Chocolate Peanut Butter Blossoms: For an extra dose of chocolate, swap out 1/4 cup of the all-purpose flour for 1/4 cup of unsweetened cocoa powder. This will give you a rich, chocolatey peanut butter cookie base. It’s a game-changer for serious chocolate lovers.
- Gluten-Free Version: I’ve tested this with a 1-to-1 gluten-free baking flour blend, and it works beautifully. Use a brand like King Arthur or Bob’s Red Mill. The texture is slightly more tender, but the flavor is spot on. No other adjustments are needed.
- Different Chocolate Centers: While the classic Hershey’s Kiss is perfect, don’t be afraid to experiment. Dark chocolate kisses offer a nice, less-sweet contrast. Caramel-filled or almond-filled kisses are also fantastic. For a fun twist, try using a mini peanut butter cup, but press it in gently as it’s softer.
- Crunchy Peanut Butter: If you like a little texture, you can use crunchy peanut butter instead of creamy. It will add little bits of peanut to every bite. Just make sure it’s still a standard, non-natural brand to maintain the right dough consistency.
- Spiced Peanut Butter Blossoms: Add 1/2 teaspoon of ground cinnamon and a pinch of nutmeg to the dry ingredients. This gives the cookies a warm, cozy flavor that is absolutely incredible in the fall and winter. It pairs surprisingly well with the chocolate.
Serving & Storage Suggestions
These cookies are best enjoyed fresh, but they store well too. Here’s how to serve them and keep them soft for as long as possible.
Serving: These cookies are perfect at room temperature. The chocolate will be slightly firm, and the cookie will be perfectly soft. They are wonderful with a cold glass of milk, a hot cup of coffee, or even a scoop of vanilla ice cream for an extra special treat. For a party, arrange them on a pretty platter. They always look beautiful with that signature chocolate kiss on top.
Storage: Store the completely cooled cookies in an airtight container at room temperature. Place a slice of plain white bread in the container with the cookies. The bread will absorb excess air and release moisture, keeping the cookies soft for up to a week. Replace the bread slice every couple of days if the cookies last that long. Do not store them in the refrigerator, as the cold air will dry them out.
Freezing: These cookies freeze beautifully. You can freeze the baked cookies in a single layer on a baking sheet, then transfer them to a freezer-safe bag or container for up to 3 months. Thaw them at room temperature. You can also freeze the unbaked dough balls. Roll them, coat them in sugar, and place them on a baking sheet in the freezer until solid. Then, store the frozen dough balls in a freezer bag. You can bake them directly from frozen, just add 1-2 minutes to the baking time.
Nutritional Information & Benefits
Let’s be honest, these are a treat, not a health food. But knowing a little about what’s in them can help you enjoy them mindfully. Here’s a rough estimate per cookie (based on making 30 cookies).
- Calories: Approximately 150-170 calories per cookie.
- Fat: About 8-9 grams, mostly from the peanut butter and butter. Peanut butter does provide some healthy monounsaturated fats.
- Carbohydrates: Around 18-20 grams, primarily from the sugars and flour.
- Protein: About 3 grams, thanks to the peanut butter and egg.
- Potential Allergens: This recipe contains peanuts, dairy (butter), gluten (flour), and eggs. It is not suitable for those with these allergies without modifications.
While these cookies are a sweet indulgence, the peanut butter does offer a small amount of protein and healthy fats, which can help make them a bit more satisfying than a plain sugar cookie. They are a perfect treat for a special occasion or a well-deserved weekend snack. Enjoy them in moderation and savor every bite!
Conclusion
These Kid-Approved Soft Peanut Butter Blossom Cookies are more than just a recipe; they’re a little moment of joy. They are quick enough for a weeknight whim, simple enough for a child to help with, and delicious enough to become a new family tradition. The soft, peanut buttery cookie paired with that perfect chocolate kiss is a combination that never gets old. I love making them because they always bring a smile to everyone’s face, and they remind me that sometimes the best lessons in the kitchen come from the most unexpected teachers.
I really hope you give these a try. Don’t be afraid to make them your own—swap the chocolate, add some spice, or just follow the recipe exactly. They are incredibly forgiving and always turn out great. Once you taste that first soft, warm bite, you’ll understand why this is my go-to cookie.
I’d love to hear how yours turn out! Leave a comment below and let me know if your family loved them as much as mine does. Did you try any fun variations? Share your photos and tag me on social media! Happy baking, friends!
Frequently Asked Questions
Why did my cookies turn out hard?
The most common reason is over-baking. Remember to take them out of the oven when the edges are set but the center still looks soft and puffy. They will continue to cook on the hot baking sheet. Also, make sure you are measuring your flour correctly by spooning it into the cup and leveling it off. Too much flour can also lead to dry, hard cookies.
Can I use natural peanut butter?
I don’t recommend it for this specific recipe. Natural peanut butters have oil that separates, which can make the dough greasy and cause the cookies to spread too much during baking. Stick with a classic, shelf-stable brand like Jif or Skippy for the best texture and results.
Do I have to chill the dough?
Not necessarily. This dough is usually soft enough to work with right away. However, if your kitchen is very warm or the dough feels too sticky to roll into balls, you can chill it in the refrigerator for 15-20 minutes. This will make it much easier to handle and will prevent the cookies from spreading too much.
Can I make these cookies ahead of time?
Absolutely! You can bake the cookies and store them in an airtight container for up to a week (use the bread trick!). You can also freeze the baked cookies for up to 3 months. For the best make-ahead option, freeze the unbaked, sugar-coated dough balls. You can bake them directly from frozen, just add an extra minute or two to the baking time.
My chocolate kisses melted into a puddle. What happened?
This usually happens if you press the kiss in too hard or if the cookie was too hot when you added it. Gently press the kiss into the center until the cookie just begins to crack. Also, let the cookies cool on the baking sheet for a few minutes before adding the kisses, but not too long—you still want the heat to soften the chocolate. If they do melt, don’t worry, they will still taste delicious!
Pin This Recipe!
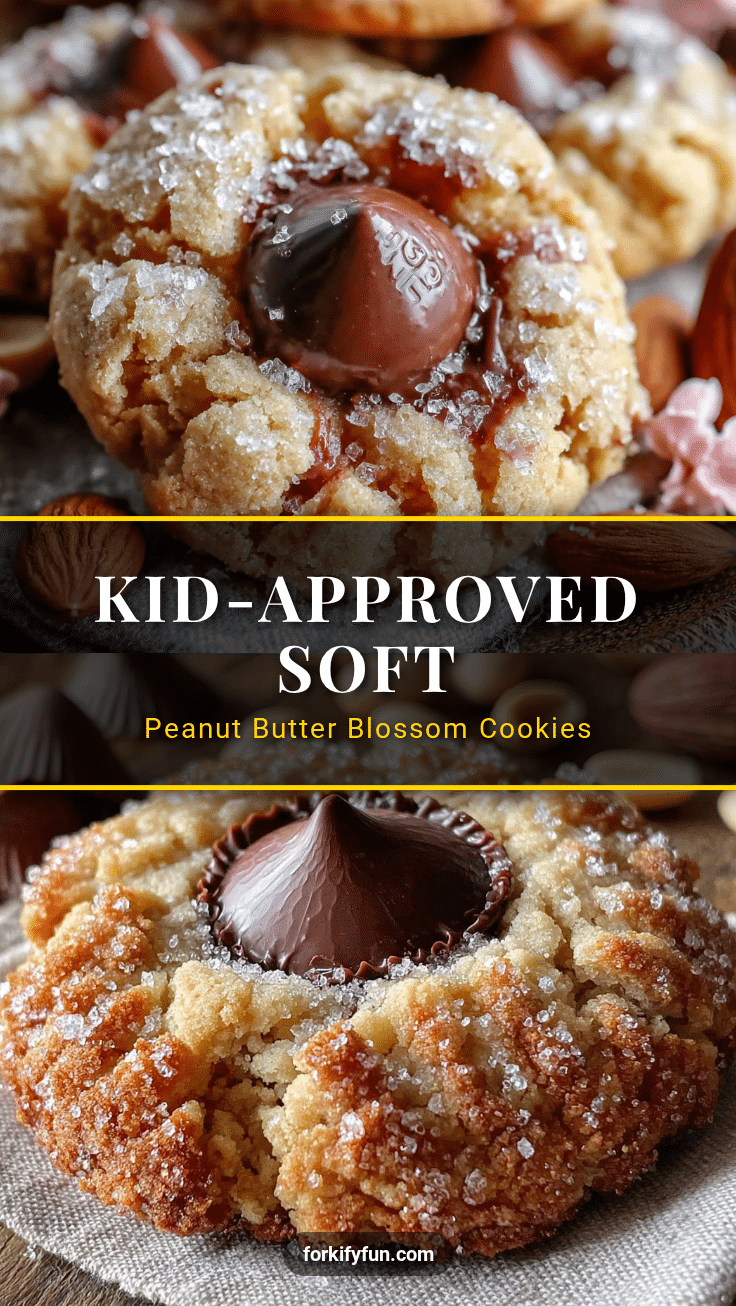
Kid-Approved Soft Peanut Butter Blossom Cookies: Easy 30-Min Recipe
These soft, chewy peanut butter blossom cookies are ready in under 30 minutes with simple pantry ingredients. A family favorite that’s perfect for baking with kids and guaranteed to disappear fast.
- Prep Time: 15 minutes
- Cook Time: 10 minutes
- Total Time: 25 minutes
- Yield: 24-36 cookies 1x
- Category: Dessert
- Cuisine: American
Ingredients
- 1/2 cup (1 stick) unsalted butter, softened
- 1/2 cup creamy peanut butter (e.g., Jif or Skippy)
- 1/2 cup granulated sugar
- 1/2 cup packed light brown sugar
- 1 large egg, room temperature
- 1 teaspoon vanilla extract
- 1 1/2 cups all-purpose flour, spooned and leveled
- 1 teaspoon baking soda
- 1/2 teaspoon salt
- 1/4 cup granulated sugar (for rolling)
- 24–36 milk chocolate candy kisses, unwrapped
Instructions
- Preheat oven to 375°F (190°C). Line two baking sheets with parchment paper or silicone baking mats.
- In a large bowl, beat softened butter, creamy peanut butter, 1/2 cup granulated sugar, and packed brown sugar with an electric mixer on medium speed until light and fluffy, about 2-3 minutes. Scrape down sides.
- Add room-temperature egg and vanilla extract; beat on low speed until just combined.
- In a separate bowl, whisk together flour, baking soda, and salt.
- Gradually add dry ingredients to wet ingredients, mixing on low speed in 2-3 additions until just combined. Scrape bowl as needed. Dough should be soft but not sticky.
- Place 1/4 cup granulated sugar in a small bowl. Roll dough into 1-inch balls (about 1.5 tablespoons each), then roll each ball in sugar to coat evenly.
- Place dough balls 2 inches apart on prepared baking sheets. Bake for 8-10 minutes, until edges are set and centers are still soft and puffy.
- Immediately after removing from oven, gently press one chocolate kiss into the center of each cookie until the cookie cracks slightly around the edges.
- Let cookies cool on baking sheet for 5 minutes, then transfer to a wire rack to cool completely.
Notes
Do not over-bake; cookies should look slightly underdone when removed. Use room temperature ingredients for best texture. For a gluten-free version, use a 1-to-1 gluten-free flour blend. Store in an airtight container with a slice of bread to keep soft for up to a week. Freeze baked cookies or unbaked dough balls for up to 3 months.
Nutrition
- Serving Size: 1 cookie
- Calories: 160
- Sugar: 12
- Sodium: 120
- Fat: 8.5
- Saturated Fat: 4
- Carbohydrates: 19
- Fiber: 1
- Protein: 3
Keywords: peanut butter blossom cookies, soft peanut butter cookies, easy cookie recipe, kid-friendly cookies, 30-minute cookies, chocolate kiss cookies


