The woman at the farmers’ market stall watched me shivering over a paper cup of sad, watery hot chocolate. She didn’t say anything at first. Then she reached under her table, pulled out a mason jar filled with something that looked like crushed candy canes and cocoa, and handed it to me. “Try this when you get home,” she said. “It’ll warm you up proper.”
I didn’t catch her name, but I remember her hands—worn and steady, the kind that had measured ingredients by feel for decades. That jar sat on my counter for three days before I finally boiled some milk and scooped in a heaping tablespoon. Honestly? I wasn’t expecting much. I mean, how different could homemade be from the packets I’d been buying for years?
The answer is: completely different. That first sip tasted like December in a mug—rich chocolate, cool peppermint, and a sweetness that didn’t hit you like a sugar hammer. I immediately texted my sister: “I think I just ruined store-bought hot cocoa forever.” She thought I was being dramatic. Then she tried it.
This homemade peppermint hot cocoa mix has become our family’s winter ritual. My kids call it “snow day cocoa” because they know if the flakes start falling, I’m pulling out the mason jars. And here’s the thing—it costs about half of what you’d spend on those tins at the grocery store, and you probably already have most of the ingredients in your pantry. Maybe you’ve been there, standing in the aisle wondering why a box of powdered cocoa costs as much as a small appliance. Let me tell you, there’s a better way.
So after tweaking ratios, testing different cocoa powders, and bribing my neighbor’s kids for honest feedback (they’re brutal critics), I landed on a mix that’s creamy, minty, and just sweet enough. It’s the recipe that keeps on giving—and it starts with a simple conversation at a market stall.
Why You’ll Love This Recipe
Let me be straight with you—I’ve tested a lot of hot cocoa recipes over the years. Some were too grainy. Some were so sweet they made my teeth hurt. And some just didn’t have that peppermint kick without tasting like toothpaste. This one hits the sweet spot.
- Budget-Friendly: A batch costs around $4 to make, compared to $8-$12 for store-bought tins. You’re essentially paying for the jar and the label, folks.
- Kid-Approved: My kids have rejected fancy hot chocolate from cafes in favor of this mix. The peppermint is present but not overpowering—think candy cane, not mouthwash.
- Simple Ingredients: No weird additives, no preservatives, no ingredients you can’t pronounce. Just cocoa, sugar, milk powder, and crushed peppermint.
- Perfect for Gifting: Layer it in a jar with a ribbon, and you’ve got a thoughtful holiday gift that costs pennies compared to store-bought options.
- Customizable: Want it extra minty? Add more crushed candy. Need dairy-free? Swap the milk powder for coconut milk powder. This recipe bends to your family’s needs.
- Quick to Make: We’re talking 10 minutes of active time. The hardest part is crushing the candy canes without making a mess—and honestly, that’s half the fun with kids.
What makes this recipe different from the rest? It’s the ratio. Most homemade mixes use too much sugar, which leaves a gritty texture. I’ve balanced the cocoa to sugar ratio so it dissolves smoothly and tastes rich without being cloying. Plus, the crushed peppermint stays suspended in the mix, so every cup gets those little flecks of minty goodness.
This isn’t just hot cocoa—it’s the kind that makes you close your eyes after the first sip. It’s comfort in a mug, made with ingredients you trust, for a price that won’t make you wince.
What Ingredients You Will Need
This recipe uses simple, pantry-friendly ingredients to deliver rich chocolate flavor with a refreshing peppermint finish. Most of these are probably already in your kitchen—if not, they’re easy to find and won’t break the bank.
For the Mix Base
- 1 cup unsweetened cocoa powder (I prefer Hershey’s Special Dark for richer flavor, but regular works great too)
- 2 cups powdered sugar (also called confectioners’ sugar—this dissolves better than granulated)
- 2 cups powdered milk (whole milk powder gives the creamiest result, but nonfat works fine)
- 1/2 teaspoon salt (just a pinch—it balances the sweetness and enhances the chocolate)
For the Peppermint Element
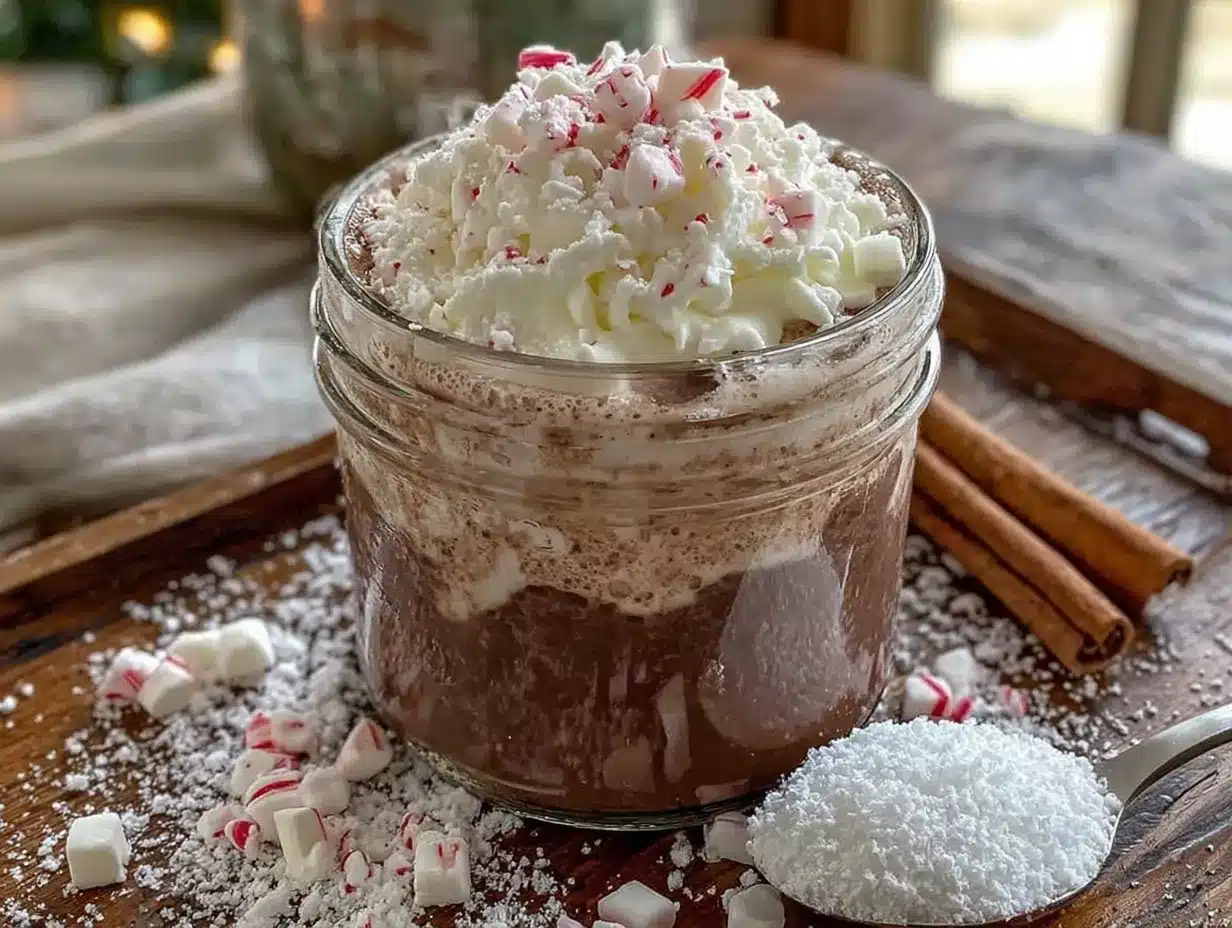
- 4-6 regular-sized candy canes (about 1/2 cup crushed—save the broken ones from the bottom of the holiday box!)
- 1/2 teaspoon peppermint extract (optional, but gives a more consistent mint flavor throughout)
Ingredient Tips and Substitutions
- Cocoa powder: Dutch-process cocoa gives a smoother, less acidic flavor. Natural cocoa works perfectly fine—your mix will just taste slightly more “traditional.” I’ve used both and honestly prefer the Dutch-process for this recipe.
- Powdered sugar: Don’t substitute granulated sugar—it won’t dissolve properly in cold or warm milk. If you’re out of powdered sugar, you can blitz granulated sugar in a blender until fine, but it’s not quite the same.
- Powdered milk: For a dairy-free version, use coconut milk powder or oat milk powder. I’ve tested both, and coconut milk powder adds a lovely subtle richness. Just note that the final mix will be slightly less creamy.
- Candy canes: Any peppermint candy works—starlight mints, peppermint swirls, even those generic red-and-white candies from the bulk bin. Avoid candy with fillings or flavors like “blue raspberry”—trust me on this one.
- Peppermint extract: This is optional but recommended. It ensures every sip has mint flavor, not just the bits with candy pieces. Use pure peppermint extract, not peppermint oil—oil can separate and leave a greasy film.
One note on brands: I’ve tested this with store-brand cocoa and name-brand cocoa. The difference is noticeable but not dramatic. If you’re on a tight budget, store-brand works fine. If you want that deep, almost fudgy chocolate flavor, splurge on a good Dutch-process cocoa. My personal favorite is Rodelle—it’s pricey but worth it for special batches.
Equipment Needed
- Mason jar or airtight container (a 32-ounce jar works perfectly for one batch)
- Food processor or blender (for crushing candy canes—a rolling pin and ziplock bag works in a pinch)
- Fine-mesh strainer (for sifting cocoa powder—this prevents lumps)
- Whisk or fork (for mixing everything together)
- Measuring cups and spoons
- Small bowl (for crushing candy if using the bag method)
I’ve made this mix with just a ziplock bag and a wooden spoon when I couldn’t find my food processor. It’s not as fine, but it works. The key is getting the candy crushed small enough that it dissolves quickly in hot milk. If you’re using a food processor, pulse rather than blend continuously—you want small pieces, not powder.
For the jar, any airtight container works. I reuse spaghetti sauce jars (washed thoroughly, obviously) and tie a ribbon around the neck. It’s frugal and looks charming. My mother-in-law uses old coffee tins—she says the slight coffee residue adds depth, but I think she’s just being stubborn.
Preparation Method
This mix comes together in about 10 minutes. The hardest part is keeping kids from eating the crushed candy canes before they go in the jar. (Spoiler: they will try.)
- Crush the candy canes. Unwrap 4-6 candy canes and place them in a ziplock bag. Seal it, then gently smash with a rolling pin or heavy skillet until you have a mix of small pieces and fine powder. Alternatively, pulse in a food processor 5-6 times. You want pieces about the size of coarse sand—small enough to dissolve, large enough to see. (Pro tip: Do this over a bowl. I’ve had bags split open and send candy shrapnel across the kitchen. Twice.)
- Sift the cocoa powder. Measure 1 cup of unsweetened cocoa powder into a fine-mesh strainer set over a large bowl. Tap the strainer gently to sift—this breaks up clumps and ensures a smooth mix. (Skipping this step means you’ll have cocoa lumps floating in your cocoa. Not the end of the world, but annoying.)
- Add the dry ingredients. Add 2 cups powdered sugar, 2 cups powdered milk, and 1/2 teaspoon salt to the sifted cocoa. Whisk thoroughly until everything is evenly combined. The mixture should look uniform in color—no white streaks of powdered sugar or milk powder.
- Add the peppermint. Stir in the crushed candy canes and 1/2 teaspoon peppermint extract (if using). The extract will make the mixture slightly damp—that’s normal. Whisk again to distribute the extract evenly. (If the mix clumps from the extract, don’t panic. Just break up any large clumps with your fingers or a fork.)
- Transfer to storage. Pour the finished mix into your jar or container. Seal tightly. Label with the date and instructions: “Add 2-3 tablespoons to 8 oz hot milk. Stir well.”
- Make a cup to test. Heat 8 ounces of milk (dairy or non-dairy) until steaming but not boiling. Add 2 tablespoons of mix. Stir vigorously until fully dissolved. Taste and adjust—add more mix for richer cocoa, a pinch more salt if it tastes flat. (I always test a cup before giving jars as gifts. One year I forgot the salt—it was edible but noticeably bland.)
Yield: This recipe makes about 3 cups of dry mix, which is enough for 12-16 servings (depending on how generous you are with the scoop). For a larger batch, simply double or triple the recipe—just be sure to sift the cocoa in batches to avoid a dusty mess.
Sensory cues: The finished mix should look like dark sand with flecks of red and white from the candy. When you open the jar, you should smell chocolate first, then a cool whisper of peppermint. If the peppermint is overwhelming, you’ve added too much extract—balance it with a bit more cocoa powder.
Cooking Tips & Techniques
I’ve made this mix at least twenty times over the past three winters, and I’ve learned a few things the hard way. Here’s what I wish someone had told me:
Don’t over-crush the candy. The first time I made this, I pulverized the candy canes into fine powder. The result? The peppermint flavor was there, but you couldn’t see those pretty red flecks, and the mix looked boring. Coarse pieces dissolve slower and give you little bursts of mint as you drink. Aim for a mix of textures.
Watch your milk temperature. Heat milk gently—if it boils, it can scorch and develop a weird skin. I heat mine over medium-low until small bubbles form around the edges (about 150°F if you’re using a thermometer). Too hot, and the powdered milk in the mix can curdle. Too cold, and the cocoa won’t dissolve properly.
Whisk, don’t stir. A spoon leaves streaks of dry mix floating on top. A small whisk breaks up clumps and gives you that frothy top that makes hot cocoa feel fancy. I bought a cheap mini whisk specifically for this—best $3 I ever spent.
Salt is non-negotiable. I forgot the salt once, and my kids asked, “Mom, why does this taste… flat?” Salt doesn’t make it salty—it makes the chocolate taste more chocolatey. It’s like magic. Don’t skip it.
Store in a cool, dark place. Heat and light can cause the cocoa to clump and the peppermint to fade. I keep my jar in the pantry, not near the stove. It lasts about 6 months, but honestly, it never lasts that long in our house.
One mistake I made: I once tried using chocolate-flavored candy canes (chocolate mint, they were called). The result was a muddy, confusing flavor. Stick with classic peppermint—it’s clean and bright against the rich cocoa.
Variations & Adaptations
This recipe is a starting point, not a rulebook. Here are some ways I’ve tweaked it over the years:
Dairy-Free Version: Substitute the powdered milk with coconut milk powder or oat milk powder. I’ve tested both, and coconut milk powder adds a subtle tropical note that actually works beautifully with peppermint. Use dairy-free chocolate if you’re serving strict vegans.
Extra-Rich Version: Replace 1/4 cup of the powdered sugar with an additional 1/4 cup cocoa powder. The result is darker, more intense, and less sweet—perfect for adults who want something closer to drinking chocolate. My husband calls this “the one that wakes you up.”
Spiced Peppermint Cocoa: Add 1/2 teaspoon cinnamon and a pinch of cayenne pepper to the dry mix. The warmth of the spices plays beautifully with the cool peppermint. I made this for a holiday party and people kept asking for the recipe.
White Peppermint Cocoa: Use white chocolate powder (found in the baking aisle) instead of cocoa powder. The result is a creamy, vanilla-mint drink that looks like melted snow. My daughter’s friends request this at every sleepover.
Marshmallow-Stuffed Version: Add 1/2 cup mini marshmallows to the jar along with the mix. They stay crunchy in the dry mix and puff up when you add hot milk. Just note that the marshmallows can absorb moisture over time, so this version is best used within a month.
Personal variation I love: I sometimes add a tablespoon of instant espresso powder to the mix. It doesn’t make the cocoa taste like coffee—it just deepens the chocolate flavor and adds a subtle complexity. My neighbor’s husband, who “doesn’t like hot chocolate,” drank three cups of this version.
Serving & Storage Suggestions
Serving: Serve hot, obviously! Pour 8 ounces of steaming milk (or water, but milk is creamier) over 2-3 tablespoons of mix. Stir well. Top with whipped cream, crushed candy canes, or marshmallows if you’re feeling fancy. For a fun presentation, rim the mug with melted chocolate and crushed peppermint before pouring.
Temperature: Best served between 140-150°F—hot enough to warm you up, cool enough to sip without burning your tongue. If you’re serving kids, let it cool for 2-3 minutes after mixing.
Complementary treats: This cocoa pairs beautifully with shortbread cookies, gingerbread, or a simple sugar cookie. For a cozy night in, serve it alongside a plate of homemade biscotti—the crunch is perfect for dunking.
Storage: Keep the dry mix in an airtight container at room temperature, away from heat and direct sunlight. It will stay fresh for 6-8 months. If you notice the mix clumping, it’s absorbed moisture—either use it quickly or spread it on a baking sheet and dry it in a 200°F oven for 10 minutes, then re-crush.
Reheating: If your cocoa cools down, microwave it in 30-second bursts, stirring between each, until hot. Don’t boil it—the milk proteins can separate. For a second cup, just add more hot milk to the leftover mix in your mug.
Flavor development: The peppermint flavor actually mellows and blends with the chocolate after about a week. I’ve found the mix tastes best after sitting for 3-5 days. If you’re giving it as a gift, make it a week ahead for optimal flavor.
Nutritional Information & Benefits
Per serving (2 tablespoons mix prepared with 8 oz whole milk):
- Calories: 180
- Fat: 5g
- Carbohydrates: 28g
- Sugar: 24g
- Protein: 7g
- Calcium: 20% DV
- Iron: 8% DV
Health benefits: Cocoa powder is rich in antioxidants called flavonoids, which can help improve blood flow and lower blood pressure. The milk provides calcium and vitamin D for bone health. Peppermint has been shown to aid digestion and soothe upset stomachs—so this drink is actually good for you after a heavy meal.
Dietary considerations: This recipe is vegetarian and can easily be made dairy-free and vegan with appropriate substitutions. It’s not gluten-free unless you verify your candy canes are gluten-free (most are, but check labels). The sugar content is moderate—you can reduce it by cutting the powdered sugar to 1 1/2 cups, though the texture will be slightly less smooth.
Allergens: Contains milk (unless substituted). Candy canes may be processed in facilities that handle nuts, so check labels if allergies are a concern.
Personal note: I don’t pretend this is health food—it’s a treat. But knowing exactly what’s in it makes me feel better than buying those packets with ingredients I can’t pronounce. It’s real food, made with real ingredients, and that counts for something.
FAQs
Can I use hot water instead of milk?
You can, but it won’t be as creamy. The powdered milk in the mix helps, but using water gives a thinner, less satisfying drink. If you’re out of milk, try using half water, half cream or half-and-half for better texture.
Why is my cocoa mix clumpy?
Moisture got into the jar. Make sure your container is completely dry before adding the mix. If clumps form, break them up with a fork or sift the mix through a strainer. Store in a cool, dry place away from the stove or sink.
Can I use chocolate chips instead of cocoa powder?
No—chocolate chips contain cocoa butter and sugar, which won’t dissolve properly in milk. You’d end up with a greasy, grainy drink. Stick with cocoa powder for a smooth, consistent mix.
How do I make this sugar-free?
Substitute the powdered sugar with a powdered monk fruit or erythritol sweetener. Note that these sweeteners can have a cooling aftertaste that might clash with the peppermint—start with half the amount and adjust to taste. Sugar-free candy canes are also available.
Can I freeze the mix?
Freezing isn’t recommended—the powdered milk can develop ice crystals and the candy canes can absorb moisture. Room temperature storage in an airtight container is best. If you need to make a huge batch, store it in multiple smaller jars and keep one out at a time.
Conclusion
This homemade peppermint hot cocoa mix has become more than just a recipe in our house—it’s a tradition. It’s what we make on the first snowy day of winter. It’s what I bring to holiday parties instead of a bottle of wine. It’s what my kids request when they come in from building snowmen, cheeks red and fingers numb.
And honestly? It’s the easiest way I know to make something special without spending a fortune. You don’t need fancy ingredients or complicated techniques. You just need a few pantry staples, some candy canes, and about ten minutes. The rest is pure comfort.
I’d love to hear how this mix turns out for you. Do your kids have a favorite variation? Did you try the spiced version and love it? Drop a comment below—I read every single one, and I’m always looking for new ideas to test. (My neighbor’s kids are ready and willing taste-testers, as always.)
So go ahead—crush those candy canes, sift that cocoa, and fill a jar with something warm and wonderful. Winter is coming, and you deserve a mug of something that feels like a hug.
Pin This Recipe!
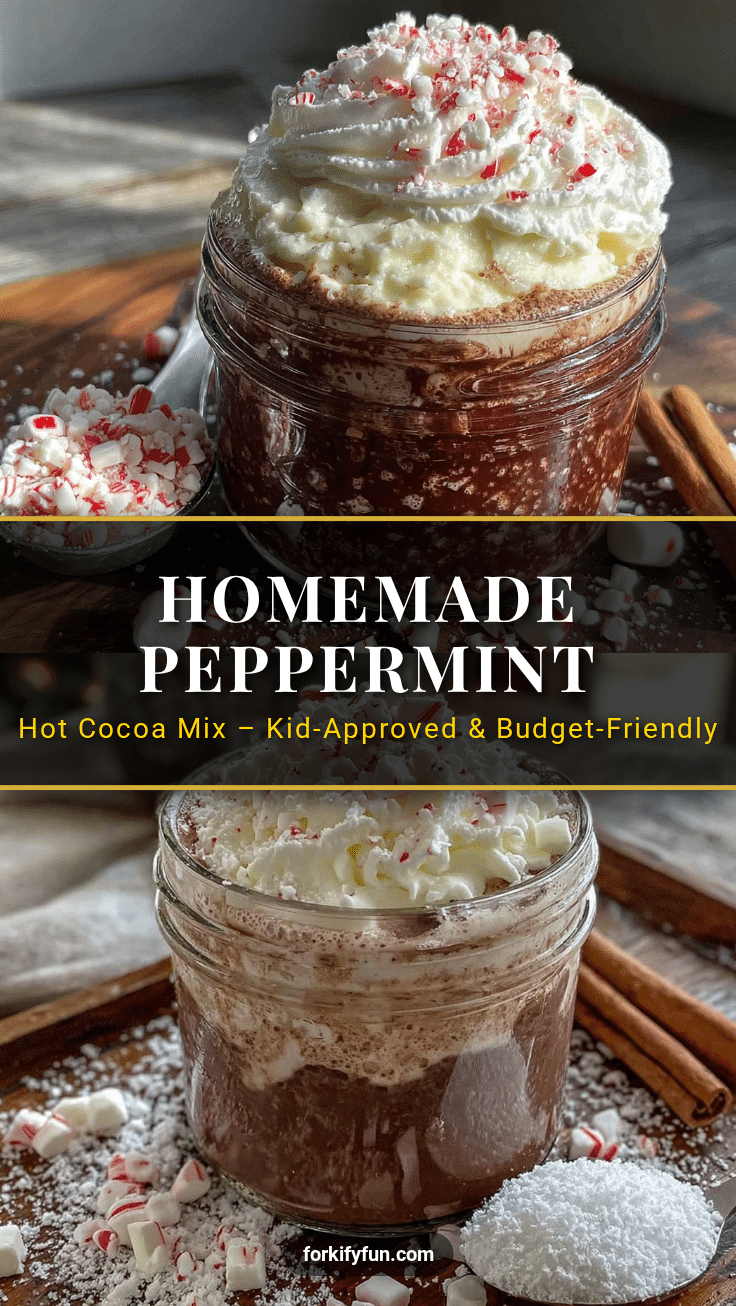
Homemade Peppermint Hot Cocoa Mix

A rich, creamy hot cocoa mix with cool peppermint flavor, made with simple pantry ingredients. Perfect for cozy winter days, gifting, and kid-approved snow day treats.
- Prep Time: 10 minutes
- Cook Time: 5 minutes
- Total Time: 15 minutes
- Yield: 12-16 servings 1x
- Category: Beverage
- Cuisine: American
Ingredients
- 1 cup unsweetened cocoa powder (preferably Dutch-process)
- 2 cups powdered sugar (confectioners’ sugar)
- 2 cups powdered milk (whole milk powder recommended)
- 1/2 teaspoon salt
- 4–6 regular-sized candy canes (about 1/2 cup crushed)
- 1/2 teaspoon peppermint extract (optional)
Instructions
- Crush the candy canes: Unwrap 4-6 candy canes and place them in a ziplock bag. Seal it, then gently smash with a rolling pin or heavy skillet until you have a mix of small pieces and fine powder. Alternatively, pulse in a food processor 5-6 times. Aim for pieces about the size of coarse sand.
- Sift the cocoa powder: Measure 1 cup of unsweetened cocoa powder into a fine-mesh strainer set over a large bowl. Tap the strainer gently to sift and break up clumps.
- Add the dry ingredients: Add 2 cups powdered sugar, 2 cups powdered milk, and 1/2 teaspoon salt to the sifted cocoa. Whisk thoroughly until everything is evenly combined and uniform in color.
- Add the peppermint: Stir in the crushed candy canes and 1/2 teaspoon peppermint extract (if using). Whisk again to distribute the extract evenly. Break up any large clumps with your fingers or a fork.
- Transfer to storage: Pour the finished mix into a mason jar or airtight container. Seal tightly. Label with the date and instructions: ‘Add 2-3 tablespoons to 8 oz hot milk. Stir well.’
- Make a cup to test: Heat 8 ounces of milk (dairy or non-dairy) until steaming but not boiling. Add 2 tablespoons of mix. Stir vigorously until fully dissolved. Taste and adjust if needed.
Notes
Store in a cool, dark place away from heat and sunlight. The mix stays fresh for 6-8 months. For best flavor, let the mix sit for 3-5 days before using. Don’t over-crush the candy canes—coarse pieces give bursts of mint. Heat milk gently to avoid scorching. Salt is essential for enhancing chocolate flavor. For dairy-free version, substitute powdered milk with coconut milk powder or oat milk powder.
Nutrition
- Serving Size: 2 tablespoons mix pr
- Calories: 180
- Sugar: 24
- Sodium: 180
- Fat: 5
- Saturated Fat: 3
- Carbohydrates: 28
- Fiber: 2
- Protein: 7
Keywords: peppermint hot cocoa, homemade hot chocolate mix, winter drink, Christmas cocoa, kid-friendly hot cocoa, gift jar recipe


