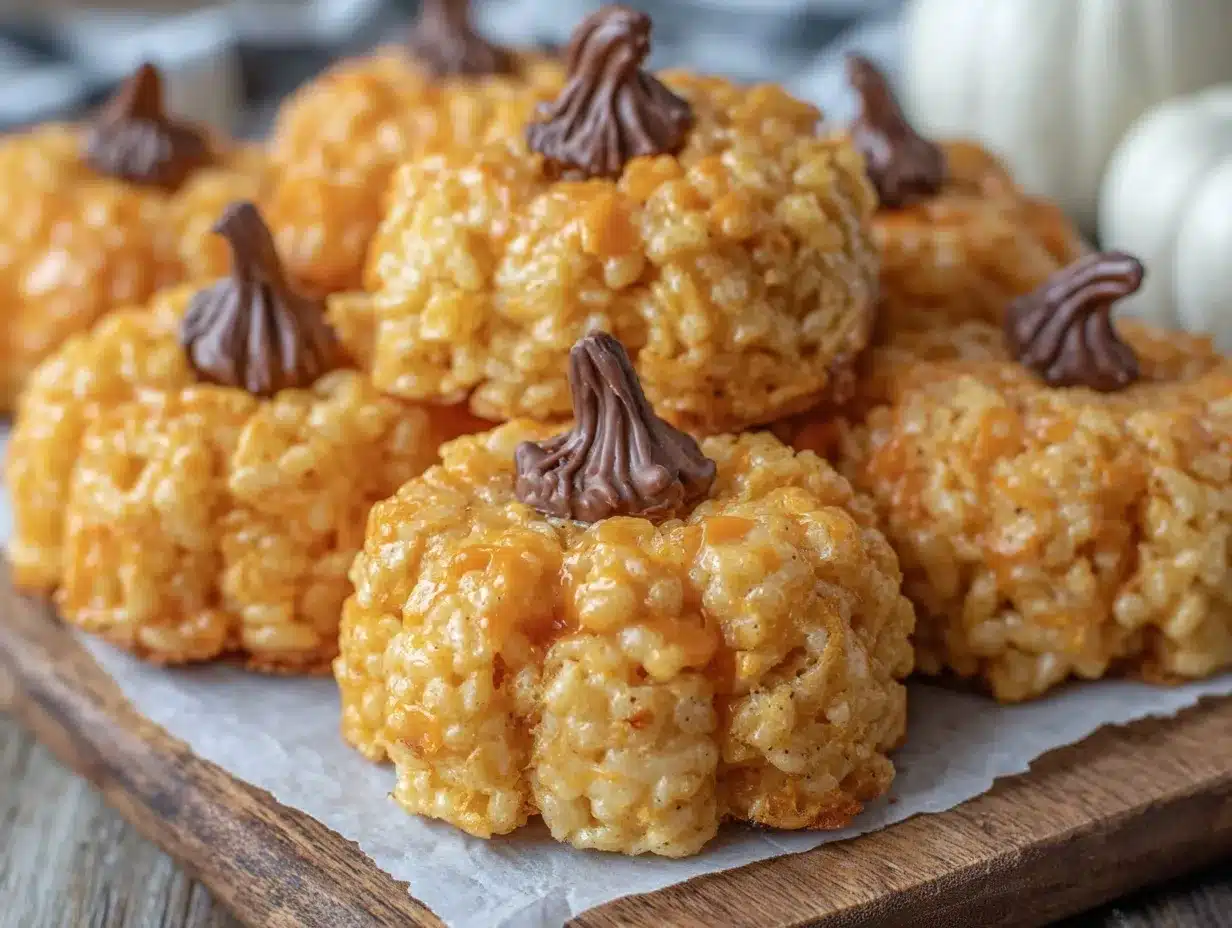
“Are you sure these are just Rice Krispie treats?” my niece asked, eyes wide as she poked the pumpkin-shaped snack on the plate. Honestly, I get it. The first time I tried making these easy pumpkin shaped Rice Krispie treats for Halloween, I was aiming for a quick festive dessert for a last-minute party invite. No fancy baking skills, no complicated ingredients—just that classic marshmallow and crisped rice cereal combo, but with a fun Halloween twist.
It all started on a blustery October afternoon when the idea hit me unexpectedly. The smell of toasted marshmallows wafting through the kitchen brought back memories of pumpkin patches and chilly evenings. I grabbed my trusty old mixing bowl and whipped up the batch without much hope—thinking, “Surely, no one will care about shaped Rice Krispie treats.” But the results surprised us all. The pumpkins looked so cute and tasted so good that they vanished fast, and the recipe stuck around for good.
What really hooked me was how effortlessly these treats capture that playful Halloween spirit without the fuss. They’re sweet, chewy, and delightfully nostalgic. Plus, they’re perfect for anyone who, like me, sometimes finds themselves juggling a million things but still wants to bring something homemade to the table. I’ve made them for family gatherings, school parties, and even paired them with a savory snack like crispy chipotle honey chicken wings for a fun dinner night.
So, if you’re after a Halloween treat that’s as fun to make as it is to eat, these pumpkin shaped Rice Krispie treats might just become your new go-to. Trust me, once you’ve got the basic technique down, decorating them is where the real magic happens. It’s a quiet little joy to shape something simple into a festive delight that brings smiles all around.
Why You’ll Love This Recipe
If you’re wondering why these easy pumpkin shaped Rice Krispie treats feel like a must-have for Halloween, let me share a few honest reasons from my kitchen trials:
- Quick & Easy: Ready in under 30 minutes, they’re ideal for those busy October afternoons when you suddenly realize you need a festive snack—fast.
- Simple Ingredients: You probably already have marshmallows, rice cereal, and butter hanging out in your pantry. No special trips to the store required.
- Perfect for Halloween Parties: These treats bring that nostalgic Halloween vibe with their bright orange color and pumpkin shape, making them a hit at school events or casual get-togethers.
- Crowd-Pleaser: Kids love the fun shapes, and adults appreciate the nostalgic chewy texture and sweet flavor.
- Unbelievably Delicious: The classic marshmallow-sweetness combined with gentle butter richness creates a comforting flavor that’s hard to resist.
This isn’t just another Rice Krispie treat recipe. The difference? I’ve found that shaping the treats into pumpkins while they’re still warm but pliable gives you that perfect balance of firmness and softness. Plus, adding a little green candy stem or licorice “vines” takes the look from plain to party-ready. I like to use mini marshmallows melted just right for a smoother texture and recommend brands like Jet-Puffed for consistent melt quality.
At its heart, this recipe is about simple pleasures—a sweet that feels homemade and festive without the stress. It’s the kind of treat that makes you pause and smile during a hectic day, reminding you that holidays can be fun and fuss-free.
What Ingredients You Will Need
This recipe relies on a handful of straightforward, pantry staples that come together to deliver those fun pumpkin shaped Rice Krispie treats. Nothing fancy, just good old comfort food ingredients with a seasonal twist:
- Rice Krispies cereal: 6 cups (about 180 grams) – the crunchy base that gives the treats their signature snap.
- Marshmallows: 10 oz (about 280 grams) mini marshmallows – I prefer Jet-Puffed for their smooth melting, but any mini marshmallow works.
- Unsalted butter: 3 tablespoons (45 grams), softened – adds richness and helps bind the mixture.
- Orange food coloring: a few drops – this is key for that classic pumpkin color without artificial flavor.
- Green candy melts or green licorice: small amount for pumpkin stems – adds that cute finishing touch.
- Vanilla extract: 1 teaspoon – subtle warmth to round out the sweetness.
- Optional spices: pinch of cinnamon or pumpkin pie spice – if you want a hint of fall flavor.
These ingredients are all common and easy to find, making the recipe super accessible. If you want a gluten-free option, be sure to pick certified gluten-free rice cereal. For a dairy-free twist, swap the butter with a plant-based alternative and use vegan marshmallows like Dandies.
The orange food coloring is purely for fun—if you prefer natural color, you can try pumpkin puree, but it will alter the texture a bit. For the pumpkin stems, I’ve tried everything from green candy melts to thin strips of fruit leather—whatever you have handy works just fine.
Equipment Needed
- Large mixing bowl: to combine cereal and marshmallow mixture comfortably.
- Medium saucepan: for melting butter and marshmallows together evenly.
- Wooden spoon or heatproof spatula: sturdy enough to stir sticky marshmallow mixture.
- Wax paper or parchment paper: for shaping and cooling the treats without sticking.
- Hand gloves or lightly buttered hands: helps shape the treats without getting too sticky.
- Cookie scoop or measuring cup (optional): for portioning consistent sizes.
- Small piping bag or plastic bag with a corner snipped (optional): to pipe green candy melts for stems.
If you don’t own a saucepan, a microwave-safe bowl works fine for melting butter and marshmallows—just be sure to stir every 20 seconds to avoid burning. I’ve found that buttering your hands lightly before shaping the pumpkins saves a lot of sticky trouble. No fancy molds required—your hands are the best tool for that perfectly imperfect pumpkin shape.
Preparation Method
- Prepare your workspace: Line a baking sheet or large tray with wax or parchment paper. Lightly butter your hands to prevent sticking later. This step takes about 5 minutes.
- Melt butter and marshmallows: In a medium saucepan over low heat, melt 3 tablespoons (45 grams) of unsalted butter. Once melted, add 10 oz (280 grams) of mini marshmallows. Stir continuously until the marshmallows are completely melted and smooth. This should take about 5 minutes. Be careful not to scorch the mixture—low and slow is the key.
- Add vanilla and color: Remove the pan from heat. Stir in 1 teaspoon of vanilla extract and a few drops of orange food coloring until the mixture is a vibrant pumpkin hue. If you want a touch of spice, add a pinch of cinnamon or pumpkin pie spice now.
- Combine with cereal: Immediately pour the marshmallow mixture over 6 cups (about 180 grams) of Rice Krispies cereal in a large bowl. Quickly but gently fold the cereal into the marshmallow mixture using a wooden spoon or spatula until evenly coated. Work fast because the mixture will start to set. This step takes about 3 minutes.
- Shape the pumpkins: While the mixture is still warm, scoop out portions with a cookie scoop or measuring cup (approximately 1/2 cup per treat). Using your buttered hands, gently shape each portion into a round ball and then pinch the sides slightly to form a pumpkin shape. The warm mixture is pliable but will firm up quickly, so work efficiently.
- Add pumpkin stems: Use green candy melts piped through a small bag or thin strips of green licorice to create the pumpkin stem on top. If using candy melts, melt them gently in the microwave for about 30 seconds and pipe immediately. This adds a charming finishing touch. This decorating step takes 10-15 minutes depending on batch size.
- Cool and set: Place the shaped pumpkins on the prepared baking sheet and let them cool at room temperature until firm, about 20-30 minutes. If you’re in a hurry, a quick chill in the fridge works too, but the texture is best if left to set naturally.
Pro tip: If the mixture starts to harden before you finish shaping, just warm it gently in the microwave for 10-15 seconds to soften back up. Also, avoid overpacking the mixture to keep the treats light and chewy rather than dense.
Cooking Tips & Techniques
I’ve learned a few things after making these pumpkin shaped Rice Krispie treats more times than I can count (sometimes multiple batches a week during October, no joke). Here are some tips to get the best results:
- Low heat melting: Melt butter and marshmallows over low heat with constant stirring. High heat scorches the marshmallows and ruins the texture. Patience is key here.
- Work quickly but gently: The marshmallow mixture sets fast. Have all your ingredients and tools ready so you can mix and shape without rushing.
- Butter your hands: This simple step saves so much frustration. It keeps the sticky mixture from clinging to your fingers so you can shape pumpkins smoothly.
- Don’t overpack: Pressing the mixture too tightly makes treats dense and hard. Aim for gentle shaping that holds form but stays chewy.
- Customize your stems: I’ve had great success swapping candy melts for green fruit leather or even small pieces of pretzel sticks dipped in green icing.
- Storage considerations: These treats are best eaten within 2-3 days for optimum freshness. Keep them in an airtight container to maintain chewiness.
One mistake I made early on was using large marshmallows—they just didn’t melt as smoothly and made the texture grainy. Mini marshmallows are worth the extra few cents. Also, I tried piping the green stems with too thick candy melts once, and it looked clumpy. Thin, controlled piping or licorice strips work best.
Variations & Adaptations
While the classic pumpkin shaped Rice Krispie treat is a winner on its own, I’ve tried a few variations that might spark your creativity:
- Spiced pumpkin: Add 1/2 teaspoon pumpkin pie spice to the melted marshmallow mixture for a warm fall flavor kick.
- Chocolate dipped: After shaping and cooling, dip half of each pumpkin in melted dark or white chocolate for a fancy touch.
- Gluten-free: Use certified gluten-free rice cereal and vegan marshmallows if needed to make these treats allergy-friendly.
- Mini pumpkins: Make bite-sized versions using a tablespoon scoop. These are perfect for little hands and party platters.
- Colored stems: Swap green candy melts with orange or yellow for a whimsical look, or use edible markers to draw faces for a jack-o’-lantern effect.
One of my favorite twists was pairing these treats alongside the crispy air fryer General Tso chicken bites at a Halloween potluck. The sweet and savory combo was a total hit.
Serving & Storage Suggestions
These pumpkin shaped Rice Krispie treats are best served at room temperature, allowing their signature chewy texture to shine. They make a festive centerpiece on any Halloween snack table or lunchbox surprise.
For presentation, arrange them on a platter with a scattering of candy corn or Halloween sprinkles to amp up the seasonal vibe. They pair surprisingly well with warm drinks like spiced apple cider or even a rich hot chocolate.
Store any leftovers in an airtight container at room temperature for up to 3 days. If you want to keep them longer, they freeze well wrapped tightly in plastic wrap and placed in freezer bags—just thaw at room temperature before serving.
Reheating isn’t necessary, but if you prefer a softer treat, a quick 10-second zap in the microwave does the trick.
Fun fact: letting the treats sit a day actually deepens the flavor and makes them easier to cut cleanly if you want to slice them into smaller pieces later.
Nutritional Information & Benefits
While these easy pumpkin shaped Rice Krispie treats are definitely a sweet indulgence, here’s a rough idea of what you’re getting per serving (assuming 12 servings per batch):
| Nutrient | Amount per Serving |
|---|---|
| Calories | 150-180 kcal |
| Fat | 4-6 grams |
| Sugar | 15-20 grams |
| Carbohydrates | 30-35 grams |
| Protein | 1-2 grams |
These treats are gluten-free if you pick the right cereal and avoid cross-contamination. Watch out for potential allergens like dairy (butter) and corn (in marshmallows and cereal). Vegan versions are possible with plant-based butter and vegan marshmallows.
From a wellness perspective, these treats are best enjoyed in moderation as a festive occasional snack. The simple ingredients mean fewer additives than many store-bought Halloween treats, and they’re a fun way to involve kids in cooking without overwhelming them.
Conclusion
Easy pumpkin shaped Rice Krispie treats are one of those recipes that bring a little extra joy to a busy season without taking over your day. They’re sweet, nostalgic, and just festive enough to feel special. I love how they let me check off the “homemade” box at parties while still keeping things simple and stress-free.
Feel free to tweak the shapes, colors, or add your own toppings to make these treats truly yours. Whether you’re crafting them with kids, hosting a casual Halloween gathering, or just craving a sweet seasonal snack, they fit right in.
And hey, if you’re looking for another easy recipe to complement these treats, you might like the creamy Cajun shrimp pasta I’ve shared—it’s one of my favorites for quick dinner nights. Cooking should be fun, and sometimes that means simple, playful recipes that bring smiles.
Give these pumpkin shaped Rice Krispie treats a try this Halloween—you might just find yourself making them every year like I do. Don’t forget to drop a comment with your decorating ideas or how they turned out!
FAQs about Easy Pumpkin Shaped Rice Krispie Treats
Can I make these treats ahead of time?
Yes! They keep well at room temperature for 2-3 days in an airtight container. You can also freeze them wrapped tightly for up to a month and thaw before serving.
What if I don’t have orange food coloring?
No worries. You can skip the coloring or use natural alternatives like a small amount of pumpkin puree, though it may change the texture slightly.
How do I prevent the marshmallow mixture from sticking to my hands?
Lightly butter or spray your hands with cooking spray before shaping. This simple trick keeps the sticky mixture manageable.
Can I use regular-sized marshmallows instead of mini ones?
Mini marshmallows melt more evenly and smoothly, which is why they’re preferred. If using large marshmallows, chop them into smaller pieces first.
Is there a way to make these treats less sweet?
You can reduce the amount of marshmallows slightly or add a pinch of salt to the mixture to balance sweetness. Just be careful not to alter the binding too much.
Pin This Recipe!
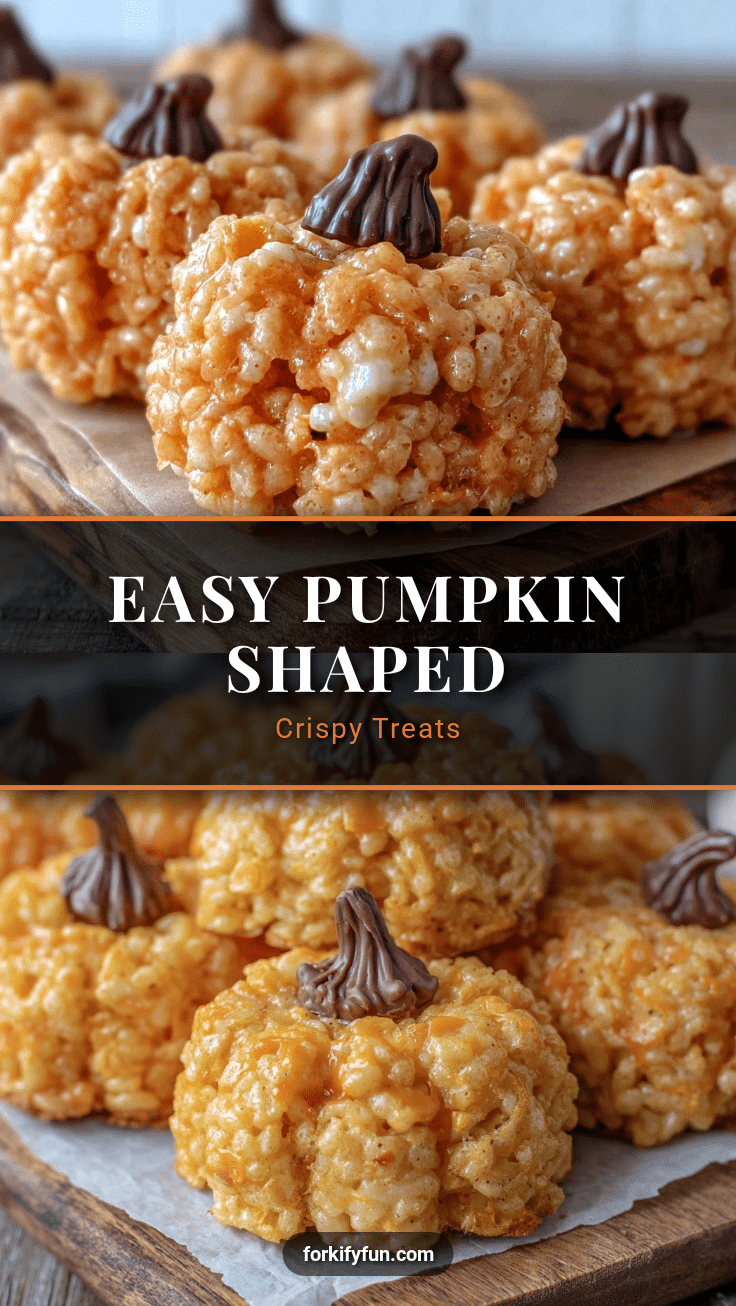
Easy Pumpkin Shaped Rice Krispie Treats Recipe for Perfect Halloween Snacks

These easy pumpkin shaped Rice Krispie treats are a quick, festive, and nostalgic Halloween snack made with classic marshmallows and crisped rice cereal, shaped into pumpkins and decorated with green candy stems.
- Prep Time: 10 minutes
- Cook Time: 10 minutes
- Total Time: 30 minutes
- Yield: 12 servings 1x
- Category: Dessert
- Cuisine: American
Ingredients
- 6 cups (about 180 grams) Rice Krispies cereal
- 10 oz (about 280 grams) mini marshmallows
- 3 tablespoons (45 grams) unsalted butter, softened
- A few drops orange food coloring
- Small amount green candy melts or green licorice for pumpkin stems
- 1 teaspoon vanilla extract
- Optional: pinch of cinnamon or pumpkin pie spice
Instructions
- Prepare your workspace by lining a baking sheet or large tray with wax or parchment paper. Lightly butter your hands to prevent sticking later (about 5 minutes).
- In a medium saucepan over low heat, melt 3 tablespoons (45 grams) of unsalted butter. Once melted, add 10 oz (280 grams) of mini marshmallows. Stir continuously until marshmallows are completely melted and smooth (about 5 minutes).
- Remove the pan from heat. Stir in 1 teaspoon vanilla extract and a few drops of orange food coloring until the mixture is a vibrant pumpkin hue. Add a pinch of cinnamon or pumpkin pie spice if desired.
- Immediately pour the marshmallow mixture over 6 cups (about 180 grams) of Rice Krispies cereal in a large bowl. Quickly but gently fold the cereal into the marshmallow mixture using a wooden spoon or spatula until evenly coated (about 3 minutes).
- While the mixture is still warm, scoop out portions (approximately 1/2 cup per treat) using a cookie scoop or measuring cup. Using buttered hands, gently shape each portion into a round ball and pinch the sides slightly to form a pumpkin shape.
- Use green candy melts piped through a small bag or thin strips of green licorice to create pumpkin stems on top. Melt candy melts gently in the microwave for about 30 seconds if using, then pipe immediately (10-15 minutes depending on batch size).
- Place shaped pumpkins on the prepared baking sheet and let cool at room temperature until firm, about 20-30 minutes. Alternatively, chill in the fridge for faster setting.
Notes
Melt butter and marshmallows over low heat to avoid scorching. Work quickly but gently when mixing and shaping as the mixture sets fast. Butter your hands to prevent sticking. Avoid overpacking the mixture to keep treats light and chewy. Store in an airtight container for 2-3 days or freeze for up to a month. Reheat briefly in microwave if desired. Use mini marshmallows for best texture.
Nutrition
- Serving Size: 1 pumpkin shaped tre
- Calories: 165
- Sugar: 18
- Sodium: 90
- Fat: 5
- Saturated Fat: 3
- Carbohydrates: 32
- Protein: 1.5
Keywords: Pumpkin shaped Rice Krispie treats, Halloween snacks, easy Halloween dessert, marshmallow treats, festive treats, no bake dessert