Three overripe bananas on the counter, a jar of peanut butter with maybe two tablespoons left scraping the bottom, and a half-empty box of tortillas staring at me from the pantry. That was my Tuesday afternoon reality at 2:47 PM, which is that weird dead zone between lunch and snack time when my youngest starts circling the kitchen like a tiny, hungry shark. I needed something fast—like, before-the-whining-escalates fast—and I definitely wasn’t about to turn on the oven. That’s how these Easy Peanut Butter Banana Sushi Roll-Ups were born, right there in the middle of a chaotic weekday, with a toddler tugging at my shirt and a preschooler asking if we could “make something fun.”
Honestly, I wasn’t trying to be clever or create a recipe. I was just trying to survive snack time without another granola bar wrapper ending up in the couch cushions. But the moment I rolled that tortilla up tight and sliced it into little pinwheels, my kids’ eyes went wide like I’d just pulled off some kind of magic trick. “It’s sushi, Mom!” my oldest yelled, and suddenly we were having the most exciting snack of the week. The peanut butter and banana combo is a classic for a reason—creamy, sweet, satisfying—but rolling it up and cutting it into rounds makes it feel like an event. These Easy Peanut Butter Banana Sushi Roll-Ups took maybe nine minutes from start to finish, and they’ve been a staple in our house ever since. Sometimes the best recipes come from just making do with what you’ve got, you know?
Why You’ll Love This Recipe
Let me tell you why these roll-ups have earned a permanent spot in our snack rotation. I’ve tested this with different tortillas, different spreads, and even different fruits, and every single time, it just works. Here’s what makes them so great:
- Ready in 9 Minutes Flat : From hungry to happy in less time than it takes to find the remote. Perfect for those moments when hangry strikes out of nowhere.
- Pantry-Friendly Ingredients : You probably have everything already. No special trips, no fancy shopping—just simple stuff you already keep around.
- Kid-Approved Fun Factor : Calling it “sushi” makes it instantly cool. My kids actually cheer when I pull out the tortillas now, and they love helping assemble their own.
- Totally Customizable : Swap the peanut butter for almond butter, add some honey, sprinkle in chocolate chips—the possibilities are endless and still delicious.
- Surprisingly Filling : The protein from the peanut butter and the fiber from the banana keep little (and big) bellies full until dinner time, no complaints.
What makes these different from just a regular peanut butter and banana sandwich? It’s the texture, honestly. Rolling it up creates these perfect little spirals where every bite has the right ratio of tortilla to filling. Plus, the fun shape makes kids actually excited to eat something that’s secretly good for them. I’ve brought these to playdates, packed them in lunchboxes, and even served them as a quick breakfast on school mornings. They’re the kind of snack that makes you feel like a superhero parent with almost zero effort.
What Ingredients You Will Need
This recipe uses the simplest ingredients you can imagine, but I’ve learned a few tricks along the way that make a real difference. Here’s what you’ll need and why each one matters:
- Flour Tortillas (8-inch) : I prefer medium-sized soft flour tortillas—they roll up easily without cracking and hold their shape nicely. Burrito-sized ones work too, but you’ll get bigger roll-ups. For a whole wheat option, Mission brand makes a good one that doesn’t taste like cardboard. If you’re gluten-free, the almond flour tortillas from Siete are fantastic here.
- Creamy Peanut Butter : About 2 tablespoons per tortilla. I’m partial to Skippy Natural or Justin’s Classic Peanut Butter because they spread smoothly without being too oily. Natural peanut butter that separates works fine—just stir it really well first, or you’ll end up with a puddle of oil on your tortilla. Crunchy peanut butter works if you like the texture, but it can make rolling a bit tricky since the chunks want to escape.
- Ripe Bananas : You want bananas that are yellow with a few brown spots—firm enough to slice neatly but sweet enough to taste amazing. Green bananas are too starchy and won’t have that natural sweetness. Overly mushy bananas will squish out when you roll, so aim for that perfect middle ground. One medium banana per tortilla is usually just right.
- Honey (Optional) : A light drizzle adds a touch of extra sweetness that pairs beautifully with the peanut butter. Local honey is my go-to, but any honey works. You could also use maple syrup or agave if that’s what you have.
- Cinnamon (Optional) : Just a sprinkle takes these from good to “oh wow, what did you put in these?” It adds warmth and makes the kitchen smell amazing. I use Saigon cinnamon because it’s extra fragrant, but regular cinnamon is perfect too.
That’s it. Five ingredients, most of which are probably in your kitchen right now. The beauty of these Easy Peanut Butter Banana Sushi Roll-Ups is that they don’t require any complicated shopping or speciality items. I’ve made them with everything from gluten-free tortillas to keto-friendly almond butter wraps, and they always turn out great. The key is using ingredients you actually enjoy eating—if you love your peanut butter, you’ll love these roll-ups even more.
Equipment Needed
You don’t need much here, which is part of why I love this recipe so much. Here’s what I use:
- A Butter Knife or Spatula : For spreading the peanut butter evenly. A regular butter knife works perfectly, but I actually prefer a small offset spatula—it makes getting an even layer so much easier, especially if your peanut butter is on the thicker side.
- A Sharp Knife : For slicing the bananas and cutting the roll-ups. A serrated knife works best for the roll-ups because it cuts through the tortilla without squishing it. Trust me on this—I learned the hard way that a dull knife just mashes everything.
- A Cutting Board : Any cutting board works. I use a large wooden one that gives me plenty of room to work, but a plastic one is totally fine too.
- A Plate or Serving Tray : For arranging your beautiful sushi roll-ups. I like using a white plate because the colors pop nicely for photos, but honestly, paper plates work just as well on busy afternoons.
That’s genuinely all you need. No food processor, no fancy gadgets, no special pans. If you have a tortilla warmer, you can use it to soften the tortillas slightly, but I usually just microwave mine for 10 seconds between damp paper towels. If you want to get fancy, a pizza cutter can slice the roll-ups quickly, but a knife works just fine.
Preparation Method
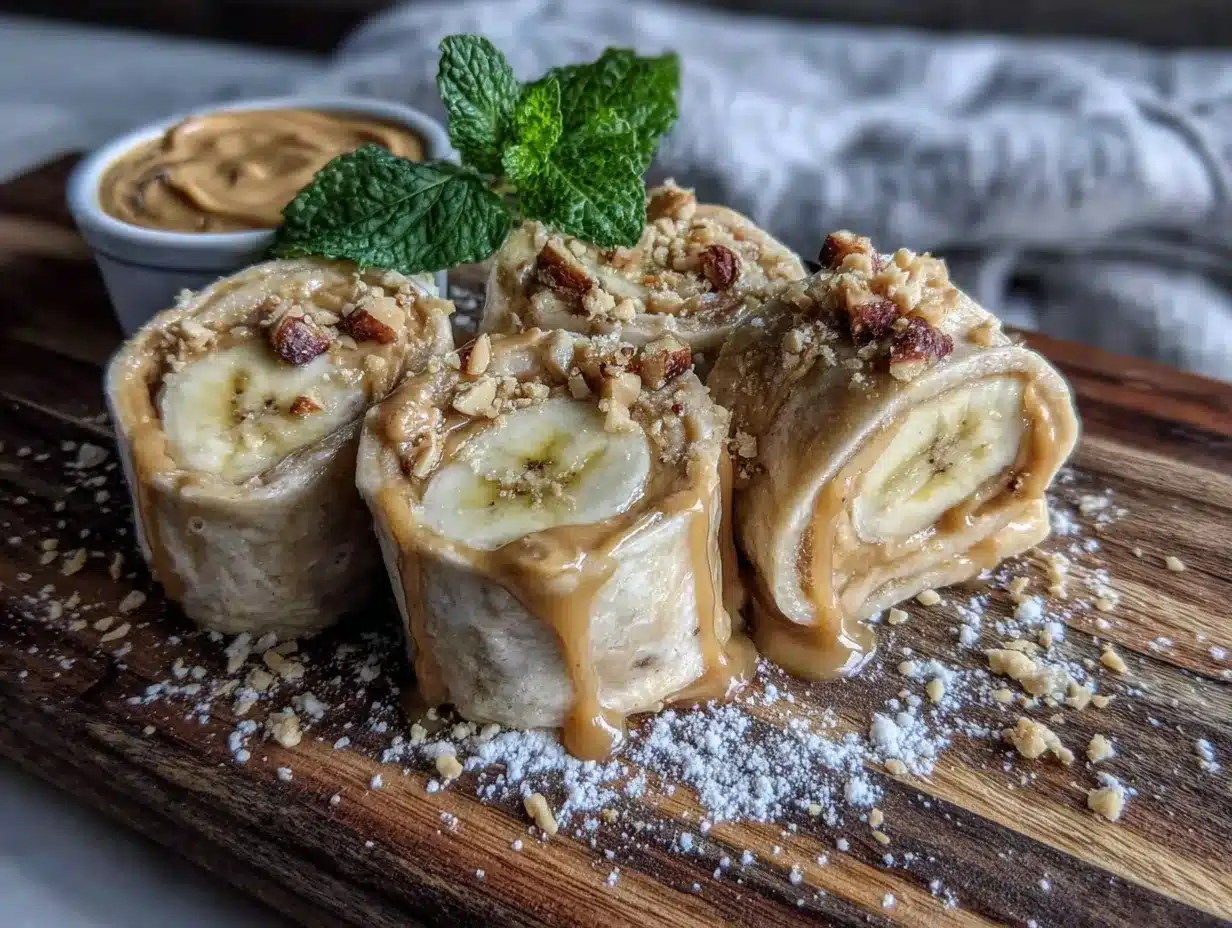
Alright, let’s make these Easy Peanut Butter Banana Sushi Roll-Ups. I promise, by the time you finish reading these steps, you could probably make them with your eyes closed. Here’s exactly how I do it:
- Soften the Tortillas : Take your flour tortillas and warm them up for about 10-15 seconds in the microwave, wrapped in a slightly damp paper towel. This makes them super pliable and prevents cracking when you roll. If you don’t have a microwave, you can warm them in a dry skillet for about 20 seconds per side. You want them warm but not hot—just flexible enough to bend without breaking.
- Spread the Peanut Butter : Place one warm tortilla flat on your cutting board. Using your butter knife or offset spatula, spread about 2 tablespoons of peanut butter evenly across the entire surface. Go all the way to the edges—this helps everything stick together. I like to leave a tiny border (like half an inch) around the very edge so nothing squishes out when I roll. If your peanut butter is too thick to spread, microwave it for 10 seconds to loosen it up.
- Add the Banana : Peel one banana and place it whole near the bottom edge of the tortilla, about an inch from the edge. If your banana is really long, you can trim the ends or let them hang out a bit—they’ll get covered when you roll. I sometimes slice the banana lengthwise into two long halves and place them side by side for a more even distribution, but a whole banana works perfectly too.
- Drizzle and Sprinkle (Optional) : If you’re using honey, drizzle about a teaspoon over the banana. Then sprinkle a light dusting of cinnamon over everything. Don’t go overboard—you want a hint of cinnamon, not a mouthful of it. A little goes a long way here.
- Roll It Up Tight : Starting from the bottom edge where the banana is, fold the tortilla over the banana and start rolling away from you. Keep it tight but not so tight that the banana squishes out the sides. Think of it like rolling a burrito—firm and even. Tuck in the sides as you go if you want a more finished look, but I usually leave the ends open for a more rustic sushi vibe.
- Slice into Pinwheels : Using your sharp serrated knife, slice the rolled tortilla into 1-inch rounds. I usually get about 6-8 pieces per tortilla. Use a gentle sawing motion rather than pressing straight down—this keeps the shape nice and round. If the first slice looks a little messy, don’t worry, that happens to everyone. Just pop that piece in your mouth as a chef’s treat and move on.
- Arrange and Serve : Place the pinwheels on a plate with the spiral side facing up so you can see all those pretty layers. Serve immediately for the best texture—the tortilla is soft, the banana is fresh, and the peanut butter is perfectly creamy. These are best eaten within an hour of making them, but honestly, they disappear way faster than that in my house.
One thing I’ve learned: if you’re making these for a lunchbox, squeeze a little lemon juice over the banana slices before rolling to prevent browning. It doesn’t affect the taste, and your roll-ups will look fresh hours later. Also, if you want to make a bunch at once, you can prep all the tortillas with peanut butter, then add bananas and roll them assembly-line style. It goes super fast once you get into a rhythm.
Cooking Tips & Techniques
Over the dozens of times I’ve made these Easy Peanut Butter Banana Sushi Roll-Ups, I’ve picked up a few tricks that make the process smoother and the results better. Here are my best tips:
Don’t skip warming the tortillas. I know it seems like an extra step, but cold tortillas crack and tear when you try to roll them tightly. That 10 seconds in the microwave makes a huge difference. If you’re making a big batch, wrap a stack of tortillas in a clean kitchen towel and microwave them together for 20-30 seconds—they’ll stay warm and pliable while you work.
Use room temperature peanut butter. Cold peanut butter straight from the fridge is a nightmare to spread evenly. It pulls at the tortilla and creates lumpy patches. Let your peanut butter sit out for 15-20 minutes before you start, or give it a quick 10-second zap in the microwave. Smooth spreading means every bite has the perfect amount of filling.
Watch your banana placement. I’ve made the mistake of placing the banana too close to the edge, and it just squishes out immediately when you start rolling. Give yourself that inch of space at the bottom. Also, if your banana is super curved, place it with the curve facing upward—it’ll roll more evenly that way.
Slice with confidence. The worst thing you can do is hesitate while cutting. Use a sharp serrated knife and use a gentle back-and-forth motion. If you press straight down, you’ll squish the roll-up flat. I ruined my first batch by using a dull chef’s knife—they came out looking like sad little pancakes instead of cute sushi rounds.
Make it a dipping situation. These are amazing on their own, but dipping takes them to another level. My kids love them with a side of honey for dipping, and I’ve been known to mix a little peanut butter with Greek yogurt for a protein-packed dip. Chocolate sauce is also a huge hit if you’re feeling indulgent.
One last thing: if you’re making these for a party or playdate, you can assemble the whole roll-up (without slicing) up to an hour ahead. Just wrap it tightly in plastic wrap and refrigerate. Slice right before serving for the freshest look. The tortilla will absorb a little moisture from the banana over time, so it won’t be quite as crisp, but it’ll still taste delicious.
Variations & Adaptations
One of the best things about these Easy Peanut Butter Banana Sushi Roll-Ups is how endlessly adaptable they are. I’ve tried so many variations, and honestly, most of them have been winners. Here are some of my favorites:
The Chocolate Lover’s Version : Spread a thin layer of Nutella or chocolate-hazelnut spread alongside the peanut butter. Add some mini chocolate chips before rolling, and you’ve got a dessert-worthy snack that tastes like a candy bar. My kids request this version for after-school treats, and I don’t blame them one bit.
The Berry Blast : Add a handful of fresh strawberries or raspberries alongside the banana. Slice the berries thinly so they roll up easily. The tartness of the berries cuts through the sweetness of the peanut butter and banana beautifully. This is my go-to in the summer when berries are at their peak.
The Crunchy Nut Version : After spreading the peanut butter, sprinkle a tablespoon of chopped peanuts or crushed almonds over the surface before adding the banana. The extra crunch is such a nice textural contrast to the soft banana and tortilla. I’ve also used crushed pretzels for a sweet-salty combo that’s absolutely addictive.
The Breakfast Sushi : Swap the flour tortilla for a whole wheat or spinach wrap, and add a sprinkle of granola or crushed cereal before rolling. Drizzle with a little maple syrup instead of honey for a breakfast twist. These are perfect for mornings when you need something quick but satisfying.
The Allergy-Friendly Version : Use sun butter or WowButter instead of peanut butter for a nut-free option that’s school-safe. Sun butter works great—just be aware that it can turn a little green when combined with banana (it’s a natural reaction, totally safe to eat). For a gluten-free option, use corn tortillas or gluten-free wraps. Corn tortillas are smaller, so adjust your banana size accordingly.
I once made a version with sliced apples instead of bananas when I ran out of bananas mid-recipe. It wasn’t quite as sweet, but the crunch was fantastic. I drizzled a little caramel sauce on top and called it “apple pie sushi”—the kids ate it up. Don’t be afraid to experiment with what you have on hand. That’s how the best recipes happen, honestly.
Serving & Storage Suggestions
These Easy Peanut Butter Banana Sushi Roll-Ups are best served immediately, but I’ve figured out a few ways to make them work for different situations. Here’s what I’ve learned:
Serving : Arrange the pinwheels on a plate with the spiral side facing up so everyone can see those pretty layers. They look gorgeous on a wooden board or a simple white plate. For parties, I like to serve them on a skewer or toothpick for easy grabbing—kids love food on sticks, and it keeps little fingers from touching every piece.
Temperature : These are perfect at room temperature. If you’ve refrigerated them, let them sit out for 5-10 minutes before serving so the tortilla softens up again. Cold tortillas get a little stiff, and nobody wants that.
What to Serve With : These pair beautifully with a glass of cold milk, a smoothie, or even a cup of coffee for the adults. For a full snack plate, I’ll add some apple slices, cheese cubes, or a handful of grapes alongside the roll-ups. If you’re serving them for breakfast, a side of yogurt or scrambled eggs rounds things out nicely.
Storage : These are really best eaten fresh, but if you have leftovers (unlikely in my house, but possible), wrap them tightly in plastic wrap and refrigerate for up to 24 hours. The tortilla will soften a bit from the banana moisture, and the peanut butter will firm up in the fridge, but they’re still tasty. I don’t recommend freezing them—the texture gets weird when thawed.
Reheating : I actually prefer these cold or room temperature, but if you want to warm them up, pop them in the microwave for 10-15 seconds. Just enough to soften the tortilla without melting the banana. You can also warm them in a dry skillet over medium heat for about 30 seconds per side for a slightly crisp exterior.
One thing I’ve noticed: the flavors actually meld together nicely after about 30 minutes in the fridge. The peanut butter and banana sort of become one, and the cinnamon spreads throughout. If you’re making these for a picnic or lunchbox, they’ll still be delicious hours later, even if they’re not quite as pretty as fresh ones.
Nutritional Information & Benefits
Let’s talk about what’s actually in these little guys, because they’re way more than just a tasty snack. Per serving (about 6-8 roll-ups, which is one full tortilla with filling), here’s the approximate breakdown:
| Nutrient | Amount Per Serving |
|---|---|
| Calories | 310-350 |
| Protein | 10-12g |
| Carbohydrates | 45-50g |
| Fiber | 5-7g |
| Sugar | 18-22g (natural from banana and honey) |
| Fat | 14-16g |
| Potassium | 450-500mg |
Bananas are packed with potassium, which is great for muscle function and blood pressure regulation. They also contain vitamin B6 and vitamin C. Peanut butter brings healthy fats and protein that keep you full and satisfied—plus it’s a good source of vitamin E and magnesium. The cinnamon adds a nice antioxidant boost, and the honey provides natural energy if you’re using it.
These roll-ups are naturally vegetarian and can easily be made vegan by using maple syrup instead of honey and choosing a vegan-friendly tortilla. For a lower-carb option, use low-carb tortillas and reduce the honey. They’re also nut-free if you use sun butter, which makes them school-friendly. The only potential allergen to watch for is peanuts, obviously, and gluten if you’re using regular flour tortillas.
I love that these feel like a treat but actually provide real nutritional value. My kids get protein, fiber, and fruit all in one fun package, and I don’t have to fight them to eat something healthy. That’s a win in my book every single time.
Conclusion
These Easy Peanut Butter Banana Sushi Roll-Ups have become such a staple in our house that I honestly can’t remember what we did for snacks before them. They’re quick enough for a desperate Tuesday afternoon, fun enough for a weekend treat, and simple enough that my five-year-old can almost make them herself (with supervision, of course). The combination of creamy peanut butter, sweet banana, and soft tortilla wrapped up in those cute little pinwheels is just pure comfort food magic.
What I love most is how forgiving this recipe is. You can use whatever tortillas you have, whatever nut butter is in the pantry, and whatever fruit is on the counter. It’s more of a technique than a strict recipe, and that makes it so much more useful in real life. I’ve made these for playdates, for road trips, for after-school snacks, and even for a quick breakfast when we’re running late. They always deliver.
I’d love to hear how yours turn out! Drop a comment below and let me know what variations you tried—did you add chocolate chips? Swap in almond butter? Make them for a party? Share your photos and tag me so I can see your beautiful creations. And if you have a picky eater at home, these are the perfect recipe to get them involved in the kitchen. Happy rolling, friends!
Frequently Asked Questions
Can I make these ahead of time for lunchboxes?
Yes! Assemble the whole roll-up (without slicing) and wrap it tightly in plastic wrap. Refrigerate for up to 24 hours, then slice right before packing. The tortilla will soften slightly, but they’ll still taste great. Just don’t add any extra honey or wet ingredients if making ahead, as they can make the tortilla soggy.
What’s the best way to prevent the banana from turning brown?
Lightly brush the banana slices with a little lemon juice or lime juice before rolling. The citric acid prevents oxidation without affecting the flavor much. You can also use pineapple juice or even a splash of orange juice in a pinch.
Can I use tortillas other than flour?
Absolutely! Whole wheat, spinach, tomato, or even corn tortillas all work. Just keep in mind that corn tortillas are smaller and more prone to cracking, so warm them well and roll gently. Gluten-free tortillas work too—just look for ones that are pliable rather than stiff.
How do I keep the roll-ups from unrolling?
Make sure you spread the peanut butter all the way to the edges—it acts like glue to hold everything together. You can also place the roll-up seam-side down on the plate so the weight of the filling keeps it closed. If you’re really worried, a toothpick through the center works perfectly.
Are these healthy enough for a regular snack?
Absolutely! They provide protein, healthy fats, fiber, and natural sugars from fruit. Compared to packaged snacks or sugary treats, these are a fantastic option. Just watch your portion sizes if you’re using extra honey or chocolate additions. For a balanced snack, pair them with some veggies or a glass of milk.
Pin This Recipe!
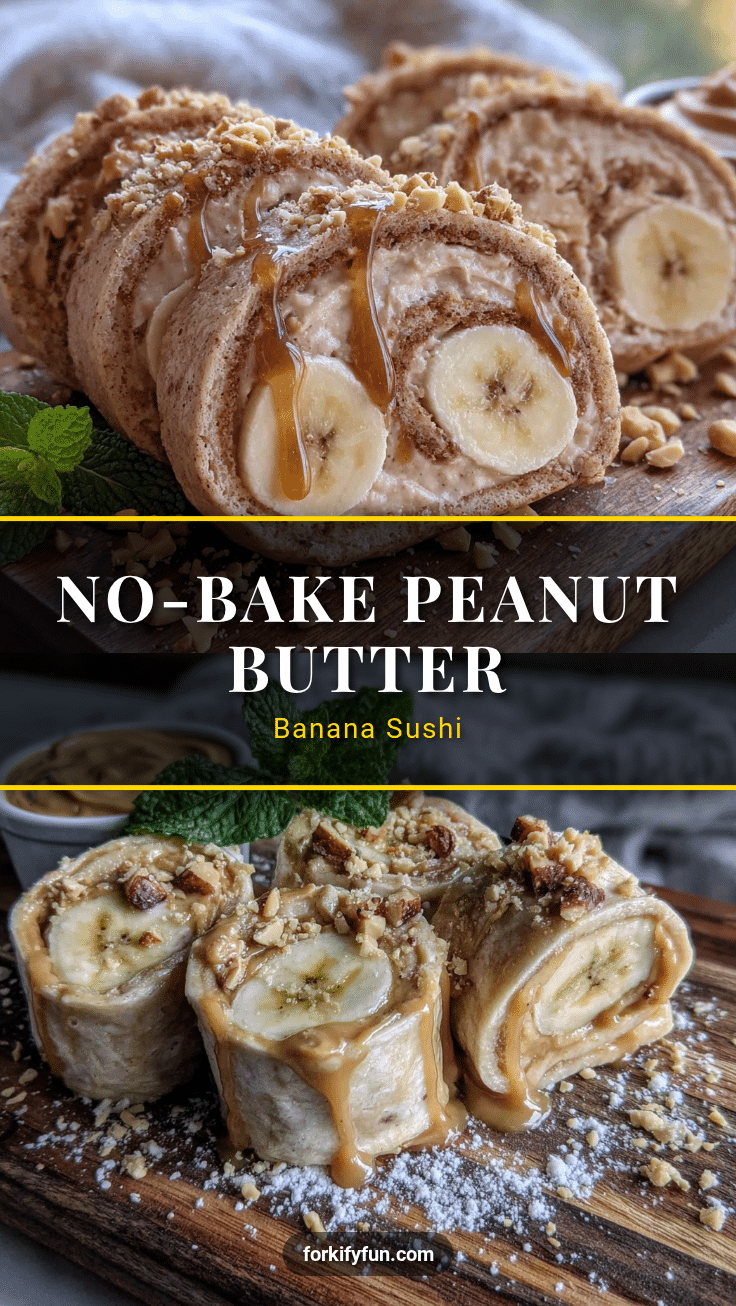
Easy Peanut Butter Banana Sushi Roll-Ups (9-Minute Snack)
These Easy Peanut Butter Banana Sushi Roll-Ups are a quick, fun, and kid-friendly snack made with simple pantry ingredients. Ready in just 9 minutes, they feature creamy peanut butter and sweet banana rolled in a soft tortilla and sliced into cute pinwheels.
- Prep Time: 9 minutes
- Cook Time: 0 minutes
- Total Time: 9 minutes
- Yield: 2 servings 1x
- Category: Snack
- Cuisine: American
Ingredients
- 2 (8-inch) flour tortillas
- 4 tablespoons creamy peanut butter
- 2 ripe bananas
- 1 teaspoon honey (optional)
- 1/4 teaspoon cinnamon (optional)
Instructions
- Soften the tortillas: Warm the tortillas in the microwave for 10-15 seconds wrapped in a damp paper towel, or in a dry skillet for 20 seconds per side, until pliable.
- Spread the peanut butter: Place one warm tortilla flat on a cutting board. Spread 2 tablespoons of peanut butter evenly across the entire surface, leaving a 1/2-inch border around the edge.
- Add the banana: Peel one banana and place it whole near the bottom edge of the tortilla, about 1 inch from the edge. Optionally, slice the banana lengthwise into two halves and place them side by side.
- Drizzle and sprinkle (optional): Drizzle about 1 teaspoon of honey over the banana and sprinkle a light dusting of cinnamon over everything.
- Roll it up tight: Starting from the bottom edge, fold the tortilla over the banana and roll away from you firmly but gently, tucking in the sides if desired.
- Slice into pinwheels: Using a sharp serrated knife, slice the rolled tortilla into 1-inch rounds (about 6-8 pieces per tortilla) using a gentle sawing motion.
- Arrange and serve: Place the pinwheels on a plate with the spiral side facing up. Serve immediately for best texture.
Notes
For lunchboxes, brush banana slices with lemon juice to prevent browning. Assemble whole roll-ups (without slicing) up to an hour ahead, wrap in plastic wrap, and refrigerate. Slice just before serving. For a nut-free version, use sun butter or WowButter. For a vegan version, use maple syrup instead of honey and a vegan-friendly tortilla.
Nutrition
- Serving Size: 1 roll-up (6-8 pinwh
- Calories: 330
- Sugar: 20
- Sodium: 300
- Fat: 15
- Saturated Fat: 3
- Carbohydrates: 48
- Fiber: 6
- Protein: 11
Keywords: peanut butter banana sushi, banana roll-ups, easy snack, kid-friendly snack, 9-minute snack, no-cook snack