By the third time I made this no-churn strawberry shortcake ice cream in a single week, I started wondering if I had a problem. Or maybe just a very delicious solution to the heatwave that had turned my kitchen into a sauna. The first batch was an experiment borne of desperation—I had a pint of heavy cream about to expire, a basket of strawberries that were one day away from sad, and absolutely zero desire to drag out my ice cream maker. The second batch was proof that the first wasn’t a fluke. The third? That was the moment I realized I’d accidentally created something I’d be making every summer for the rest of my life.
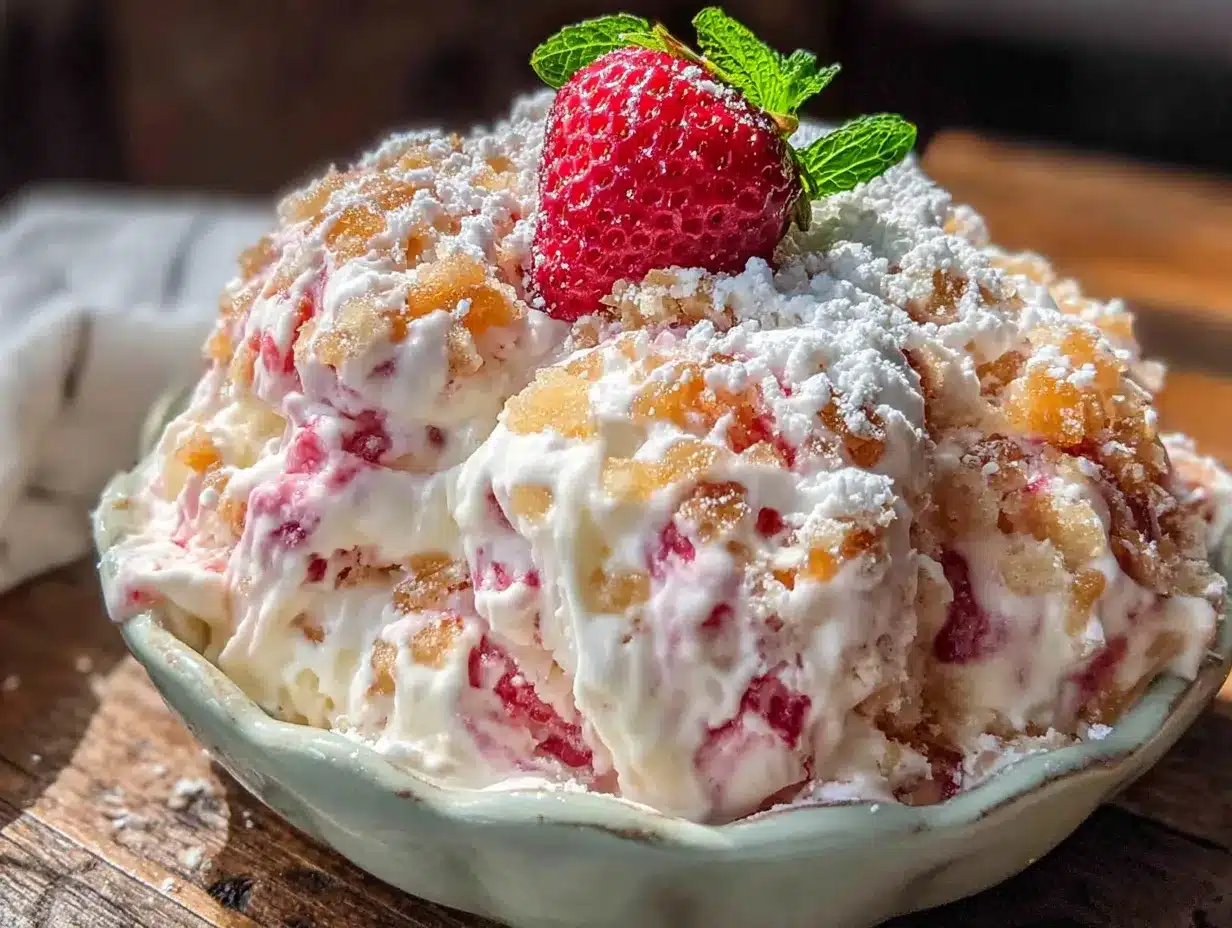
Here’s the thing about this recipe—it doesn’t taste like a shortcut. It doesn’t taste like “oh, that’s cute, she made ice cream without a machine.” It tastes like the real deal. Creamy, rich, with ribbons of sweet strawberry running through vanilla-scented custard and soft, buttery cake pieces that stay tender even after freezing. I honestly wasn’t expecting it to work this well. The texture surprised me. The flavor surprised me. The fact that I didn’t have to babysit a machine for thirty minutes while it churned? That surprised me too.
I’ve made a lot of ice cream over the years, both with and without a machine, and I can tell you this: the no-churn method gets a bad rap sometimes. People think it’s icy or dense. But when you do it right—when you whip the cream to the perfect soft peaks and fold everything together gently—you get something that rivals anything from the store. And when you add crumbled shortbread cookies and macerated strawberries? You get something better. This is the kind of recipe that makes you close the freezer door slowly after scooping a bowl, just to savor the anticipation.
Why You’ll Love This Recipe
Let me be honest with you—I’ve tested this recipe six times in the last month to make sure it was absolutely perfect before sharing it. My family has been very happy taste-testers, and I’ve learned a few things along the way that I’m passing on to you.
- No Ice Cream Maker Required — You don’t need any fancy equipment. Just a mixing bowl and a hand mixer or stand mixer. That’s it.
- Simple Ingredients — Heavy cream, sweetened condensed milk, vanilla, strawberries, and shortbread cookies. You probably already have most of these in your kitchen.
- Ready in Under 15 Minutes — The active prep time is laughably short. The hardest part is waiting for it to freeze.
- Perfect for Summer Entertaining — Make it ahead of time for barbecues, pool parties, or lazy Sunday afternoons. It’s a crowd-pleaser that disappears fast.
- Customizable to Your Taste — Swap the strawberries for raspberries, use different cookies, or add a swirl of chocolate sauce. This recipe is forgiving and flexible.
- Creamy, Not Icy — The sweetened condensed milk works magic here. It prevents ice crystals from forming, giving you a smooth, scoopable texture every time.
I remember the first time I served this at a family gathering. My aunt, who is notoriously picky about desserts, took one bite and asked for the recipe. When I told her there was no churning involved, she didn’t believe me. She actually made me show her the process the next weekend. That’s when I knew this recipe was special—it’s not just good for no-churn ice cream. It’s good ice cream, period.
What Ingredients You Will Need
This recipe uses simple, humble ingredients that come together to create something surprisingly luxurious. The magic is in how they interact—the fat in the cream, the sugar in the condensed milk, the acidity of the strawberries, and the buttery crunch of the cookies. Here’s what you’ll need:
For the Strawberry Swirl
- 2 cups fresh strawberries, hulled and chopped — You can use frozen strawberries in a pinch, but fresh gives you the best texture and flavor. If using frozen, thaw them first and drain off any excess liquid.
- ¼ cup granulated sugar — This helps draw out the strawberries’ natural juices and creates a syrupy swirl. You can adjust this based on how sweet your berries are.
- 1 tablespoon lemon juice — A tiny bit of acid brightens the strawberry flavor and keeps the swirl from tasting flat. Don’t skip it.
For the Ice Cream Base
- 2 cups heavy cream or heavy whipping cream — This needs to be cold. Like, straight-from-the-fridge cold. I’ve made the mistake of using slightly warm cream, and it refused to whip properly. Save yourself the frustration.
- 1 can (14 ounces) sweetened condensed milk — This is the secret weapon of no-churn ice cream. It adds sweetness, creaminess, and prevents ice crystals. I prefer the brand Eagle Brand, but any brand works fine.
- 2 teaspoons vanilla extract — Pure vanilla extract makes a difference here. Imitation vanilla will work, but the flavor won’t be as rich. I’ve used both, and pure is worth the splurge for this recipe.
- Pinch of salt — Just a tiny pinch. It balances the sweetness and enhances all the other flavors.
For the Shortbread Crunch
- 1½ cups crumbled shortbread cookies — I use Walker’s shortbread cookies because they hold their texture beautifully even after freezing. You can also use vanilla wafers, graham crackers, or even crushed pound cake. Just make sure whatever you use isn’t too soft or it will turn to mush.
One thing I’ve learned through my many batches: the quality of your strawberries matters more than you think. I made a batch with pale, out-of-season berries once, and the swirl was more pink than red and lacked that punchy strawberry flavor. Wait for good strawberries, or use frozen ones that were picked at peak ripeness. Your taste buds will thank you.
Equipment Needed
The beauty of this recipe is that you don’t need much. Here’s what you’ll need to have on hand:
- Large mixing bowl — For whipping the cream. Make sure it’s clean and dry. Any trace of grease can prevent the cream from whipping properly.
- Hand mixer or stand mixer — You can whip the cream by hand with a whisk, but your arm will definitely feel it. A hand mixer makes this process quick and easy. I’ve used both my KitchenAid stand mixer and a cheap hand mixer, and both work perfectly.
- Rubber spatula — For folding everything together gently. A metal spoon can deflate the whipped cream, so stick with a spatula.
- Medium saucepan — For cooking down the strawberries into a thick, jammy swirl. A small pot works too.
- Loaf pan or freezer-safe container — A standard 9×5-inch loaf pan works perfectly. You can also use a wide, shallow container if you want the ice cream to freeze faster.
- Parchment paper or plastic wrap — For covering the surface of the ice cream to prevent freezer burn.
- Cutting board and knife — For hulling and chopping the strawberries.
If you don’t have a hand mixer, you can absolutely whip the cream by hand. It takes about 5-7 minutes of vigorous whisking, but it’s a great arm workout. I’ve done it before when my mixer was in the dishwasher, and honestly, it’s not that bad. Just make sure your cream is very cold.
Preparation Method
Alright, let’s make some ice cream. I’ll walk you through every step so you don’t miss a thing.
Step 1: Macerate the Strawberries
In a medium bowl, combine the chopped strawberries, granulated sugar, and lemon juice. Stir gently to coat all the berries. Let them sit at room temperature for about 20-30 minutes. You’ll notice the strawberries start releasing their juices—that’s exactly what we want. The sugar draws out the natural liquid, creating a syrupy mixture that will become our swirl.
While the strawberries are macerating, I usually take a moment to crumble my shortbread cookies. I put them in a zip-top bag and gently crush them with a rolling pin. You want a mix of smaller crumbs and slightly larger pieces—about the size of peas. Too fine and they’ll disappear into the ice cream; too large and they’ll be hard to scoop.
Step 2: Cook the Strawberry Swirl
After the strawberries have released their juices, transfer them to a medium saucepan. Cook over medium heat, stirring occasionally, for about 8-10 minutes. The mixture will bubble and thicken. You’re looking for a jammy consistency—thick enough that it coats the back of a spoon but still pourable.
Here’s a tip I learned from a batch that turned out too runny: don’t overcook it. You want it to be thick, but if you cook it too long, it will become stiff and hard to swirl into the ice cream. Remove it from the heat when it’s still slightly loose—it will continue to thicken as it cools.
Let the strawberry mixture cool completely before using. I usually pour it into a small bowl and pop it in the fridge for about 30 minutes. You can even make this a day ahead and keep it refrigerated.
Step 3: Whip the Cream
In a large mixing bowl, pour the cold heavy cream. Using a hand mixer or stand mixer fitted with the whisk attachment, beat the cream on medium-high speed until soft peaks form. This usually takes about 3-4 minutes. You’ll know it’s ready when the cream holds its shape when you lift the beaters, but the peaks droop slightly at the tips.
Be careful not to overwhip. I’ve done this before—you walk away for thirty seconds and suddenly you have butter. If you see the cream starting to look grainy or separated, stop immediately. You can still salvage it by gently folding in a little more cold cream, but it’s better to stop early than late.
Step 4: Combine the Base
In a separate medium bowl, whisk together the sweetened condensed milk, vanilla extract, and pinch of salt until smooth. This only takes about 30 seconds. The mixture should be thick and pale yellow.
Now, gently fold the sweetened condensed milk mixture into the whipped cream. Use a rubber spatula and fold from the bottom up, rotating the bowl as you go. Be gentle—you don’t want to deflate all that air you just whipped into the cream. Fold until just combined, with no visible streaks of white or yellow. The mixture should be light, airy, and uniform in color.
Step 5: Layer and Swirl
Take your loaf pan or freezer-safe container. Spread about one-third of the ice cream base evenly across the bottom. Drizzle about one-third of the cooled strawberry mixture over the top. Sprinkle about one-third of the crumbled shortbread cookies over that. Use a knife or skewer to gently swirl everything together—just a few figure-eight motions. You don’t want to fully mix it; you want distinct ribbons of strawberry and pockets of cookie throughout.
Repeat this process two more times: another layer of ice cream base, strawberry swirl, cookie crumbs, and a gentle swirl. Finish with the remaining ice cream base on top, and if you have any leftover strawberry mixture or cookie crumbs, scatter them on top for a pretty finish.
Step 6: Freeze
Cover the pan tightly with plastic wrap or parchment paper, pressing it directly onto the surface of the ice cream to prevent ice crystals from forming. Place it in the freezer for at least 6 hours, but preferably overnight. I know the waiting is the hardest part, but trust me, it’s worth it.
The ice cream will be perfectly scoopable after about 6 hours. If you freeze it for longer (like a day or two), let it sit at room temperature for 5-10 minutes before scooping to soften slightly.
Cooking Tips & Techniques
After making this recipe more times than I care to count, I’ve picked up a few tricks that make a real difference. Here are my best tips for success:
- Keep everything cold. Your cream, your bowl, even your beaters—cold is key for whipping cream properly. I sometimes pop my mixing bowl in the freezer for 10 minutes before starting.
- Don’t skip the maceration step. Letting the strawberries sit with sugar isn’t just about sweetness. It draws out their natural pectin, which helps thicken the swirl and prevents it from making the ice cream icy.
- Cool the strawberry mixture completely. If you add warm strawberry swirl to your whipped cream base, it will melt the cream and deflate all that air. Trust me, I learned this the hard way. Patience is your friend here.
- Use a light hand when swirling. Too much stirring and you’ll end up with pink ice cream instead of beautiful ribbons. Just a few gentle figure-eights are enough.
- Press plastic wrap onto the surface. This isn’t just for show—it prevents freezer burn and keeps the ice cream creamy. The less air exposure, the better.
- Let it sit before scooping. No-churn ice cream freezes harder than churned ice cream because it has less air incorporated. Letting it sit at room temperature for 5-10 minutes makes scooping much easier.
One mistake I made early on was using strawberries that were too watery. I didn’t cook them down enough, and the excess moisture created ice crystals in the finished ice cream. If your strawberries are particularly juicy, cook the swirl for an extra 2-3 minutes to evaporate more liquid. You want it thick and jammy, not runny.
Variations & Adaptations
This recipe is incredibly versatile. Here are some of my favorite variations I’ve tried over the past few weeks:
- Mixed Berry Shortcake — Swap half the strawberries for raspberries or blueberries. The combination of berries creates a beautiful color and even more complex flavor.
- Chocolate-Dipped Strawberry — Add ½ cup of finely chopped dark chocolate along with the cookie crumbs. The chocolate chunks freeze beautifully and taste amazing with the strawberry swirl.
- Vegan Version — Use full-fat coconut cream (chilled overnight) in place of heavy cream, and use a dairy-free sweetened condensed coconut milk. The texture won’t be exactly the same, but it’s still delicious and creamy.
- Gluten-Free Option — Use gluten-free shortbread cookies or gluten-free vanilla wafers. Most store-bought shortbread cookies contain wheat, so check the label carefully.
- Lemon Strawberry — Add the zest of one lemon to the sweetened condensed milk mixture. The lemon brightens the strawberry flavor and adds a lovely freshness.
I personally love the lemon strawberry variation. I made it for a summer barbecue last week, and everyone kept asking what made it taste so fresh. The lemon zest doesn’t overpower—it just makes everything taste more like itself. It’s a small change that makes a big difference.
Serving & Storage Suggestions
This ice cream is best served straight from the freezer with a slight soften. Here’s how I like to serve it:
- Serving Temperature — Let the ice cream sit at room temperature for 5-10 minutes before scooping. This makes it creamy and easy to portion.
- Presentation — Scoop into bowls and top with fresh sliced strawberries, a drizzle of honey, and an extra crumble of shortbread cookies. A sprig of mint adds a pop of color.
- Pairings — This ice cream is amazing on its own, but it also pairs beautifully with fresh peach cream cheese danishes for a summer dessert board. You could also serve it alongside warm brown sugar peach cobbler for a double-fruit dessert situation.
- Storage — Keep the ice cream in an airtight container in the freezer for up to 2 weeks. After that, the texture may start to get icy. I’ve never had a batch last that long though—it always disappears first.
- Reheating — There’s no reheating here, but if the ice cream is too hard to scoop, microwave the container for 10-15 seconds to soften it slightly. Don’t overdo it or you’ll melt the edges.
The flavors actually develop and deepen after a day or two in the freezer. The strawberry swirl becomes more pronounced, and the cookie pieces soften slightly into little cake-like pockets. It’s almost better on day two. Almost.
Nutritional Information & Benefits
Let’s be real—this is a treat, not a health food. But that doesn’t mean it can’t fit into a balanced lifestyle. Here’s the estimated nutritional breakdown per serving (based on 8 servings):
| Nutrient | Amount Per Serving |
|---|---|
| Calories | 385 |
| Total Fat | 24g |
| Saturated Fat | 15g |
| Cholesterol | 85mg |
| Sodium | 120mg |
| Total Carbohydrates | 40g |
| Dietary Fiber | 1g |
| Sugars | 32g |
| Protein | 4g |
Strawberries are a great source of vitamin C and antioxidants, while the heavy cream provides calcium and vitamin A. The shortbread cookies? Well, they provide joy. And that counts for something. If you’re looking for a lighter option, you can use reduced-fat sweetened condensed milk and swap half the heavy cream for whole milk, though the texture won’t be as rich.
This recipe contains dairy and gluten. For a dairy-free version, see the variations section above. For a gluten-free version, use certified gluten-free shortbread cookies.
Conclusion
This no-churn strawberry shortcake ice cream has become my go-to summer dessert, and I have a feeling it’ll become yours too. It’s the kind of recipe that feels special enough for company but simple enough for a random Tuesday night when you just need something sweet. The creamy vanilla base, the jammy strawberry swirl, the buttery cookie crunch—every spoonful has a little bit of everything.
I love that this recipe doesn’t require any special equipment or techniques. It’s just good ingredients treated with a little care and patience. And honestly? It tastes better than most store-bought ice cream I’ve had. There’s something about making it yourself that makes it taste even better.
I’d love to hear how yours turns out. Did you try a variation? Did you add something unexpected? Drop a comment below and let me know. And if you’re looking for more no-churn ice cream inspiration, you might enjoy my creamy no-churn salted caramel ice cream or these strawberry shortcake ice cream bars for a fun twist. Happy scooping!
Frequently Asked Questions
Can I use frozen strawberries instead of fresh?
Yes, you can use frozen strawberries. Thaw them first and drain off any excess liquid before macerating. Frozen berries tend to be more watery, so you may need to cook the swirl for an extra 2-3 minutes to thicken it properly.
How long does this ice cream need to freeze?
At least 6 hours, but overnight is best. The longer it freezes, the firmer and more scoopable it becomes. If you’re in a hurry, you can spread the mixture in a wide, shallow dish to speed up freezing.
Can I use a different type of cookie?
Absolutely! Vanilla wafers, graham crackers, digestive biscuits, or even crushed pound cake all work beautifully. Just avoid very soft cookies like Oreo cream centers, as they can turn mushy. I’ve used shortbread, and it’s my favorite for its buttery flavor and firm texture.
Why did my ice cream turn out icy?
Icy ice cream usually means too much water content. This can happen if your strawberry swirl wasn’t cooked down enough, or if you didn’t press plastic wrap onto the surface before freezing. Make sure to cook the strawberries until thick and jammy, and always cover the surface directly to prevent ice crystals.
Can I make this recipe in an ice cream maker?
You can, but you’ll need to adjust the method. Skip the whipped cream step and simply whisk all the ingredients together (except the strawberries and cookies), then churn according to your machine’s instructions. Fold in the strawberry swirl and cookie crumbs after churning. The texture will be slightly different—more traditional ice cream texture—but still delicious.
Pin This Recipe!
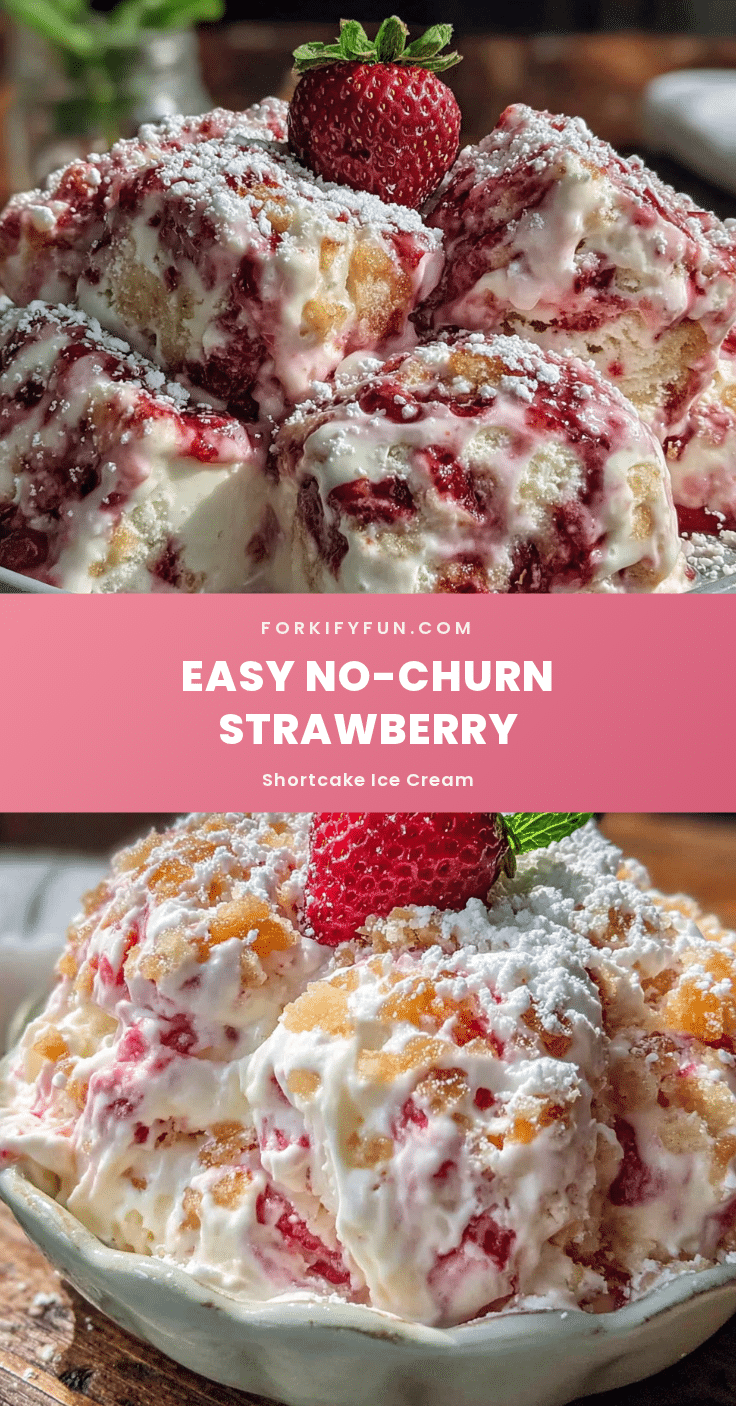
Easy No-Churn Strawberry Shortcake Ice Cream Recipe
This no-churn strawberry shortcake ice cream is creamy, rich, and packed with ribbons of sweet strawberry, vanilla-scented custard, and buttery shortbread pieces. No ice cream maker required, and it’s ready in under 15 minutes of active prep.
- Prep Time: 15 minutes
- Cook Time: 10 minutes
- Total Time: 6 hours 25 minutes (including freezing)
- Yield: 8 servings 1x
- Category: Dessert
- Cuisine: American
Ingredients
- 2 cups fresh strawberries, hulled and chopped
- ¼ cup granulated sugar
- 1 tablespoon lemon juice
- 2 cups heavy cream or heavy whipping cream
- 1 can (14 ounces) sweetened condensed milk
- 2 teaspoons vanilla extract
- Pinch of salt
- 1½ cups crumbled shortbread cookies
Instructions
- In a medium bowl, combine the chopped strawberries, granulated sugar, and lemon juice. Stir gently and let sit at room temperature for 20-30 minutes to macerate.
- Transfer the macerated strawberries to a medium saucepan. Cook over medium heat, stirring occasionally, for 8-10 minutes until the mixture thickens to a jammy consistency. Let cool completely (about 30 minutes in the fridge).
- In a large mixing bowl, beat the cold heavy cream with a hand mixer or stand mixer on medium-high speed until soft peaks form, about 3-4 minutes.
- In a separate medium bowl, whisk together the sweetened condensed milk, vanilla extract, and pinch of salt until smooth.
- Gently fold the sweetened condensed milk mixture into the whipped cream using a rubber spatula until just combined and uniform in color.
- In a loaf pan or freezer-safe container, spread one-third of the ice cream base. Drizzle one-third of the cooled strawberry mixture over the top, then sprinkle one-third of the crumbled shortbread cookies. Use a knife or skewer to gently swirl. Repeat layers two more times, finishing with the remaining ice cream base.
- Cover the pan tightly with plastic wrap or parchment paper, pressing it directly onto the surface of the ice cream. Freeze for at least 6 hours, preferably overnight.
- Before serving, let the ice cream sit at room temperature for 5-10 minutes to soften slightly for easier scooping.
Notes
Keep everything cold for best results. Cool the strawberry mixture completely before adding to the whipped cream. Use a light hand when swirling to maintain distinct ribbons. Press plastic wrap onto the surface to prevent freezer burn. Let the ice cream sit at room temperature before scooping for easier serving.
Nutrition
- Serving Size: 1 serving (about 1/2
- Calories: 385
- Sugar: 32
- Sodium: 120
- Fat: 24
- Saturated Fat: 15
- Carbohydrates: 40
- Fiber: 1
- Protein: 4
Keywords: no-churn ice cream, strawberry shortcake, summer dessert, easy ice cream, homemade ice cream