My six-year-old announced on a Tuesday afternoon that he was “the worm king” and proceeded to shove a gummy worm into a cup of chocolate pudding with such ceremonial seriousness that I had to stop chopping vegetables and just watch. He wasn’t eating it, you see. He was building a kingdom. And when he took that first bite, chocolate smeared across his cheek, he looked up and said, “Mom, this is the best thing you ever made.” I hadn’t even made anything. I’d just handed him a package of Oreos and some pudding mix. But in his eyes, I was a Halloween hero. That’s the thing about these easy no-bake Halloween Oreo dirt cups with gummy worms. They don’t require a lot from you. They don’t ask for fancy techniques or a clean kitchen. They just show up, look creepy-cute, and let everyone build their own little world of chocolate and worms. Honestly, I think that’s why they work so well. It’s not about impressing anyone. It’s about handing someone a spoon and watching their imagination take over.
These dirt cups have become our go-to for Halloween parties, classroom treats, and even just a regular Tuesday when the October energy feels extra spooky. They come together in about fifteen minutes of actual work, and the rest is just fridge time. No oven, no mixer, no stress. Just layers of crushed Oreos, creamy chocolate pudding, and those wiggly little gummy worms peeking out like they’re trying to escape. And if you’re worried about making them look good, don’t be. The messier they look, the more they look like actual dirt. That’s my kind of recipe. One where perfection is just a happy accident.
So whether you’re hosting a Halloween bash, sending treats to school, or just looking for a fun project to do with little hands that want to help, these dirt cups deliver. They’re the kind of recipe that makes you feel like you’ve got it together, even when you’re just winging it. And that’s a pretty good feeling to have.
Why You’ll Love This Recipe
I have made a lot of Halloween treats over the years. Some of them were gorgeous. Some of them were disasters. These dirt cups are the ones I keep coming back to, and here’s why.
- No oven required. Seriously. No baking, no boiling, no standing over a hot stove. If you can stir and crush, you can make these.
- Kid-friendly from start to finish. My kids help crush the Oreos (in a bag with a rolling pin, which is very therapeutic), stir the pudding, and poke the worms into the cups. It’s a whole activity, not just a dessert.
- Perfect for Halloween parties. They look spooky and fun, but they’re not overly sweet or complicated. Kids love them, and adults sneak them when nobody’s looking.
- Easy to customize. You can make them ahead, swap out the pudding flavor, add extra toppings, or even turn them into a healthier version if that’s your thing.
- Minimal cleanup. A few bowls, a spoon, and some cups. That’s it. No baking sheets to scrub or frosting to scrape off the counter.
I’ve tested this recipe with different pudding brands, different Oreo knockoffs, and even different types of gummy worms. The version I’m sharing today is the one that got the most “can I have another?” requests from actual kids. And honestly, that’s the only test that matters.
What Ingredients You Will Need
This recipe uses simple, store-bought ingredients that you can find at any grocery store. No specialty baking aisles, no obscure extracts, nothing that requires a trip to three different stores. Here’s what you need:
- 1 package (3.9 oz) instant chocolate pudding mix — I use Jell-O brand because it’s reliable and sets up perfectly every time. You can also use sugar-free if you want to cut down on sugar.
- 2 cups cold milk — Whole milk gives the creamiest texture, but 2% or even oat milk works fine. Just don’t use skim, it makes the pudding a little thin.
- 1 package (14.3 oz) Oreo cookies — Regular Oreos are best because the cream filling helps the crumbs stick together. You can use Double Stuf if you want extra creaminess, but regular works just fine.
- 1 package gummy worms — Get the sour ones if you want a tangy contrast to the sweet pudding. I like the Trolli brand because they’re extra wiggly and colorful.
- Optional: whipped topping — A dollop of Cool Whip or homemade whipped cream on top adds a nice cloud-like layer before the Oreo crumbs. Totally optional, but highly recommended.
- Optional: Halloween sprinkles or candy eyes — For extra spooky decoration. My kids love adding little candy eyeballs to the worms.
That’s it. Six ingredients, and you probably already have the milk and maybe even the Oreos in your pantry. The gummy worms are the only thing I ever have to specifically buy for this recipe, and they’re worth it for the look on a kid’s face when they see a worm poking out of their pudding.
Equipment Needed
You don’t need any fancy equipment for this recipe. Here’s what you’ll need:
- Mixing bowls — One for the pudding, one for crushing the Oreos. Medium-sized bowls work best.
- Whisk or electric mixer — A whisk works fine, but an electric mixer makes the pudding come together faster and smoother. I usually just whisk by hand because it’s easier to clean.
- Measuring cups — For the milk. A liquid measuring cup is best.
- Ziploc bag and rolling pin — For crushing the Oreos. You can also use a food processor, but the bag-and-rolling-pin method is more fun and lets kids help.
- Small cups or jars — I use 8-ounce clear plastic cups so you can see the layers. Mason jars work great too, and they’re reusable. Shot glasses are fun for mini versions at parties.
- Spoon or spatula — For layering the pudding and crumbs.
If you don’t have a rolling pin, a heavy skillet or even a wine bottle works. I’ve used a can of beans in a pinch. The goal is just to get those Oreos into fine crumbs.
Preparation Method
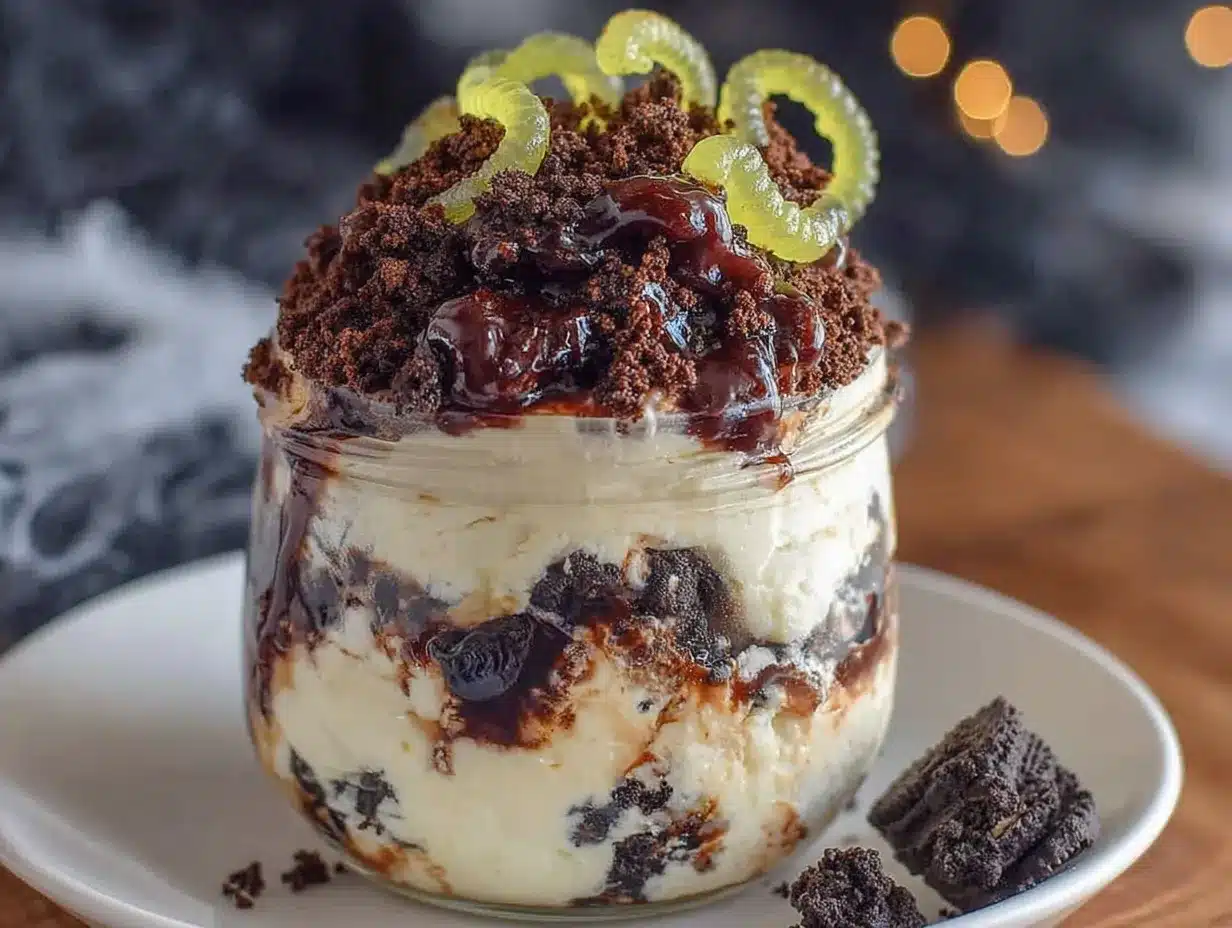
This is the easy part. Follow these steps, and you’ll have dirt cups ready to chill in no time.
- Make the chocolate pudding. In a medium bowl, whisk together the instant pudding mix and 2 cups of cold milk. Whisk for about 2 minutes until it starts to thicken. If you’re using an electric mixer, go low and slow to avoid splashing. The pudding will be thin at first, then suddenly it’ll thicken up. That’s your cue to stop. Set it aside to set for about 5 minutes.
- Crush the Oreos. Place the entire package of Oreos (cream filling and all) into a large Ziploc bag. Seal it, squeeze out the air, and then go to town with a rolling pin. You want a mix of fine crumbs and some slightly chunkier pieces. It gives the “dirt” texture more depth. If you have kids, let them do this part. It’s loud and messy and they love it.
- Layer the cups. Start with a layer of Oreo crumbs at the bottom of each cup. About 2 tablespoons per cup. Then add a layer of chocolate pudding, about 3 tablespoons. Repeat with another layer of Oreo crumbs. If you’re using whipped topping, add a thin layer between the pudding and the top crumbs. It adds a nice creamy surprise.
- Add the gummy worms. Before you add the final layer of Oreo crumbs, poke a few gummy worms into the pudding so they’re sticking out at different angles. Then sprinkle the top with more Oreo crumbs, leaving the worms peeking out. It should look like they’re crawling out of the dirt.
- Chill. Place the cups in the refrigerator for at least 1 hour. This allows the pudding to fully set and the Oreo crumbs to soften slightly, which gives that real dirt-like texture. Overnight is even better if you have the time.
- Decorate and serve. Right before serving, add a few extra gummy worms on top, maybe some Halloween sprinkles or candy eyes. Serve cold and watch them disappear.
A quick note: if you’re making these for a party, you can assemble them up to 24 hours in advance. Just wait to add the extra gummy worms on top until right before serving so they stay bright and chewy.
Cooking Tips & Techniques
I’ve made these dirt cups more times than I can count, and I’ve learned a few things along the way. Here are my best tips:
- Don’t overmix the pudding. Instant pudding sets quickly. Once it thickens, stop mixing. Overmixing can make it grainy or too stiff.
- Crush the Oreos in stages. If you crush them all at once, you’ll end up with dust. I like to crush them until they’re mostly fine crumbs with a few bigger chunks. It looks more like real dirt.
- Use clear cups. The whole point of dirt cups is seeing the layers. Clear plastic cups or mason jars show off the stripes of pudding and crumbs. It’s part of the fun.
- Let the kids go wild with the worms. I used to carefully position the gummy worms so they looked “perfect.” Then I let my kids do it, and they shoved worms in at all angles, some upside down, some half-buried. It looked way better than anything I could have planned. Embrace the chaos.
- Make a test batch. If you’re unsure about the texture, make one cup first and let it chill for an hour. Taste it, adjust the ratios, and then make the rest. It saves you from ending up with 12 cups of something you don’t love.
- Double-check your pudding mix. Some instant pudding mixes require different amounts of milk. Always check the box before you start. I once used a larger box and ended up with soup. It was a sad day.
One mistake I made early on was adding the gummy worms on top of the final Oreo layer instead of poking them into the pudding. They just sat there looking sad. Poking them in makes them look alive, which is the whole point.
Variations & Adaptations
This recipe is incredibly flexible. Here are some ways to change it up:
- Make it gluten-free. Use gluten-free chocolate sandwich cookies (like Glutino or Kinnikinnick) and check your pudding mix label. Most instant pudding is gluten-free, but always double-check.
- Make it dairy-free. Use almond milk, oat milk, or coconut milk for the pudding. Just know that the texture might be slightly less creamy. Also use dairy-free whipped topping if you want that extra layer.
- Swap the pudding flavor. Vanilla or butterscotch pudding works great. It gives the dirt cups a different vibe, but it’s still delicious. My kids actually prefer vanilla because it reminds them of ice cream.
- Add a cheesecake layer. Mix 4 oz of softened cream cheese with 1/4 cup powdered sugar and fold in 1 cup of whipped topping. Layer it between the pudding and the Oreo crumbs. It’s decadent and so good.
- Try a different candy. Gummy spiders, candy corn, or even small chocolate pumpkins can replace the gummy worms. Just make sure they’re small enough to fit in the cups.
- Make mini dirt cups. Use shot glasses or small paper cups for a party. They’re perfect for little hands and look adorable lined up on a tray.
I once made a version with crushed graham crackers instead of Oreos and added a layer of caramel sauce. It was basically a s’mores dirt cup, and it was incredible. Don’t be afraid to experiment.
Serving & Storage Suggestions
These dirt cups are best served cold, straight from the fridge. The contrast between the cold pudding and the slightly softened Oreo crumbs is what makes them so satisfying.
For presentation, I like to arrange them on a platter or tray with extra gummy worms scattered around. You can also add a few Halloween-themed napkins or a spooky tablecloth. If you’re serving them at a party, label them “Worm Habitat” or “Dirt Cups” for a fun touch.
Storage is simple. Cover each cup with plastic wrap or a lid and refrigerate for up to 3 days. The Oreo crumbs will soften over time, which actually makes them taste more like real dirt. Some people prefer that texture. I do.
If you want to make them ahead for a party, assemble them the day before and add the extra gummy worms on top just before serving. This keeps the worms bright and chewy instead of getting soggy.
These dirt cups also work great for lunchboxes. Just pack them in a small container with a spoon, and your kid will be the most popular person at the lunch table. Trust me on that one.
Nutritional Information & Benefits
Let’s be honest: these are a treat, not a health food. But here’s the breakdown so you know what you’re working with. Per serving (one 8-ounce cup, assuming 6 servings per batch):
- Calories: Approximately 320
- Fat: 14g
- Carbohydrates: 48g
- Sugar: 34g
- Protein: 5g
- Fiber: 2g
If you use sugar-free pudding and reduced-fat Oreos, you can cut the sugar and fat by about a third. It won’t taste quite as indulgent, but it’s still pretty good.
On the plus side, the milk adds calcium and protein, and the Oreos bring a little bit of iron. The gummy worms? They’re just for fun. And honestly, sometimes that’s the most important ingredient of all.
These dirt cups are vegetarian and can easily be made gluten-free or dairy-free with the right substitutions. They’re not suitable for vegans unless you use plant-based milk and dairy-free pudding, but the Oreos themselves are actually vegan-friendly.
Conclusion
These easy no-bake Halloween Oreo dirt cups with gummy worms are the kind of recipe that makes you look like a hero with almost no effort. They’re fun to make, even more fun to eat, and they bring a little bit of Halloween magic to any table. Whether you’re making them for a classroom party, a family gathering, or just a quiet Tuesday night when you need something sweet, they deliver every time.
I love that this recipe lets kids be part of the process. Crushing Oreos, poking worms into pudding, arranging the cups just so—it’s a memory in the making. And honestly, that’s what cooking is really about. Not perfection, but connection.
So go ahead and grab a package of Oreos, some gummy worms, and a few cups. Make a mess. Have fun. And when someone takes that first bite and smiles, you’ll know exactly why this recipe is a keeper. If you try them, I’d love to hear how they turned out. Drop a comment below or tag me in your photos. Happy Halloween, and happy snacking!
Frequently Asked Questions
Can I make these dirt cups ahead of time?
Yes! You can assemble them up to 24 hours in advance. Just wait to add the extra gummy worms on top until right before serving so they stay bright and chewy.
Can I use homemade pudding instead of instant?
You can, but the texture will be different. Homemade pudding is usually thinner and won’t set as firmly. If you use it, you might need to let it chill longer before layering.
What if I don’t have Oreos?
Any chocolate sandwich cookie will work. You can also use chocolate graham crackers or even chocolate wafer cookies. The flavor will be slightly different, but still delicious.
Can I use sugar-free pudding?
Absolutely. Sugar-free instant pudding works just fine. Just follow the package directions for the milk amount, as it can vary by brand.
How do I keep the gummy worms from getting soggy?
Poke them into the pudding layer rather than the Oreo crumbs, and add the top layer of worms right before serving. This keeps them chewy and bright instead of soft and sticky.
Pin This Recipe!
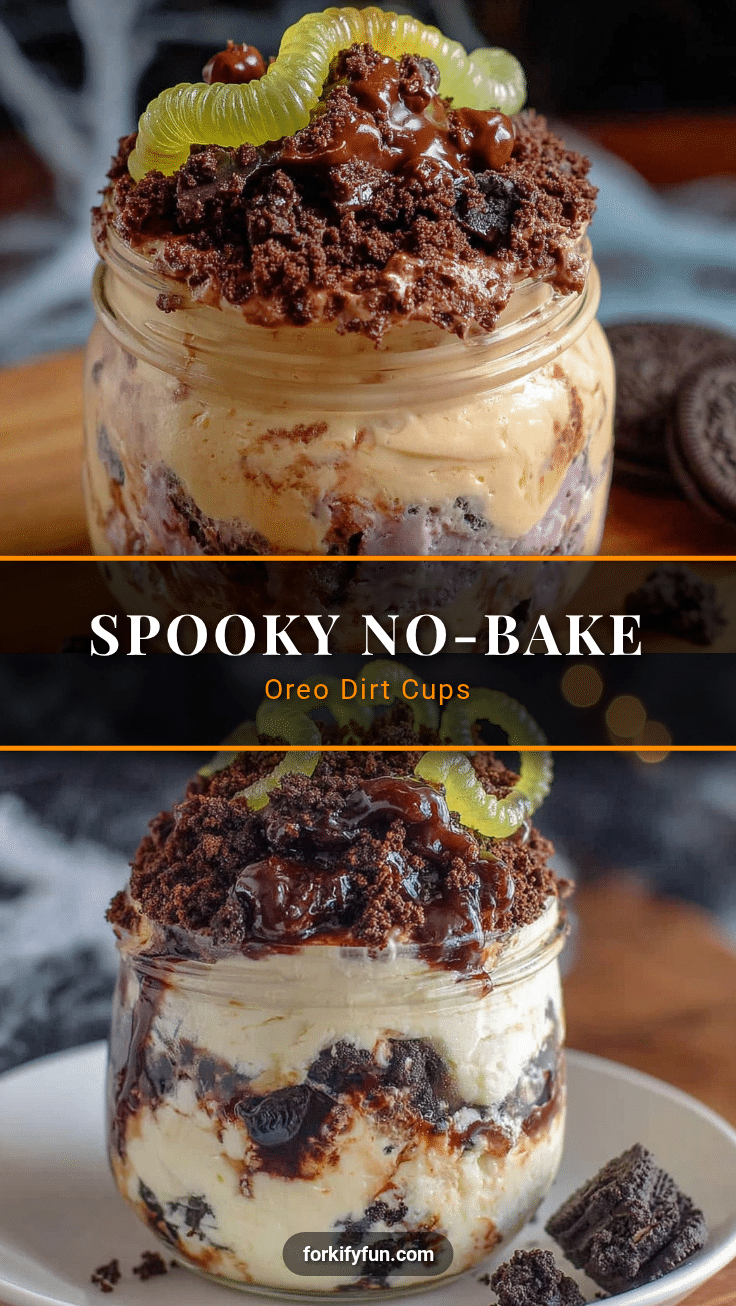
Easy No-Bake Halloween Oreo Dirt Cups
These easy no-bake Halloween Oreo dirt cups with gummy worms are a fun, kid-friendly treat that comes together in about 15 minutes. Layers of crushed Oreos, creamy chocolate pudding, and gummy worms create a spooky dessert perfect for Halloween parties or a fun family activity.
- Prep Time: 15 minutes
- Cook Time: 0 minutes
- Total Time: 1 hour 15 minutes (includes chilling time)
- Yield: 6 servings 1x
- Category: Dessert
- Cuisine: American
Ingredients
- 1 package (3.9 oz) instant chocolate pudding mix
- 2 cups cold milk
- 1 package (14.3 oz) Oreo cookies
- 1 package gummy worms
- Optional: whipped topping (e.g., Cool Whip or homemade whipped cream)
- Optional: Halloween sprinkles or candy eyes
Instructions
- Make the chocolate pudding: In a medium bowl, whisk together the instant pudding mix and 2 cups of cold milk. Whisk for about 2 minutes until it starts to thicken. Set aside to set for about 5 minutes.
- Crush the Oreos: Place the entire package of Oreos (cream filling and all) into a large Ziploc bag. Seal it, squeeze out the air, and crush with a rolling pin until you have a mix of fine crumbs and some slightly chunkier pieces.
- Layer the cups: Start with a layer of Oreo crumbs at the bottom of each cup (about 2 tablespoons). Add a layer of chocolate pudding (about 3 tablespoons). Repeat with another layer of Oreo crumbs. If using whipped topping, add a thin layer between the pudding and the top crumbs.
- Add the gummy worms: Before adding the final layer of Oreo crumbs, poke a few gummy worms into the pudding so they stick out at different angles. Sprinkle the top with more Oreo crumbs, leaving the worms peeking out.
- Chill: Place the cups in the refrigerator for at least 1 hour (overnight is even better).
- Decorate and serve: Right before serving, add a few extra gummy worms on top, and optionally add Halloween sprinkles or candy eyes. Serve cold.
Notes
Don’t overmix the pudding. Crush Oreos in stages for varied texture. Use clear cups to show layers. Let kids help with crushing and poking worms. Make a test batch if unsure. Check pudding mix box for milk amount. For best results, add extra gummy worms on top just before serving to keep them chewy.
Nutrition
- Serving Size: 1 cup (8 ounces)
- Calories: 320
- Sugar: 34
- Fat: 14
- Carbohydrates: 48
- Fiber: 2
- Protein: 5
Keywords: Halloween, dirt cups, Oreo, no-bake, gummy worms, chocolate pudding, kid-friendly, easy dessert


