That first bite—the soft, buttery roll giving way to salty ham and that ribbon of melted cheese—still takes me straight back to the preschool pickup line. I was desperate, honestly. My son, Leo, had just started a new school, and the lunchbox pressure was real. Everything I sent came back half-eaten, a sad little Tupperware tomb of rejected crusts and untouched fruit. I needed something that felt like a treat but wouldn’t cause a meltdown at the table. Something he could actually manage with his tiny, still-learning-to-use-a-fork hands. That’s when the idea of mini ham and cheese sliders hit me like a little, savory lightbulb. They’re not just a sandwich; they’re a secret weapon for anyone staring down the preschool lunch challenge.
These aren’t your average, sad, dry sandwiches. We’re talking about gloriously soft Hawaiian rolls, split and loaded with layers of thinly sliced ham and gooey Swiss cheese, all baked together in a single pan until the tops are glossy and the cheese is a stringy, molten dream. The magic is in the sauce—a simple brush of melted butter, Dijon mustard, a whisper of poppy seeds, and a tiny pinch of onion powder that bakes into a golden, flavorful crust. It turns a humble slider into something you’d want to sneak from the pan yourself. And the best part? You can assemble the whole tray the night before, which is a game-changer for those chaotic school mornings. This recipe has become our go-to, not just for lunchboxes, but for playdates, quick dinners, and even weekend snacking. It’s the kind of easy win that makes you feel like you’ve got this whole parenting thing figured out, even if just for one meal.
Why You’ll Love These Easy Mini Ham and Cheese Sliders for Preschool Lunch
Let’s be real—finding a lunch that’s both kid-approved and parent-approved feels like a small miracle. These sliders check every box. They’re fast to throw together, use super simple ingredients you can grab on any grocery run, and the taste is honestly next-level. I’ve tested this method more times than I can count (and had a few burnt-butter disasters along the way), so you can trust this is the best version.
- Quick & Easy: From start to finish, these sliders take about 20 minutes of hands-on time. Pop them in the oven, and 15 minutes later, you have a warm, satisfying meal. Perfect for busy weeknights or last-minute lunch prep.
- Simple Ingredients: No fancy grocery trips needed. You likely already have the butter and mustard in your fridge. The ham, cheese, and rolls are pantry staples that are easy to keep on hand.
- Perfect for Preschool Lunches: They’re the ideal size for little hands. No crusts to fight over, no messy fillings sliding out. They hold up beautifully in a lunchbox, even after a few hours.
- Crowd-Pleaser: I’ve made these for playdates and preschool parties, and they are always the first thing to disappear. Kids and adults alike go crazy for that buttery, savory flavor.
- Unbelievably Delicious: The texture is everything. You get that soft, slightly sweet roll, the salty ham, the creamy melted cheese, and that irresistible buttery, tangy top. It’s pure comfort food in a tiny package.
This isn’t just another sandwich recipe. The secret is in the bake. By assembling them in a single pan and brushing them with that seasoned butter, you create a cohesive, warm, and gooey experience that a cold, slapped-together sandwich just can’t match. It’s comfort food reimagined for the lunchbox—faster, smarter, but with the same soul-soothing satisfaction that makes you close your eyes after the first bite. Perfect for impressing your picky eater without any stress, or turning a simple lunch into something they’ll actually look forward to.
What Ingredients You Will Need
This recipe uses simple, wholesome ingredients to deliver bold flavor and satisfying texture without the fuss. Everything is easy to find and most are probably in your kitchen right now.
- 12-count package Hawaiian Sweet Rolls (like King’s Hawaiian) — These are non-negotiable for the best texture. Their soft, slightly sweet flavor is the perfect base. Don’t try to substitute with regular dinner rolls; they just aren’t the same.
- 1/2 pound thinly sliced deli ham — I prefer a good quality honey ham or black forest ham. Ask for it shaved or very thinly sliced at the deli counter. It layers better and melts into the cheese.
- 6-8 slices Swiss cheese — Swiss is classic for a reason. Its nutty, mild flavor melts beautifully. You can also use provolone or havarti for a slightly different taste. (I’ve used havarti in a pinch, and it was delicious!)
- 1/4 cup unsalted butter — Melted. Use unsalted so you can control the salt level. Salted butter will work, just skip the added salt in the glaze.
- 1 tablespoon Dijon mustard — This is the secret ingredient that cuts through the richness. Don’t skip it! Yellow mustard will work in a pinch, but Dijon has a better, more sophisticated flavor.
- 1 tablespoon poppy seeds — These add a lovely little crunch and nutty flavor. They’re what make the tops look so professional.
- 1/2 teaspoon onion powder — Adds a savory depth without any actual onion chunks, which is perfect for picky eaters. Garlic powder can be substituted.
- 1/2 teaspoon Worcestershire sauce — This adds a subtle umami kick that makes the butter glaze sing. It’s a tiny addition with a big impact.
Equipment Needed
You don’t need any fancy gadgets for this one. Here’s what you’ll need:
- 9×13-inch baking dish — This is the perfect size for a 12-pack of rolls. A glass or ceramic dish works best for even baking.
- Sharp serrated knife — To slice the entire block of rolls in half horizontally. A serrated knife is key for cutting through the soft rolls without squishing them.
- Small bowl — For whisking together the butter glaze.
- Pastry brush — For brushing the glaze over the tops. A silicone brush is easy to clean. If you don’t have one, you can carefully spoon the butter over the tops.
- Aluminum foil — To cover the sliders during the first part of baking, ensuring the tops don’t burn before the cheese is melted.
Preparation Method

Follow these steps carefully, and you’ll have perfect sliders every single time. Don’t rush the butter brush—it’s the most important part!
- Preheat your oven to 350°F (175°C). While it’s heating, lightly grease your 9×13-inch baking dish with cooking spray or a little butter.
- Prepare the rolls. Without separating them, carefully slice the entire block of 12 Hawaiian rolls in half horizontally. You should have one large top half and one large bottom half. Place the bottom half in the prepared baking dish.
- Layer the ham. Arrange the thinly sliced ham evenly over the bottom layer of rolls. Don’t be shy—you want a good, even layer. I usually use about half a pound, but you can add more if you’re feeling generous.
- Add the cheese. Lay the Swiss cheese slices over the ham. If your slices are small, just overlap them a bit to make sure every slider gets some cheese. This is where the magic happens.
- Top with the roll tops. Carefully place the top half of the rolls back over the cheese and ham, lining them up as best you can.
- Make the butter glaze. In your small bowl, whisk together the melted butter, Dijon mustard, poppy seeds, onion powder, and Worcestershire sauce until everything is well combined. It should smell amazing already.
- Brush the tops. Using your pastry brush, generously brush the entire top of the roll block with the butter mixture. Don’t just dab it—really soak it in. Make sure you get the edges and any cracks between the rolls. This is what creates that golden, flavorful crust.
- Bake covered. Cover the baking dish tightly with aluminum foil. Bake for 10 minutes. This steams the sliders, melting the cheese and warming the ham through without burning the tops.
- Bake uncovered. Remove the foil and bake for another 5-7 minutes, or until the tops are golden brown and the butter glaze is bubbly and fragrant. Watch them closely at the end so they don’t burn.
- Rest before slicing. This is crucial. Let the sliders rest in the pan for at least 5 minutes. This allows the cheese to set slightly so the sliders hold their shape when you cut them. If you cut too soon, you’ll have a gooey mess.
- Slice and serve. Using a sharp knife, cut between the rolls to separate them. Serve warm. They are absolutely divine straight out of the oven.
Cooking Tips & Techniques
I’ve made these sliders more times than I can count, and I’ve definitely learned a few things the hard way. Here are my best tips to ensure slider success.
The biggest mistake? Over-baking. Those first few times, I left them in the oven too long, trying to get the tops extra brown. The result was a dry, hard top and cheese that had solidified into a rubbery mess. Trust the 5-7 minutes uncovered. You want a gentle golden brown, not a dark tan.
Another tip I swear by: Don’t skip the rest time. I know it’s tempting to dig in right away, but those 5 minutes are non-negotiable. It gives the cheese a chance to set just enough so that when you cut the sliders, they stay together. If you cut them immediately, the cheese will ooze out and the top will slide right off. Patience is a virtue, especially with melted cheese.
For the best flavor, let the assembled sliders sit in the fridge for 30 minutes before baking. This allows the flavors to meld together. I often assemble them the night before, cover them, and pop them in the fridge. Then, in the morning, I just brush on the butter glaze and bake. It’s a total game-changer for busy mornings. If you’re doing this, you might need to add 2-3 minutes to the covered baking time since you’re starting from cold.
Multitasking tip: While the sliders are baking covered, you can prep a simple side dish like carrot sticks or apple slices. This way, everything is ready at the same time.
Variations & Adaptations
This recipe is incredibly versatile. Don’t be afraid to make it your own! Here are a few of my favorite twists.
- Turkey and Cheddar Sliders: Swap the ham for thinly sliced turkey and the Swiss for sharp cheddar. It’s a classic combo that’s perfect for fall or post-Thanksgiving leftovers. For a cozy twist, try adding a thin layer of leftover creamy potato leek soup inside—it’s surprisingly delicious!
- Spicy Buffalo Chicken Sliders: Replace the ham with shredded rotisserie chicken tossed in buffalo sauce. Use provolone or pepper jack cheese, and add a drizzle of ranch dressing before baking. These are a huge hit for game day, especially when served alongside crispy buffalo chicken dip stuffed pretzel bites.
- Vegetarian Caprese Sliders: Layer the rolls with fresh mozzarella slices, sun-dried tomatoes, and fresh basil leaves. Brush the tops with a mixture of melted butter, balsamic glaze, and a pinch of Italian seasoning. It’s a lighter, fresher option that’s still incredibly satisfying.
- Dairy-Free Version: Use dairy-free butter and your favorite dairy-free cheese slices (I like Violife or Daiya for melting). The rest of the ingredients are naturally dairy-free. The texture will be slightly different, but the flavor is still fantastic.
- Gluten-Free Version: Use your favorite gluten-free sweet rolls. I’ve found that the Udi’s brand works well, though they are a bit smaller. Adjust the baking time slightly, as gluten-free rolls can dry out faster. Keep a close eye on them.
Serving & Storage Suggestions
These sliders are best served warm, straight from the oven. The cheese is perfectly melted, and the tops are gloriously buttery. For a preschool lunch, let them cool completely before packing them in a lunchbox. They actually hold up really well at room temperature.
What to serve with them? They’re a complete meal on their own, but they pair beautifully with simple sides. Think carrot sticks, cucumber slices, a handful of grapes, or a small cup of apple sauce. For a heartier dinner, serve them with a side of creamy roasted tomato basil soup for dipping—the combination is pure comfort food heaven.
Storage: Store any leftover sliders in an airtight container in the refrigerator for up to 3 days. The flavors actually continue to meld, making them even more delicious the next day.
Reheating: The best way to reheat them is in the oven. Place them on a baking sheet and warm them at 350°F (175°C) for 5-7 minutes, or until the cheese is melty again. You can also use an air fryer at 350°F for 3-4 minutes. The microwave works in a pinch, but the rolls will get a bit soggy.
Freezing: These sliders freeze beautifully. Assemble them completely (including the butter glaze) but do not bake them. Wrap the entire pan tightly in plastic wrap, then a layer of aluminum foil. Freeze for up to 3 months. To bake, thaw overnight in the refrigerator, then follow the baking instructions as written. You may need to add a few extra minutes to the covered baking time. This is a lifesaver for busy weeks!
Nutritional Information & Benefits
While these sliders are definitely a comfort food, they also offer some surprising nutritional benefits. The ham provides a good source of high-quality protein, which is essential for growing kids. The Swiss cheese adds calcium for strong bones and teeth. The butter, while rich, contains fat-soluble vitamins like A, D, and E. Plus, making them at home means you control the ingredients, avoiding the preservatives and excessive sodium found in many pre-packaged lunch options.
Here is an approximate nutritional breakdown for one slider (based on 12 servings):
| Nutrient | Amount per slider |
|---|---|
| Calories | 220 |
| Total Fat | 12g |
| Saturated Fat | 7g |
| Cholesterol | 45mg |
| Sodium | 580mg |
| Total Carbohydrates | 18g |
| Dietary Fiber | 1g |
| Sugars | 7g |
| Protein | 12g |
Dietary Considerations: This recipe is not gluten-free or dairy-free as written, but see the variations section for easy adaptations. It is nut-free and egg-free, making it a great option for school lunchboxes with common allergen restrictions. Always check your specific ingredient labels for potential cross-contamination.
Conclusion
These easy mini ham and cheese sliders are more than just a recipe—they’re a solution to the daily lunchbox dilemma. They’re quick, they’re delicious, and they’re practically guaranteed to come home with an empty container. I love that I can make a batch on a Sunday afternoon, and my son has a delicious lunch ready for the week. It takes one more thing off my plate, and that’s a win in my book.
I encourage you to make this recipe your own. Swap the ham for turkey, add a little spicy mustard, or throw in some pickles—the possibilities are endless. The first time Leo actually asked for seconds of his lunch, I almost cried. That’s the power of a good slider. So go ahead, give them a try. I promise, your little one (and your future self) will thank you.
Have you tried these sliders? I’d love to hear how they turned out! Drop a comment below and let me know your favorite variation. And if you’re looking for more easy, kid-friendly recipes, be sure to check out our easy no-bake peanut butter oat energy balls for another perfect snack idea. Happy cooking!
Frequently Asked Questions
Can I make these mini ham and cheese sliders ahead of time?
Absolutely! You can assemble the entire dish (including the butter glaze) up to 24 hours in advance. Just cover the pan tightly with plastic wrap and store it in the refrigerator. When you’re ready to bake, simply remove the plastic wrap, cover with foil, and bake as directed. You may need to add 2-3 minutes to the covered baking time since you’re starting from a cold pan.
Can I use a different type of bread?
While Hawaiian sweet rolls are the classic choice for their soft texture and subtle sweetness, you can substitute with other soft, pull-apart rolls. Slider buns, brioche rolls, or even small dinner rolls will work. Just be aware that the flavor and texture will be slightly different. Avoid crusty rolls or hard breads, as they won’t have the same soft, squishy texture that makes these sliders so good.
My sliders came out soggy. What did I do wrong?
Soggy sliders are usually the result of over-brushing with the butter glaze or not baking them uncovered long enough. Make sure you’re using just enough glaze to coat the tops—you don’t want pools of butter in the pan. Also, ensure you’re baking them uncovered for the full 5-7 minutes to allow the tops to crisp up slightly. Letting them rest after baking also helps the steam escape.
Can I freeze these sliders?
Yes, they freeze beautifully! The best method is to assemble them completely (including the butter glaze) but do not bake them. Wrap the entire pan tightly in plastic wrap, then a layer of aluminum foil. Freeze for up to 3 months. To bake, thaw overnight in the refrigerator, then follow the baking instructions as written. You may need to add a few extra minutes to the covered baking time.
What are the best sides to serve with these sliders?
These sliders are incredibly versatile and pair well with a wide variety of sides. For a simple lunch, try carrot sticks, cucumber slices, apple slices, or a small cup of applesauce. For a heartier dinner, serve them with a side salad, creamy roasted tomato basil soup, or sweet potato fries. They’re also fantastic alongside a bowl of slow cooker beef and barley stew for a cozy, comforting meal.
Pin This Recipe!
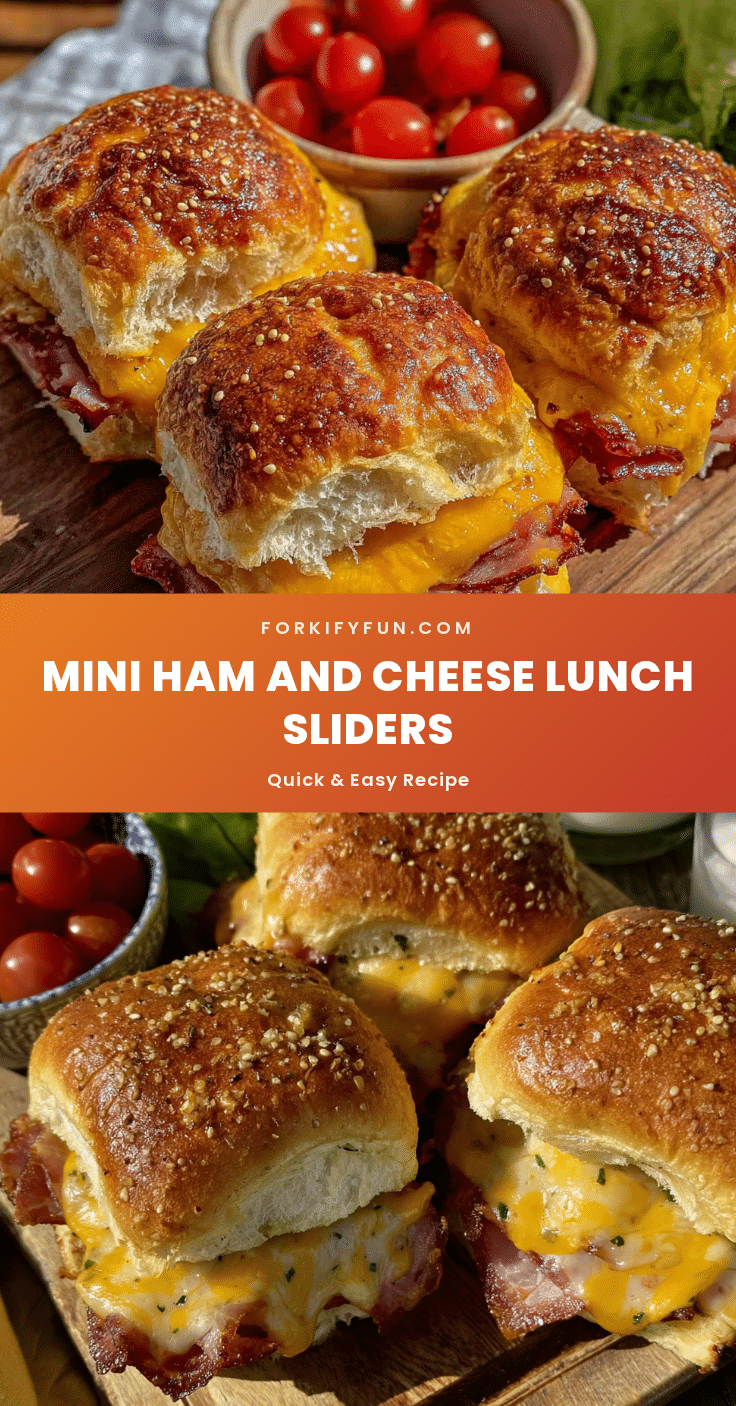
Easy Mini Ham and Cheese Sliders: Best Quick Preschool Lunch Idea

These gloriously soft Hawaiian rolls are split and loaded with layers of thinly sliced ham and gooey Swiss cheese, all baked together in a single pan until the tops are glossy and the cheese is a stringy, molten dream. The magic is in the sauce—a simple brush of melted butter, Dijon mustard, a whisper of poppy seeds, and a tiny pinch of onion powder that bakes into a golden, flavorful crust.
- Prep Time: 20 minutes
- Cook Time: 15 minutes
- Total Time: 35 minutes
- Yield: 12 servings 1x
- Category: Main Course
- Cuisine: American
Ingredients
- 12-count package Hawaiian Sweet Rolls (like King’s Hawaiian)
- 1/2 pound thinly sliced deli ham (honey ham or black forest ham)
- 6–8 slices Swiss cheese
- 1/4 cup unsalted butter, melted
- 1 tablespoon Dijon mustard
- 1 tablespoon poppy seeds
- 1/2 teaspoon onion powder
- 1/2 teaspoon Worcestershire sauce
Instructions
- Preheat your oven to 350°F (175°C). Lightly grease a 9×13-inch baking dish with cooking spray or a little butter.
- Without separating them, carefully slice the entire block of 12 Hawaiian rolls in half horizontally. Place the bottom half in the prepared baking dish.
- Arrange the thinly sliced ham evenly over the bottom layer of rolls.
- Lay the Swiss cheese slices over the ham, overlapping if needed to cover all sliders.
- Carefully place the top half of the rolls back over the cheese and ham, lining them up as best you can.
- In a small bowl, whisk together the melted butter, Dijon mustard, poppy seeds, onion powder, and Worcestershire sauce until well combined.
- Using a pastry brush, generously brush the entire top of the roll block with the butter mixture, making sure to get the edges and any cracks between the rolls.
- Cover the baking dish tightly with aluminum foil. Bake for 10 minutes.
- Remove the foil and bake for another 5-7 minutes, or until the tops are golden brown and the butter glaze is bubbly and fragrant.
- Let the sliders rest in the pan for at least 5 minutes before slicing.
- Using a sharp knife, cut between the rolls to separate them. Serve warm.
Notes
For best flavor, let assembled sliders sit in fridge for 30 minutes before baking. Can assemble night before and refrigerate; add 2-3 minutes to covered baking time if starting from cold. Don’t skip the 5-minute rest after baking to allow cheese to set. Watch closely during uncovered baking to prevent burning.
Nutrition
- Serving Size: 1 slider
- Calories: 220
- Sugar: 7
- Sodium: 580
- Fat: 12
- Saturated Fat: 7
- Carbohydrates: 18
- Fiber: 1
- Protein: 12
Keywords: mini ham and cheese sliders, preschool lunch, easy lunch idea, kid-friendly, Hawaiian rolls, ham and cheese, quick dinner, lunchbox recipe