There used to be a tiny bakery in the strip mall next to my old apartment that made the most incredible cake dip. Not the kind you’d find at a party with a sad bowl of marshmallow fluff and cream cheese—no, this was different. It had these little flecks of something colorful mixed in, and it tasted exactly like those Christmas tree-shaped snack cakes I’d beg my mom for as a kid. When that bakery closed its doors two winters ago—”retired” was what the sign said—I honestly felt a little pang of grief. That dip was my December ritual.
After about seven tries—some were too runny, one was so thick I could barely get a pretzel in it—I finally cracked the code. Let me tell you, the secret was staring me right in the face the whole time. You know that feeling when you’ve been overcomplicating something, and the answer is just sitting on the shelf at the grocery store? Yeah, that was me. Standing in the snack aisle at 9 p.m. on a Tuesday, holding a box of Little Debbie Christmas Tree Cakes and having one of those lightbulb moments.
The first time I made this dip, I was honestly skeptical. I mean, could it really work? Would it taste like the real thing, or would it be one of those Pinterest fails you scroll past and cringe at? But the moment I took that first scoop with a graham cracker, I knew. It was spot on. The creamy texture, the sweet vanilla undertones, those little green sprinkles—it was like that bakery had never left. Now I make this dip every December, and honestly, sometimes in July too. No judgment here.
Why You’ll Love This Recipe
Let’s be real for a second. Weeknights are chaos. You’re tired, the kids are hungry, and the last thing you want to do is spend an hour in the kitchen making something complicated. This dip is the answer to that exact problem. It comes together in about ten minutes flat, uses ingredients you can grab at any grocery store, and honestly tastes like you put way more effort into it than you actually did.
- Quick & Easy: From start to finish, you’re looking at about 10 minutes. No baking, no stovetop, no complicated techniques. Just mix and serve.
- Simple Ingredients: You only need five ingredients, and three of them are probably already in your fridge or pantry. No fancy grocery store runs required.
- Perfect for Holiday Parties: This dip is a total crowd-pleaser. I’ve brought it to cookie swaps, office parties, and family gatherings, and it always disappears first.
- Kid-Approved: My niece literally stood next to the bowl at Thanksgiving and ate it with a spoon. I’m not even kidding.
- Unbelievably Delicious: The texture is creamy and light, with just the right amount of sweetness. It tastes exactly like the inside of a Christmas Tree Cake, but somehow even better.
What makes this recipe different from all the other dip recipes out there? It’s the texture. Most cake dips end up too thick or too runny, but this one hits that perfect sweet spot. The cream cheese gives it structure, the Cool Whip keeps it light and fluffy, and the crushed Christmas Tree Cakes add that signature flavor and those little bits of colorful sprinkles. It’s not just another dessert dip—it’s the one you’ll come back to year after year.
Honestly, this recipe is comfort food at its finest. It’s the kind of thing that makes you close your eyes after the first bite and just smile. And the best part? You can make it ahead of time, so when your guests show up, you’re actually relaxed enough to enjoy the party too.
What Ingredients You Will Need
This recipe uses simple, everyday ingredients that come together to create something truly special. The magic is in how they work together—each one plays a specific role in getting that perfect creamy, sweet, nostalgic flavor.
For the Dip Base
- Cream cheese, softened: 8 ounces (one block). Make sure it’s at room temperature, or your dip will be lumpy. I prefer Philadelphia brand for the smoothest texture.
- Unsalted butter, softened: ¼ cup (half a stick). Again, room temperature is key here. If you only have salted butter, just skip adding any extra salt.
- Powdered sugar: ½ cup. This sweetens the dip without making it grainy. Sift it if you want an extra-smooth texture, but honestly, I’ve skipped that step plenty of times and it still turns out great.
- Vanilla extract: 1 teaspoon. Pure vanilla extract gives the best flavor, but imitation works fine in a pinch. I’ve used both and honestly can’t tell the difference once everything’s mixed together.
- Cool Whip, thawed: 8 ounces (one tub). This is what makes the dip light and fluffy. Don’t substitute with homemade whipped cream—it won’t hold up the same way, and the texture will be off.
- Little Debbie Christmas Tree Cakes: 4 cakes, crushed. You’ll want to crush them into small pieces, but leave some bigger chunks for texture. The green icing and sprinkles are what give this dip its festive look.
For the Topping (Optional but Recommended)
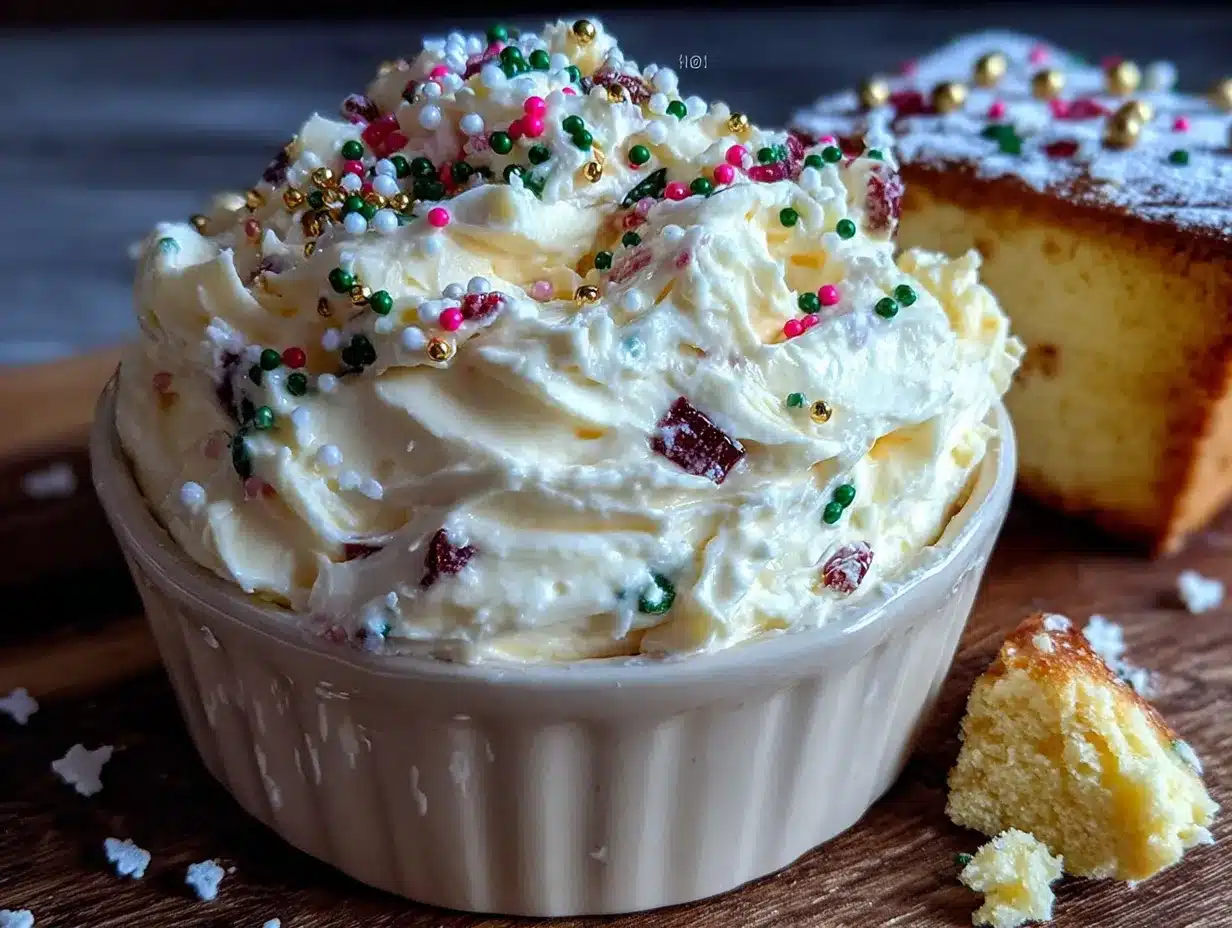
- Extra crushed Christmas Tree Cakes: 1-2 cakes. Sprinkle these on top right before serving for a prettier presentation.
- Green and red sprinkles: A handful. Adds that extra holiday cheer.
One thing I’ve learned from making this dip about a dozen times—don’t skimp on the cream cheese quality. I tried a store brand once to save a buck, and the dip came out a little grainy. Not the end of the world, but it wasn’t as smooth as I wanted. Stick with a brand you trust, and your dip will thank you.
If you’re looking for a lighter version, you can use reduced-fat cream cheese and light Cool Whip. I’ve tested it both ways, and honestly, the full-fat version tastes better, but the lighter one is still pretty darn good. Your call.
Equipment Needed
You don’t need much for this recipe, which is honestly one of the best things about it. Here’s what you’ll need:
- Electric hand mixer or stand mixer: You could technically mix this by hand with a wooden spoon, but your arm will get tired, and the texture won’t be as smooth. I use my hand mixer every time.
- Large mixing bowl: Any bowl will work, but a wider one makes it easier to mix everything evenly.
- Rubber spatula: For scraping down the sides of the bowl and folding in the crushed cakes.
- Measuring cups and spoons: For the powdered sugar, vanilla, and butter.
- Ziploc bag or rolling pin: For crushing the Christmas Tree Cakes. I usually just put them in a Ziploc bag and smash them with my hands—it’s oddly satisfying.
- Serving bowl: Something festive if you’ve got it. A red or green bowl makes the dip look extra holiday-ready.
That’s it. No food processor, no stand mixer attachment you’ll never use again, no special gadgets. Just basic kitchen stuff you probably already own.
Preparation Method
- Soften the cream cheese and butter: Take them out of the fridge about 30 minutes before you start. If you forgot (which, let’s be honest, happens to all of us), you can microwave the cream cheese in 10-second bursts until it’s soft but not melted. Same for the butter—just be careful not to melt it completely.
- Crush the Christmas Tree Cakes: Put 4 cakes in a Ziploc bag and seal it. Use your hands or a rolling pin to crush them into small pieces. You want a mix of fine crumbs and some bigger chunks for texture. Don’t pulverize them into dust—you want to actually taste the cake in the dip.
- Beat the cream cheese and butter: In your large mixing bowl, beat the softened cream cheese and butter together on medium speed until smooth and creamy. This takes about 2 minutes. Scrape down the sides of the bowl with your spatula halfway through.
- Add the powdered sugar: With the mixer on low, gradually add the powdered sugar. Start slow or you’ll get a sugar cloud all over your kitchen—speaking from experience here. Once it’s incorporated, increase the speed to medium and beat for another minute until smooth.
- Mix in the vanilla: Add the vanilla extract and beat on low just until combined. You’ll smell it immediately, and honestly, that’s one of my favorite parts.
- Fold in the Cool Whip: Add the thawed Cool Whip to the bowl. Use your spatula to gently fold it in until no white streaks remain. Don’t overmix—you want to keep that light, fluffy texture.
- Add the crushed cakes: Fold in the crushed Christmas Tree Cakes until they’re evenly distributed. Some of the green icing will streak through the dip, which is exactly what you want. It gives it that pretty pastel green color.
- Chill (optional but recommended): Transfer the dip to your serving bowl, cover it, and refrigerate for at least 30 minutes. This helps the flavors meld together and makes the texture even better. If you’re in a hurry, you can serve it right away—it’s still delicious.
- Top and serve: Right before serving, sprinkle extra crushed Christmas Tree Cakes and some festive sprinkles on top. Serve with graham crackers, pretzels, vanilla wafers, or just a spoon—no judgment here.
A few things I’ve learned the hard way: If your dip seems too thick, let it sit at room temperature for 10 minutes before serving. If it’s too thin, pop it in the fridge for another 30 minutes. And if you accidentally eat half of it before anyone else shows up—well, that’s between you and the fridge door.
Cooking Tips & Techniques
After making this dip more times than I care to count, I’ve picked up a few tricks that make a real difference. Here’s what I wish someone had told me the first time:
Temperature matters more than you think. Cold cream cheese and butter will give you a lumpy dip, no matter how long you beat it. Set them out on the counter before you even start gathering your other ingredients. Thirty minutes is enough, but an hour is better. If you’re in a rush, cut the cream cheese into small cubes—they’ll soften faster.
Don’t overmix the Cool Whip. I made this mistake once when I was trying to multitask and answer a text at the same time. The dip came out a little dense, and I knew exactly why. Fold the Cool Whip in gently, just until it’s combined. Overmixing deflates all those air bubbles that make the dip light and fluffy.
Crush the cakes strategically. I learned this one from a failed batch where I crushed everything into fine dust. The dip tasted fine, but it was missing those little pockets of cake and icing that make it special. Aim for a mix of textures—some fine crumbs, some pea-sized pieces, and a few bigger chunks. It makes every bite a little different.
Let it rest overnight if you can. I know, I know—waiting is hard. But if you make this dip the night before you need it, the flavors really meld together. The cake pieces soften slightly, the vanilla gets more pronounced, and everything just tastes more cohesive. I’ve served it both ways, and the overnight version always gets more compliments.
One mistake I still make sometimes: Forgetting to check if my powdered sugar is lumpy. If it’s been sitting in the pantry for a while, sift it before adding it to the dip. Otherwise you’ll get little white clumps that don’t mix in. Not a disaster, but annoying when you see them.
Variations & Adaptations
This dip is pretty perfect as-is, but I’ve played around with it quite a bit over the years. Here are some variations worth trying:
Peppermint Twist
Crush up a couple of candy canes and fold them in along with the Christmas Tree Cakes. The mint adds a nice freshness that balances the sweetness. I tried this one year when I had leftover candy canes from a gingerbread house project, and it was a hit.
Chocolate Lover’s Version
Swap out one of the Christmas Tree Cakes for a crushed Little Debbie Chocolate Christmas Tree Cake. Or better yet, drizzle some melted chocolate over the top before serving. My neighbor tried this and now she won’t make the original version anymore.
Gluten-Free Option
This one takes a little more work, but it’s doable. Use gluten-free vanilla sandwich cookies instead of the Christmas Tree Cakes, and add a few drops of green food coloring to mimic the festive look. The flavor won’t be exactly the same, but it’s still really good.
Dairy-Free Adaptation
Use dairy-free cream cheese (I like Kite Hill) and coconut cream instead of Cool Whip. The texture will be a little different—slightly denser—but the flavor is still there. I made this for a friend with a dairy allergy, and she ate half the bowl.
Birthday Cake Version
This isn’t just for Christmas, you know. Swap the Christmas Tree Cakes for crushed Birthday Cake Little Debbies, and use rainbow sprinkles on top. It’s perfect for birthdays, baby showers, or any day you want a little extra celebration.
Serving & Storage Suggestions
This dip is best served chilled or at room temperature—either way works, depending on your preference. I like it straight out of the fridge because the texture is firmer and the flavors are more concentrated. But if you let it sit out for 15-20 minutes, it gets softer and more spreadable.
What to dip: Graham crackers are the classic choice, and honestly, they’re hard to beat. But I’ve also served this with pretzel sticks (the salty-sweet combo is amazing), vanilla wafers, animal crackers, apple slices, and even just plain old spoons. One year I put it out with a platter of shortbread cookies, and that was a game-changer.
Storage: Cover the bowl with plastic wrap or transfer the dip to an airtight container. It will keep in the fridge for up to 5 days. The texture might get a little softer over time as the cake pieces absorb moisture, but the flavor actually gets better. I’ve never had it last longer than 3 days in my house, so I can’t vouch for week-old dip.
Freezing: You can freeze this dip, but I don’t really recommend it. The texture changes quite a bit—it gets a little grainy when thawed. If you absolutely have to freeze it, put it in a freezer-safe container and use it within a month. Thaw it in the fridge overnight and give it a good stir before serving.
Reheating: Don’t. This is a cold dip. If you want it softer, just let it sit at room temperature for a bit.
One thing I love about this dip is that the flavors actually develop over time. Day two is always better than day one. The vanilla gets more pronounced, the cake pieces soften just enough, and everything comes together in a way that feels more cohesive. So don’t be afraid to make it ahead.
Nutritional Information & Benefits
Let’s be honest—this is a dessert dip, and it’s not pretending to be health food. But here’s the thing: life is about balance, and sometimes you need a little indulgence. That said, here’s what you’re looking at per serving (about 2 tablespoons):
| Nutrient | Amount |
|---|---|
| Calories | 120 |
| Total Fat | 7g |
| Saturated Fat | 4g |
| Cholesterol | 15mg |
| Sodium | 60mg |
| Total Carbohydrates | 14g |
| Sugars | 11g |
| Protein | 1g |
The cream cheese in this recipe does provide a small amount of calcium and protein, and the butter adds a little vitamin A. But let’s not pretend this is a health food. It’s a treat, and that’s okay. The way I see it, if you’re going to indulge, do it with something that actually brings you joy.
If you’re watching your sugar intake, you can reduce the powdered sugar to ¼ cup and add a little extra vanilla for flavor. It won’t be as sweet, but it’ll still be good. And if you’re dairy-sensitive, the dairy-free version I mentioned earlier works well.
Conclusion
Look, I know there are a million dessert dip recipes out there. I’ve tried a bunch of them. But this one—this Easy Little Debbie Christmas Tree Cake Dip—is the one I keep coming back to. It’s simple, it’s nostalgic, and it honestly tastes like the holidays in a bowl. Every time I make it, I think about that little bakery that closed down, and I smile knowing I don’t need them anymore. I’ve got my own version now.
I’d love for you to try this recipe and make it your own. Maybe you’ll add a little extra vanilla, or swap in a different flavor of cake, or serve it with something I never would have thought of. That’s the beauty of recipes—they’re meant to be played with. So go ahead, give it a shot, and let me know how it turns out. Drop a comment below, share a photo, or tell me about your own version. I read every single one, and honestly, hearing about your kitchen adventures is one of my favorite parts of this whole blogging thing.
Happy holidays, and happy dipping!
Frequently Asked Questions
Can I make this dip ahead of time?
Absolutely. In fact, I recommend it. Make it the day before, cover it, and let it chill in the fridge overnight. The flavors will meld together and taste even better the next day.
Can I use homemade whipped cream instead of Cool Whip?
You can, but I wouldn’t recommend it. Homemade whipped cream doesn’t hold up as well, and the dip will be runnier. Cool Whip gives it that stable, fluffy texture that makes this recipe work.
How long does this dip last in the fridge?
About 5 days in an airtight container. The texture will soften a bit over time as the cake pieces absorb moisture, but the flavor stays great. It’s never lasted more than 3 days in my house, though.
Can I use a different flavor of Little Debbie cakes?
Yes! Birthday Cake, Chocolate, or even Strawberry Shortcake flavors all work well. Just keep in mind that the color and flavor of your dip will change based on what you use.
Is this dip gluten-free?
No, because the Little Debbie Christmas Tree Cakes contain wheat flour. If you need a gluten-free version, try using gluten-free vanilla sandwich cookies and a few drops of green food coloring instead.
Pin This Recipe!
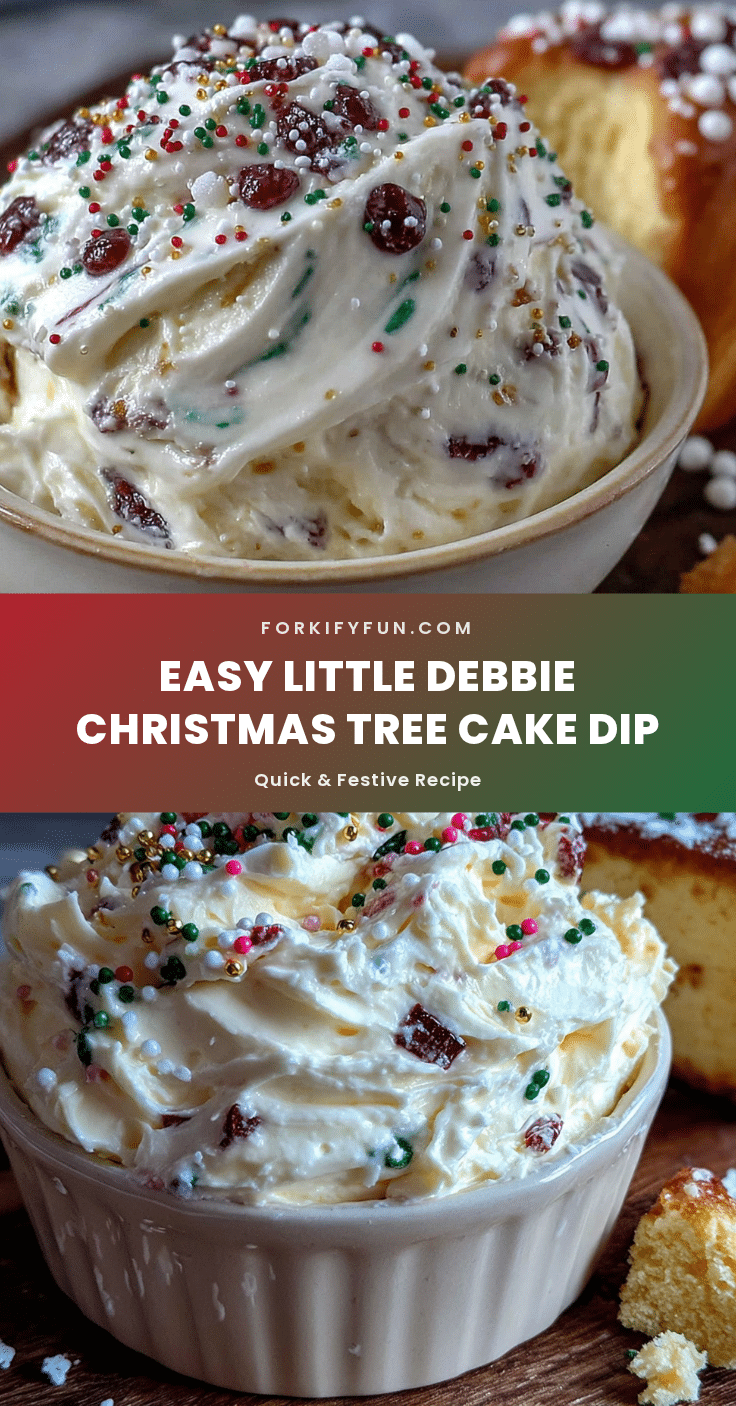
Easy Little Debbie Christmas Tree Cake Dip Recipe
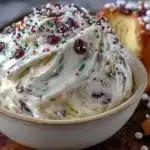
A quick and easy dessert dip that tastes exactly like the inside of a Little Debbie Christmas Tree Cake. Creamy, sweet, and perfect for holiday parties.
- Prep Time: 10 minutes
- Cook Time: 0 minutes
- Total Time: 10 minutes (plus optional 30 minutes chilling)
- Yield: 8 servings 1x
- Category: Dessert
- Cuisine: American
Ingredients
- 8 ounces cream cheese, softened
- 1/4 cup unsalted butter, softened
- 1/2 cup powdered sugar
- 1 teaspoon vanilla extract
- 8 ounces Cool Whip, thawed
- 4 Little Debbie Christmas Tree Cakes, crushed
- 1–2 extra Little Debbie Christmas Tree Cakes, crushed (for topping, optional)
- Green and red sprinkles (for topping, optional)
Instructions
- Soften the cream cheese and butter by letting them sit at room temperature for about 30 minutes. If in a hurry, microwave cream cheese in 10-second bursts until soft but not melted, and do the same for butter.
- Crush 4 Christmas Tree Cakes in a Ziploc bag using your hands or a rolling pin until you have a mix of fine crumbs and some bigger chunks.
- In a large mixing bowl, beat the softened cream cheese and butter together on medium speed until smooth and creamy, about 2 minutes. Scrape down the sides of the bowl halfway through.
- With the mixer on low, gradually add the powdered sugar to avoid a sugar cloud. Once incorporated, increase speed to medium and beat for another minute until smooth.
- Add the vanilla extract and beat on low just until combined.
- Gently fold in the thawed Cool Whip with a rubber spatula until no white streaks remain. Do not overmix.
- Fold in the crushed Christmas Tree Cakes until evenly distributed. Some green icing will streak through the dip.
- Transfer the dip to a serving bowl, cover, and refrigerate for at least 30 minutes (optional but recommended) to let flavors meld.
- Just before serving, sprinkle extra crushed Christmas Tree Cakes and festive sprinkles on top. Serve with graham crackers, pretzels, vanilla wafers, or apple slices.
Notes
For best results, use full-fat cream cheese and Cool Whip. The dip can be made a day ahead and refrigerated overnight for better flavor. If the dip is too thick, let it sit at room temperature for 10 minutes before serving. If too thin, refrigerate for another 30 minutes.
Nutrition
- Serving Size: 2 tablespoons
- Calories: 120
- Sugar: 11
- Sodium: 60
- Fat: 7
- Saturated Fat: 4
- Carbohydrates: 14
- Protein: 1
Keywords: Christmas tree cake dip, Little Debbie dip, holiday dessert dip, easy dessert dip, no-bake dessert