I had refused to make pumpkin pie for years. Let me tell you, it wasn’t about being a dessert snob or anything like that. It was about the texture, honestly. That wobbly, almost jiggly slice that seemed to sigh on the plate before you even got a fork near it. I just couldn’t get past it. Then last November, my neighbor Carol, a woman who gardens like it’s an Olympic sport, knocked on my door holding a pie plate. “Just try it,” she said, shoving it into my hands. “It’s different.”
I took it inside, mostly to be polite, and set it on the counter. My kids, who are usually picky about anything that isn’t shaped like a nugget, started circling it. “What is that, Mom?” my youngest asked, poking the crumbly, dark brown crust. I mumbled something about pumpkin pie and braced myself for the eye rolls. But an hour later, I caught my oldest sneaking a piece with their fingers, and that was the end of my anti-pumpkin-pie stance.
This recipe is that pie. It’s the one that made me eat my words—literally. The secret is browning the butter, which adds a nutty, toasty flavor that cuts through the sweetness. And the crust? Forget the flaky pastry nonsense. A crunchy, spicy gingersnap crust is where it’s at. It gives the whole thing this warm, snappy texture that even the pickiest eaters can’t resist. Maybe you’ve been burned by a sad, soggy pumpkin pie before. I get it. But this one is different. It’s the kind of dessert that makes you close your eyes after the first bite, not because you’re trying to savor it, but because you’re genuinely surprised at how good it is.
Why You’ll Love This Recipe
This isn’t just another pumpkin pie recipe you found on the internet. I’ve tested this version more times than I care to admit, tweaking the butter temperature and the spice blend until it was just right. Here is why this one is a keeper for your family table:
- Kid-Approved Flavor: The brown butter adds a deep, almost caramel-like richness that masks that “vegetable” taste kids sometimes pick up on. My own kids ask for seconds, and that’s a win in my book.
- Simple Ingredients: You don’t need to hunt down fancy baking chocolate or imported vanilla. Most of this is pantry stuff—pumpkin puree, eggs, cream, and spices. The gingersnaps are the only “special” item, and you can find them at any grocery store.
- Perfect for Thanksgiving or a Tuesday: This pie is fancy enough for the holiday table but easy enough to whip up on a random fall evening when you just want something cozy.
- Crowd-Pleaser: I brought this to a potluck last month, and a man who claimed he “hated pumpkin pie” asked me for the recipe. Seriously.
- Unbelievably Delicious: The contrast between the crunchy, spicy crust and the silky, nutty filling is next-level comfort food. It’s not just pie; it’s an experience.
What makes this recipe different from the rest is the technique. Browning the butter isn’t just a fancy chef trick—it actually changes the chemistry of the filling. It deepens the flavor profile without adding more sugar or spices. And the gingersnap crust? It’s not just a shortcut; it’s a flavor upgrade. The molasses and ginger in the cookies complement the pumpkin in a way that a regular pie crust just can’t match. This is comfort food, reimagined. It is healthier on the wallet, faster to put together, and it still gives you that soul-soothing satisfaction of a classic dessert.
What Ingredients You Will Need
This recipe relies on simple, wholesome ingredients that work together to create a complex flavor profile. I’ve kept the list short because nobody wants to buy fifteen things for one pie. Here is everything you need, broken down by the crust and the filling.
For the Gingersnap Crust
- 2 cups (about 200g) gingersnap cookies, crushed: I recommend the Nabisco brand for a consistent crunch. You want fine crumbs, not chunks. A food processor makes this easy, but a rolling pin and a zip-top bag works in a pinch.
- 5 tablespoons (70g) unsalted butter, melted: Use the real stuff here. Margarine won’t give you the same rich flavor or help the crust hold together.
- 2 tablespoons (25g) granulated sugar: This adds a little extra sweetness and helps the crust brown nicely in the oven.
- Pinch of salt: Just a small pinch to balance the sweetness of the cookies.
For the Brown Butter Pumpkin Filling
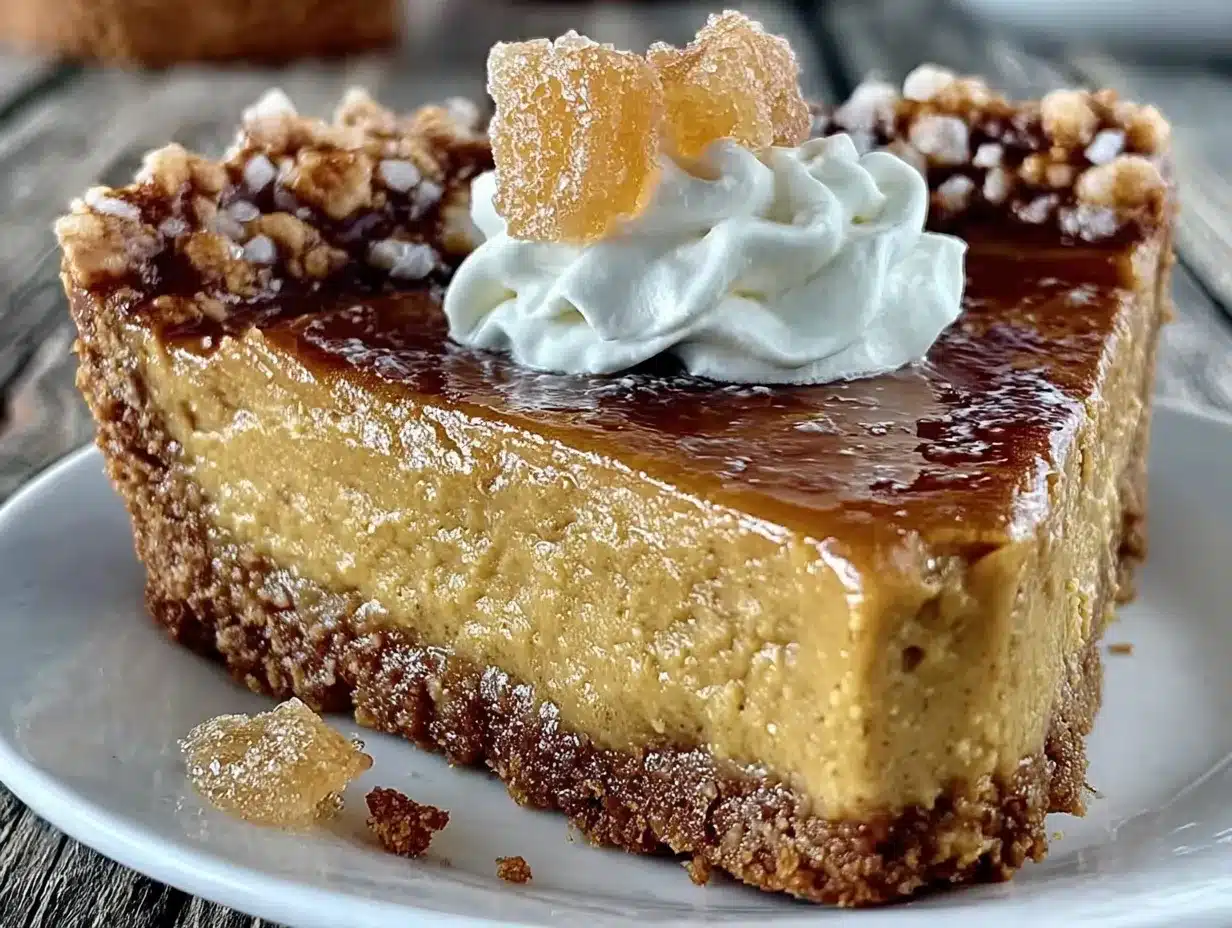
- 1/2 cup (1 stick or 113g) unsalted butter: This is the star of the show. You’ll brown it on the stove until it smells nutty and looks amber. Don’t walk away from it—it burns fast.
- 1 can (15 oz or 425g) pumpkin puree: Make sure you grab pure pumpkin, not pumpkin pie filling. The Libby’s brand is my go-to for consistent texture and flavor.
- 3/4 cup (150g) packed light brown sugar: Brown sugar adds moisture and a hint of molasses that pairs beautifully with the browned butter.
- 1/4 cup (50g) granulated sugar: For straight-up sweetness.
- 2 large eggs, room temperature: Room temperature eggs blend into the filling more smoothly, giving you a silkier texture. If you forgot to set them out, place them in a bowl of warm water for 5 minutes.
- 1 teaspoon vanilla extract: Use pure vanilla if you have it. It makes a subtle but noticeable difference.
- 1 teaspoon ground cinnamon: The backbone of any good pumpkin pie spice blend.
- 1/2 teaspoon ground ginger: Adds a little warmth and kick.
- 1/4 teaspoon ground nutmeg: Freshly grated is best, but pre-ground works fine.
- 1/4 teaspoon ground cloves: Go easy on this one—it’s potent.
- 1/2 teaspoon salt: Salt is crucial here. It balances the sweetness and makes all the flavors pop.
- 1 cup (240ml) heavy cream: You can substitute half-and-half for a lighter pie, but the texture won’t be as luxuriously creamy.
Equipment Needed
You don’t need a professional bakery setup for this pie, but having the right tools makes the process smoother. Here is what I use when I make this recipe.
- 9-inch pie dish: A standard glass or ceramic pie dish works perfectly. I prefer a deep-dish style because this filling is generous.
- Food processor or rolling pin: For crushing the gingersnaps. A food processor gives you the most consistent crumbs, but a rolling pin and a strong arm will get the job done.
- Medium saucepan: You’ll need this for browning the butter. A light-colored pan is best so you can see the color change.
- Large mixing bowl: For whisking together the filling ingredients.
- Whisk: A good whisk helps you get a smooth, lump-free filling.
- Rubber spatula: For scraping every last bit of that delicious brown butter out of the pan.
- Measuring cups and spoons: Accuracy matters in baking, so use proper measuring tools.
- Cooling rack: Essential for letting the pie cool evenly after it bakes.
If you don’t have a food processor, don’t stress. I’ve made the crust by putting the cookies in a zip-top bag and smashing them with a heavy skillet. It’s a little more work, but it gets the job done. And honestly, it’s kind of therapeutic after a long day.
Preparation Method
Let’s get to the good part. I’ll walk you through this step by step so you don’t miss a thing. Trust me, the brown butter step is worth the extra few minutes.
Step 1: Make the Gingersnap Crust
Preheat your oven to 350°F (175°C). In your food processor, pulse the gingersnap cookies until they turn into fine crumbs. You should have about 2 cups. If you’re using the bag-and-rolling-pin method, make sure there are no large chunks left. Pour the crumbs into a medium bowl, then add the melted butter, sugar, and salt. Stir with a fork until the mixture looks like wet sand and holds together when you squeeze it.
Press the mixture firmly into the bottom and up the sides of your 9-inch pie dish. Use the bottom of a measuring cup to get it nice and even. Bake the crust for 10 minutes, then set it aside to cool while you make the filling. The crust will firm up as it cools.
Step 2: Brown the Butter
This is the step that makes this pie special. Place the stick of butter in a medium saucepan over medium heat. Let it melt completely, then start swirling the pan gently. The butter will begin to foam and sputter—that’s the water evaporating. Keep a close eye on it. After about 5 to 7 minutes, you’ll see little brown specks forming at the bottom of the pan, and the butter will smell nutty and amazing. As soon as it turns a deep amber color, remove it from the heat immediately. Pour it into a heat-safe bowl to stop the cooking process. Don’t walk away from this—burnt butter is sad butter.
Step 3: Mix the Filling
In a large mixing bowl, whisk together the pumpkin puree, brown sugar, and granulated sugar until smooth. Add the eggs one at a time, whisking well after each addition. Stir in the vanilla extract. Now, slowly drizzle in the warm brown butter while whisking constantly. You want the butter to emulsify into the pumpkin mixture, not just sit on top.
In a small bowl, whisk together the cinnamon, ginger, nutmeg, cloves, and salt. Sprinkle this spice mixture over the pumpkin batter and whisk until fully combined. Finally, pour in the heavy cream and whisk until the filling is smooth, glossy, and a beautiful pale orange color. It should look like thick soup.
Step 4: Assemble and Bake
Pour the filling into the pre-baked crust. It will fill the dish almost to the brim—that’s normal. Place the pie on the middle rack of your oven and bake at 350°F (175°C) for 50 to 60 minutes. The edges should be set and slightly puffed, but the center will still jiggle a little when you gently shake the pan. That jiggle is good—it means the filling will set up silky and smooth as it cools.
If the edges of the crust start browning too quickly, loosely tent the pie with aluminum foil for the last 15 minutes of baking.
Step 5: Cool and Set
Place the pie on a cooling rack and let it cool completely at room temperature. This takes about 2 hours. Don’t rush this step—if you cut into the pie while it’s warm, the filling will be runny. Once it’s cool, you can refrigerate it for at least 4 hours or overnight. The pie actually tastes better the next day after the flavors have had time to mingle.
Cooking Tips & Techniques
I’ve made this pie enough times to know where things can go wrong. Here are a few hard-earned lessons from my kitchen to yours.
Don’t skip the crust pre-bake. I tried skipping this once because I was in a hurry, and the bottom of the crust turned out soggy. Pre-baking for 10 minutes seals the crust and keeps it crunchy against the wet filling. It’s a non-negotiable step in my book.
Watch the butter like a hawk. Brown butter goes from perfect to burnt in about 30 seconds. I learned this the hard way when I looked away to answer a text. The smell of burnt butter will haunt you. Keep your eyes on the pan, and take it off the heat as soon as those brown specks appear.
Room temperature ingredients matter. Cold eggs and cold cream can cause the brown butter to seize up or create a lumpy filling. Take everything out of the fridge 30 minutes before you start. If you forget, place the eggs in warm water for 5 minutes and let the cream sit on the counter while you make the crust.
Use a light-colored pan for browning. A dark non-stick pan makes it hard to see the color change. I use a stainless steel saucepan, and I can see exactly when the butter turns that perfect amber shade.
Let the pie cool completely. I know it’s tempting to slice into a warm pie, but patience pays off here. The filling needs time to set. I usually make this pie the day before I plan to serve it. It saves me stress on the day of, and the flavor is even better.
Variations & Adaptations
One of the best things about this recipe is how flexible it is. Here are a few ways I’ve tweaked it over the years to suit different needs and cravings.
Gluten-Free Version: Swap the regular gingersnap cookies for a gluten-free brand. Most grocery stores carry them now. The rest of the ingredients are naturally gluten-free, so you’re good to go. I’ve used the Mi-Del brand, and the crust turned out perfectly crunchy.
Dairy-Free Adaptation: Use a high-quality vegan butter for browning (Miyoko’s works well) and replace the heavy cream with full-fat coconut cream. The coconut adds a slight tropical note that’s actually lovely with the pumpkin and ginger. Just make sure you use the thick part of the canned coconut milk, not the watery stuff.
Spice It Up: If you like a little heat, add 1/4 teaspoon of cayenne pepper or a pinch of black pepper to the spice blend. It doesn’t make the pie spicy—it just deepens the warmth and makes the flavors more complex. I tried this on a whim one year, and now I can’t go back.
Maple Brown Sugar Twist: Replace the granulated sugar with an equal amount of maple sugar, and use maple syrup instead of 1/4 cup of the heavy cream. The maple flavor pairs beautifully with the brown butter and ginger. Just be aware that the filling will be slightly softer, so you’ll need to bake it a few minutes longer.
Mini Pie Version: Press the crust into a muffin tin instead of a pie dish for individual servings. Reduce the baking time to about 20 to 25 minutes. These are perfect for holiday parties or lunchboxes. My kids love finding a mini pie in their lunch bag.
Serving & Storage Suggestions
This pie is delicious at room temperature or slightly chilled. I actually prefer it cold from the fridge because the filling firms up to a perfect sliceable texture. Here’s how I like to serve it and keep it fresh.
Serving: A dollop of lightly sweetened whipped cream is the classic choice, and it’s my go-to. The cream cuts through the richness of the filling and adds a light, airy contrast. For a fancier presentation, add a sprinkle of cinnamon or a few crushed gingersnaps on top. I’ve also served this with a scoop of vanilla bean ice cream, and let me tell you, the warm-cold contrast is divine.
Storage: Cover the pie loosely with plastic wrap or aluminum foil and store it in the refrigerator. It will keep well for up to 4 days. The crust stays surprisingly crunchy for the first two days, then it starts to soften a bit. I’ve never had a problem with leftovers lasting longer than that because they get eaten too fast.
Freezing: You can freeze this pie for up to 2 months. Bake and cool it completely, then wrap it tightly in a layer of plastic wrap and a layer of foil. Thaw it overnight in the refrigerator before serving. I’ve done this for Thanksgiving prep, and nobody could tell it wasn’t fresh-baked.
Reheating: If you prefer your pie warm, place individual slices in a 300°F (150°C) oven for about 10 minutes. The microwave works in a pinch, but it can make the crust a little soggy. The oven is worth the extra wait.
The flavors in this pie actually deepen after a day in the fridge. The brown butter becomes more pronounced, and the spices settle into a beautiful harmony. If you can, make this a day ahead. Your future self will thank you.
Nutritional Information & Benefits
Let’s be real—this is a dessert, and it’s meant to be enjoyed. But I also believe in knowing what’s on your plate. Here’s a rough breakdown per slice (assuming 8 servings).
| Nutrient | Amount Per Slice |
|---|---|
| Calories | ~420 |
| Total Fat | 26g |
| Saturated Fat | 15g |
| Carbohydrates | 44g |
| Sugar | 30g |
| Protein | 5g |
| Fiber | 2g |
Pumpkin is a nutritional powerhouse in disguise. It’s packed with vitamin A, which is great for your eyes and immune system. It also contains fiber, which helps you feel full and satisfied. The eggs and cream add a good dose of protein and calcium. The brown butter? Well, it adds happiness, and I think that counts for something.
If you’re watching your sugar intake, you can reduce the brown sugar to 1/2 cup and the granulated sugar to 2 tablespoons. The pie will be less sweet, but the pumpkin and spice flavors will shine through more clearly. For a lower-fat option, replace the heavy cream with evaporated milk. The texture will be slightly less rich, but it’s still a very good pie.
Frequently Asked Questions
Can I use homemade pumpkin puree instead of canned?
Yes, you can. Just make sure you strain it well to remove excess water. Homemade puree tends to be more watery than canned, which can make the filling too loose. I recommend roasting a sugar pumpkin, pureeing it, and then letting it drain in a cheesecloth-lined strainer for at least an hour before using.
Why did my crust fall apart?
This usually happens if there isn’t enough butter to bind the crumbs together. Make sure you’re using the full 5 tablespoons and that you’re pressing the crust firmly into the dish. Using the bottom of a measuring cup helps compact it evenly. If your crumbs still seem dry, add another tablespoon of melted butter.
Can I use store-bought gingersnaps?
Absolutely. In fact, I recommend it. Store-bought gingersnaps have a consistent texture and flavor that works perfectly for this crust. I’ve tried making my own cookies for the crust, and honestly, the store-bought ones are better for this purpose. They’re crunchier, which makes for a sturdier crust.
How do I know when the pie is done baking?
The edges should be set and slightly puffed, but the center should still jiggle when you gently shake the pan. It should look like firm Jell-O, not liquid soup. The internal temperature should reach 175°F (80°C) if you want to be precise. Remember, the pie continues to set as it cools, so don’t overbake it trying to get the center completely firm.
Can I make this pie ahead of time?
Yes, and I actually recommend it. This pie tastes even better the next day after the flavors have had time to meld together. Bake it, cool it completely, then cover and refrigerate it for up to 2 days before serving. Just add the whipped cream right before you serve it for the best presentation.
Conclusion
This Kid-Approved Brown Butter Pumpkin Pie with Gingersnap Crust is the dessert that changed my mind about pumpkin pie forever. It’s rich without being heavy, sweet without being cloying, and it has that perfect balance of creamy filling and crunchy crust that makes every bite interesting. The brown butter adds a nutty depth that feels sophisticated, but the recipe itself is simple enough for a beginner baker to tackle.
I love this recipe because it’s proof that small changes make a big difference. Browning the butter takes ten extra minutes, but it transforms the entire pie. Using gingersnaps instead of a traditional crust isn’t just a shortcut—it’s a flavor upgrade. And honestly, watching my kids ask for seconds of a pumpkin pie is a victory I’ll never get tired of.
I’d love to hear how this pie turns out in your kitchen. Did your family love it as much as mine does? Did you try one of the variations? Drop a comment below and let me know. And if you’re looking for another foolproof dessert, you might want to check out my recipe for creamy no-bake pumpkin cheesecake. It’s another family favorite that comes together in no time. Happy baking, friends!
Pin This Recipe!
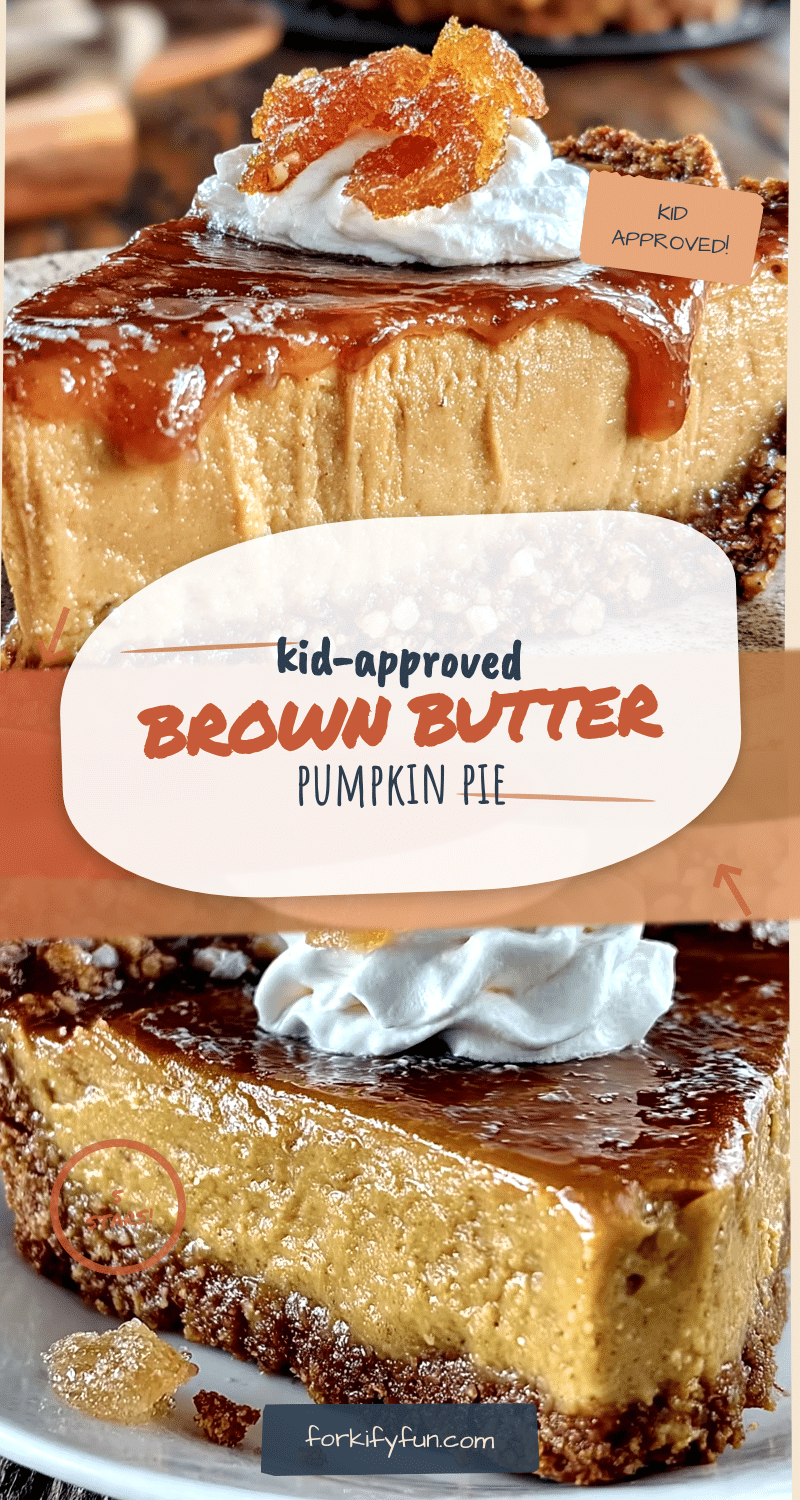
Easy Kid-Approved Brown Butter Pumpkin Pie Recipe
This brown butter pumpkin pie with a crunchy gingersnap crust is the dessert that will change your mind about pumpkin pie forever. It’s rich, nutty, and perfectly spiced, with a silky filling and a snappy crust that even picky eaters love.
- Prep Time: 20 minutes
- Cook Time: 60 minutes
- Total Time: 80 minutes (plus cooling and chilling time)
- Yield: 8 servings 1x
- Category: Dessert
- Cuisine: American
Ingredients
- 2 cups (about 200g) gingersnap cookies, crushed
- 5 tablespoons (70g) unsalted butter, melted
- 2 tablespoons (25g) granulated sugar
- Pinch of salt
- 1/2 cup (1 stick or 113g) unsalted butter
- 1 can (15 oz or 425g) pumpkin puree
- 3/4 cup (150g) packed light brown sugar
- 1/4 cup (50g) granulated sugar
- 2 large eggs, room temperature
- 1 teaspoon vanilla extract
- 1 teaspoon ground cinnamon
- 1/2 teaspoon ground ginger
- 1/4 teaspoon ground nutmeg
- 1/4 teaspoon ground cloves
- 1/2 teaspoon salt
- 1 cup (240ml) heavy cream
Instructions
- Preheat your oven to 350°F (175°C). In a food processor, pulse the gingersnap cookies until they turn into fine crumbs. You should have about 2 cups.
- Pour the crumbs into a medium bowl, then add the melted butter, sugar, and salt. Stir with a fork until the mixture looks like wet sand and holds together when squeezed.
- Press the mixture firmly into the bottom and up the sides of a 9-inch pie dish. Use the bottom of a measuring cup to get it even. Bake the crust for 10 minutes, then set it aside to cool.
- Place the stick of butter in a medium saucepan over medium heat. Let it melt completely, then start swirling the pan gently. After about 5 to 7 minutes, when the butter turns a deep amber color and smells nutty, remove it from the heat immediately and pour into a heat-safe bowl.
- In a large mixing bowl, whisk together the pumpkin puree, brown sugar, and granulated sugar until smooth. Add the eggs one at a time, whisking well after each addition. Stir in the vanilla extract.
- Slowly drizzle in the warm brown butter while whisking constantly. In a small bowl, whisk together the cinnamon, ginger, nutmeg, cloves, and salt. Sprinkle this spice mixture over the pumpkin batter and whisk until fully combined.
- Pour in the heavy cream and whisk until the filling is smooth, glossy, and a beautiful pale orange color.
- Pour the filling into the pre-baked crust. Bake at 350°F (175°C) for 50 to 60 minutes. The edges should be set and slightly puffed, but the center will still jiggle a little when gently shaken.
- If the edges of the crust start browning too quickly, loosely tent the pie with aluminum foil for the last 15 minutes of baking.
- Place the pie on a cooling rack and let it cool completely at room temperature (about 2 hours). Once cool, refrigerate for at least 4 hours or overnight before serving.
Notes
Don’t skip pre-baking the crust to avoid sogginess. Watch the butter carefully when browning—it can burn in 30 seconds. Room temperature ingredients ensure a smooth filling. The pie tastes even better the next day after flavors meld. For gluten-free, use gluten-free gingersnaps. For dairy-free, use vegan butter and full-fat coconut cream.
Nutrition
- Serving Size: 1 slice
- Calories: 420
- Sugar: 30
- Fat: 26
- Saturated Fat: 15
- Carbohydrates: 44
- Fiber: 2
- Protein: 5
Keywords: pumpkin pie, brown butter, gingersnap crust, kid-friendly, Thanksgiving dessert, fall dessert, easy pumpkin pie


