Snow piling up on the windowsill, three kids underfoot, and a sudden craving for something warm that didn’t involve another bowl of soup. I’d promised them a movie night, but honestly, I had zero energy for anything complicated. The cabinets were bare of fancy baking supplies, and the thought of running to the store in that weather made me want to cry. So I did what any slightly desperate parent does—I raided the pantry for hot cocoa mix, grabbed a bag of marshmallows from the back of the cupboard, and decided to make it an event instead of a snack.
That first makeshift setup was pretty sad, if I’m being honest. Just a pot of milk, some envelopes of mix, and those sad little marshmallows that sort of melted into a puddle. But the kids didn’t care. They lined up their mugs, added their own sprinkles from a birthday cake kit, and acted like I’d created magic. That’s when it hit me—this didn’t need to be fancy. It just needed to feel special. And that’s exactly what this Easy Hot Cocoa Bar with Peppermint Marshmallows delivers.
It’s the kind of setup that makes everyone slow down, breathe, and actually enjoy the moment. No stress, no complicated recipes, just warm mugs and happy faces. And those peppermint marshmallows? They’re the star of the show—fluffy, minty, and way better than anything from a bag. I’ve been perfecting this for two winters now, and I think I’ve finally cracked the code for the coziest hot cocoa bar that looks impressive but takes almost no effort.
Why You’ll Love This Recipe
This isn’t your average hot cocoa station. I’ve tested this setup at holiday parties, snow days, and even a few grown-up gatherings, and it never fails to bring out the kid in everyone. Here’s why this Easy Hot Cocoa Bar with Peppermint Marshmallows works so well:
- Comes Together in Minutes : The marshmallows take about 20 minutes of active work, and the cocoa bar itself is just assembling toppings. Perfect for those “I need something cozy right now” moments.
- Simple Pantry Ingredients : No weird specialty items. You probably have most of the marshmallow ingredients already—sugar, corn syrup, gelatin, and peppermint extract are all easy to find.
- Perfect for Entertaining : Whether it’s a holiday gathering, a birthday party, or just a Tuesday night, this setup makes everyone feel special without you slaving away in the kitchen.
- Crowd-Pleaser for All Ages : Kids love the DIY aspect, and adults appreciate the grown-up touches like dark chocolate shavings or a splash of peppermint schnapps (optional, of course).
- Unbelievably Delicious : Homemade marshmallows are a game-changer. They’re pillowy, melt beautifully, and the peppermint adds this fresh, cool finish that regular marshmallows just can’t touch.
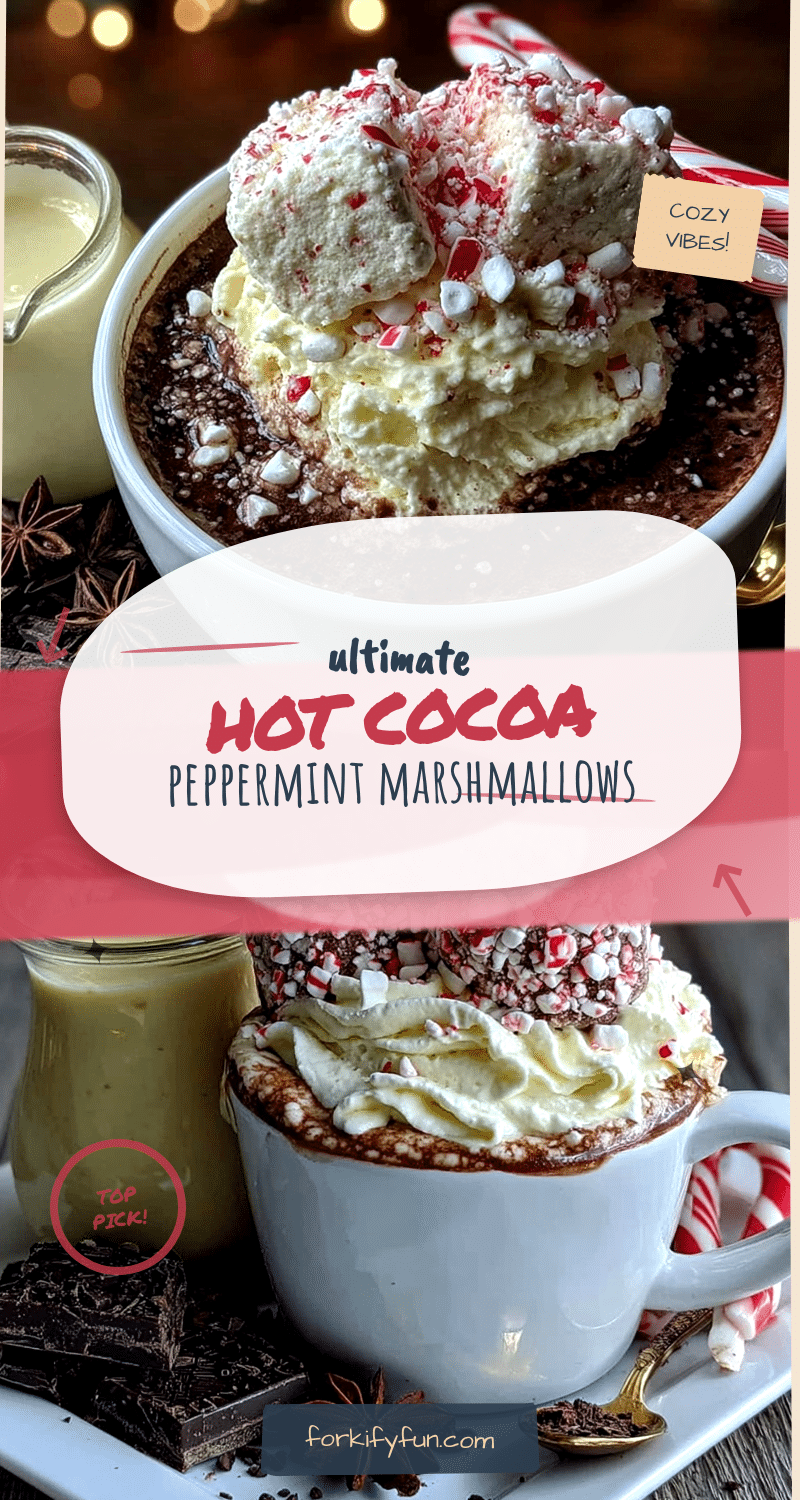
What makes this version different from other hot cocoa bars is the marshmallows. Most recipes use store-bought, which are fine but kind of boring. These homemade peppermint marshmallows are soft, slightly chewy, and have that perfect minty kick that cuts through the richness of the cocoa. Plus, they look gorgeous dusted with crushed candy canes. It’s the kind of detail that makes people think you spent way more time than you actually did.
What Ingredients You Will Need
This Easy Hot Cocoa Bar with Peppermint Marshmallows relies on a handful of quality ingredients. The marshmallows are the heart of the setup, so let me walk you through what you’ll need for both the marshmallows and the bar itself.
For the Peppermint Marshmallows
- 3 envelopes unflavored gelatin (about 3 tablespoons) – This is the base that gives marshmallows their structure. I use Knox brand—it’s reliable and easy to find.
- 1 cup cold water, divided – Half goes into blooming the gelatin, half goes into the sugar syrup. Use filtered water for best results.
- 1 ½ cups granulated sugar – Regular white sugar works perfectly. Don’t substitute with brown sugar; it’ll change the texture.
- 1 cup light corn syrup – This prevents crystallization and keeps the marshmallows soft. Karo is my go-to brand.
- ¼ teaspoon salt – Just a pinch to balance the sweetness. I use fine sea salt.
- 1 tablespoon vanilla extract – Pure vanilla adds warmth and depth. Imitation works in a pinch, but pure is better.
- 1 teaspoon peppermint extract – This is where the magic happens. Use pure peppermint extract, not mint, for that clean, cool flavor.
- ½ cup powdered sugar – For dusting the pan and the finished marshmallows. Prevents sticking.
- ½ cup cornstarch – Mixed with the powdered sugar for the perfect non-stick coating.
- ⅓ cup crushed candy canes – For rolling the marshmallows. You can crush them in a bag with a rolling pin or use a food processor.
For the Hot Cocoa Bar

- Your favorite hot cocoa mix or homemade recipe – I use a mix of dark cocoa powder, sugar, and a pinch of salt. But store-bought works great too.
- Milk or milk alternatives – Whole milk makes the richest cocoa, but oat milk and almond milk are excellent dairy-free options.
- Whipped cream – Homemade is best, but canned works in a pinch. Just make sure it’s cold.
- Chocolate shavings or curls – Use a vegetable peeler on a dark chocolate bar for fancy-looking curls.
- Crushed candy canes – Extra for sprinkling on top of the cocoa.
- Mini chocolate chips – They melt slightly and add little pockets of chocolate.
- Cinnamon sticks – For stirring. They add a subtle warmth that’s lovely.
- Caramel sauce or chocolate syrup – For drizzling. Homemade caramel is amazing, but store-bought is totally fine.
- Optional: peppermint schnapps or Irish cream – For the adults. Just a splash makes it extra special.
Equipment Needed
You don’t need a fancy kitchen to pull this off. Here’s what you’ll actually use:
- Stand mixer or hand mixer – A stand mixer with the whisk attachment is ideal, but a hand mixer works too. You’ll be whipping for about 10-12 minutes, so your arms might get tired with a hand mixer.
- 9×13-inch baking pan – For setting the marshmallows. Glass or metal both work fine. Line it with parchment paper for easy removal.
- Candy thermometer – This is crucial. You need the sugar syrup to reach exactly 240°F (soft ball stage). No thermometer means guesswork, and that’s risky with candy.
- Medium saucepan – For cooking the sugar syrup. Use a heavy-bottomed pan to prevent scorching.
- Spatula – A silicone spatula is best for scraping every bit of marshmallow goodness.
- Small bowls and ramekins – For organizing your cocoa bar toppings. I use little ceramic bowls I found at a thrift store.
- Mugs – Big, cozy mugs. The bigger the better, honestly.
- Piping bag or zip-top bag – For drizzling sauces neatly. Not essential, but it looks prettier.
Preparation Method
Making homemade marshmallows sounds intimidating, but I promise it’s easier than you think. Let me walk you through it step by step.
- Prep your pan. Lightly grease a 9×13-inch baking pan with butter or cooking spray. In a small bowl, whisk together ¼ cup powdered sugar and ¼ cup cornstarch. Dust the pan generously with this mixture, tapping out any excess. Set aside.
- Bloom the gelatin. In the bowl of your stand mixer, sprinkle the 3 envelopes of gelatin over ½ cup cold water. Let it sit for about 5-10 minutes until it’s firm and jiggly. This is called blooming, and it’s essential for smooth marshmallows.
- Cook the sugar syrup. In a medium saucepan, combine 1 ½ cups sugar, 1 cup corn syrup, ¼ teaspoon salt, and the remaining ½ cup water. Stir gently over medium heat until the sugar dissolves. Stop stirring once it comes to a boil. Clip your candy thermometer to the side and let it boil undisturbed until it reaches 240°F. This takes about 8-10 minutes. Don’t walk away—syrup can burn quickly.
- Whip the gelatin. While the syrup is boiling, turn your mixer on low speed and start beating the bloomed gelatin. It’ll look strange at first, but keep going. Once the syrup hits 240°F, remove it from heat immediately.
- Combine carefully. With the mixer running on low, slowly pour the hot syrup into the gelatin mixture. Be careful—the syrup is extremely hot, and splashing can burn you. Pour it in a thin, steady stream down the side of the bowl.
- Whip until fluffy. Once all the syrup is in, increase the speed to high and whip for 10-12 minutes. The mixture will turn white, thick, and glossy. It should look like marshmallow fluff. Add the vanilla extract and peppermint extract during the last minute of whipping.
- Pour and spread. Scrape the marshmallow mixture into your prepared pan. Use a lightly greased spatula to spread it evenly. Don’t overwork it—just get it mostly flat. Dust the top with more of the powdered sugar-cornstarch mixture.
- Let it set. Cover the pan loosely with plastic wrap and let it sit at room temperature for at least 4 hours, or overnight. Don’t put it in the fridge—it’ll get sticky and weird.
- Cut and coat. Once set, turn the marshmallows out onto a cutting board dusted with the powdered sugar mixture. Use a sharp knife or pizza cutter to cut them into squares. I like 1-inch cubes, but you can go bigger or smaller. Toss each square in the remaining powdered sugar mixture, then roll in crushed candy canes if desired.
- Set up the cocoa bar. While the marshmallows set, prepare your hot cocoa bar. Arrange your mugs, cocoa mix, milk, whipped cream, and all your toppings in little bowls. I like to use a tiered tray for visual interest. Keep the marshmallows in a separate bowl so they don’t get soggy.
- Make the cocoa. For each serving, heat 1 cup of milk (or water) until steaming. Whisk in 2-3 tablespoons of cocoa mix until smooth. Top with whipped cream, a peppermint marshmallow, and any other toppings you love.
Cooking Tips & Techniques
I’ve made these marshmallows about a dozen times now, and I’ve learned a few things the hard way. Here’s what I wish someone had told me:
- Don’t skip the thermometer. I tried eyeballing it once. Big mistake. The marshmallows turned out grainy and weird. That 240°F mark is non-negotiable for the perfect texture.
- Humidity is your enemy. Marshmallows don’t set well on rainy or humid days. If it’s muggy outside, wait for a drier day or run a dehumidifier in the kitchen.
- Oil your scissors or knife. When cutting the marshmallows, lightly oil your blade with cooking spray. It prevents sticking and gives you clean edges. A pizza cutter works great too.
- Double the marshmallows. Seriously. They disappear fast. I always make a double batch because people eat them straight from the bowl before they even make it into the cocoa.
- Toast them if you want. These marshmallows toast beautifully over a gas stove or campfire. The peppermint flavor gets slightly caramelized, and it’s incredible.
- Keep the cocoa warm. If you’re serving a crowd, keep the hot cocoa in a slow cooker on warm. Set out mugs and let people serve themselves. It’s so much easier than reheating individual cups.
Variations & Adaptations
This Easy Hot Cocoa Bar with Peppermint Marshmallows is endlessly customizable. Here are a few ways I’ve adapted it:
- Dairy-Free Version : Use oat milk or coconut milk for the cocoa. The marshmallows are naturally dairy-free (no butter or milk in the recipe), so you’re good there. Just double-check your chocolate syrup if you’re using store-bought.
- Vegan Marshmallows : Traditional marshmallows use gelatin, which isn’t vegan. You can substitute with agar agar powder, but the texture will be different—more like a jelly marshmallow. I’ve tried it, and it’s good, but not as fluffy.
- Spiced Hot Cocoa : Add a pinch of cinnamon, nutmeg, or even a tiny bit of cayenne pepper to the cocoa mix. It gives it a Mexican hot chocolate vibe that pairs beautifully with the peppermint.
- White Chocolate Cocoa : Swap the regular cocoa for white hot chocolate mix. The peppermint marshmallows look stunning against the white backdrop, and it’s a fun twist.
- Peppermint Stick Stirrers : Instead of crushed candy canes, use whole mini candy canes as stirrers. They melt slowly and add sweetness with every stir.
- Add a Boozy Option : Set out a small bottle of peppermint schnapps or vanilla vodka for the adults. A splash adds warmth without overwhelming the cocoa.
Serving & Storage Suggestions
This setup is designed for sharing, but here’s how to make it work for your specific situation:
- Serving Temperature : Serve the cocoa piping hot. The marshmallows will start to melt within a minute or two, creating a creamy, dreamy top layer. If you’re serving a crowd, keep the cocoa warm in a slow cooker on the “warm” setting.
- Presentation Tips : I love using a wooden board or a tiered tray for the toppings. It creates visual height and makes everything feel special. Add a few sprigs of fresh mint or rosemary for a pop of green.
- Complementary Treats : This cocoa bar pairs beautifully with soft pumpkin chocolate chip cookies or a slice of pumpkin coffee cake with streusel. The warm spices complement the peppermint perfectly.
- Storing Marshmallows : Keep the peppermint marshmallows in an airtight container at room temperature for up to 2 weeks. Layer them between sheets of parchment paper so they don’t stick together. Do not refrigerate—they’ll get weepy and sticky.
- Freezing Marshmallows : You can freeze them for up to 3 months. Place them in a single layer on a baking sheet, freeze until firm, then transfer to a freezer bag. Thaw at room temperature for about 30 minutes before serving.
- Storing Cocoa Mix : If you make your own cocoa mix, store it in an airtight jar in a cool, dark place. It’ll keep for months. Just give it a stir before using in case the ingredients settle.
- Reheating Leftover Cocoa : If you have leftover prepared cocoa, store it in the fridge for up to 3 days. Reheat gently on the stovetop or in the microwave, whisking to recombine. Add a splash of fresh milk to restore creaminess.
Nutritional Information & Benefits
Let’s be real—this is a treat, not a health food. But that doesn’t mean it’s without some redeeming qualities. Here’s the breakdown per serving (1 cup cocoa with 1 marshmallow and whipped cream):
- Calories : Approximately 320-380 calories, depending on your cocoa mix and toppings.
- Fat : 8-12 grams, mostly from the milk and whipped cream. Use skim milk or a dairy-free alternative to reduce this.
- Carbohydrates : 55-65 grams, with most coming from sugar. The marshmallows and candy canes add sweetness, so go easy if you’re watching your sugar intake.
- Protein : 6-8 grams from the milk and gelatin. Gelatin is actually good for your joints and skin—bonus!
- Calcium : About 25% of your daily needs from the milk. Great for bone health.
- Allergens : Contains dairy (unless using alternatives) and gelatin. Gluten-free as written. Check your cocoa mix for any hidden gluten if that’s a concern.
I like to think of this as a mindful indulgence. It’s not something you eat every day, but when you do, you savor it. The peppermint can also help with digestion after a heavy meal, so it’s a nice way to end a holiday dinner.
Conclusion
This Easy Hot Cocoa Bar with Peppermint Marshmallows has become a winter tradition in our house, and I hope it becomes one in yours too. It’s the kind of recipe that brings people together—whether it’s a quiet night in with the kids or a full-blown holiday party. The marshmallows are surprisingly simple to make, and the setup is as flexible as your imagination.
Don’t be afraid to customize it. Swap in your favorite toppings, try different extracts in the marshmallows (peppermint is classic, but almond or orange would be lovely), or set out a board of charcuterie with pepperoni and cheese for a savory balance. The point is to make it yours.
I’d love to hear how your cocoa bar turns out. Drop a comment below and tell me what toppings you used, or share a photo of your setup. And if you’re looking for more cozy winter recipes, check out this slow-roasted tomato soup with grilled cheese croutons for the perfect savory companion. Now go pour yourself a mug and enjoy the warmth!
Frequently Asked Questions
Can I use store-bought marshmallows instead?
Absolutely. The homemade peppermint marshmallows are the star of this setup, but if you’re short on time, store-bought marshmallows work fine. Just toss them in crushed candy canes for a similar effect. They won’t be as fluffy, but they’ll still taste great.
How far in advance can I make the marshmallows?
You can make them up to 2 weeks ahead. Store them in an airtight container at room temperature, layered between parchment paper. They actually get a little better after a day or two as the flavors meld.
Can I make this a vegan hot cocoa bar?
Yes! Use a plant-based milk like oat or almond milk for the cocoa. For the marshmallows, you can try using agar agar powder instead of gelatin, but the texture will be different—more like a jelly marshmallow. There are also store-bought vegan marshmallows that work well.
What’s the best way to crush candy canes?
I put them in a heavy-duty zip-top bag and smash them with a rolling pin. It’s satisfying and gives you control over the size. For finer pieces, use a food processor, but be careful not to turn them into powder.
Can I use this setup for a party?
Absolutely! This is perfect for parties. Set up the cocoa bar on a table with all the toppings in little bowls, keep the hot cocoa warm in a slow cooker, and let guests serve themselves. It’s interactive, fun, and requires almost no effort from you once it’s set up.
Pin This Recipe!
Easy Hot Cocoa Bar with Peppermint Marshmallows

A cozy, customizable hot cocoa bar featuring homemade peppermint marshmallows. Perfect for snow days, holiday parties, or any occasion that calls for a warm, comforting treat.
- Prep Time: 20 minutes
- Cook Time: 10 minutes
- Total Time: 4 hours 30 minutes (includes setting time)
- Yield: 12 servings 1x
- Category: Dessert
- Cuisine: American
Ingredients
- 3 envelopes unflavored gelatin (about 3 tablespoons)
- 1 cup cold water, divided
- 1 ½ cups granulated sugar
- 1 cup light corn syrup
- ¼ teaspoon salt
- 1 tablespoon vanilla extract
- 1 teaspoon peppermint extract
- ½ cup powdered sugar
- ½ cup cornstarch
- ⅓ cup crushed candy canes
- Your favorite hot cocoa mix or homemade recipe
- Milk or milk alternatives
- Whipped cream
- Chocolate shavings or curls
- Crushed candy canes (extra for topping)
- Mini chocolate chips
- Cinnamon sticks
- Caramel sauce or chocolate syrup
- Optional: peppermint schnapps or Irish cream
Instructions
- Prep your pan: Lightly grease a 9×13-inch baking pan with butter or cooking spray. In a small bowl, whisk together ¼ cup powdered sugar and ¼ cup cornstarch. Dust the pan generously with this mixture, tapping out any excess. Set aside.
- Bloom the gelatin: In the bowl of your stand mixer, sprinkle the 3 envelopes of gelatin over ½ cup cold water. Let it sit for about 5-10 minutes until it’s firm and jiggly.
- Cook the sugar syrup: In a medium saucepan, combine 1 ½ cups sugar, 1 cup corn syrup, ¼ teaspoon salt, and the remaining ½ cup water. Stir gently over medium heat until the sugar dissolves. Stop stirring once it comes to a boil. Clip your candy thermometer to the side and let it boil undisturbed until it reaches 240°F. This takes about 8-10 minutes.
- Whip the gelatin: While the syrup is boiling, turn your mixer on low speed and start beating the bloomed gelatin. Once the syrup hits 240°F, remove it from heat immediately.
- Combine carefully: With the mixer running on low, slowly pour the hot syrup into the gelatin mixture. Pour it in a thin, steady stream down the side of the bowl.
- Whip until fluffy: Once all the syrup is in, increase the speed to high and whip for 10-12 minutes. The mixture will turn white, thick, and glossy. Add the vanilla extract and peppermint extract during the last minute of whipping.
- Pour and spread: Scrape the marshmallow mixture into your prepared pan. Use a lightly greased spatula to spread it evenly. Dust the top with more of the powdered sugar-cornstarch mixture.
- Let it set: Cover the pan loosely with plastic wrap and let it sit at room temperature for at least 4 hours, or overnight. Do not refrigerate.
- Cut and coat: Once set, turn the marshmallows out onto a cutting board dusted with the powdered sugar mixture. Use a sharp knife or pizza cutter to cut them into 1-inch cubes. Toss each square in the remaining powdered sugar mixture, then roll in crushed candy canes if desired.
- Set up the cocoa bar: While the marshmallows set, prepare your hot cocoa bar. Arrange your mugs, cocoa mix, milk, whipped cream, and all your toppings in little bowls.
- Make the cocoa: For each serving, heat 1 cup of milk (or water) until steaming. Whisk in 2-3 tablespoons of cocoa mix until smooth. Top with whipped cream, a peppermint marshmallow, and any other toppings you love.
Notes
Don’t skip the candy thermometer; 240°F is crucial for texture. Humidity can affect marshmallow setting. Oil your knife or scissors when cutting marshmallows to prevent sticking. Double the marshmallow batch if desired. Marshmallows can be toasted over a gas stove or campfire. Keep cocoa warm in a slow cooker for parties.
Nutrition
- Serving Size: 1 cup cocoa with 1 m
- Calories: 320380
- Sugar: 4555
- Sodium: 150200
- Fat: 812
- Saturated Fat: 58
- Carbohydrates: 5565
- Fiber: 12
- Protein: 68
Keywords: hot cocoa bar, peppermint marshmallows, homemade marshmallows, winter dessert, holiday treat, cozy drink, hot chocolate bar