This was supposed to be a batch of from-scratch marshmallows for a holiday baking exchange. I had the sugar syrup bubbling on the stove, the gelatin blooming in a bowl, and my kitchen timer set to the exact minute I needed to start whipping. Then my neighbor rang the doorbell to borrow a cup of flour, and I got distracted for what felt like thirty seconds but was probably closer to three minutes. The sugar syrup went a shade too dark, the texture was off, and my perfect marshmallows turned into a sticky, unusable mess.
I stood there staring at the failed batch, honestly feeling sorry for myself. I mean, I had already bought the pretty glass jars and the festive twine to package everything up. The whole plan was shot. But then I looked at my pantry and saw the cocoa powder, the powdered milk, and the bag of mini marshmallows I had grabbed as a backup “just in case.” And I thought—well, maybe I can salvage this gift idea another way.
So I threw together a simple mix of cocoa, sugar, and milk powder, layered it in those jars, and topped each one with a handful of those backup marshmallows. I tied a ribbon around the lid, attached a little tag with instructions, and handed them out anyway. You know that feeling when you expect people to be polite but underwhelmed? That was not what happened. Everyone loved them. Like, genuinely loved them. One friend texted me later that week saying her kids had already finished the jar and begged her to ask for the recipe.
That’s how these Homemade Hot Cocoa Mix Jars with Marshmallows became my go-to gift and my go-to winter indulgence. They started as a failed experiment, but honestly, I’m so glad I messed up those marshmallows. Because what came out of that mistake was something I keep coming back to, year after year. It’s simple, it’s cozy, and it makes the perfect cup of hot chocolate every single time.
Why You’ll Love This Recipe
Let me tell you why these Homemade Hot Cocoa Mix Jars with Marshmallows have become my favorite thing to make during the colder months. I’ve tested this mix more times than I can count, tweaking the ratios until it was just right.
- Quick & Easy: This mix comes together in under 10 minutes. Seriously, it’s just measuring and layering. Perfect for last-minute gifts or when you need a cozy drink fast.
- Simple Ingredients: You probably already have most of these in your pantry. No fancy grocery trips needed—just cocoa, sugar, milk powder, and marshmallows.
- Perfect for Gifting: These jars are the ultimate homemade gift. They look beautiful on a countertop, and everyone—from kids to grandparents—loves getting them.
- Crowd-Pleaser: I’ve brought these to holiday parties and work gatherings, and they always get rave reviews. People love the personal touch.
- Unbelievably Delicious: The flavor is rich and chocolatey, but not too sweet. And the marshmallows on top? Pure comfort.
What makes this mix different from the store-bought packets is the quality. You control the ingredients. I use a high-quality cocoa powder—my favorite is Ghirardelli—and real powdered milk for a creamier texture. No weird additives, no preservatives, just pure hot chocolate goodness.
This recipe isn’t just good—it’s the kind that makes you close your eyes after the first sip. It’s comfort in a mug, the kind you want on a snowy afternoon or after a long day. And when you give it as a gift, you’re giving a little piece of that warmth.
What Ingredients You Will Need
This recipe uses simple, wholesome ingredients to deliver that rich, cozy flavor. Most of these are pantry staples, which makes it so easy to whip up a batch whenever you need it.
- Unsweetened Cocoa Powder: 1 cup (85g). This is the heart of the mix. I recommend using a Dutch-process cocoa for a smoother, less acidic flavor. My go-to is Ghirardelli, but any good brand works.
- Granulated Sugar: 2 cups (400g). Provides the sweetness. You can adjust this slightly if you prefer a less sweet mix, but this ratio is well-balanced.
- Powdered Milk: 1 ½ cups (180g). This makes the hot cocoa creamy without needing fresh milk. Look for instant powdered milk—it dissolves easily.
- Powdered Sugar: ½ cup (60g). Adds a touch of extra sweetness and helps the mix dissolve smoothly.
- Salt: ¼ teaspoon. Just a pinch to enhance the chocolate flavor. Don’t skip it!
- Mini Marshmallows: 1 ½ cups (about 80g). For topping the jars. Use store-bought or homemade if you’re feeling ambitious.
- Optional: Chocolate Shavings or Sprinkles: For decorating the jars. Adds a pretty touch for gifting.
When selecting your cocoa powder, look for one that’s rich and dark. I’ve tried this with natural cocoa, and it works, but the Dutch-process gives a more mellow, sophisticated flavor. For the powdered milk, I prefer Nestlé Nido or Carnation—they both dissolve well and add a nice creaminess.
If you’re making this for someone with dietary restrictions, you can swap the powdered milk for a dairy-free powdered alternative like coconut milk powder. The texture will be slightly different, but still delicious. And if you’re watching your sugar intake, you can use a sugar substitute like monk fruit sweetener—just note that the volume will be different, so you’ll need to adjust.
Equipment Needed
You don’t need much to make these jars, which is part of the charm. Here’s what you’ll need:
- Quart-Sized Mason Jars: 4 jars. Wide-mouth jars are easiest for layering. I use Ball or Kerr brand, but any glass jar with a tight-fitting lid works.
- Measuring Cups and Spoons: For accurate measurements. A kitchen scale is even better for consistency.
- Funnel: A wide-mouth funnel makes layering the dry ingredients so much cleaner. If you don’t have one, you can use a rolled-up piece of paper.
- Mixing Bowl: For combining the dry ingredients before layering.
- Whisk: To ensure everything is evenly mixed.
- Ribbon or Twine: For decorating the jars. This is optional but makes them look gift-ready.
- Gift Tags: To attach instructions for making the hot cocoa.
I’ve made these jars without a funnel before, and let me tell you, it’s messy. Cocoa powder gets everywhere. A cheap funnel from the grocery store is worth the investment. Also, if you’re reusing old jars, make sure they’re completely dry before adding the mix—moisture will cause clumping.
Preparation Method
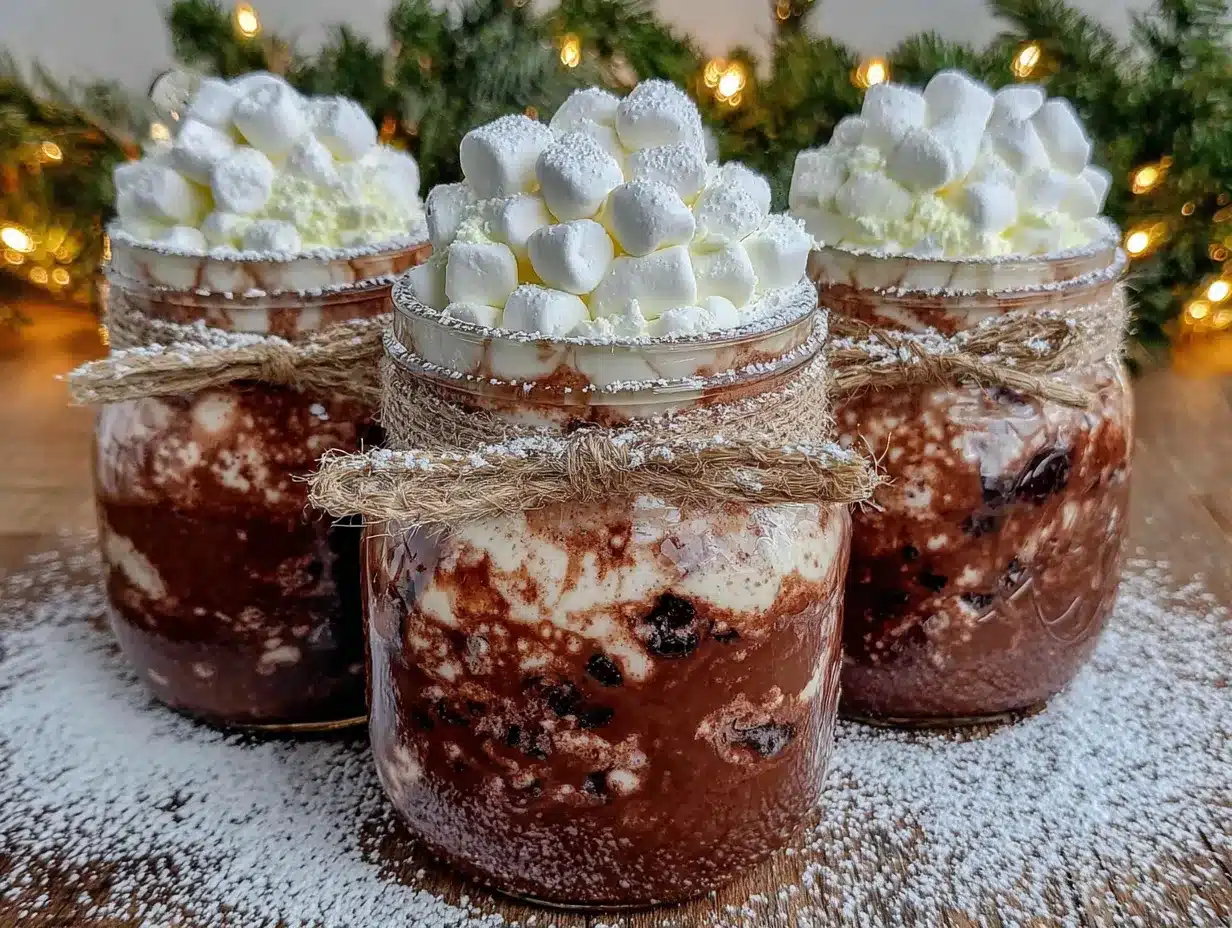
- Prepare your jars: Wash and dry your mason jars thoroughly. Any moisture inside will ruin the dry mix. I usually let them air dry overnight to be safe.
- Combine the dry ingredients: In a large mixing bowl, whisk together the unsweetened cocoa powder, granulated sugar, powdered milk, powdered sugar, and salt. Whisk until no lumps remain. This takes about 2 minutes. The mixture should look uniform and smell intensely chocolatey.
- Layer the mix: Using your funnel, spoon the dry mix into each jar. I like to divide the mix evenly among the 4 jars, which gives you about 1 ½ cups of mix per jar. Tap the jar gently on the counter to settle the layers.
- Add the marshmallows: Top each jar with a generous layer of mini marshmallows—about ⅓ cup per jar. Press them down slightly so they stay in place.
- Seal the jars: Screw the lids on tightly. If you’re gifting them, you can add a layer of decorative fabric or paper under the lid ring for a prettier look.
- Attach instructions: Write or print a small tag with the following directions: “To make hot cocoa: Empty the contents of the jar into a saucepan. Add 4 cups of milk (dairy or non-dairy) and heat over medium, whisking constantly, until hot and smooth. Do not boil. Serve and enjoy!”
- Decorate (optional): Tie a ribbon or piece of twine around the neck of the jar. Add a sprig of cinnamon or a candy cane for extra flair.
One thing I learned the hard way—don’t pack the mix too tightly. If you press it down too hard, it becomes difficult to scoop out later. Just a gentle tap on the counter is enough. Also, if you’re making a big batch for yourself, you can store the mix in an airtight container and just scoop out what you need. It keeps for months.
Cooking Tips & Techniques
Over the years, I’ve made a few mistakes with these jars so you don’t have to. Here are my best tips:
Don’t skip the powdered milk. I tried making a batch without it once, thinking I’d just use fresh milk when making the cocoa. It wasn’t the same. The powdered milk gives the mix a creamier texture that fresh milk alone can’t replicate. It’s worth including.
Whisk, don’t just stir. When combining the dry ingredients, use a whisk to break up any clumps. Cocoa powder loves to form little lumps, and those won’t dissolve well later. A good 2-minute whisk will save you from a lumpy cup of cocoa.
Use a funnel for clean layers. I know I mentioned this, but seriously—a funnel is a game-changer. It keeps the cocoa powder off your counter and makes the layers look neat and professional.
Toast the marshmallows for a twist. If you’re making a cup for yourself right away, try toasting the marshmallows under the broiler for a minute. It gives that campfire flavor that takes the cocoa to another level.
Make a test cup first. Before you gift all your jars, make one cup of cocoa to taste-test. Adjust the sweetness or cocoa level if needed. I once made a batch that was way too sweet, and I had to redo all the jars. Learn from my mistake!
Variations & Adaptations
One of the best things about this recipe is how easy it is to customize. Here are a few variations I’ve tried:
Peppermint Hot Cocoa: Add ¼ cup of crushed candy canes to the dry mix. Layer it in the jar with the marshmallows. The peppermint flavor is perfect for the holidays.
Spiced Mexican Hot Chocolate: Add 1 teaspoon of cinnamon, ¼ teaspoon of cayenne pepper, and a pinch of nutmeg to the dry mix. It gives a warm, spicy kick that’s so cozy on a cold night.
Vegan Version: Use coconut milk powder instead of dairy powdered milk, and swap the marshmallows for vegan marshmallows (Dandies brand works great). The flavor is still rich and creamy.
Dark Chocolate Lover’s Mix: Use dark cocoa powder (like Hershey’s Special Dark) and reduce the sugar to 1 ¾ cups. The result is a more intense, less sweet cocoa that adults especially love.
White Hot Cocoa: Omit the cocoa powder entirely. Use 2 cups of white chocolate chips, finely chopped, mixed with the powdered milk and sugar. Layer with white marshmallows. It’s a fun alternative for kids.
I’ve personally tried the peppermint version, and it’s become my holiday staple. I crush the candy canes in a zip-top bag with a rolling pin—it’s messy but therapeutic.
Serving & Storage Suggestions
When you’re ready to enjoy a cup, here’s how to make it perfect. Empty one jar of mix into a medium saucepan. Add 4 cups of milk—I prefer whole milk for richness, but 2% or oat milk work too. Heat over medium heat, whisking constantly, until the mixture is hot and smooth. Do not let it boil, or the milk can scorch. Serve immediately in your favorite mug.
For a fun presentation, top with extra marshmallows, a dollop of whipped cream, or a sprinkle of cinnamon. A candy cane stirrer makes it feel extra festive.
These jars make wonderful gifts for teachers, neighbors, or holiday hosts. I like to pair them with a cute mug and a bag of gourmet marshmallows for a complete experience.
Storage: The unopened jars will keep for up to 6 months in a cool, dry place. Once opened, use the mix within 2 months for best flavor. Do not refrigerate—the moisture will cause clumping. If you’re making a big batch for yourself, store the mix in an airtight container in your pantry.
The flavors actually meld together after a week or so, so the cocoa tastes even better if you let the jars sit for a few days before using. Just something I noticed after making a batch ahead of time.
Nutritional Information & Benefits
One serving (using ¼ cup of mix and 1 cup of milk) contains approximately:
- Calories: 220
- Fat: 4g
- Carbohydrates: 42g
- Protein: 8g
- Sugar: 35g
These values will vary based on the type of milk you use. Using skim milk will reduce the calories and fat, while oat milk will add a bit more carbs.
The cocoa powder is rich in antioxidants called flavonoids, which can support heart health. The milk provides calcium and vitamin D for strong bones. And honestly, there’s a mental health benefit too—sipping a warm cup of cocoa is a simple pleasure that can lift your spirits on a gray day.
If you’re watching your sugar intake, you can reduce the sugar in the mix by ¼ cup without sacrificing too much flavor. I’ve done this, and the cocoa is still satisfyingly sweet.
Conclusion
These Homemade Hot Cocoa Mix Jars with Marshmallows are proof that sometimes the best recipes come from happy accidents. They’re easy to make, beautiful to give, and absolutely delicious to drink. Whether you’re making them for holiday gifts, a cozy night in, or just because you deserve a little warmth, they never disappoint.
I love that this recipe lets me share a bit of comfort with the people I care about. Every time I hand over a jar, I think about that failed marshmallow batch and smile. It’s funny how things work out, isn’t it?
I’d love to hear how your jars turn out! Leave a comment below and tell me about your favorite variation. And if you share a photo on social media, tag me so I can see your beautiful creations. Happy sipping, friends!
Frequently Asked Questions
Can I use hot water instead of milk to make the cocoa?
You can, but it won’t be as creamy. The powdered milk in the mix helps, but using hot water will result in a thinner, less rich cocoa. I always recommend milk for the best texture.
How long do these jars last as gifts?
Stored in a cool, dry place, the unopened jars will stay fresh for up to 6 months. I’ve kept them for 8 months before and they were still fine, but the flavor starts to fade after that point.
Can I double this recipe?
Absolutely! This recipe scales beautifully. Just multiply all the ingredients by the number of jars you want to make. I often make 12 jars at a time for holiday gifting.
Why did my cocoa turn out lumpy?
Lumpy cocoa usually means the dry mix wasn’t whisked well enough before layering, or the milk was heated too quickly. Make sure to whisk the mix thoroughly and heat the milk slowly while stirring constantly.
Can I use this mix for baking?
I don’t recommend it. This mix is formulated specifically for drinking. The sugar-to-cocoa ratio is different from baking cocoa, and the powdered milk can throw off the chemistry of baked goods. Stick to using it for hot cocoa!
Pin This Recipe!
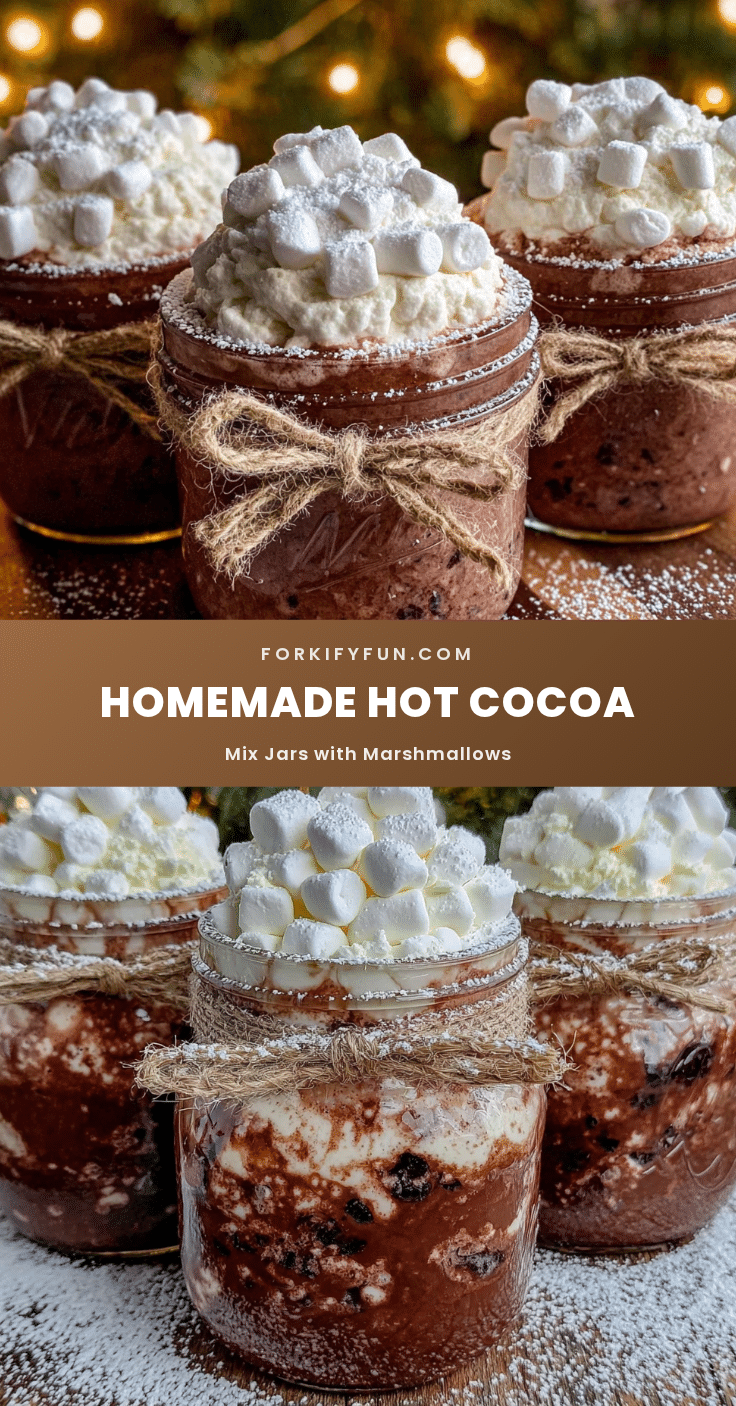
Easy Homemade Hot Cocoa Mix Jars with Marshmallows

These Homemade Hot Cocoa Mix Jars with Marshmallows are the perfect gift or winter indulgence. Made with simple pantry ingredients, they come together in under 10 minutes and deliver a rich, creamy cup of hot chocolate every time.
- Prep Time: 10 minutes
- Cook Time: 5 minutes
- Total Time: 15 minutes
- Yield: 4 jars (each jar makes 4 servings) 1x
- Category: Beverage
- Cuisine: American
Ingredients
- 1 cup (85g) unsweetened cocoa powder (Dutch-process recommended)
- 2 cups (400g) granulated sugar
- 1 ½ cups (180g) powdered milk (instant)
- ½ cup (60g) powdered sugar
- ¼ teaspoon salt
- 1 ½ cups (about 80g) mini marshmallows
- Optional: chocolate shavings or sprinkles for decorating
Instructions
- Wash and dry your mason jars thoroughly. Let them air dry overnight to ensure no moisture remains.
- In a large mixing bowl, whisk together the unsweetened cocoa powder, granulated sugar, powdered milk, powdered sugar, and salt until no lumps remain (about 2 minutes).
- Using a funnel, spoon the dry mix evenly into 4 quart-sized mason jars (about 1 ½ cups per jar). Tap the jar gently on the counter to settle the layers.
- Top each jar with a generous layer of mini marshmallows (about ⅓ cup per jar). Press them down slightly so they stay in place.
- Screw the lids on tightly. For gifting, you can add a layer of decorative fabric or paper under the lid ring.
- Attach a small tag with instructions: ‘To make hot cocoa: Empty the contents of the jar into a saucepan. Add 4 cups of milk (dairy or non-dairy) and heat over medium, whisking constantly, until hot and smooth. Do not boil. Serve and enjoy!’
- Optional: Tie a ribbon or piece of twine around the neck of the jar. Add a sprig of cinnamon or a candy cane for extra flair.
Notes
Do not pack the mix too tightly in the jars; a gentle tap on the counter is enough. The flavors meld together after a week, so the cocoa tastes even better if the jars sit for a few days before using. For a test cup before gifting, make one cup to adjust sweetness or cocoa level as needed. To toast marshmallows for a twist, place under the broiler for a minute.
Nutrition
- Serving Size: 1 cup (using ¼ cup m
- Calories: 220
- Sugar: 35
- Sodium: 150
- Fat: 4
- Saturated Fat: 2
- Carbohydrates: 42
- Fiber: 2
- Protein: 8
Keywords: hot cocoa mix, homemade hot chocolate, gift jars, holiday gift, easy hot cocoa, marshmallow cocoa, DIY hot chocolate mix


