My daughter came home from school last October clutching a wrinkled flyer for the annual Harvest Party. “We need to bring something for the class snack table, Mom,” she said, her eyes scanning the list of sign-up items—veggie platters, apple slices, juice boxes. She looked at me, and I knew what she was thinking. We needed something fun. Something festive. Something that felt like Halloween but wouldn’t require me to spend hours in the kitchen piping intricate frosting onto cookies I’d inevitably burn. I had been looking for a Halloween treat that actually looked like it belonged at a party without needing a pastry degree to pull off. The classic Rice Krispie treat was the obvious starting point—sturdy, kid-friendly, and endlessly moldable. But shaping them into pumpkins? That was the lightbulb moment. It wasn’t complicated. It wasn’t fancy. It was just smart. And honestly, that’s exactly what I needed that afternoon with a clock ticking and a kindergartener “helping” at the counter.
Why You’ll Love This Recipe
These pumpkin Rice Krispie treats are the kind of recipe that makes you look like a Halloween hero with almost zero effort. I’ve tested this method at three different parties now, and they disappear faster than the candy bowl every single time.
- No-Bake & Simple: You don’t even turn on the oven. Stovetop and microwave both work perfectly, which means less cleanup and no risk of burning your treats.
- Kid-Friendly Activity: Little hands can help press the mixture into the pumpkin shapes—my daughter treats the greased hands part like a personal spa moment, and honestly, I don’t correct her.
- Perfect for Halloween Parties: Whether it’s a classroom celebration, trunk-or-treat, or just a spooky movie night at home, these pumpkins fit right in without looking out of place.
- Easy to Customize: You can make them orange, add chocolate stems, or even turn them into ghosts by skipping the food coloring—the base recipe stays the same.
- Always a Crowd-Pleaser: Rice Krispie treats have that nostalgic pull that adults love just as much as kids. I’ve watched grown men at office parties grab three before anyone else got a turn.
What makes these different from every other pumpkin-shaped dessert out there? It’s the texture. Most shaped treats get dense and hard when you try to mold them. But this method keeps them perfectly chewy with that signature snap when you bite in. I figured out that letting the marshmallow mixture cool just slightly before shaping makes all the difference—too hot and they’re sticky messes, too cold and they crumble. There’s a sweet spot, and I’ll walk you right through it.
This isn’t just another Halloween recipe—it’s the one that makes your kids say “You made these?” with actual awe in their voices. And honestly? That feeling is better than any store-bought candy.
What Ingredients You Will Need
This recipe uses simple, pantry-friendly ingredients to create something that looks way more impressive than its parts suggest. I’ve tested a few variations over the years, and this combination delivers the best flavor and easiest handling every time.
For the Pumpkin Treats
- 6 cups Rice Krispies cereal (or any crisp rice cereal—store brands work fine, just check the texture)
- 4 tablespoons unsalted butter (I prefer salted butter in a pinch, but unsalted lets you control the saltiness better)
- 1 package (10 oz) mini marshmallows (about 4 cups—regular marshmallows work too, but minis melt faster and more evenly)
- 1 teaspoon vanilla extract (pure vanilla is worth it here, but imitation works fine for kids’ treats)
- 1/4 teaspoon salt (this balances the sweetness—don’t skip it)
- Orange gel food coloring (gel works better than liquid because it doesn’t add extra moisture that makes the treats sticky)
For Decorating
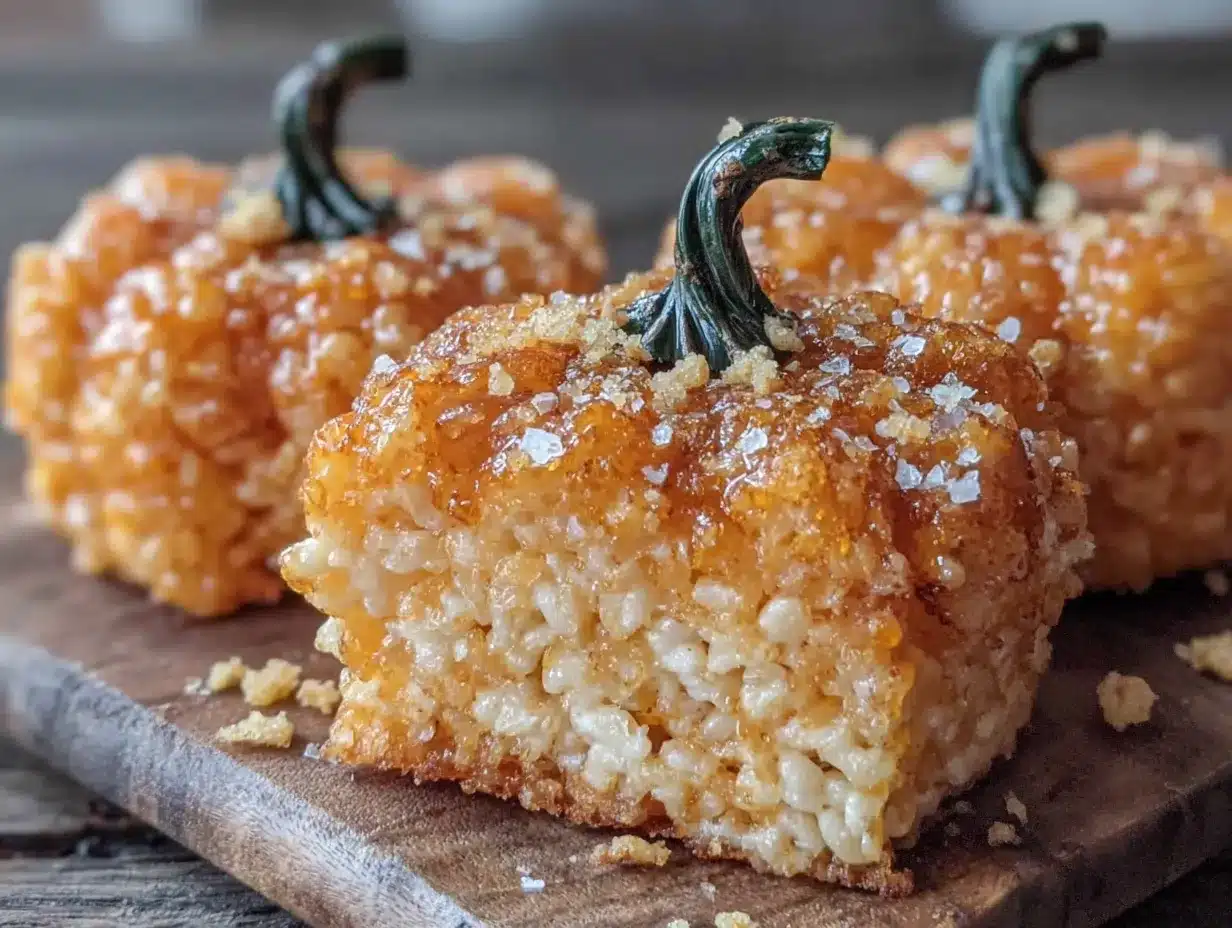
- Pretzel sticks (for the stems—broken in half works best)
- Green candy melts or green frosting (for little leaves on top)
- Black decorating gel (optional—for jack-o’-lantern faces, though my kids prefer them plain)
Ingredient Notes & Substitutions: I’ve made these with both name-brand Rice Krispies and generic crisp rice cereal, and honestly, the difference is minimal once they’re shaped. The real key is the marshmallows—Jet-Puffed brand melts the creamiest, but any mini marshmallow works. For a nut-free version (school-safe), double-check your pretzel sticks—some brands process in facilities with peanuts. For more nut-free snack ideas, check out this after-school snack board that’s perfect for Halloween week.
If you want to make these dairy-free, swap the butter for vegan butter (I like Miyoko’s brand) and use dairy-free marshmallows—Dandies brand melts beautifully and tastes identical to regular ones. I tested this version for a friend’s kid with dairy allergies, and nobody could tell the difference.
One pro tip I learned the hard way: don’t use liquid food coloring. The first batch I made turned a sad, watery orange and the treats came out sticky and hard to shape. Gel coloring gives you that vibrant Halloween orange without messing with the texture. A little goes a long way—start with a tiny drop and add more until you’re happy.
For the stems, I’ve tried candy corn, chocolate chips, and even green licorice strings. Pretzel sticks win every time—they look like real stems, add a salty contrast, and don’t fall off when you stack the treats in a container.
Equipment Needed
You don’t need any fancy tools for this recipe, which is exactly why I love it. Here’s what you’ll need:
- Large microwave-safe bowl (or a large saucepan if you’re doing stovetop—I use both depending on my mood)
- Rubber spatula (a silicone one is best—it won’t scratch your bowl and handles the sticky mixture better)
- 9×13-inch baking pan (for pressing the treats before shaping—line it with parchment paper or foil for easy removal)
- Parchment paper or wax paper (essential for the shaping step—trust me on this)
- Sharp knife or pizza cutter (for cutting the treats into squares before shaping)
- Small bowl of water (for wetting your hands—keeps the mixture from sticking to you like glue)
If you don’t have a 9×13 pan, a rimmed baking sheet works fine. I’ve even used a casserole dish in a pinch. The shape doesn’t matter much since you’ll be forming individual pumpkins anyway. Just make sure whatever you use is lightly greased.
For the shaping part, I’ve found that buttering your hands works better than using cooking spray—spray tends to make the mixture slippery rather than just non-stick. Keep a paper towel nearby to wipe off excess butter between pumpkins.
One piece of equipment I splurged on last year? A kitchen scale. It’s not necessary for this recipe, but if you make treats often, weighing your marshmallows ensures consistent results every time. If you love baking with precision, these snickerdoodle blondies are another recipe where a scale makes a difference.
Preparation Method
Let’s make some pumpkin treats. This whole process takes about 20 minutes of active time plus 30 minutes for setting. I usually make these the night before a party so they’re fully set and ready to decorate in the morning.
Step 1: Prep Your Workspace
Line your 9×13-inch pan with parchment paper, leaving some overhang on two sides (this makes lifting the whole block out later a breeze). Lightly grease the parchment with butter or non-stick spray. Set it aside.
Step 2: Melt the Butter and Marshmallows
In a large microwave-safe bowl, melt the butter in the microwave for about 30 seconds until fully melted. Add the mini marshmallows and microwave in 30-second intervals, stirring between each, until completely smooth. This usually takes about 2 minutes total. The mixture should be glossy and stretchy when you lift the spatula.
Stovetop method: Melt the butter in a large saucepan over low heat. Add the marshmallows and stir constantly until melted and smooth. Remove from heat immediately—overheating makes the treats hard and brittle.
Step 3: Add Color and Flavor
Stir in the vanilla extract and salt. Add a tiny dab of orange gel food coloring—start with less than you think you need. Stir thoroughly, then check the color. You can always add more, but you can’t take it away. I usually end up using about 1/4 teaspoon of gel for this batch size.
Step 4: Mix in the Cereal
Pour the Rice Krispies into the marshmallow mixture. Fold gently with your rubber spatula until every piece of cereal is coated. Don’t overmix or you’ll crush the cereal, which makes the treats dense. You want to see distinct cereal shapes, not a homogeneous orange paste.
Step 5: Press Into the Pan
Transfer the mixture to your prepared pan. Using a piece of parchment paper or greased hands (I prefer greased hands—more control), press the mixture into an even layer. Don’t press too hard—firm but gentle pressure keeps them chewy. If you smash them flat, they’ll be rock hard.
Step 6: Cool and Cut
Let the treats cool at room temperature for about 20 minutes. They should be set but still slightly warm—not hot, not cold. Using the parchment overhang, lift the whole block out onto a cutting board. Use a sharp knife or pizza cutter to cut into squares. I aim for 12-16 squares, depending on how big I want the pumpkins. A pizza cutter gives cleaner edges than a knife.
Step 7: Shape Into Pumpkins
Here’s where the magic happens. Lightly butter your hands or dip them in a small bowl of water. Take one square and gently roll it into a ball between your palms. Then, using your thumb and forefinger, gently pinch the top to create a slight point—this is where the stem will go. Use your fingers to press vertical indentations around the sides to mimic pumpkin ridges. I usually make 4-5 ridges per pumpkin.
Sensory cue: The mixture should feel pliable but not sticky. If it’s too sticky, let it cool another minute. If it’s too crumbly, your marshmallow mixture was overheated—try warming it briefly in the microwave and stirring in a tablespoon of butter to bring it back.
Step 8: Add Stems and Decorations
While the pumpkins are still slightly warm, press a pretzel stick half into the top point for the stem. If you’re adding leaves, melt green candy melts according to package directions and pipe small leaf shapes onto parchment paper. Let them set, then attach to the pumpkins with a tiny dab of melted candy. For jack-o’-lantern faces, use black decorating gel to draw simple expressions—my kids love making silly faces on theirs.
Step 9: Let Them Set Completely
Place the finished pumpkins on a parchment-lined baking sheet. Let them sit at room temperature for at least 30 minutes so everything sets firmly. If you’re in a hurry, pop them in the fridge for 15 minutes—just don’t leave them too long or condensation can make the pretzel stems soggy.
Cooking Tips & Techniques
I’ve made these pumpkin treats at least a dozen times now, and I’ve collected a few hard-won lessons along the way. Here’s what I wish someone had told me before my first attempt.
Don’t Overheat the Marshmallows: This is the number one mistake I see in recipe comments. If you microwave marshmallows too long, they start to caramelize and turn into a hard, candy-like substance that makes rock-solid treats. Heat in short bursts and stop as soon as everything is melted and smooth. The residual heat will finish the job.
The Warmth Window Is Real: You have about 10-15 minutes of workable time before the mixture firms up too much to shape. If you’re making a big batch, work in smaller portions—cut the block into quarters and shape one quarter at a time, keeping the rest covered with a clean kitchen towel to stay pliable.
Wet Hands Are Your Best Friend: I keep a small bowl of water next to my shaping station. Dipping my fingers between each pumpkin prevents sticking without adding too much butter flavor. Just shake off the excess water before touching the mixture—you don’t want soggy treats.
Consistency Check: If your mixture feels too dry and crumbly, you might have measured the cereal incorrectly (packed down instead of fluffed). Add a tablespoon of melted butter and stir gently to bring it back. If it’s too sticky, let it sit for 2-3 minutes and try again—sometimes it just needs a moment to cool.
Make It a Production: I learned the hard way that trying to shape all 16 pumpkins at once while my daughter “helped” was a recipe for stress. Now I set up a little assembly line—she rolls the balls, I shape the ridges, and we both add stems. It’s faster, more fun, and she feels proud of her contribution.
Storage Tip for Parties: If you’re making these a day ahead, store them in an airtight container at room temperature with a piece of bread tucked in the corner. The bread absorbs excess moisture and keeps the treats from getting sticky. Replace the bread after 24 hours if needed.
Variations & Adaptations
One of the best things about this recipe is how easily it adapts to different tastes, dietary needs, and occasions. Here are some variations I’ve tried and loved.
Ghost Treats (White Pumpkin Alternative)
Skip the orange food coloring entirely and shape the treats into round balls instead of pumpkins. Use mini chocolate chips for eyes and a small dot of black gel for the mouth. These are perfect if you’re making treats for a group that includes kids with food dye sensitivities. I made these for my daughter’s preschool Halloween party last year, and the teachers asked for the recipe.
Chocolate Pumpkin Treats
Add 1/4 cup of unsweetened cocoa powder to the marshmallow mixture before adding the cereal. The chocolate flavor pairs beautifully with the salty pretzel stems. Use orange sprinkles on top to keep the pumpkin theme going. My husband actually prefers these to the original—he says they taste like Halloween brownies.
Gluten-Free Version
Rice Krispies are naturally gluten-free (check the box—some store brands add malt flavoring that contains gluten). Use gluten-free pretzels for the stems. This version is always a hit at parties where someone has celiac disease, because they finally get to eat the same treat as everyone else.
Spider Web Pumpkins
After shaping the pumpkins, drizzle melted white chocolate over the top in a zigzag pattern, then use a toothpick to drag the lines into a web design. Add a plastic spider ring on top for maximum Halloween effect. This is my go-to for adult Halloween parties where the kids aren’t around to judge my decorating skills.
Mini Pumpkin Bites
Instead of cutting 12-16 squares, cut the block into 24-30 smaller pieces. Shape into tiny pumpkins about the size of a walnut. These are perfect for classroom treat bags or party favor boxes. You’ll need more stems—I use broken pretzel stick pieces or even candy corn cut in half.
Serving & Storage Suggestions
These pumpkin treats are best served at room temperature, which means you can set them out on a platter and forget about them until party time. They hold their shape beautifully for hours without getting sticky or falling apart.
Presentation Ideas: Arrange the pumpkins on a large wooden board or a black serving platter (the contrast makes the orange pop). Scatter a few candy corn pieces around the base for a “harvest” look. If you’re feeling fancy, place a few fake autumn leaves around the edges—just make sure they’re decorative, not edible.
What to Serve With Them: These treats are sweet on their own, so I like to balance the table with something savory. These buffalo chicken dip stuffed pretzel bites are my go-to savory pairing for Halloween parties—the spicy, cheesy flavor contrasts perfectly with the sweet marshmallow treats.
Storage Instructions: Store the pumpkin treats in an airtight container at room temperature for up to 3 days. Layer them between sheets of parchment paper to prevent sticking. Do not refrigerate—the cold air makes them hard and stale-tasting. If you need to keep them longer, freeze them (see below).
Freezing Tips: These treats freeze beautifully for up to 2 months. Place the shaped pumpkins on a parchment-lined baking sheet and freeze until solid (about 1 hour). Transfer to a freezer-safe bag or container, layering with parchment. To thaw, leave them at room temperature for about 30 minutes. Don’t microwave frozen treats—they’ll turn into a chewy mess.
How Flavors Develop: Honestly, these taste best on the second day. The marshmallow flavor mellows out, and the texture becomes perfectly chewy—not too soft, not too hard. If you can resist eating them all on day one, you’ll be rewarded on day two.
Nutritional Information & Benefits
Let’s be real—these are treats, not health food. But that doesn’t mean they can’t fit into a balanced lifestyle, especially during the Halloween season when a little indulgence is part of the fun.
Estimated Nutritional Values (per pumpkin treat, based on 16 servings):
- Calories: 145
- Total Fat: 3g
- Saturated Fat: 2g
- Carbohydrates: 29g
- Sugar: 14g
- Protein: 1g
- Sodium: 135mg
Health Considerations: Rice Krispies are fortified with iron and B vitamins, so there’s a tiny nutritional silver lining. The butter adds a small amount of vitamin A. If you’re watching sugar intake, you can reduce the marshmallows by 1 cup—the treats will be less sweet but still workable. For a lower-calorie version, use sugar-free marshmallows (they’re harder to find but available at most health food stores).
Allergen Notes: This recipe contains dairy (butter) and gluten (pretzels). For dairy-free, use vegan butter and dairy-free marshmallows. For gluten-free, use certified gluten-free cereal and pretzels. The base recipe is nut-free, but always check your ingredient labels if serving to someone with severe allergies.
My Personal Take: I believe in the 80/20 rule—eat nourishing foods 80% of the time, and enjoy treats like these the other 20%. Halloween comes once a year, and these pumpkins bring so much joy to my kids and their friends that I don’t stress about the sugar content. Life is about balance, not perfection.
Conclusion
These Easy Halloween Rice Krispie Treats Shaped Like Pumpkins are proof that you don’t need to be a professional baker to create something truly memorable for the holiday. They’re simple enough for a five-year-old to help with, impressive enough to steal the show at any party, and delicious enough that you’ll find yourself sneaking one (or three) after the kids go to bed.
What I love most about this recipe is how it brings people together. There’s something about shaping these little orange pumpkins that makes everyone smile—even my grumpy teenager cracked a grin when he saw the finished platter. The marshmallow aroma fills the kitchen, the kids’ hands get sticky, and for about 20 minutes, the whole family is working on the same project without anyone staring at a screen.
I’d love to hear how your pumpkin treats turn out! Did your kids invent their own face designs? Did you try the chocolate version? Drop a comment below and share your Halloween creations—I read every single one and love seeing photos of your kitchen victories. And if you’re looking for more spooky-season inspiration, don’t forget to check out the other Halloween recipes on the site.
Happy Halloween, and happy snacking!
Frequently Asked Questions
Can I make these pumpkin treats ahead of time?
Absolutely! These treats actually taste better on day two. Make them up to 3 days in advance and store in an airtight container at room temperature. Add the pretzel stems right before serving to keep them crunchy.
Why did my Rice Krispie treats turn out hard?
This usually happens when the marshmallows are overheated or when the mixture is pressed too firmly into the pan. Heat the marshmallows in short bursts until just melted, and use gentle pressure when shaping. If they’re already hard, try warming them in the microwave for 10 seconds to soften them up.
Can I use liquid food coloring instead of gel?
You can, but I don’t recommend it. Liquid food coloring adds extra moisture that makes the treats sticky and harder to shape. It also takes more drops to achieve a vibrant orange, which can affect the texture. Gel coloring gives you better color with less product and no texture issues.
How do I keep the pretzel stems from falling off?
Press the pretzel stem into the pumpkin while the treat is still slightly warm—the marshmallow mixture will hold it in place as it cools. If the treats have already cooled completely, use a tiny dab of melted candy melt or frosting as “glue” to attach the stem.
Can I make these without a microwave?
Yes! Use the stovetop method instead. Melt the butter in a large saucepan over low heat, then add the marshmallows and stir constantly until melted and smooth. Everything else stays the same. The stovetop method actually gives you more control over the temperature, so it’s my preferred method when I have the time.
Pin This Recipe!
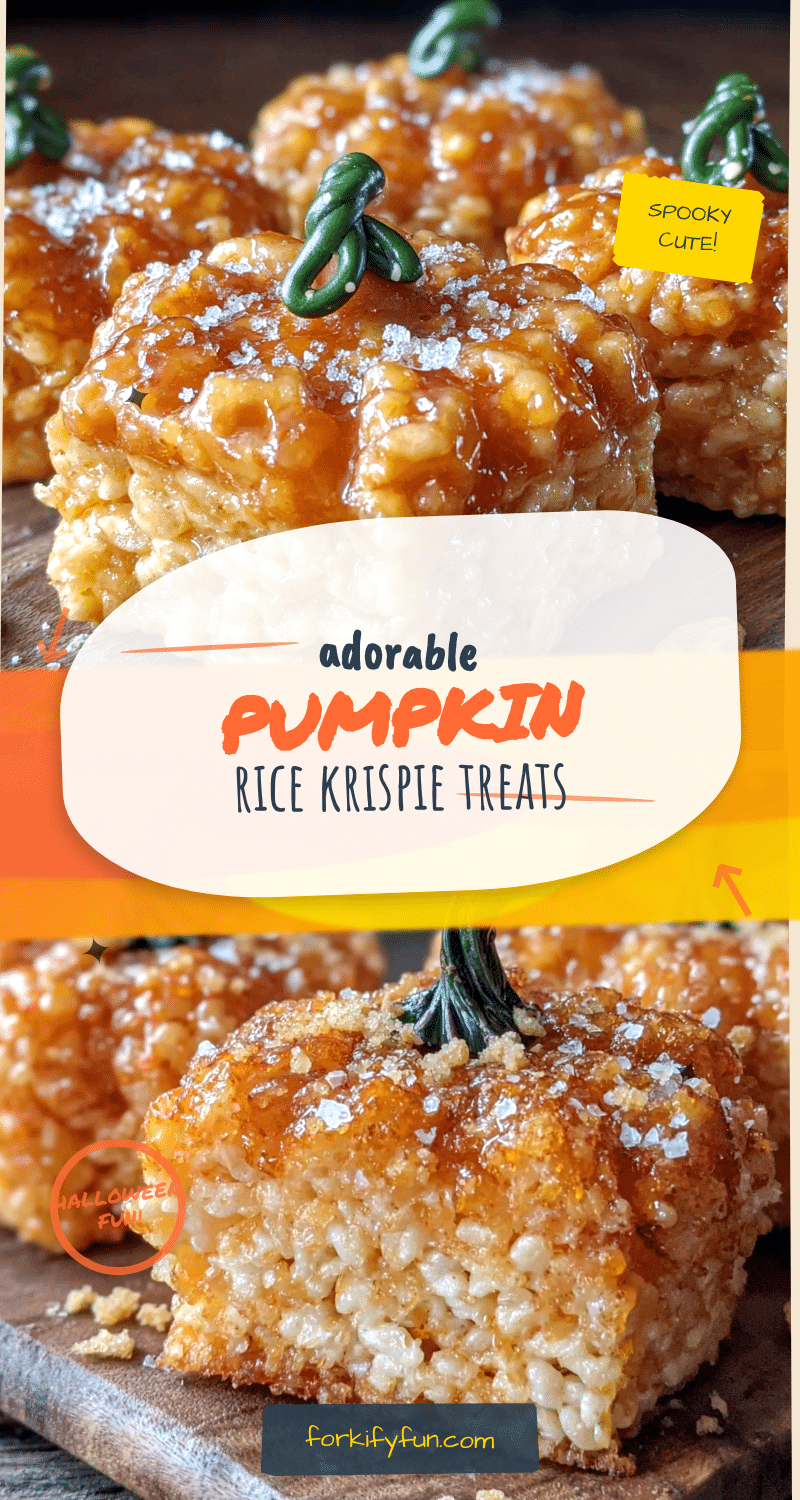
Easy Halloween Pumpkin Rice Krispie Treats: Best Fall Dessert
These no-bake pumpkin-shaped Rice Krispie treats are a fun and festive Halloween dessert that’s easy enough for kids to help make and always a crowd-pleaser at parties.
- Prep Time: 20 minutes
- Cook Time: 5 minutes
- Total Time: 55 minutes
- Yield: 16 servings 1x
- Category: Dessert
- Cuisine: American
Ingredients
- 6 cups Rice Krispies cereal (or any crisp rice cereal)
- 4 tablespoons unsalted butter
- 1 package (10 oz) mini marshmallows (about 4 cups)
- 1 teaspoon vanilla extract
- 1/4 teaspoon salt
- Orange gel food coloring
- Pretzel sticks (for stems, broken in half)
- Green candy melts or green frosting (for leaves, optional)
- Black decorating gel (for jack-o’-lantern faces, optional)
Instructions
- Line a 9×13-inch pan with parchment paper, leaving overhang on two sides. Lightly grease the parchment with butter or non-stick spray.
- In a large microwave-safe bowl, melt the butter in the microwave for about 30 seconds until fully melted. Add the mini marshmallows and microwave in 30-second intervals, stirring between each, until completely smooth (about 2 minutes total). Alternatively, use the stovetop method: melt butter in a large saucepan over low heat, add marshmallows, and stir constantly until melted and smooth.
- Stir in the vanilla extract and salt. Add a tiny dab of orange gel food coloring (start with less than 1/4 teaspoon) and stir until the color is evenly distributed.
- Pour the Rice Krispies into the marshmallow mixture and fold gently with a rubber spatula until every piece of cereal is coated. Do not overmix.
- Transfer the mixture to the prepared pan. Using greased hands or a piece of parchment paper, press the mixture into an even layer with firm but gentle pressure.
- Let the treats cool at room temperature for about 20 minutes until set but still slightly warm. Use the parchment overhang to lift the block onto a cutting board. Cut into 12-16 squares using a sharp knife or pizza cutter.
- Lightly butter your hands or dip them in a small bowl of water. Take one square and gently roll it into a ball between your palms. Pinch the top to create a slight point for the stem. Use your fingers to press 4-5 vertical indentations around the sides to mimic pumpkin ridges.
- While the pumpkins are still slightly warm, press a pretzel stick half into the top point for the stem. If adding leaves, melt green candy melts, pipe small leaf shapes onto parchment paper, let set, and attach with a tiny dab of melted candy. For jack-o’-lantern faces, use black decorating gel to draw expressions.
- Place the finished pumpkins on a parchment-lined baking sheet and let them set at room temperature for at least 30 minutes (or refrigerate for 15 minutes) until firm.
Notes
Don’t overheat the marshmallows or they’ll become hard. Work within 10-15 minutes before the mixture firms up. Keep hands wet or buttered to prevent sticking. For best texture, let treats cool slightly before shaping. Store in an airtight container at room temperature for up to 3 days. Freeze for up to 2 months.
Nutrition
- Serving Size: 1 pumpkin treat
- Calories: 145
- Sugar: 14
- Sodium: 135
- Fat: 3
- Saturated Fat: 2
- Carbohydrates: 29
- Protein: 1
Keywords: Halloween treats, Rice Krispie treats, pumpkin shaped, no-bake dessert, kid-friendly, fall dessert, easy Halloween recipe


