The jack-o’-lantern sat on the counter, its grin already softening at the edges, and I held a colander full of slippery orange innards. It was nearly eleven on a cool October night, the house finally quiet after the chaos of pumpkin carving—sticky hands, seeds skittering across the floor, my youngest declaring his pumpkin needed “angry eyebrows.” And honestly? The only thing I wanted was crispy cinnamon sugar roasted pumpkin seeds. Not the savory, salty kind I usually make. Something sweet. Something that felt like a reward for wrestling with a carving knife and three very opinionated children.
I stood there, rinsing the seeds in the sink, pulling off the stringy bits (you know the ones—they cling like they’ve got a personal vendetta), and I realized I’d never actually tried sweet pumpkin seeds before. Salty? A thousand times. Spicy? Sure. But cinnamon sugar? That felt like a whole different thing. A cozy, fireside, curl-up-on-the-couch kind of thing. So I tossed them with melted butter, a generous shower of cinnamon, and just enough sugar to make them dangerous. I spread them on a baking sheet, slid them into the oven, and waited.
The smell that came out of that oven—warm cinnamon, toasted nuts, a whisper of caramel—was the kind of smell that makes you close your eyes for a second. When I finally pulled them out, golden and crackling, I nearly burned my tongue because I couldn’t wait. They were crispy. They were sweet. They were exactly what a late October night needed. And I’ve been making them every pumpkin season since.
Why You’ll Love This Recipe
Let’s be real for a second—pumpkin seeds are usually an afterthought. You carve the pumpkin, you toss the guts, and maybe you roast the seeds with some salt if you’re feeling ambitious. But these crispy cinnamon sugar roasted pumpkin seeds? They’re the main event. Here’s why you’re going to want to make them immediately:
- Quick & Easy: From seed to snack in under 30 minutes. No complicated steps, no fancy equipment. Just rinse, toss, bake, and try not to eat them all before they cool.
- Simple Ingredients: You probably have everything in your pantry right now. Butter, cinnamon, sugar, salt. That’s it. No weird extracts or specialty sugars.
- Perfect for Fall Gatherings: Halloween parties, Thanksgiving appetizers, cozy movie nights—these little crunchy bites fit everywhere. I brought a bowl to a Friendsgiving potluck last year, and someone asked if they could take the leftovers home. (I said no. I’m not that generous.)
- Crowd-Pleaser: My kids fight over these. My husband sneaks them by the handful. Even my mother-in-law, who is notoriously hard to impress, asked for the recipe. That’s a win.
- Unbelievably Delicious: The texture is what gets you—crispy on the outside, with that subtle crunch that makes you reach for “just one more” about seventeen times. And the cinnamon-sugar coating? It’s not too sweet. It’s just right.
What makes this recipe different from all the other pumpkin seed recipes out there? It’s the butter-to-sugar ratio, honestly. I tested this about four times before I got it perfect. Too much butter and they get soggy. Too much sugar and they burn before they crisp. This version hits that sweet spot where the coating caramelizes just enough to create a delicate crunch without turning into a sticky mess. It’s the kind of snack that makes you feel like you actually know what you’re doing in the kitchen—even if you’re just a tired parent who carved a pumpkin and needed a treat.
What Ingredients You Will Need
This recipe uses simple, wholesome ingredients to deliver bold flavor and satisfying texture without the fuss. Most of these are pantry staples, which means you can whip up a batch anytime the craving hits—no special trip to the store required.
- Fresh pumpkin seeds (1 cup, rinsed and patted dry) — You can use seeds from any carving pumpkin, but sugar pumpkins tend to produce smaller, more tender seeds. If you’re using store-bought raw pumpkin seeds (pepitas), they’ll work too, though they’re smaller and cook faster.
- Unsalted butter (2 tablespoons, melted) — I use unsalted so I can control the salt level. If you only have salted butter, just skip the added salt in the recipe. I personally prefer Kerrygold for its rich flavor, but any good unsalted butter works.
- Granulated sugar (2 tablespoons) — Regular white sugar gives the best caramelization. Brown sugar works in a pinch, but it can make the seeds slightly stickier and less crisp.
- Ground cinnamon (1 teaspoon) — Use fresh cinnamon for the best flavor. I like Saigon cinnamon for its bold, slightly spicy kick. Don’t use old cinnamon that’s been sitting in your cabinet for two years—it’ll taste like dust.
- Salt (¼ teaspoon, plus more for rinsing) — A tiny pinch of salt balances the sweetness and brings out the nutty flavor of the seeds. Flaky sea salt like Maldon is lovely for finishing, but regular table salt works fine.
- Optional: Vanilla extract (½ teaspoon) — This is my secret ingredient. It adds a warm, almost caramel-like depth that makes the cinnamon sing. You won’t taste vanilla directly, but you’ll notice something is missing if you skip it.
A quick note on pumpkin seeds: if you’re scooping them straight from a freshly carved pumpkin, don’t skip the rinsing step. The pumpkin pulp can make the seeds clump together and prevent even crisping. Rinse them in a colander under cold water, rubbing gently to remove the stringy bits, then pat them really dry with a clean kitchen towel. Damp seeds = steamed seeds = sad, chewy results. We’re not doing that.
If you’re using pepitas (the green, hulled pumpkin seeds), keep in mind they’re much smaller and thinner. Reduce the baking time by about 5 minutes and keep a close eye on them—they go from golden to burnt in about 30 seconds flat. Ask me how I know.
Equipment Needed
You don’t need a fancy kitchen to make these. Here’s what you’ll need:
- Baking sheet — A standard half-sheet pan works perfectly. Line it with parchment paper for easy cleanup. Trust me on this—caramelized sugar on a bare pan is a nightmare to scrub.
- Mixing bowl — Any medium bowl will do. I use a glass mixing bowl because it doesn’t retain odors.
- Colander — For rinsing those seeds. A fine-mesh strainer works even better if you have one.
- Kitchen towel or paper towels — For drying the seeds thoroughly. This step matters more than you think.
- Spatula — For stirring and spreading the seeds on the baking sheet. A silicone spatula is great for scraping every last bit of buttery cinnamon goodness.
- Measuring spoons — Because eyeballing cinnamon and sugar leads to sadness. (Or accidental genius. But mostly sadness.)
If you don’t have parchment paper, you can use a silicone baking mat. Aluminum foil works in a pinch, but the seeds might stick a little more. Honestly, parchment is your best friend here.
Preparation Method
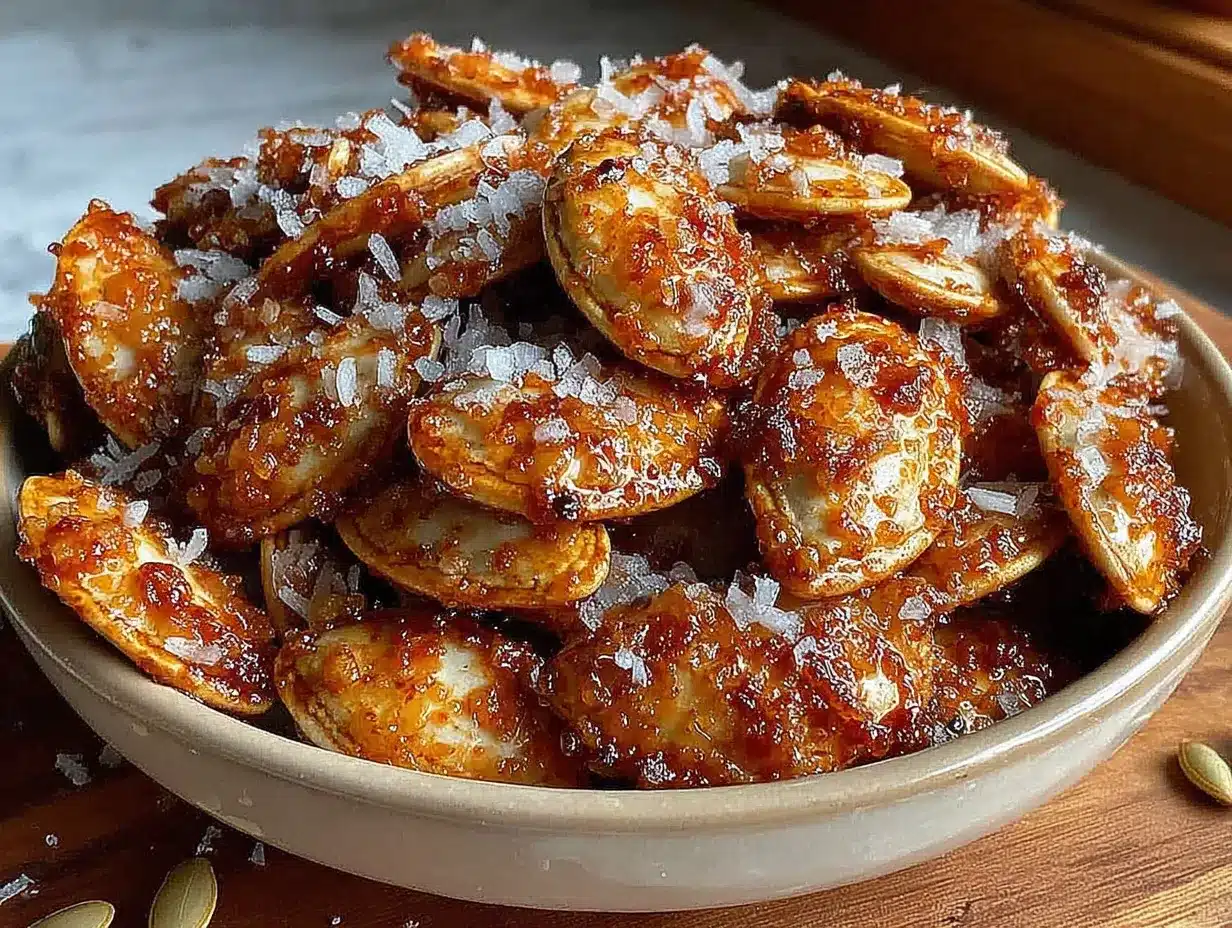
Alright, let’s get to the good part. Here’s exactly how to make these crispy cinnamon sugar roasted pumpkin seeds without burning your kitchen down or ending up with a pan of sad, chewy seeds.
- Preheat your oven to 300°F (150°C). Yes, 300°F. I know that seems low, but trust me—higher heat will burn the sugar before the seeds have a chance to crisp up inside. Low and slow is the way to go.
- Rinse the pumpkin seeds thoroughly. Place them in a colander and run cold water over them, using your fingers to rub off any remaining pumpkin guts. You don’t need to get every single string off, but try to remove the big clumps. Those stringy bits burn easily and taste bitter.
- Dry the seeds really, really well. This is not a step to rush. Spread the rinsed seeds on a clean kitchen towel or a layer of paper towels and pat them dry. Let them sit for a few minutes while you prep the other ingredients. If they’re still damp when they hit the butter mixture, they’ll steam instead of roast, and you’ll end up with chewy seeds. Nobody wants chewy seeds.
- In a medium mixing bowl, combine the melted butter, granulated sugar, ground cinnamon, salt, and vanilla extract (if using). Whisk until the sugar is mostly dissolved and the mixture smells like a fall candle you’d pay too much for at a fancy boutique.
- Add the dried pumpkin seeds to the bowl and toss until every seed is coated. Use a spatula to scrape the sides and make sure you’re not leaving any of that buttery cinnamon goodness behind. The seeds should look glossy and evenly coated.
- Spread the seeds in a single layer on your parchment-lined baking sheet. Try not to overlap them too much—overlapping means uneven cooking, which means some seeds will be perfectly crisp while others are still soft. If you have a lot of seeds, use two baking sheets instead of crowding one.
- Bake for 20-25 minutes, stirring halfway through. At the 10-minute mark, pull the pan out and give the seeds a good stir with a spatula. This helps them cook evenly and prevents the sugar from burning on the edges. When they’re done, the seeds should be golden brown and feel dry to the touch. They’ll continue to crisp up as they cool, so don’t overbake them trying to get them “crunchy” in the oven.
- Let them cool completely on the baking sheet. This is the hardest part, I know. But if you try to eat them straight out of the oven, you’ll burn your mouth and they won’t be fully crispy yet. Give them at least 15-20 minutes. Use that time to clean up the kitchen or hide a few in a secret container so your family doesn’t eat them all before you get a proper taste.
A quick note on timing: if you’re using smaller seeds (like those from a sugar pumpkin), check them at the 18-minute mark. Larger seeds from carving pumpkins might need the full 25 minutes. Every oven runs a little differently, so trust your eyes and nose more than the timer. You’re looking for a warm, toasty aroma and a golden-brown color.
Cooking Tips & Techniques
I’ve made these crispy cinnamon sugar roasted pumpkin seeds about a dozen times now, and let me tell you—I’ve made every mistake in the book so you don’t have to. Here’s what I’ve learned:
Don’t skip the drying step. The first time I made these, I was impatient and tossed damp seeds into the butter mixture. They came out of the oven looking sad and slightly steamed, like they’d given up on life. Dry seeds are crispy seeds. End of story.
Watch the sugar. Sugar burns fast. Like, blink-and-you-miss-it fast. If your oven runs hot, check the seeds at 18 minutes instead of 20. I once got distracted by a phone call and pulled out a tray of what looked like charcoal briquettes. My kitchen smelled like a campfire for two days.
Stirring is non-negotiable. That halfway stir isn’t just for show. The sugar mixture tends to pool at the edges of the pan, and if you don’t stir, the seeds in the center might be pale while the ones on the edges are practically cremated. Give them a good toss.
Let them cool completely. I cannot stress this enough. When you pull them out of the oven, they’ll still feel slightly soft. That’s normal. As they cool, the sugar hardens and the seeds become wonderfully crunchy. If you try to speed this up by putting them in the fridge, the moisture will make them chewy. Patience, my friend.
Double the batch. Seriously. These disappear faster than you’d expect. I made a single cup of seeds last week, and by the time I’d finished cleaning the kitchen, my husband had eaten half of them. Make a double batch and store the extras in an airtight container. You’ll thank me later.
If you’re new to roasting seeds, start with a smaller batch until you get the hang of it. There’s nothing worse than ruining a huge bowl of seeds because you got the temperature wrong. Practice makes perfect—and perfect makes delicious.
Variations & Adaptations
One of the best things about this recipe is how easy it is to customize. Here are some variations I’ve tried (and loved):
Pumpkin Spice Version: Swap the cinnamon for 1 teaspoon of pumpkin pie spice. It adds a lovely warmth with notes of nutmeg, ginger, and clove. I made this version for a fall brunch, and it paired beautifully with a warm mug of apple cider. If you’re into cozy fall flavors, you might also enjoy these alongside a slice of perfect fresh peach cobbler with brown sugar biscuits for a full autumn dessert spread.
Maple Cinnamon Twist: Replace the granulated sugar with 2 tablespoons of pure maple syrup. The flavor is deeper and more complex, though the seeds will be slightly less crispy. Still delicious though. I drizzle a little extra maple syrup over the seeds right when they come out of the oven for a glossy, candied finish.
Spicy-Sweet Combo: Add ¼ teaspoon of cayenne pepper along with the cinnamon. The heat sneaks up on you and plays beautifully with the sweet coating. This one’s great for parties where you want to offer something a little unexpected.
Chocolate Drizzle: Once the seeds have cooled completely, drizzle them with melted dark chocolate and let it set. It turns these into a candy-like treat that’s dangerous to have around. I brought a batch to a Halloween party and they vanished in minutes.
Sugar-Free Option: Use a granulated monk fruit sweetener or erythritol in place of the sugar. The texture will be slightly different, but the crunch is still there. Just keep an eye on them in the oven—some sugar substitutes burn faster than regular sugar.
If you’re looking for more sweet snack ideas, these seeds pair wonderfully with creamy chocolate peanut butter overnight oats for a breakfast that feels like dessert. Or, if you’re planning a fall-themed snack board, try adding these seeds alongside healthy after-school snack board ideas for a treat that both kids and adults will love.
Serving & Storage Suggestions
These crispy cinnamon sugar roasted pumpkin seeds are incredibly versatile when it comes to serving. Here’s how I like to enjoy them:
At room temperature — They’re best enjoyed at room temperature, straight from the bowl. The texture is at its peak, and the cinnamon aroma is most pronounced. I serve them in a little wooden bowl on the coffee table during movie nights, and they never last past the first act.
As a topping — Crush them up and sprinkle them over yogurt, oatmeal, or even a bowl of vanilla ice cream. The crunch adds a lovely contrast to creamy textures. I’ve been known to add a handful to my morning yogurt for a week after pumpkin carving.
With a warm drink — They’re fantastic with a cup of chai tea or hot apple cider. The cinnamon and sugar complement the spices in the drink beautifully. For an extra-special treat, try them alongside a creamy pumpkin cold foam iced latte for the ultimate fall pairing.
Storage: Store any leftovers (if there are any!) in an airtight container at room temperature. They’ll stay crispy for up to 5 days. Do not refrigerate them—the moisture in the fridge will make them soft and sad. If they do lose their crunch, you can pop them back in a 300°F oven for 5 minutes to re-crisp them.
Freezing: You can freeze these seeds for up to 3 months. Place them in a freezer-safe bag or container, and thaw at room temperature before serving. They might lose a tiny bit of crunch, but they’re still delicious.
A word of warning: these seeds absorb moisture from the air, so if you live in a humid climate, eat them within a day or two for the best texture. I learned this the hard way after leaving a bowl out overnight in my kitchen. They were still tasty, but that perfect crunch was gone.
Nutritional Information & Benefits
Pumpkin seeds are a nutritional powerhouse, and these crispy cinnamon sugar roasted pumpkin seeds let you enjoy them in a way that feels like a treat. Here’s the estimated nutritional breakdown for a ¼-cup serving:
- Calories: 180
- Fat: 14g (mostly healthy unsaturated fats)
- Carbohydrates: 10g
- Fiber: 2g
- Protein: 7g
- Sugar: 6g
- Sodium: 75mg
Pumpkin seeds are packed with magnesium, zinc, and iron. Magnesium supports muscle function and sleep quality—great for those restless fall nights. Zinc is fantastic for immune health, which is especially welcome during cold and flu season. And the fiber and protein make these seeds surprisingly satisfying for a snack that feels indulgent.
This recipe is naturally gluten-free and can be made dairy-free by swapping the butter for coconut oil or a plant-based butter alternative. If you’re watching your sugar intake, the maple or sugar-free variations work beautifully.
One thing I love about this recipe is that it turns a kitchen “waste” product into something genuinely delicious. Instead of tossing those pumpkin seeds after carving, you’re creating a snack that’s both nutritious and satisfying. That feels good, you know?
Conclusion
These crispy cinnamon sugar roasted pumpkin seeds are more than just a snack—they’re a little ritual. They’re the reward at the end of a messy, fun, slightly chaotic pumpkin carving session. They’re the thing you reach for when you’re curled up on the couch with a blanket and a good movie. They’re the bowl that somehow empties itself before you even realize what happened.
I love this recipe because it’s forgiving. It doesn’t require precision or fancy techniques. It just asks for a little patience and a willingness to get your hands sticky. And the result? Pure, simple joy in crunchy, cinnamon-scented form.
So the next time you carve a pumpkin—or the next time you see a bag of raw pumpkin seeds at the store—give these a try. Play with the spices. Make them your own. And then come back and tell me how they turned out. I’d love to hear about your variations, your triumphs, and even your happy accidents. (Because let’s face it, some of the best recipes start with mistakes.)
Drop a comment below and let me know—what’s your favorite way to enjoy pumpkin seeds? Sweet, savory, or somewhere in between?
Frequently Asked Questions
Can I use pepitas instead of fresh pumpkin seeds?
Absolutely. Pepitas (hulled pumpkin seeds) work great, but they’re smaller and thinner, so reduce the baking time by about 5 minutes. Keep a close eye on them—they burn quickly.
Why did my pumpkin seeds turn out chewy instead of crispy?
Most likely, they weren’t dried thoroughly before baking, or they were overcrowded on the baking sheet. Make sure to pat them completely dry and spread them in a single layer with space between each seed.
Can I make this recipe in an air fryer?
Yes! Air fry at 300°F for 10-12 minutes, shaking the basket halfway through. Check them at the 10-minute mark since air fryers run hot. They’ll be perfectly crispy.
How do I prevent the sugar from burning?
Bake at a lower temperature (300°F) and stir the seeds halfway through. If your oven runs hot, check them a few minutes early. Burnt sugar smells like regret.
Can I double this recipe?
Definitely. Just use two baking sheets instead of one to avoid overcrowding. Rotate the pans halfway through baking for even cooking.
Pin This Recipe!
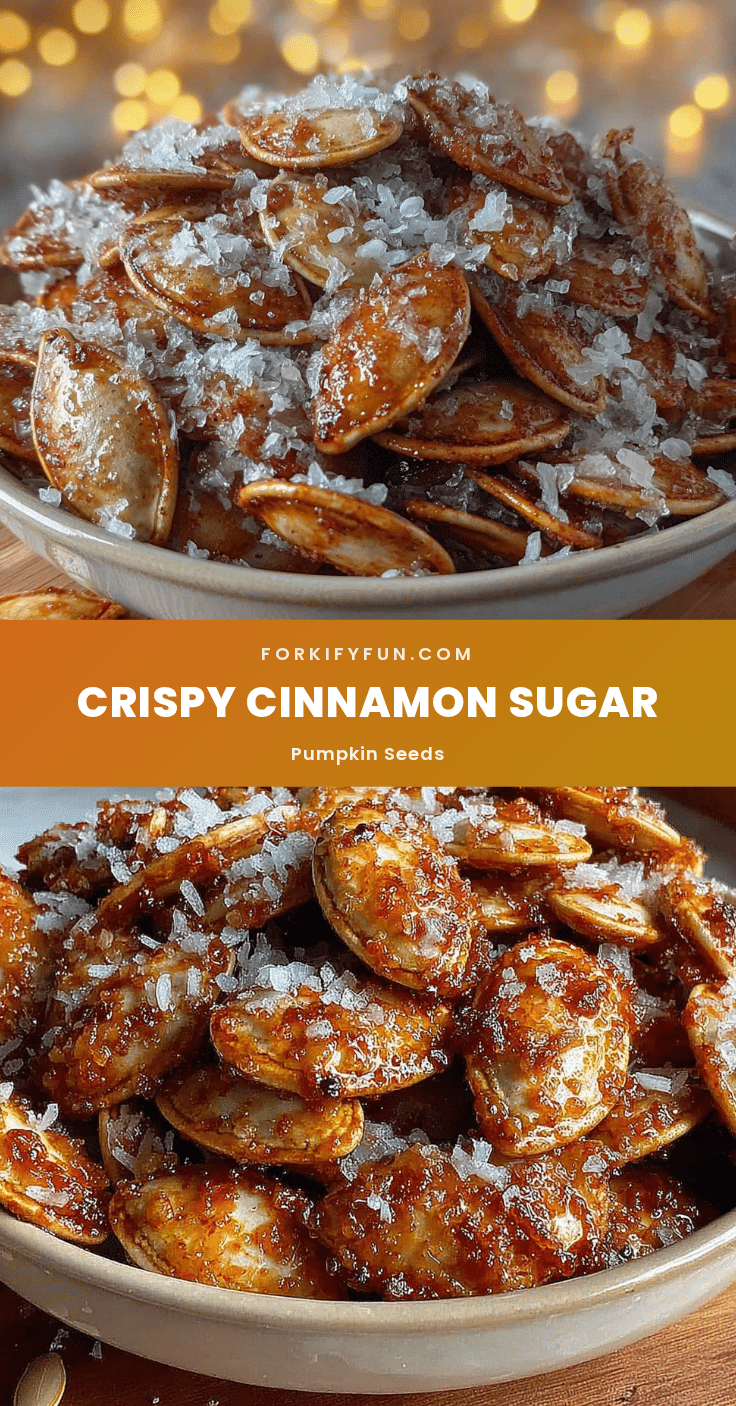
Easy Crispy Cinnamon Sugar Roasted Pumpkin Seeds Recipe

These crispy cinnamon sugar roasted pumpkin seeds are the perfect sweet fall snack. Made with simple pantry ingredients, they’re quick, easy, and irresistibly crunchy—ideal for Halloween parties, Thanksgiving, or cozy movie nights.
- Prep Time: 10 minutes
- Cook Time: 25 minutes
- Total Time: 35 minutes
- Yield: 4 servings 1x
- Category: Snack
- Cuisine: American
Ingredients
- 1 cup fresh pumpkin seeds, rinsed and patted dry
- 2 tablespoons unsalted butter, melted
- 2 tablespoons granulated sugar
- 1 teaspoon ground cinnamon
- ¼ teaspoon salt, plus more for rinsing
- ½ teaspoon vanilla extract (optional)
Instructions
- Preheat your oven to 300°F (150°C).
- Rinse the pumpkin seeds thoroughly in a colander under cold water, rubbing off any pumpkin guts.
- Dry the seeds really well with a clean kitchen towel or paper towels.
- In a medium mixing bowl, combine the melted butter, granulated sugar, ground cinnamon, salt, and vanilla extract (if using). Whisk until the sugar is mostly dissolved.
- Add the dried pumpkin seeds to the bowl and toss until every seed is coated.
- Spread the seeds in a single layer on a parchment-lined baking sheet, avoiding overlap.
- Bake for 20-25 minutes, stirring halfway through at the 10-minute mark, until golden brown and dry to the touch.
- Let them cool completely on the baking sheet for at least 15-20 minutes before serving.
Notes
Don’t skip drying the seeds thoroughly—damp seeds lead to chewy results. Stir halfway through baking to prevent burning. Let seeds cool completely for maximum crunch. For smaller seeds (like from sugar pumpkins), check at 18 minutes. For pepitas, reduce baking time by 5 minutes. Store in an airtight container at room temperature for up to 5 days. To re-crisp, bake at 300°F for 5 minutes.
Nutrition
- Serving Size: ¼ cup
- Calories: 180
- Sugar: 6
- Sodium: 75
- Fat: 14
- Saturated Fat: 4
- Carbohydrates: 10
- Fiber: 2
- Protein: 7
Keywords: cinnamon sugar pumpkin seeds, roasted pumpkin seeds, crispy pumpkin seeds, sweet pumpkin seeds, fall snack, Halloween snack, Thanksgiving snack